Crash Bandicoot N. Sane Trilogy has launched to great success — but as many are discovering, the Crash games may be a bit more difficult than most remember. And The Lost City level in particular seems to be giving a lot of people trouble. In order to get a special prize, you’ll need to beat this stage without dying once.
In this short guide, we’ll go over how you can complete this level without a single fatality so that you can earn that prize for yourself. Just stay on guard and follow the tips below, and you should clear it in no time!
How to Complete the Lost City Without Dying in Crash Bandicoot
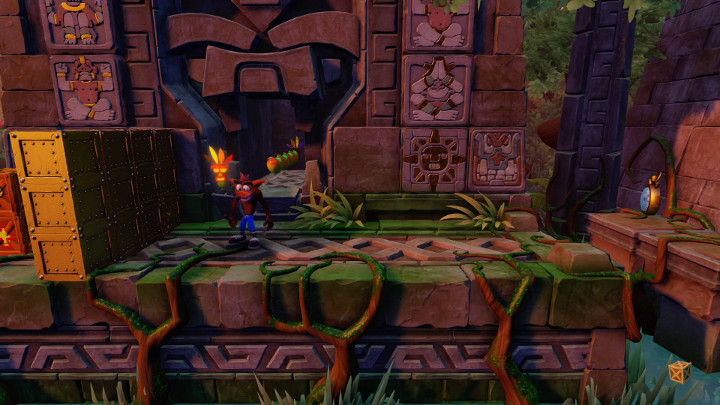
Right off the bat, make sure to hop back from your starting point and grab Aku Aku sitting in the cave behind you. On your way out, you might notice some boxes sitting behind a wall of iron crates to your left. With a quick u-turn hop into the foreground, you can jump around the front of that box wall and grab the first two boxes in the stage.
After that, you’ll need do some quick platforming involving some pushers and platforms that fall out underneath you after a few seconds — making sure to break all the boxes in the background as you go by.
Eventually, you’ll come across some hanging bats and a horde of swooping ones. If you want to get rid of the swooping guys permanently, you can spin away both of the hanging bats on either end, making the area a little safer for Crash to explore.
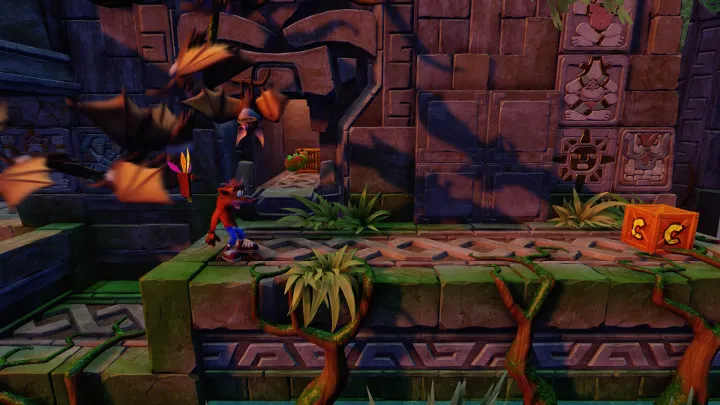
These guys can be a pain if you don’t spin em away.
In the middle of the bat-infested area is a box with the first of this stage’s Tawna Tokens. On your way out, make sure to bounce on the box in the back hallway. There’s a hidden button back there that you’ll hit when bouncing, which will make some invisible boxes tangible throughout the stage.
Right after that, make sure to bounce on a lone box to grab the first N. Brio token of the level.
After that comes a few more pure platforming sections with bats and pushers. As usual, make sure to grab the obvious boxes in the tunnels on your way. One of these also contains a Tawna Token.
Eventually, you’ll come across a hopping lizard right before some pushers. Here, make sure to bounce on top of that lizard when it’s at its rightmost position. If timed right, you’ll be able to use that bounce to get up on top of the pushers, to nab an N. Brio token and (if you’re fast enough) another life.
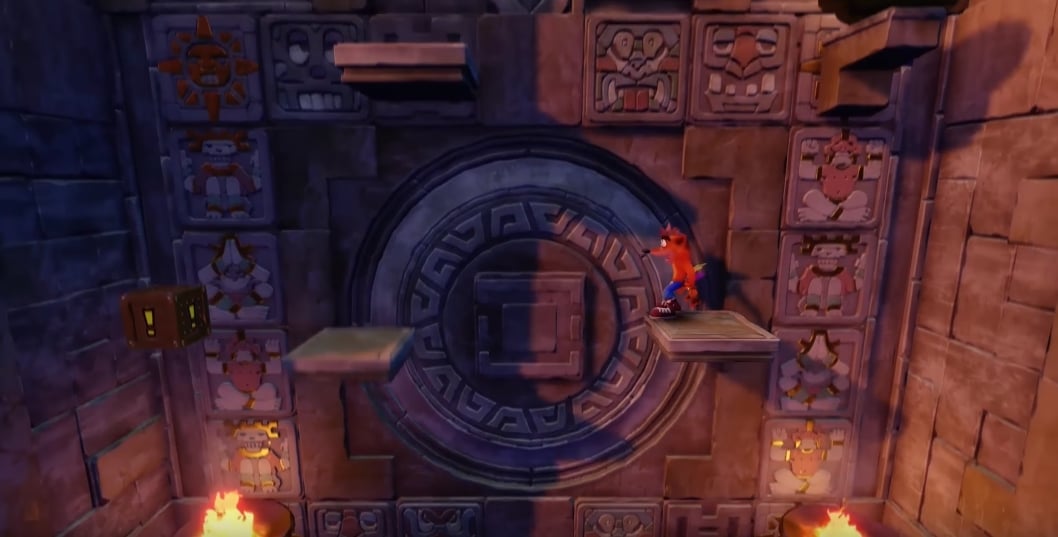
After that area, you’ll find a vertical platforming section with some platforms that go in and out of the wall, and others that spin in circles. On the second set of spinning platforms, make sure to hop down and hit the ! Crate shown above before continuing your climb, as it’ll make some otherwise invisible boxes tangible and, more importantly, breakable. It’s a bit of a tricky jump, and if you miss, you’re likely to burn up in the torch below, so take your time lining it up, or bring Aku Aku along for extra protection.
Upon completing your climb, you’ll notice an N. Brio platform off to the right, but you’ll only have 2 of the needed 3 tokens. Don’t panic — you haven’t missed it. Run left a bit until you can head into the background under a stone structure. There’s a sneaky hidden hallway back there that has some boxes at the end of it, one of which has your final N. Brio token.
Make the quick trip back and hop on the platform to enter the N. Brio bonus stage. This bonus requires some well-timed air spins to avoid destroying TNT barrels, but don’t worry about dying here. You can die as many times as you like in the bonus stages, and it won’t count against your main stage death count — so feel free to be a little riskier here than you would be otherwise.

Right after, you’ll come across some platforms that look like the ones above. Be careful with these. They may look innocent, but they act like scales that tip dangerously towards the end you’re standing on. Stand still and you’ll get dropped into the abyss. Your safest bet is to try and jump to the safe middle, and then jump the rest of the way over the platform, in order to avoid any of the dangerous tipping altogether.
Some hopping lizards and bat-areas later, you’ll come across a set of pushers. Take your time here — if you’re not used to the timing of their movement, you could easily get shoved off and lose your perfect run.
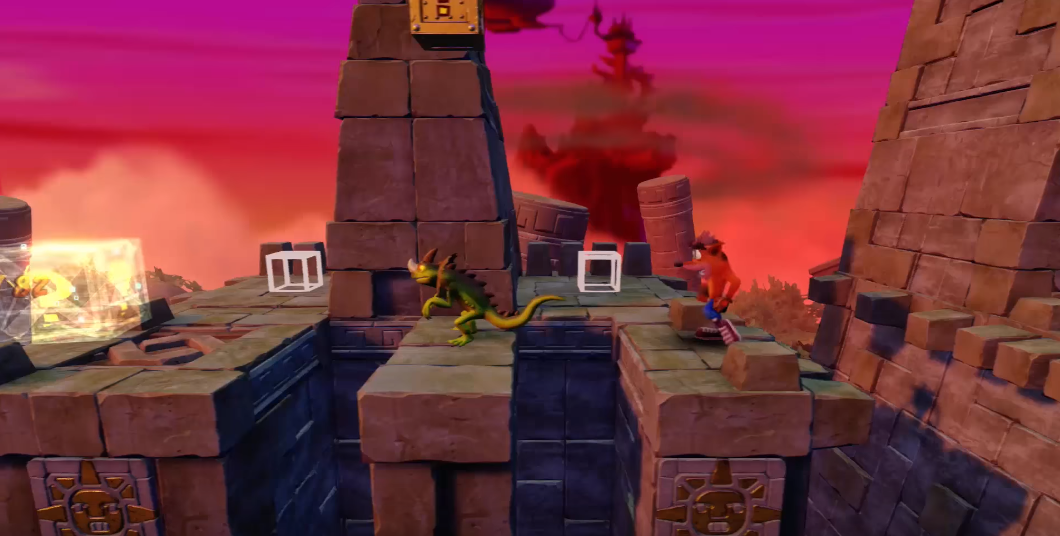
Right after, you’ll see a lizard hanging out a couple of platforms away. Don’t spin this guy right away, as you’ll need a bounce off him to bust an otherwise unreachable box.
Once you’ve got the box and deal with the lizard, you’ll find yourself in an area with two lizards and the ever-so-common bat swarms. Take your time here so you don’t jump into the bat swarm by accident, and you should be fine.
Right after it is a breather with a box containing your final Tawna Token, and her respective Bonus Stage. As with N. Brio, feel free to die as much as you like here without consequence. You’re almost there, but don’t lose your cool just yet.
Up next comes some more scales platforms and a lizard hopping between pushers. Deal with these accordingly — but when you get to the above area, refrain from spinning the lizard, as this one’s important. Wait for it to jump back to the middle platform, as you need it to reach the ! Crate above. Hitting this final button will phase in and then destroy those otherwise intangible boxes in the background, hopefully giving you 100% of the level’s boxes if you’ve been diligent.
The big ghostly box at the end will then explode, revealing the coveted Green Gem — provided that you’ve managed to do all of this without dying outside the bonus rooms. Collect it, make one final hop to the end portal, and you’re all done! You’ll have successfully 100%’ed The Lost City, and will have nabbed that Green Gem. On to the rest of the game!
—
And that’s our guide to The Lost City! Did it help you get through this difficult stage? Are there any other stages you’d like us to cover from Crash’s latest outing? Let us know in the comments below! And while you’re here, check out the rest of our Crash Bandicoot N. Sane Trilogy guides for even more help with this challenging series of platformers:
- Crash 2 Colored Gems Locations Guides
- Crash 3 Colored Gems Locations Guides
- Ultimate Guide to Relics in the Crash Bandicoot N. Sane Trilogy
- How to Slide in Crash Bandicoot N. Sane Trilogy
- How to Make Invisible Platforms Appear in Crash Bandicoot


Published: Jul 13, 2017 12:59 am