I am finally wrapping up my Lancer/Dragoon Hunter's Log series. For the rest of the Lancer series you can follow the links below.
- Gridania Hunter's Log Tier 1: Lancer, Archer, and Conjurer
- Lancer Hunter's Log Tier 2
- Lancer Hunter's Log Tier 3
- Lancer Hunter's Log Tier 4
This time I did things a bit different with the labeling. Instead of listing A-Z consecutively based on zones, I listed them based on order of the log. Some zones skip a few letters but it's intentional.
Target List:
Coerthas Central Highlands:
- Dragonfly: A
- Baritine Croc: B
- Snow Wolf: I
- Natalan Watchwolf: L
Western La Noscea:
- Dead Man's Moan: C
- Sea Wasp: J
East Shroud:
- Morbol: D
- 3rd Cohort Signifier: E
- Sylphlands Sentinel: M
South Shroud:
- Wild Hog: F
Mor Dhona:
- Darring Harrier: G
- Lake Cobra: H
- 5th Cohort Vanguard: K
Northern Thanalan:
- Basilisk: N
Eastern La Noscea:
- 2nd Cohort Eques: O
I hope the following slides help in finding the targets for the last page of your hunter's log. For all of my FFXIV guides and tips please refer to my guide list.

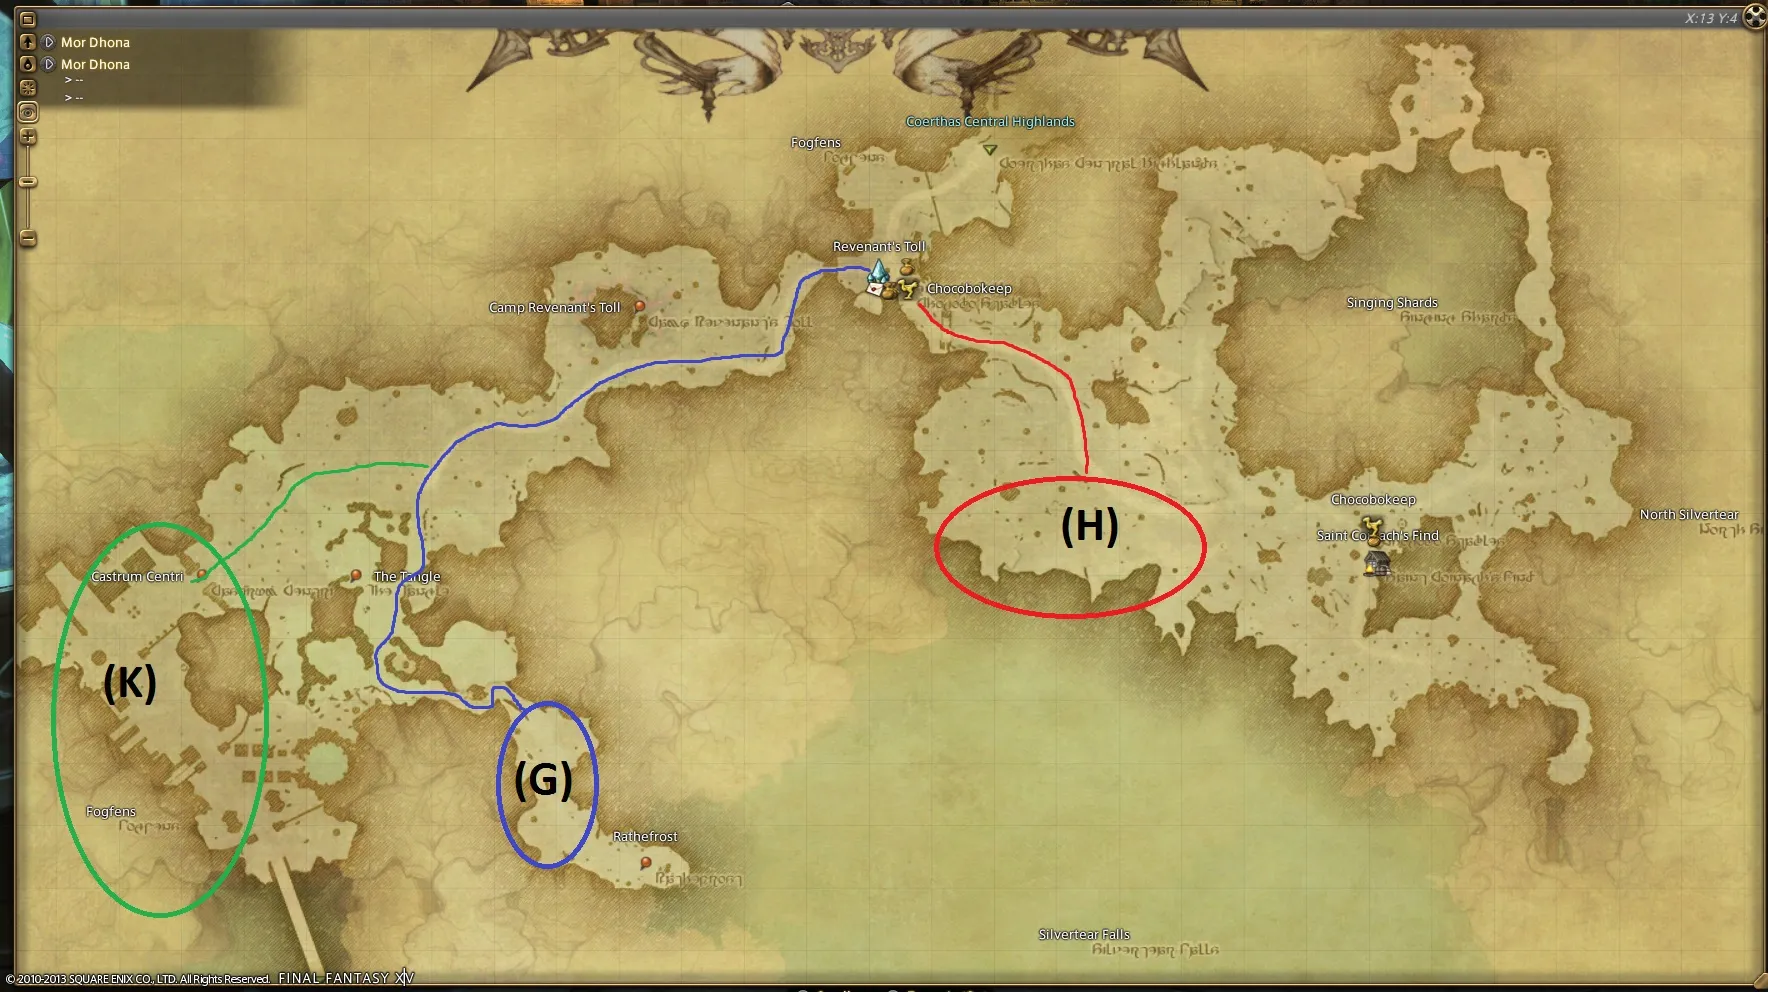
Coerthas Central Highlands:
For this map, I drew lines to the targets.
Dragonfly: A
The Dragonfly and Baritine Croc are both in the same direction, so you can follow the blue line until the green line branches off. The Dragonflies are all spread out in the green oval.
Baritine Croc: B
This time instead of splitting off, follow the blue line to the end. You will find several Baritine Crocs clustered in a cave at the end.
Snow Wolf: I
This one is way out in the boonies. The Snow Wolves are along the southwest wall. They are very spaced out as well, just wander around a bit.
Natalan Watchwolf: L
These wolves are easy to find but require more effort to get to. There are generally one to two outside the Ixali camp. After that you'll have to fight your way into the camp to get to more. Not to difficult, it's just time consuming.
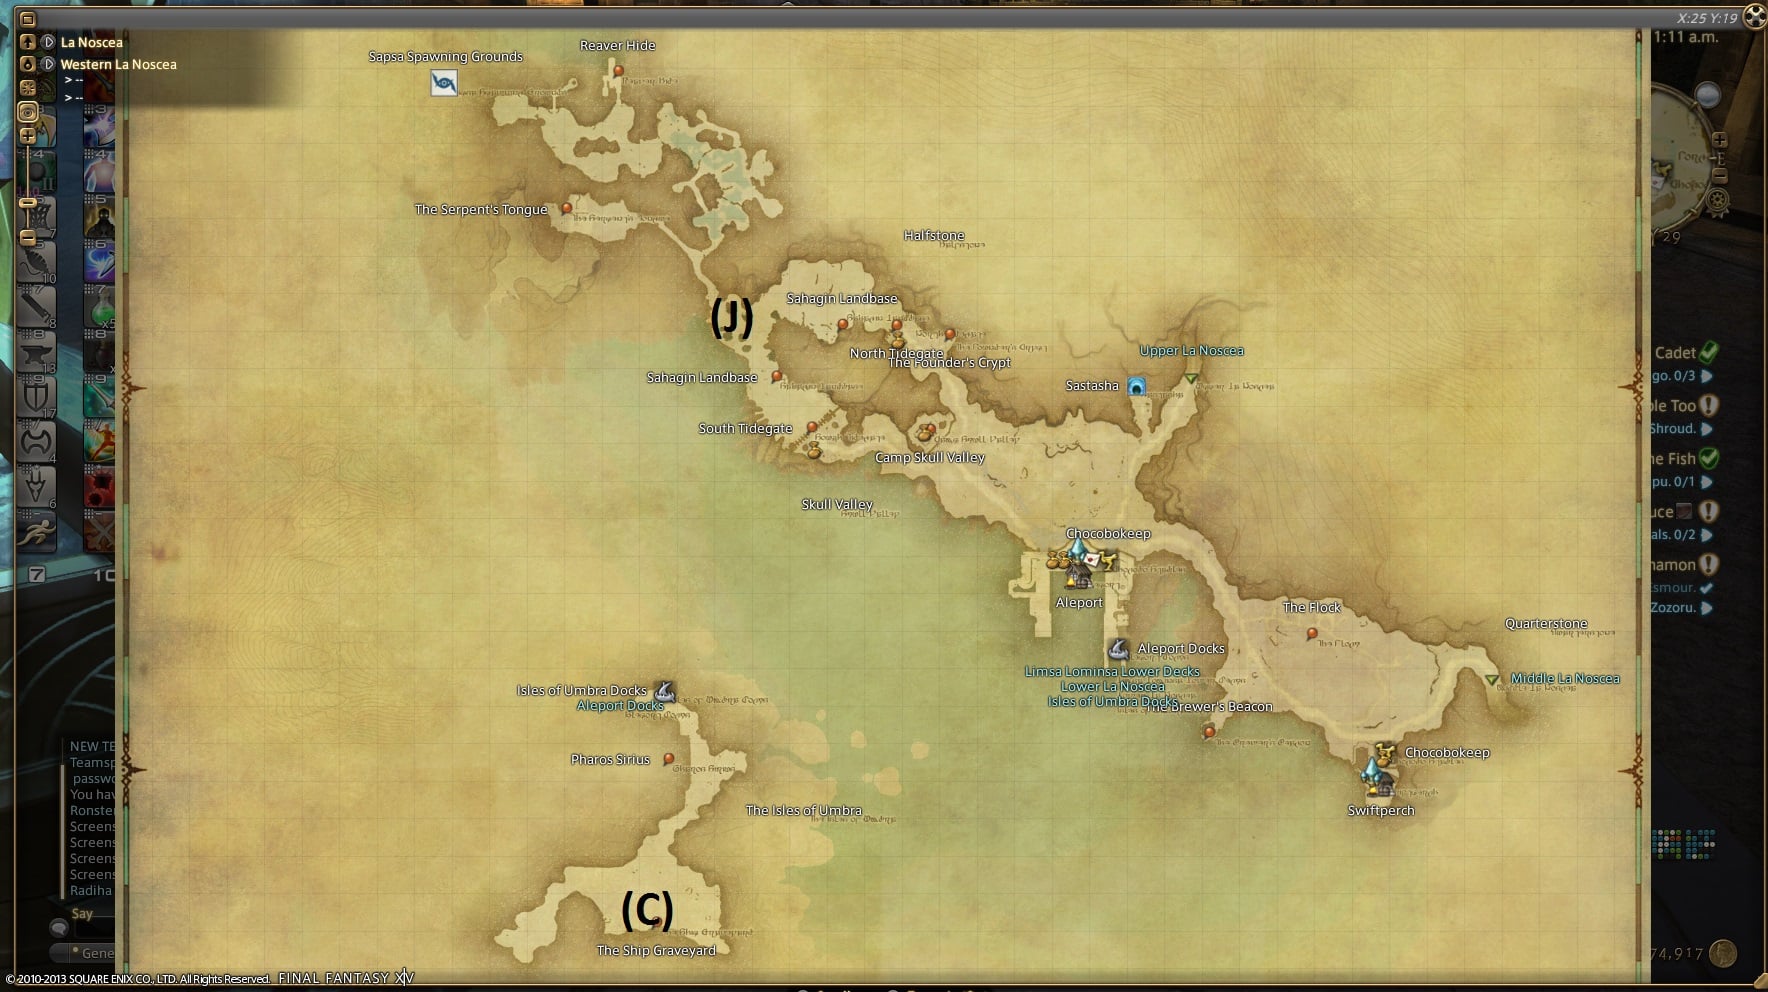
Western La Noscea:
The only real trick to this zone is the story quest requirement. For Dead Man's Moan you must be on Reluctant Researcher or farther in the story. It's a level 42 quest, you should be right around there if you haven't already met the requirement.
Dead Man's Moan: C
After meeting the story requirement, take the ferry in Aleport to Isles of Umbra. From there you can just go south to the beach to reach the skeletons.
Sea Wasp: J
Exit Aleport to the north and travel northwest. You can use either gate to get there, either way you'll have to dodge some Sahagin to get to the Sea Wasps.
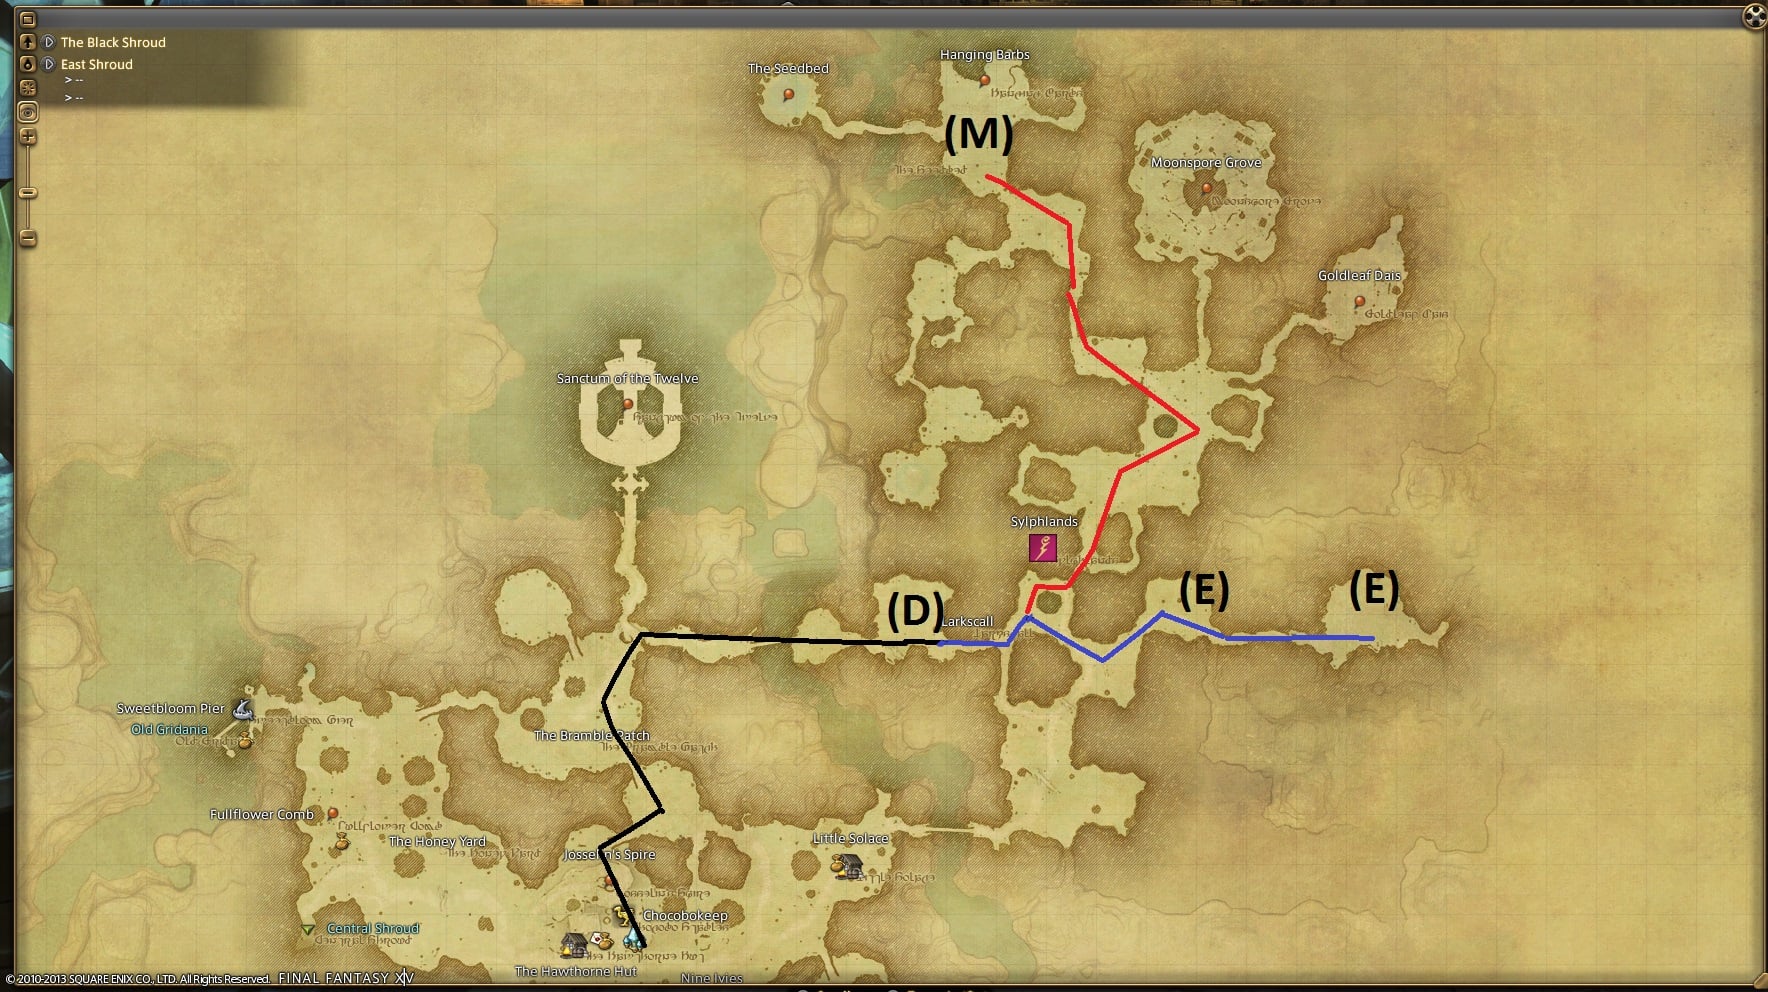
East Shroud:
Since the targets are in such an annoying location I drew lines on the map for this one.
Morbol: D
If you follow the black line it will lead you straight to the Morbol. As for the area, it's probably the simplest area to fight in for the three targets on this map. You can fight the Morbol where they spawn with ease.
3rd Cohort Signifer: E
From the Morbol, if you follow the blue line all the way, you will find two spawns. At the first there is only one Signifer. However at both spawns you will have to clear a space in order to fight the Signifer. Due to the Garlean clustering in this are it's really difficult to get this target. Be careful and patient on this one.
Sylphlands Sentinel: M
Of the three, this is the most annoying to get to. If you're not very good at dodging monsters you'll have to fight all the way to the spawn. The red line is the one you want to follow this time instead of the blue. Once you reach the Sentinels it's pretty easy to fight them near their spawn.
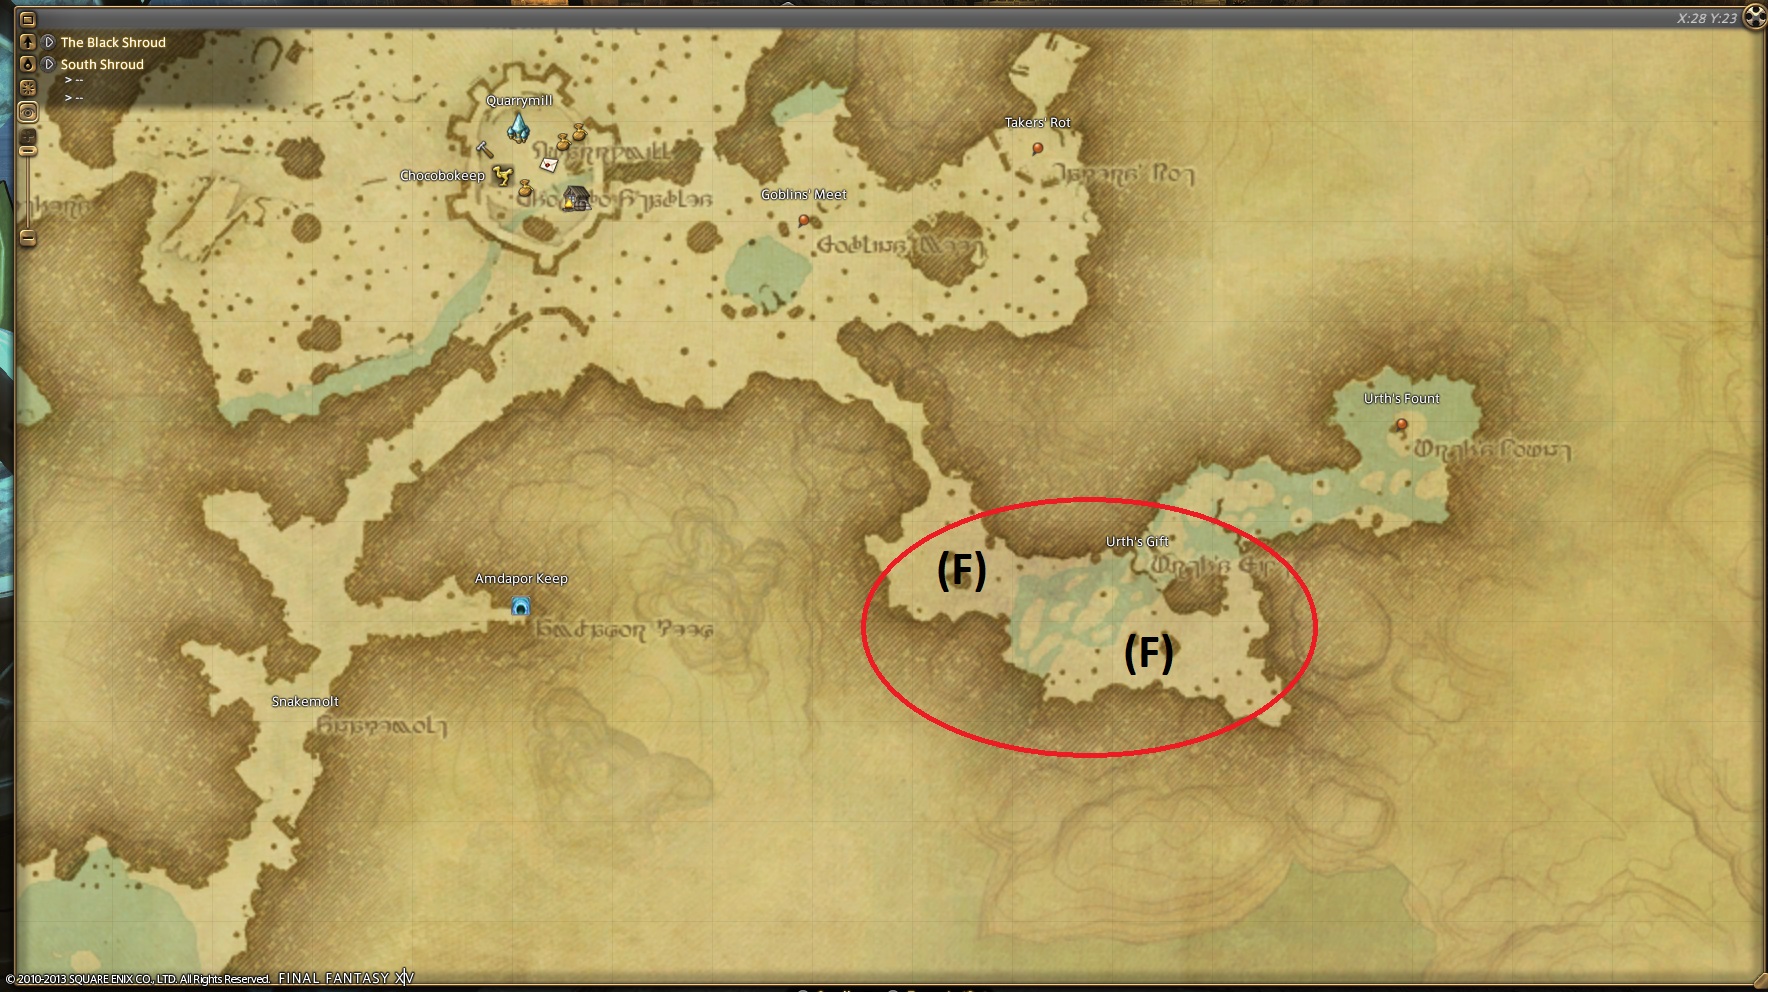
South Shroud:
Getting the spawn point is just like it was for the Lesser Kalong from tier four.
Wild Hog: F
Travel southeast from Quarrymill. Instead of stopping in the tunnel like you do for the Lesser Kalong, just go all the way through. The entire area in the oval is the spawn location for Wild Hogs. Coincidentally this is also the best place to farm boar hides.
Mor Dhona:
This zone is fairly easy, it's just a matter of traveling.
Daring Harrier: G
Follow the blue line west exactly as it's drawn. There really are no shortcuts, if you try searching for one you'll end up taking longer. The Spawn point has clusters of different Daring mobs. The Harriers are spaced out among them.
Lake Cobra: H
The Lake Cobras are along the south wall on the east side of Revenant's Toll. There are quite a few of them so they should be easy to spot.
5th Cohort Vanguard: K
You can follow the blue line until it breaks off to the green line. The Vanguards are really spread out and you may have to clear out other Garleans to get to them. Just take your time and be aware of your surroundings.
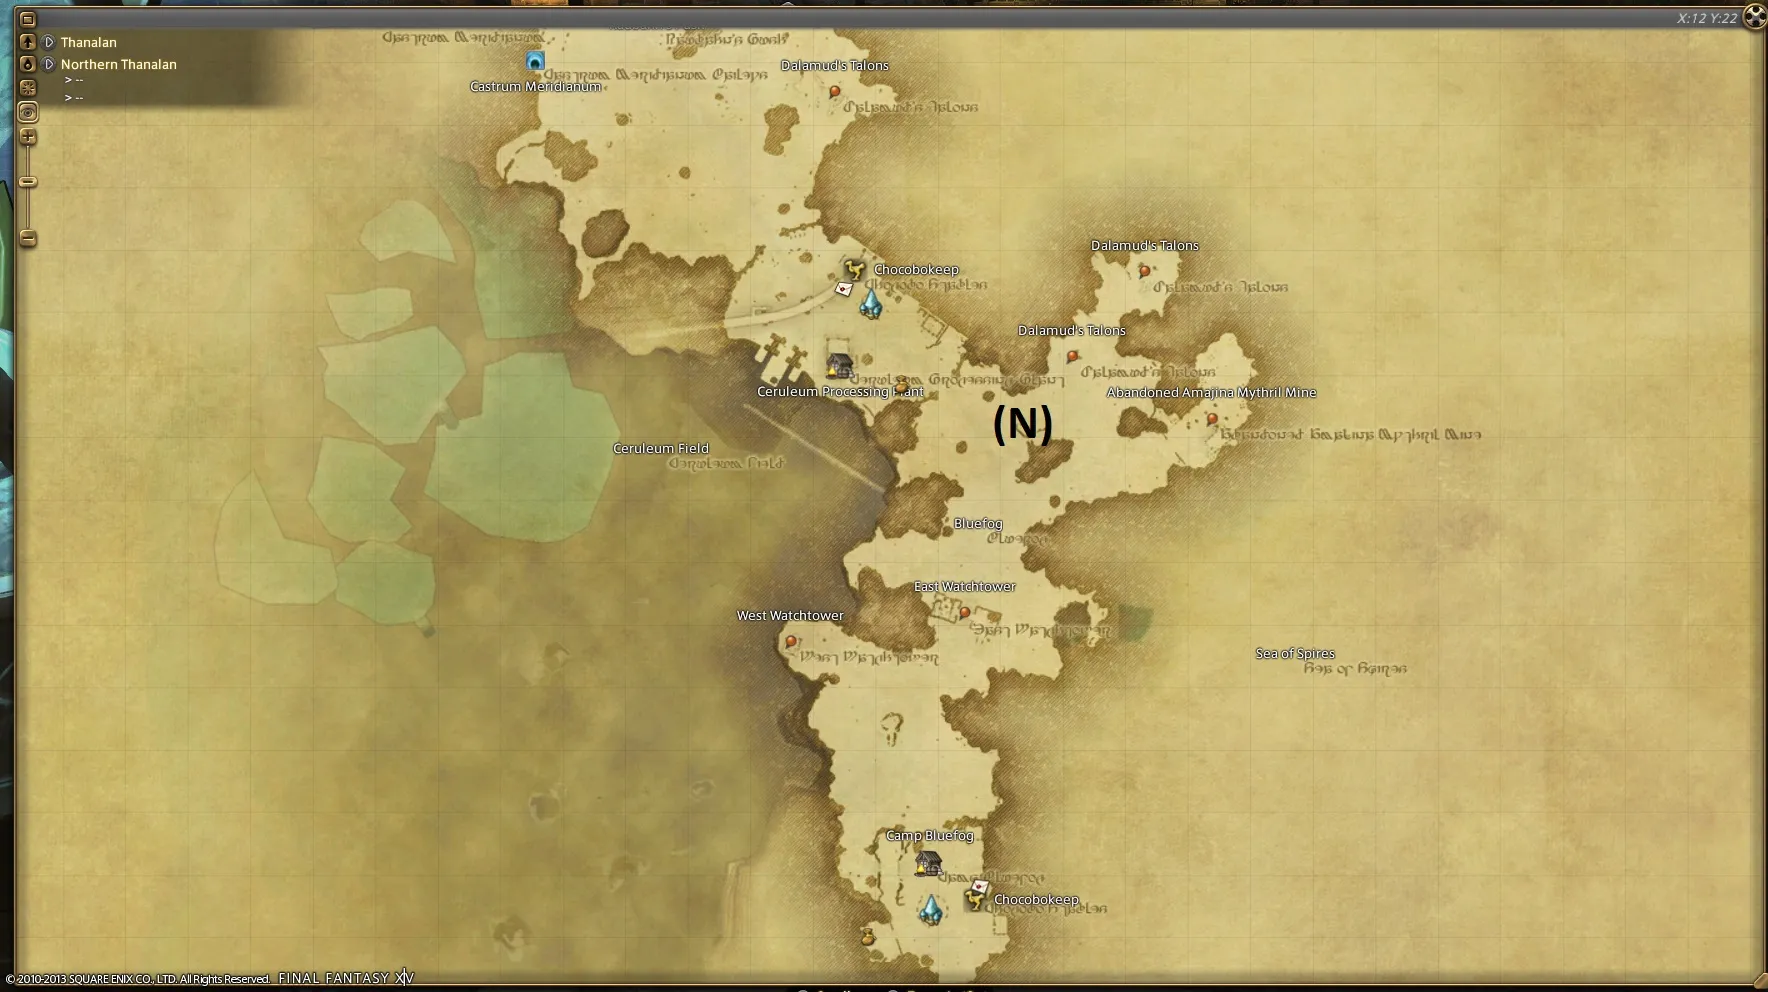
Northern Thanalan
This is a relatively easy one since there is only one target in the zone.
Basilisk: N
The Basilisk are spread out south of the Ceruleum Processing Plant telepoint. Just wander around and you should be able to find them.

Eastern La Noscea:
Another easy zone, though there is more walking involved.
2nd Cohort Eques: O
After exiting Wineport, head east. There is a large Garlean fortress with several different 2nd Cohorts. Two Eques will always spawn right in front of the gate. If you're not in a rush you can just wait for respawns. Otherwise, you can just wander around inside for more.


Published: Nov 11, 2013 04:20 pm