
In Hollow Knight, charms are special items that provide buffs, and can be found all over the world. To equip charms you’ll be using notches. You start with three notches and can gain up to seven more throughout the game. Each charm requires a set number of notches to be equipped, allowing you to mix and match a variety of charms to help fight your way through the world.
The notches that determine how many charms you can equip are not a hard cap. A risky concept, the ability to be “overcharmed” allows you to equip more charms than you should be able to. If you attempt to equip a charm that uses more notches than you have, the game will refuse a few times before finally relenting and equipping the charm. When overcharmed, play carefully — as you will take double damage until you are no longer overcharmed.
Master List of All Charms and Their Locations in Hollow Knight
Wayward Compass
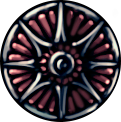 Description: Whispers its location to the bearer whenever a map is open, allowing wanderers to pinpoint their current location.
 - Notches: 1
- Location: After first encounter with Cornifer, it can be bought from Iselda in Dirtmouth for 220 Geo.
This charm is perfect for a first time playthrough. While equipped, it will show the player’s location on the map — making it primarily useful in learning the complex map of Hollow Knight. The winding passageways of the world can quickly confuse you, so it’s a safe charm to have if you’re not intending to get involved in any serious battles.
Gathering Swarm
 Description: A swarm will follow the bearer and gather up any loose Geo. Useful for those who can’t bear to leave anything behind, no matter how insignificant.
 - Notches: 1
- Location: Bought from Sly in Dirtmouth for 300 Geo.
This is a really helpful charm early on when you don’t have quite enough Geo. The swarm will pick up any Geo that you can’t reach — like the coins that fall into spikes. Mostly useful for grinding Geo to get the expensive early items like the Lumafly Lantern, this charm loses its usefulness late in the game after most items have already been bought.
Stalwart Shell
 Description: Builds resilience. When recovering from damage, the bearer will remain invulnerable for longer. Makes it easier to escape from dangerous situations.
 - Notches: 2
- Location: Bought from Sly in Dirtmouth for 200 Geo.
This charm increases the length of the invulnerability period that occurs after taking damage. Mostly useful in boss fights or against large groups of enemies that are hard to dodge, the charm gives some extra time to escape a situation or start swinging wildly.
This charm can be more effectively used with the Quick Slash and Fragile Strength charms to output a ton more damage, or the Quick Focus charm to get a quick heal during the invulnerability.
Soul Catcher
 Description: Used by shamans to draw more SOUL from the world around them. Increases the amount of SOUL gained when striking an enemy with the nail.
 - Notches: 2
- Location: After killing the Elder Baldur, found at the end of the Ancestral Mound.
The description on this charm is pretty self-explanatory. You get more SOUL for hitting enemies, which is useful for casting spells and healing. It’s not an incredibly powerful effect, but it is still useful well into the later stages of the game.
Soul Catcher’s effect can be combined with a ton of other charms to get some impressive power spikes. You can stack this charm with Soul Eater and further increase the amount of SOUL gained, or equip Spell Twister and be able to more frequently cast spells.
Shaman Stone
 Description: Said to contain the knowledge of past generations of shaman. Increases the power of spells, dealing more damage to foes.
 - Notches: 3
- Location: Purchased from Salubra in Forgotten Crossroads for 220 Geo.
A spell focused charm, the Shaman Stone increases the damage of spells by 33%. The damage increase is substantial, but unless you can guarantee that you will have enough SOUL for both spells and healing, it isn’t as useful on its own.
Bringing charms to help get more SOUL makes the Shaman Stone far more useful. Soul and Eater, Soul Catcher, and Grubsong are both good combinations to increase the amount of SOUL generated during combat. The Spell Twister charm is also a good option as it reduces the cost of spells.
Soul Eater
 Description: Forgotten shaman artifact, used to draw SOUL from still-living creatures. Greatly increases the amount of SOUL gained when striking an enemy with the nail.
 - Notches: 4
- Location: Found in the Resting Grounds. Use Desolate Dive on the grave underneath the stag station. The charm is found down the passageway on the right, next to a statue.
An upgraded for of the Soul Catcher, this charm grants even more SOUL when hitting at enemy. The four notch requirement makes it a little harder to manage early on, and generally Soul Catcher is a better option.
Combining this charm with other spell-based charms can lead to an effective spell build though, with Spell Twister and Shaman Stone both being good combination options.
Dashmaster
 Description: Bears the likeness of an eccentric bug known only as ‘The Dashmaster‘. The bearer will be able to dash more often as well as dash downwards. Perfect for those who want to move around as quickly as possible.
 - Notches: 2
- Location: Found southeast of the Mantis Village in the Fungal Wastes, near the entrance to the Royal Waterway.
A good option for the early game, the Dashmaster charm loses its usefulness into the late game. Dashing is faster than walking, so this charm can help to move across large distances, but there are so many other charms that are more useful that it is hard to justify using Dashmaster for long.
That being said, using the Dashmaster alongside the Sharp Shadow increases the damage to 150% Nail damage, rather than the standard 100% Nail damage.
Thorns of Agony
 Description: Senses the pain of its bearer and lashes out at the world around them. When taking damage, sprout thorny vines that damage nearby foes.
 - Notches: 1
- Location: Requires Mothwing Cloak. Can be found in Greenpath in a maze of thorns.
Thorns of Agony is a useful charm if fighting multiple enemies. The damage is double your base Nail damage, giving it a fair amount of damage. Unfortunately, the damage dealt doesn’t gather any SOUL, which can make it difficult to gather SOUL for healing or spells.
When combined with the Baldur Shell charm, Thorns of Agony will activate when the Baldur Shell breaks, even if no damage is taken.
Fury of the Fallen
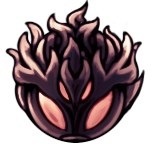 Description: Embodies the fury and heroism that comes upon those who are about to die. When close to death, the bearer’s strength will increase.
 - Notches: 2
- Location: Found in King’s Pass. Acquired with the Mothwing Cloak or Mantis Claw.
A pretty risky option for new players, the Fury of the Fallen charm activates when you reach one health. As long as you remain on one health, your Nail damage is increased by 75%. Fury of the Fallen only affects Nail damage, so it shouldn’t be used on spell-focused builds.
This charm stacks with Fragile Strength, granting roughly 162% increased damage as long as you are at one health. Interestingly, it also interacts with Grubberfly’s Elegy to give the player red projectiles at one health.
Fragile Heart
 Description: Increases the health of the bearer, allowing them to take more damage. This charm is fragile, and will break if its bearer is killed.
 - Notches: 2
- Location: Purchased from Leg Eater in Fungal Wastes for 350 Geo.
The Fragile Heart charm is a powerful option, giving the player two additional points of health. The only real downside is that the charm can break, but even that is a fairly small problem since Leg Eater will repair it for Geo.
When combined with Joni’s Blessing, the Fragile Heart charm will grant Lifeblood Masks in keeping with the Joni’s Blessing charm effect.
Fragile Greed
 Description: Causes the bearer to find more Geo when defeating enemies. This charm is fragile, and will break if its bearer is killed.
 - Notches: 2
- Location: Purchased from Leg Eater in Fungal Wastes for 250 Geo.
This charm simply grants more Geo from enemies when they die. Its biggest use comes from exploring the world, and it doesn’t have any combat use. Like the other Fragile charms, it breaks upon death and Leg Eater will repair it for Geo.
Combining Fragile Greed with the Gathering Swarm can maximize the Geo earned, by allowing the swarm to pick up the Geo that falls into unreachable places.
Fragile Strength
 Description: Strengthens the bearer, increasing the damage they deal to enemies with their nail. This charm is fragile, and will break if its bearer is killed.
 - Notches: 3
- Location: Purchased from Leg Eater in Fungal Wastes for 600 Geo.
Fragile Strength increases Nail damage by 50%. This option is technically weaker than other charms, but generally more effective because it is a constant upgrade, rather than having the 1 health requirement of the Fury of the Fallen charm. Like other Fragile charms, it breaks upon death and Leg Eater will repair it for Geo.
The charm can be combined with other charms to increase damage output. Charms like Quick Slash allows you to output your damage faster, while the damage of Fury of the Fallen and Fragile Strength stacks multiplicatively.
Spell Twister
 Description: Reflecting the desires of the Soul Sanctum for mastery over SOUL, it improves the bearer’s ability to cast spells. Reduces the SOUL cost of casting spells.
 - Notches: 2
- Location: Found in a secret room at the top of Soul Sanctum.
A useful charm for spell-focused builds, the Spell Twister reduces spell costs by 33%. Combining this charm with other spell-based charms can greatly improve spellcasting. Soul Catcher and Soul Eater both grant more SOUL per hit giving more opportunities to cast spells, and Shaman Stone increases the damage of your spells reducing how many spells you need to cast to defeat your enemies.
Steady Body
 Description: Keeps its bearer from recoiling backwards when they strike an enemy with a nail. Allows one to stay steady and keep attacking.
 - Notches: 1
- Location: Purchased from Salubra in Forgotten Crossroads for 120 Geo.
A fairly simple effect, the Steady Body charm removes the recoil from attacking. This charm is most effective in areas with heavy platforming, where sliding backwards could send you tumbling to your death. Luckily, the charm does not affect the bounce that happens when attacking enemies from above.
Steady Body can be combined with a number of charms (Mark of Pride, Longnail, and Quick Slash are a few examples) usually as a way to stay in range of the enemy.
Heavy Blow
 Description: Farmed from the nails of fallen warriors.
Increase the force of the bearer’s nail, causing enemies to recoil further when hit.- Notches: 2
- Location: After acquiring the Shopkeeper’s Key from the Crystal Peak, can be purchased from Sly for 350 Geo.
Heavy Blow is another simple, yet powerful charm. Granting the player a more effective knockback effect when attacking enemies gives more opportunity to avoid the enemies attacks and can create openings to heal.
Quick Slash
 Description: Born from imperfect, discarded nails that have fused together. The nails still long to be wielded. Allows the bearer to slash much more rapidly with their nail.
 - Notches: 3
- Location: In a hidden room in Kingdom’s Edge.
A fairly plain effect that combos exceptionally well with other charms, Quick Slash increases your attack speed — and when used alongside other charms, can ramp up your damage.
Common combinations include basic damage buffing charms like Fragile Strength, or Grubberfly’s Elegy to increase the number of projectiles.
Longnail

- Description: Increases the range of the bearer’s nail, allowing them to strike foes from further away.
- Notches: 2
- Location: Purchased from Salubra in Forgotten Crossroads for 300 Geo.
Used primarily to keep distance, the Longnail increases the range of your melee attacks. It is slightly shorter range than the Mark of Pride, but oftentimes that difference isn’t a huge factor, especially considering Longnail has a lower notch cost and is easier to acquire.
You can equip both Longnail and Mark of Pride for a further extended range, but it’s generally advised to pick one or the other and use the extra slots for something else.
Mark of Pride
 Description: Freely given by the Mantis Tribe to those they respect. Greatly increases the range of the bearer’s nail, allowing them to strike from further away.
 - Notches: 3
- Location: In the Mantis Village. Look for a room to the northeast of the Mantis Lords, available only after defeating the Mantis Lords.
An upgraded version of the Longnail. The upgraded range can be used to more safely Nail bounce.
Baldur Shell

- Description: Protects its bearer with a hard shell while focusing SOUL. The shell is not indestructible and will shatter if it absorbs too much damage.
- Notches: 2
- Location: Southwest portion of Howling Cliffs. After finding a chest that drops only 1 Geo, jump inside the box to find a cave guarded by two Elder Balder and the charm.
The Baldur Shell is a protective charm that can be incredibly useful early on, but is generally considered less useful than other charms. The charm provides a protective barrier when focusing SOUL — but if the barrier is hit the focus will be interrupted and the SOUL will be wasted. Charms like Quick Focus and Shape of Unn tend to be better. By the far the biggest downside is that the shell breaks after four hits and won’t regenerate until the next time you rest.
Flukenest
 Description: Living charm born in the gut of a Flukemarm. Transforms the Vengeful Spirit into a horde of volatile baby flukes.
 - Notches: 2
- Location: Dropped by Flukemarm in the Royal Waterways.
Flukenest is a replacement of the Vengeful Spirit spell. It does more total damage and has a wider spread, while sacrificing consistency.
While Flukenest is best used against large bosses to ensure maximum damage, when combined with the Defender’s Crest it will send out a toxic fluke that explodes releasing a toxic cloud, making it much more reliable for damage.
Defender’s Crest
 Description: Unique charm bestowed by the King of Hallownest to his most loyal knight. Scratched and dirty, but still cared for. Causes the bearer to emit a heroic odour.
 - Notches: 1
- Location: Reward for defeating Dung Defender in the Royal Waterways.
The Defender’s Crest is fairly situational, as it emits toxic clouds around the player. The clouds are small and very strong, but they linger and can be used to damage enemies as you run away from them. Mostly, this charm shines when combined with other charms. Flukenest and Glowing Womb both create toxic creatures that will explode and release toxic clouds.
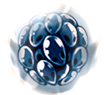
Glowing Womb
 Description: Drains the SOUL of its bearer and uses it to birth hatchlings. The hatchlings have no desire to eat or live, and will sacrifice themselves to protect their parent.
 - Notches: 2
- Location: Requires Crystal Heart. Acquired in the Forgotten Crossroads, to the right of the False Knight arena in the ceiling.
Glowing Womb uses the player’s SOUL to create up to four followers that will charge at nearby enemies. Useful for players who prefer Nail combat since SOUL is only used for healing. Combined with the Defender’s Crest the followers will explode into poison clouds.
Quick Focus
 Description: A charm containing a crystal lens. Increases the speed of focusing SOUL, allowing the bearer to heal damage faster.
 - Notches: 3
- Location: Purchase from Salubra in Forgotten Crossroads for 800 Geo.
Most useful in high pressure situations, the Quick Focus charm allows you to cast Focus faster. The increased speed of Focus can let you heal in the middle of a boss fight or an arena.
When combined with the Stalwart Shell, the time it takes to heal is just shorter than the invulnerability time. Additionally, charms like Soul Catcher and Soul Eater allow more SOUL per hit, giving more opportunities to heal.
Deep Focus
 Description: Naturally formed within a crystal over a long period. Draws in SOUL from the surrounding air. The bearer will focus SOUL at a slower rate, but the healing effect will double.
 - Notches: 4
- Location: Requires Crystal Heart. Found in Crystal Peak. Below the area where the player finds Cornifer, a Husk Miner is mining a wall. Breaking the wall reveals the secret area.
The opposite of the Quick Focus, the Deep Focus charm grants two points of health, though a bit slower. The extended time makes it difficult to use in boss battles so it’s recommended for platforming challenges or other places where there is a lot of time to rest.
The biggest combination for Deep Focus is with the Quick Focus charm. With both charms active you can use Focus to get 2 health back, at the regular speed.
Lifeblood Heart
 Description: Contains a living core that seeps precious lifeblood. When resting, the bearer will gain a coating of lifeblood that protects from a modest amount of damage.
 - Notches: 2
- Location: Purchase from Salubra in Forgotten Crossroads for 250 Geo.
The Lifeblood Heart grants 2 Lifeblood Masks. These additional health points regenerate after resting and are commonly used for spell casting builds as a way to reserve SOUL for casting rather than healing.
Lifeblood Heart can be combined with other Lifeblood based charms like Joni’s Blessing and Lifeblood Core for additional Lifeblood masks.
Lifeblood Core
 Description: Contains a living core that bleeds precious lifeblood. When resting, the bearer will gain a coating of lifeblood that protects from a large amount of damage.
 - Notches: 3
- Location: On the left wall of the Abyss is a cave that only opens if a player has 15 or more Lifeblood masks. The charm can be found inside the cave.
An upgraded version of the Lifeblood Heart, the Lifeblood Core grants 4 masks rather than 2. It stacks with Joni’s Blessing and Lifeblood Heart and costs one only one notch more than the Lifeblood Heart while providing double the effect.
The biggest downside to what is arguably the best Lifeblood charm, is that it is immensely difficult to obtain. It is recommended that you get at least 7 health, then use Joni’s Blessing and Lifeblood Heart to reach 15 Lifeblood masks to open the door to the Lifeblood Core.
Joni’s Blessing
 Description: Blessed by Joni, the kindly heretic. Transfigures vital fluids into blue lifeblood. The bearer will have a healthier shell and can take more damage, but they will not be able to heal themselves by focusing SOUL.
 - Notches: 4
- Location: Acquired at Joni’s repose in Howling Cliffs.
Joni’s Blessing has one of the most noticeable effect of any charm. It increases your health by 4, and changes all masks into Lifeblood masks. The Focus ability becomes useless as you can’t regenerate Lifeblood masks, which makes this a powerful choice for spell builds as it reserves all SOUL for casting.
When combined with Hiveblood, the masks granted by Joni’s Blessing will regenerate, unlike the masks granted by other Lifeblood charms. Shaman Stone is another strong option for spell builds utilizing Joni’s Blessing.
Grubsong
 Description: Contains the gratitude of freed grubs. Gain SOUL when taking damage.
 - Notches: 1
- Location: Given by the Grubfather after the player has freed 10 grubs.
With such a low cost, the Grubsong charm is a top notch choice. The charm grants SOUL every time you take damage, and while the amount of SOUL gained isn’t enough for a heal or spell on its own, when combined with striking enemies it becomes far easier to gather SOUL.
Grubsong can be combined with a ton other charms for useful interactions. When combined with the regenerative effect of Hiveblood, you can have infinite SOUL by jumping into a hazard then letting Hiveblood heal you before repeating. When combined with Grubberfly’s Elegy, it actually increases the amount of SOUL received from damage.
Grubberfly’s Elegy
 Description: Contains the gratitude of grubs who will move to the next stage of their lives. Imbues weapon with a holy strength. When the bearer is at full health, they will fire beams of white hot energy from their nail.
 - Notches: 3
- Location: Gifted by the Grubfather after freeing all 46 grubs.
While Grubberfly’s Elegy projectiles are a cool effect, it is fairly difficult to obtain with pretty low damage — making it kind of a letdown. Having said that, it works well in combinations that increase damage or attack speed. When combined with Fragile Strength and Fury of the Fallen, reaching one health brings the projectiles back and gives them a massive increase in damage.
Hiveblood
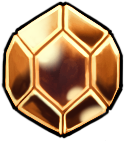 Description: Golden nugget of the Hive’s precious hardened nectar. Heals the bearer’s wounds over time, allowing them to regularly gain health without focusing SOUL.
 - Notches: 4
- Location: Acquired in the Hive, below the Hive Queen’s spirit.
Hiveblood returns the last point of health over a period of 10 seconds. This regeneration can keep you fairly healthy as long as you’re not diving headfirst into enemies. Hiveblood can also regenerate the health from Joni’s Blessing, though not Lifeblood Heart or Lifeblood Core. An interesting passive to this charm is that the Hive enemies will cease to be hostile unless attacked.
Spore Shroom
 Description: Composed of living fungal matter. Scatters spores when exposed to SOUL. When focusing SOUL, emit a spore cloud that slowly damages enemies.
 - Notches: 1
- Location: Requires Mothwing Cloak and Mantis Claw. Located in the Fungal Wastes, near the secret ways to Queen’s Gardens and Deepnest.
Useful against slow enemies or in tight spaces, the Spore Shroom releases a toxic cloud after healing. Unfortunately, it loses some of its use as you shift into the late game. Additionally, there is a passive ability that allows you to understand the both language of the Riddle Tablet in Kingdom’s Edge and Mister Mushroom.
Spore Shroom achieves various aesthetic effects when combined with the Baldur Shell and the Shape of Unn, changing your character into a snail while using Focus. Alternately, when combined with the Defender’s Crest the poison damage does more damage and ticks faster, dealing more damage over the duration.
Sharp Shadow
 Description: Contains a forbidden spell that transforms shadows into deadly weapons. When using the Shadow Dash, the bearer’s body will sharpen and damage enemies.
 - Notches: 2
- Location: Requires Shade Cloak. In Deepnest, in a room beneath the tram station behind a wall of shadows.
The Sharp Shadow increases the dash length as well as dealing damage to enemies. The damage scales off the current Nail damage, but is unaffected by damage buffs from other charms. The only exception being in the case of Dashmaster, which improves Sharp Shadow’s damage slightly.
Shape of Unn
 Description: Reveals the form of Unn within the bearer. While focusing SOUL, the bearer will take on a new shape and can move freely to avoid enemies.
 - Notches: 2
- Location: Requires Isma’s Tear. Acquired from Unn beneath the Lake of Unn.
The Shape of Unn charm grants you the ability to move while healing. The movement is slow and you can’t jump, but movement is still safer than standing still. It can be combined with Spore Shroom and Baldur Shell for aesthetic changes, and combining with Quick Focus allows for faster movement.
Nailmaster’s Glory
 Description: Contains the passion, skill and regret of a Nailmaster. Increases the bearer mastery of Nail Arts, allowing them to focus their power faster and unleash arts sooner.
 - Notches: 1
- Location: Given by Sly after learning all 3 Nail Arts from the Nailmasters.
Nailmaster’s Glory charges Nail arts twice as fast, making it an incredibly useful one notch choice. When combined with the Fury of the Fallen, your Nail arts damage is increased by 75% — making them a solid retaliation option.
Dream Wielder
 Description: Transient charm created for those who wield the Dream Nail and collect essence. Allows the bearer to charge the Dream nail faster and collect more SOUL when striking foes.
 - Notches: 1
- Location: Given by the Seer after gathering 500 essence.
The Dream Wielder reduces the time to charge the Dream Nail while simultaneously increasing the amount of SOUL gained from those strikes. Unfortunately, you have to stand still to use it and it does no damage.
Kingsoul
 Description: Holy charm symbolising a union between higher beings. The bearer will slowly absorb the limitless SOUL contained within. Opens the way to a birthplace.
 - Notches: 5
- Location: Acquired by finding both halves. One half is given by the White Lady in Queen’s Garden, and the other is a reward for completing the White Palace.
This charm’s high notch cost makes it difficult to combine with other charms, but the constant SOUL regeneration is still useful, as you can guarantee both healing and spells. Additionally, the charm is still used to unlock the secret area of the Abyss.
Void Heart
 Description: An emptiness that was hidden within, now unconstrained. Unifies the void under the bearer’s will. This charm is part of its bearer and cannot be unequipped.
 - Notches: 0
- Location: Found in the Birthplace.
The most drastic effect of this charm is that it grants access to two different endings for the game. It also uses no notches, replaces the Kingsoul charm, and makes your Shade and Siblings non-hostile.
—
There you have it! That’s all the charms in Hollow Knight, along with where to find them and how to best utilize them. If you want even more tips for this Metroidvania game, check out the rest of our Hollow Knight guides here on GameSkinny:


Published: Jul 10, 2017 11:53 am