Destiny 2‘s first raid is finally out and there is plenty of new loot and rewards waiting for you. Some people like to go in with no info and figure things out as they go, while others like to get some tips before venturing out into the unknown to save on precious time.
Regardless of which category you’re in, this guide is sure to help you. In this Destiny 2 Leviathan Raid guide, I’m going to go over each section of the raid and explain in detail how to complete them.
Note: Be warned — the following Destiny 2 raid showcase solutions for each major encounter. However, they do include chat audio from my clan’s first time playing through the raid, and each of them contains some mature language throughout.
Let’s dive in, Guardian!
Leviathan Raid Entrance
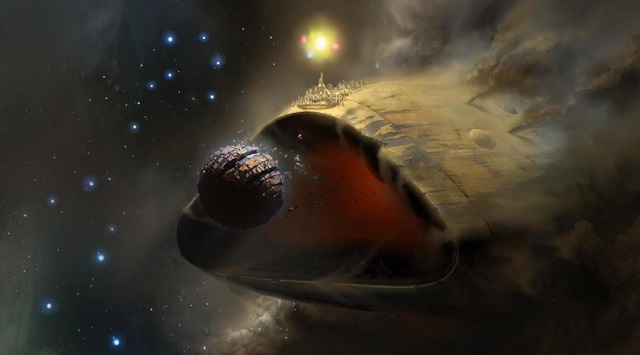
To begin the Leviathan Raid, go to the director and navigate to the solar system map. You will see the Leviathan Raid in orbit above Nessus (in the top right-hand corner of the map). Select that, and once you drop in, simply make your way up into the massive palace before you. You can ignore the guards you see and continue forward.
Once you make it inside, you’ll see a room of Cabal enemies. Now, you’re ready to start the Raid in earnest.
Castellum Standard Puzzle
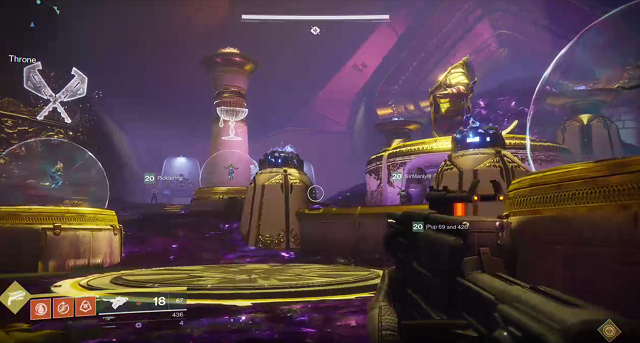
After you’ve cleared out the enemies, you’ll find yourself going through several corridors before you exit into an area that looks like a courtyard. You’ll see a golden statue in the center of the area. The enemies in this area spawn around the location you need to protect, and the idea is to take three standards, one from each location, and place them in the middle area you are guarding.
Each standard has an icon — axes, a cup, a beast, or a guard — that corresponds to a spot in which you need to place it. If you look at the middle, you will see a holograph of one of the icons. This means it is the next standard you need to get.
As you are facing the middle of the area, where the enemies come from, this is the icon sequence: the left is the cup, the bottom middle is the dog, and the bottom right is the axes.
There will also be two special enemy types that spawn near the golden statue:
- Councilor Psion — These enemies are surrounded by a white/clear bubble, and they will shield the Standard Liberators so that you can’t kill them.
- To defeat these enemies, simply walk into their bubbles and melee them once.
- Standard Liberator — These enemies are huge Cabal that will try and take the standard that you’ve already placed. You must kill them before they reach it, or you will have to get the standard all over again.
After you’ve placed all three standards, the door will open behind you and you will be able to get your first loot chest of the Leviathan Raid. This chest will give you rep token you can turn in after you’ve finished the raid, raid shaders, and a powerful legendary engram.
Note: You will need to come back to this room between each fight and do the same thing to open each encounter. It’s also important to point out that the sequence of the following challenges changes from week to week, from reset to reset.
Royal Pools Encounter
This is the first real encounter in the Leviathan Raid and will reward you with raid-specific loot.
When you walk into the room, you will notice five plates with icons, one in the center, one in the front, one in the back, and one on each side. The icons themselves are not important to the fight other than calling out to your team where you are going.
This is mostly a survival fight where your fireteam needs to stay on each of the corner plates. To initiate the battle, have the designated members of your fireteam jump on their respective plates at the same time — two on the middle plate and the others on the plates around the room.
Note: All plates have protection orbs before the encounter begins, but only the central plate will have a respawning orb. This is important for …
Psionic Protection
This is a buff that you get when you touch any of the orbs on any of the plates. It protects you from the void water that would otherwise constantly damage you. However, whether you stand in the water or on a plate, the defense shield that each orb creates will degrade over time. When the shield erodes (reaches zero hit points), you will lose protection and must run back to the middle plate to refresh it.
How to Win the Royal Pools Encounter
When you stand on any of the plates around the room sans the center plate, the chains in front of it will start to move. You must stay on the plate until the chains stop moving. Each plate will lock into place once its gray block touches the water at its base. To advance to the next section of the encounter, you will need to do this for all four plates.
The problem is that as soon as you leave a plate, it will start moving in the opposite direction. To solve this predicament, split your raid party into two groups of three. At the beginning, players A, B, C, and D are those on the plates around the room, and Players E and F stay out of the water and help kill the adds that spawn.
Players A and B are on one side, while players C and D are on the opposite side.
When Players A, B, C, and D get to around 20 hit points left on their psionic protections, Players E and F will switch with Players A and C to keep the chains moving in the correct direction. You will need to constantly rotate players from the plates around the side they are on to the middle plate in order to keep protections up across your fireteam.
As you do this, powerful enemies called Ceremonial Bathers will appear from the chain pools. You will want to kill them as quickly as possible because they do a lot of damage and are very difficult to take down.
Bell Destruction
Once you get all the chains to stop moving, everyone will need to go into the middle section and stand on the plate. This gives you protection and you will see bells all around the room with purple centers. Shoot them in the center to cause damage. If you AoE weapons, such as rocket launchers and grenade launchers, these work wonders on the bells as you can damage multiple bells with a single shot.
However, be wary when your shield buffs erode and reach zero because you will begin to burn. Go to the sides of the room and be careful of the Sol Councilor that spawns in the middle. Kill him and return to the middle and continue the fight.
Once you destroy all the bells (there are three sets of three), you win and can get your loot.
You might need to do the chain section more than once. If so, you will need to melee kill a bubble psion that spawns on the middle plate. If you don’t do it fast enough, you will also need to shoot another psion that spawn in the air nearby.
Pleasure Gardens — aka Dogs of Doom
As you enter the room, there will be small beasts and a Beast Handler Cabal that you will have to take out before you progress. After you eliminate these enemies, two prism weapons will spawn on a platform in the back of the room. As this happens, Royal Beasts will spawn, six large, dog-like creatures you’ll have to elude while contending with a safe-room mechanic and other adds.
Setting Up
When you pick up both of the prism weapons, the fight starts. However, before you do this, you will want to split the prism weapon holders, one on each side of the platform in the back of the room.
Everyone else should stand in the middle (where the prism weapons spawned) and drop down into the safe room after the fight starts. This room will have four purple spores you can pick up. The four members of your fireteam in the safe room will then need to take one each of these purple spores to one of the glowing purple flowers around the room.
Once at a flower, a prism wielder can shoot the flower to grant everyone on the ground a buff called Empowering Spores. This stacks depending on how many players with spores are near the flower when it explodes. There are many ways to deal with this, but we found the quickest way was to have all the spore holders stack to get the buff quickly. The buff stays, so anyone who goes to the ground will get it as long as they stay there.
Dog Patrol
During all this, there is a very important mechanic that must be heeded at all costs — the six Royal Beasts on patrol. No one in your raid party can be seen by these giant dog-like creatures as they make their way through the labyrinthine Pleasure Gardens. If someone on your fireteam is spotted, the Royal Beasts will start howling and your team will need to run back to the safe room or they will instantly die. However, you can only do these three times before the safe room stops working — so be careful.
You will need to learn the patrol routes of each dog so you don’t run into them while trying to shoot the flowers. But keep in mind: a Beast Handler will spawn each time you shoot a flower and get the buff. The prism wielders can easily kill them, but they shouldn’t kill any of the Royal Beasts, yet …
Defeating the Pleasure Garden’s Royal Beasts
Once you’ve gathered enough of the buff from the flowers, or the Beasts become restless and howl, you will need to attack the Beasts. The higher your team’s buff, the more damage you deal to the Beasts. At 60 stacks, each member in the team was able to kill a Beast.
However, there is an easier method if your damage multiplier isn’t high. Simply lower each Beast’s health (without killing them the first time), and run back to the safe room. The next time the safe room door opens, gather up a bunch of the empowering spores again and run out to kill them all.
The Gauntlet
This room has four platforms with symbols on them — the same symbols that you’ve already seen throughout the raid — beast, axes, chalice, and sun. On top of that, there is an outside area protected by an energy gate. To start the fight, you must jump on all four plates in this area.
If you look toward the energy barrier from the plates, you will see three triangles: top, middle, and bottom. Later in the fight, you will need to have two people shoot specific triangles, but I’ll get to that a bit later.
At the beginning of the Gauntlet, you must kill enemies until an elite Cabal appears near each platform. After you kill this Cabal, an orb charge will spawn at the Beast and Cup underneath the triangles. Two fireteam members (runner) will need to grab these orbs (one each), while the other four stay put — two at each of the platforms at which the orbs spawned.
Now, for the fun part …
The Gauntlet Running Section
After the runner picks up the orb, he will be transported outside of the shield and a wall with nine holes will appear in front of him. Above this wall, there will be a symbol that corresponds to a shooter’s platform — beast, axes, chalice, and sun. As long as someone is standing on that icon’s platform, you will notice that one of the holes in the wall is red.
This part’s important: The guardians outside of the barrier (the shooters) will need to shoot the other two holes in the same row at the same time to turn all the holes green. A purple orb will spawn in the hole that was previously red. This will increase the time you can hold the charge when you run through it.
You will need to continue doing this until you have gone through all four symbols. After that, you will make it back to the inside. Run to the middle and your character will automatically slam the charge into one of the nine openings.
After you slam the orbs, repeat the steps two more times, starting from when the enemies spawn again. After that, the final phase begins.
Note: During all of this, your shooters will also have a few adds to deal with, such as regular Cabal and Centurions. Bubble psions will spawn under the triangles — which you must melee to kill.
Final sprint
If you do everything correctly, you will have lit up six of the nine spots in the middle of the chamber. The final phase will spawn orbs in the middle where you slammed the charges. Everyone must pick these orbs up to progress.
And this is where things get intense. Once everyone picks up an orb, the entire fireteam will be transported into a more difficult version of the obstacle course that the runners just completed. Four purple orbs will spawn at each wall, all of which need to be picked up. However, since there are six members in a fireteam, you will need to alternate who grabs these purple orbs as you make your way through the course.
We made up an order of which two team members would skip the purple orbs at each wall so that everyone would get an orb every other time. Why? If you miss more than one orb in a row, your charge will run out of time and detonate, killing you. It’s best for your Raid party to be especially vocal during this section (calling out which orb who is picking up) to speed things up and prevent confusion.
As long as you get three members back to the center in time to slam the middle, you win. Note: If you ever miss slamming one in during the first three running sections, you will need to get more charges in at the end.
Collect your rewards and your Raid gear and move on to the final challenge of the Leviathan Raid.
Emperor Calus
The final boss fight is not as complicated as you might think, but it is unforgiving and requires clear voice communication. When you enter the room, you will see a huge Emperor Calus sitting with a cup in his hand. If you shoot or melee this out of his hand, the fight will commence.
Beginning of the End
When the battle starts, you will need to kill all the enemies in the room. But be careful because Calus will be in the room as well, raining attacks upon your party. However, he will be immune, so it will be a little longer before you can engage him directly.
Eventually, elite Cabal Councilors will spawn that you need to kill. When everything is dead, the next part begins.
Another Dimension
Councilors will begin to spawn on the four plates around the room with the same symbols you’ve seen earlier in the raid. After a short time, everyone will be teleported into a Dark Realm. Ahead of you will be a giant projection of Calus’ head, a small void wall (which looks more like a small wave), and three orbs. The wall stops you from being sucked in by Calus, which otherwise kills you.
Here, the fireteam will essentially be split in half. Three people will perform a small jump into the orbs, which takes them back to the throne room. The three left in the dark realm must stay behind the void wall, which will continually move toward Calus. Each time this happens, you’ll need to look at his forehead for a symbol.
Each of the three team members in the dark realm will see a different symbol and must call out, one by one, which symbol they see. The other half of the fireteam back in the throne room must kill the Councilor showing the symbol that was not called out by those in the dark realm. To top things off, they will also need to deal with additional enemies while they for the call from their teammates.
Back in the dark realm, those fireteam members will see regular psions and floating psions. They need to kill all of them, but the floating ones are the priority because they will instantly kill everyone if they aren’t eliminated fast enough.
Damage Phase
Once your fireteam reaches the last wall in the dark realm, the Callus projection will start spitting out skulls in a huge plume. You and your teammates will need to destroy as many as you can to gain stacks for a Force of Will buff that will affect the entire team.
The members in the throne room must shoot Calus to drop his shield. This needs to be done before he finishes his attack or everyone will die. Start doing this when you have a decent number of stacks, 20-40.
When Calus’ dark realm apparition has shot enough skulls, orbs will spawn that will take the dark realm fireteam back to the throne room. Now the real damage begins.
Everyone (all six players) needs to jump on the platform that’s glowing and damage the boss. Calus will eventually initiate an explosion attack that will affect the plate upon which your fireteam is standing. And although his arm will telegraph the attack, you’ll want to make sure that you’re paying attention and jumping off the targeted plate and to another one.
When this phase is over, you repeat everything until you get his health all the way down.
Final Assault
After you’ve done enough damage, Calus will start his final attack. You must damage him enough to drop his shield before he finishes — or your entire team will die. If you do this in time, you finally win the fight and can collect your loot, watching the story unfold.
—
That’s it for our Destiny 2 Leviathan Raid Walkthrough. If you find any better ways to complete each fight, drop your strategies in the comments and we’ll update this guide. And be sure to check out our other Destiny 2 guides! Here are a few to get you started:
- Destiny 2 Location Guide: Where is Xur?
- Destiny 2 Exotics and How to Get Them
- Destiny 2 Beginner’s Guide
- How to Replay Story Missions
- Destiny 2 Clan Guide
- How to Unlock Challenges
- Activating Heroic Public Events
- How to Get the Kill Tracker Ghost
- What to Do at Max Level


Published: Sep 15, 2017 09:01 am