The search for clues is a huge part of solving the mysteries of Until Dawn. There are three major categories for clues: the twins, 1952, and the mystery man. Acquiring these clues can have an effect on how actions play out through the story including whether characters live or die. Below I have listed the collectibles by chapter and with accompanying pictures showing their location. Happy hunting!
Chapter 1
Chapter 2
Chapter 3
Chapter 4
Chapter 5
Chapter 6
Chapter 7
Chapter 8
Chapter 9
Chapter 10
Chapter 1
Wanted Poster-Mystery Man Clue #1
After meeting Chris, this first clue can be found on the side of the building. It can be inspected as Sam when Chris leads her to the shooting range, or afterward when Chris and Sam are heading to the cable car.
Chapter 2
Axe Holder-Mystery Man Clue #4
When Chris and Josh head around to the back of the cabin, take notice of this clue near the movable cabinet.
Newspaper Fragment-Mystery Man Clue #2
Before exiting the garage and heading into the living room, make sure to get this off the shelf in the nearby small room.
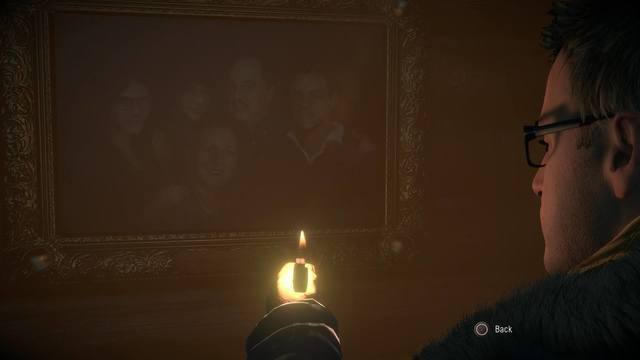
Family Portrait-Twins Clue #4

As Chris leaves the garage and into the cabin’s interior, this large, fairly noticeable portrait hangs on the wall in the adjoining hallway.
Phone Message-Mystery Man Clue #3
When you first enter the living room, head into the small alcove on the opposite side of the room. An answering machine can be interacted with on the side table near the large dining table.
Prom Night Photo-Twins Clue #3
When you head back into the living room from the dining room, make a left. This clue will be on a table just past some double doors.
Beach Photo-Twins Clue #2
From the table with the prom photo, head downstairs. The clue will be on a table nearby the locked cinema room doors.
Film Trophy-Twins Clue #1
Back upstairs, head up another flight of stairs to be on the balcony overlooking the cabin. The clue is on the right side of the balcony near a bookcase.
Cigar Stub-Mystery Man Clue #5
When playing as Mike, Jessica falls into an abandoned mine. After Mike jumps down to assist her, the two will almost be hit by a falling beam. Shortly after this event, head to the right. Here you will find this clue on a nearby barrel.
Mystical Symbol-Mystery Man Clue #6
In the same room as the cigar stub, found on the back wall.
Mine Danger Map-1952 Clue #1
Just a little ways past the last clues, this clue is on a table right before Jessica and Mike exit the mine.
Postcard-Mystery Man Clue #8
When you gain control of Sam, exit the bathroom and take a left. You’ll be in Hannah’s room. Examine the nightstand near her bed to unlock this clue.
Tattoo Card-Twins Clue #5
Also, in Hannah’s room, laying on top of her desk.
Compatibility Test-Twins Clue #6
In Hannah’s closet, this clue is lying discarded on the floor.
Chapter 3
Old Mask-1952 Clue #2

After resuming control of Mike once again, there is a small shack on the path to the cabin. Go inside to find this clue.
Native American Book-Mystery Man Clue #7
Once inside the cabin, check the small stand in the corner of the room. There you will find this clue. Due note that in order to receive credit for this one, you must flip through the pages.
Tennis Photo-Twins Clue #7
The clue is resting on a stand in the hallway right before the entrance to the bedroom.
Hannah’s Glasses Case-Twins Clue #9
Once the séance concludes, instead of following Chris down the stairs, head over to the small table to retrieve this clue.
Light from Below-Mystery Man Clue #10

When Ashley and Chris head into the library, there is a small grate on the floor nearby some shelves. Examine it to uncover this clue.
Photo-Twins Clue #8 & Threatening Letter-Mystery Man Clue #9

After Chris and Ashley press the button on the shelf revealing this hidden alcove, check out the photo of the twins for the first clue. Make sure to turn it over to unlock the second.
Native American Letter-Mystery Man Clue #11
After Chris and Ashley find the secret room, they head down a long hallway. Near the end of the hallway, a clue rests on a table.
Chapter 4
Pig’s Head-Mystery Man Clue #15
This clue can be found when Chris is searching for Ashley. On the way to the shed, make a left when the path splits. This clue will be found near the base of a tree.
Chapter 5
Administrative Notes-1952 Clue #3
When Mike climbs through the hole and into the main room of the sanitorium, walk over to a small stand across from your position to find this clue.
Clocking-in cards-1952 Clue #6
After heading into admin, you’ll notice a safe nearby. By having Mike interact with the safe, you will find this clue inside.
Broken Camera-1952 Clue #4
In the same room resting on a nearby barrel, you’ll find this clue.
Old Newspaper-1952 Clue #8
Continue into the morgue, but do not head down the stairs yet. Instead, head into a small office to find a clue on a nearby desk.
Medical Notes-1952-Clue #5 
Still on the floor with the old newspaper clue, there is a doorway on the right. You’ll know you’re near when you get an overhead camera angle of the room.
Restraining Chair-1952 Clue #9
Now head down the stairs and into the morgue. Mike will spot a machete with which you must interact. Once done, there is a green curtain nearby to interact with as well. Once done, you will get credit for this clue.
Telegram-1952 Clue #10
While searching the rest of this floor, head right into an office. The clue will be sitting on the desk.
Strange Skull-1952 Clue #12
Once you’ve made it through the big room (the one with the bear trap), proceed into the next room to find the clue on the right-hand shelf.
Death Certificate-1952 Clue #13
When you come to the room with the pull-out cold chambers, find this clue inside of the left side, bottom right.
Name Tag-1952 Clue #11
Same room, same cold chambers except on the opposite wall this time. The clue can be found inside the bottom left side chamber.
Cigar Box-Mystery Man Clue #12
Once inside the chapel, this clue is sitting on a barrel in the middle of the room. Can’t miss it.
Clippings-Mystery Man Clue #13
In the same area, go into the open fenced-in room to check the cork board.
Rescue Photo-1952 Clue #7
When Mike uses the pistol to blow the lock off of a door, do not go down the stairs. Instead, search the right side of the room to find this clue.
Axe-Mystery Man Clue #16
When you gain control of Matt, you will have to interact with this clue as a part of the story. It is wedged into a door.
Beth’s Phone-Twins Clue #10
After Matt and Emily walk across a long wooden walkway, turn to the left. You will arrive a small covered wooden bridge. Matt must walk near the end of it to receive a prompt to interact with the floorboards.
Business Card-Mystery Man Clue #14
When Sam gets out of the bathtub, head downstairs into the main living room. Do not head down to the cinema room yet! Instead, head over to the front door. Next to it will be this clue on a table.
Hannah’s Poster-Twins Clue #11
When inside the fire tower, inspect the locker. The clue will be inside.
Hannah’s Poster-Twins Clue #11
Also, inside the fire tower. However, the power must be turned back on. Head out through the door and around the balcony to find a fuse box. Flip the switch. Once back inside the office, check the printer for this clue BEFORE checking the radio!
Hidden Camera-Mystery Man Clue #17
When Ashley and Chris head down into the basement, Ashley will have to interact with a dollhouse. After the event, a door opens with fog pouring in from under the frame. After viewing the small scene, turn to the right and check behind some boxes for this clue.
Lightbulb Catalogue-Mystery Man Clue #19
In the same room, check a nearby table for a book. You must flip through the pages to get credit for this clue.
Faked Newspapers-Mystery Man Clue #18
When you head out of the basement and into the abandoned hotel, watch for a room with smashed pillars. In this room, you will find the clue.
Batteries & Timers-Mystery Man Clue #20
After retrieving the previous clue, you will notice this clue in the foreground. It is really hard to miss this one.
Dead Pig-Mystery Man Clue #21
In the kitchen, Chris and Ashley will interact with this clue automatically.
Photos of Friends-Mystery Man Clue #22
In the same room, near a busted door. You’ll find this on the wall.
Hooks and Chains-Mystery Man Clue #23
This one is kind of easy to miss. It is against the left wall hanging above a sink.
Death Machine Plans-Mystery Man Clue #26
When you start with Sam, head a bit to the right to find these tacked on a board. You must interact with the clue in order to receive credit for it.
Psychiatric Report-Mystery Man Clue #30
There is a desk with an intractable drawer nearby. The clue is inside.
Josh’s Cell Phone-Mystery Man Clue #27
Right across from the desk, you’ll find this clue on a shelf.
Remembrance Board-Mystery Man Clue #28
Opposite the shelf, head towards some boxes that need to be pushed in order to view this clue.
Voice Recordings-Mystery Man Clue #29
After exiting the workshop, you’ll happen upon a chance to interact with a door. The next clue is very nearby on a desk.
Video Camera-Mystery Man Clue #24
It’s hard to miss this one. It’s on the other side of some double doors.
Dummy in Sam’s Clothes-Mystery Man Clue #25
Again, can’t miss it. It’s next to the camera.
Miner Photo-1952 Clue #15
In the mines with Emily, before moving the carts, find this clue situated inside a trunk.
Clock-in Machine-1952 Clue #4
After sending the cart through the door, this clue is in the next room on a wall.
Miner’s Family Photo-1952 Clue #16
After Emily takes a spill down a tunnel, head past some planks and make a sharp right. There is a little box you can interact with containing this clue.
Hannah’s Glasses-Twins Clue #13
After the scene in which Emily attempts to climb the steep slope, this clue is found nearby the wooden structure.
Tattoo Photo-Twins Clue #17
Right across from where you found the glasses (previous clue).
Marks on the Rock-Twins Clue #15
In the same area, move the huge pieces of sheet metal to uncover this clue.
Beth’s Cross-Twins Clue #16
When you head up the path, make the first right. The clue will be there.
Hannah’s Locket-Twins Clue #14
At the end of the path, there will be a barrel. Interact with the locket to get credit for the clue.
Beth’s Head-Twins Clue #18
You can’t miss this at all. The grotesque clue will appear right in front of the camera.
Romantic Postcard-1952 Clue #17
Continuing Emily’s trek through the mines, you’ll find this clue hiding out in a tiny shack.
Intro, Cannibalism, History, Combat, and Bite-1952 Clues #18, 19, 20, 21, & 22
When you gain control of Ashley and can flip through the book, you will get credit for all of these clues. Make sure to flip through all of the pages!
Makeshift Graveyard-1952 Clue #23
When playing as Mike in the sanatorium once again, you’ll head outside and see this clue near some old fencing.
Doctor’s Report-1952 Clue #25
As Mike heads into the psych ward, enter the room with the detention sign. This clue will be inside on a desk.
Old Film Reel-1952 Clue #25
When you see a sign that says “B-Wing”, head left instead of right. Continue down the hall and enter the first door on the right. Turn on the projector to view this clue.
Case Study Dossier-1952 Clue #27
Keep continuing down the hall from the last room, you’ll come to a doctor’s office. Flip through the file folder on his desk to get this clue.
Suicide Note-1952 Clue #26
Nearby will be some light shining through a wooden wall. If you interact with the wall and then shoot the door lock, you will be in a room with a corpse! Take the note from his leg to get this clue.
Beth’s Watch-Twins Clue #19
Before dropping down to get into the water, follow the left path to discover a grave. The clue will be there.
Scrawled Journal-Twins Clue #20
After wading through the water, this clue will be along the left side of the wall.
If you need help with finding totems, check out my totem guide for Until Dawn!


Published: Sep 3, 2015 04:53 am