
The Hidden Missions in Kirby and the Forgotten Land can be tricky to find, but they are crucial to rescuing all the Waddle Dees the game has to offer. World 3, Wondaria Remains, is no different.
This guide to Kirby and the Forgotten Land will tell you where to find and how to complete all of the Hidden Missions in Wondaria Remains. It also includes tips for besting some of the harder Hidden Missions, including those for the world’s final boss.
Use the links below to jump to each level:
- Welcome to Wondaria
- Circuit Speedway
- Invasion at the House of Horrors
- The Wondaria Dream Parade
- Danger Under the Big Top
All Hidden Missions in Wondaria Remains’ Welcome to Wondaria
There are three Hidden Missions in Welcome to Wondaria.
Welcome to Wondaria Hidden Mission 1: Help the Lost Ducklings Find Their Mama
There will be five cute yellow ducklings scattered throughout the early parts of the first level. You’ll want to collect them all by walking near them and deliver them to their worried mother.
- The first duckling is up the first stairs and to the left. Walk by it to collect it.
- The second duckling is on the other side of the stairs, to the right of the rocket statue.
- The third duckling is hiding behind the sign with the theme park map displayed on it.
- The fourth is behind the popcorn cart just left of where the larger mama duck is stranding.
- The fifth and final duckling is tricky. You’ll need to jump on a hedge behind the rocket statue to walk behind the statue. There is a secret passage here, and you’ll only be able to see Kirby’s silhouette as you walk. Once you are far enough in you’ll see the silhouette of the fifth duckling. Return them all to mama to complete the mission.
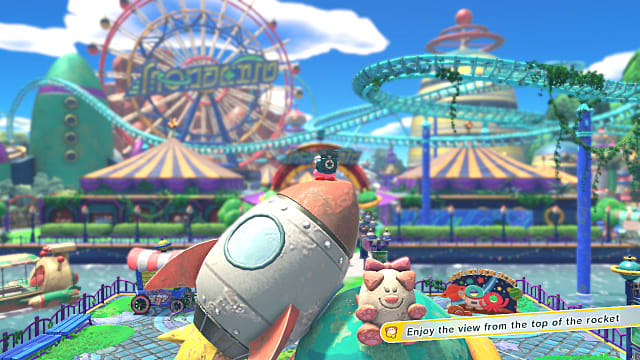
Welcome to Wondaria Hidden Mission 2: Enjoy the View From the Top of the Rocket
This Hidden Mission can be done right at the entrance to the park at the start of the level. There will be a statue a rocket ship and dogs sitting on a planet out front. Use various parts of the statue to climb to the top.
Welcome to Wondaria Hidden Mission 3: Make All the Wilted Flowers Bloom
After the Coaster Mouth section of the stage, the next Mouthful section will require you to use Water-Balloon Mouth Kirby to bloom all of the dying flowers. The first spigot can be found right before the first section of four wilted flowers you’ll need to spray.
You’ll take a ladder up to another spigot and three more wilted flowers. Spray them and then spray the suspicious mud patch in the right-hand corner of the area to reveal the eighth and final flower. This Hidden Mission will grant you the Toy Hammer blueprint.
All Hidden Missions in Wondaria Remains’ Circuit Speedway

There are three Hidden Missions in Wondaria’s Circuit Speedway.
Circuit Speedway Hidden Mission 1: Reach the First Race’s Goal Within 20 Seconds
There are two races in Circuit Speedway that require Kirby to inhale the race car in Mouthful mode. For the first Hidden Mission in the level, you’ll need to boost your way to the end of the race in less than 20 seconds. Use the turbo boost whenever you accelerate, and hit the ramps to jump off the tire stacks and shave down your time.
Circuit Speedway Hidden Mission 2: Defeat Wild Edge Using an Invincible Candy
After you save the second Hidden Waddle Dee of the stage, you’ll be able to go up a hidden ladder to find an Invincible Candy. Once you eat the candy, head for the door leading forward. This will put you in an arena with a Wild Edge boss enemy who, if you still have your Invincible Candy active, should be easily eliminated.
Circuit Speedway Hidden Mission 3: Boost Through the Cardboard Shortcuts
The final Hidden Mission in Circuit Speedway can be found during the second speedway race. There are many shortcuts in this long race, but you’ll have to use the specific ones marked by cardboard boxes to complete this mission.
- The first cardboard shortcut is on your left during the first muddy section, allowing you to skip taking an annoying corner.
- The second shortcut needs to be taken off your first ramp. Look to your left, and you’ll see a gap in the fence around the track. Boost and jump off the ramp to cross the water and slam through the cardboard, cutting out a big part of the race and saving a Waddle Dee.
All Hidden Missions in Wondaria Remains’ Invasion at the House of Horrors
There are three Hidden Missions in Invasion at the House of Horrors in Wondaria Remains.
Invasion at the House of Horrors Hidden Mission 1: Clear Without Touching Any Ghost Gordos
Completing this Hidden Mission simply requires caution. The Ghost Gordos appear in the dark maze that you must illuminate using Light-Bulb Mouth Kirby. These translucent spike balls will home into your location whenever you light up in their vicinity.
Don’t tap the illumination button to see where to go. If you try and keep the button held down, the Gordos will find you. Briefly illuminate the room to see the next step and quickly complete this Hidden Mission.
Invasion at the House of Horrors Hidden Mission 2: Eat 3 of the Ghosts’ Hidden Snacks
- The first ghost snack is hidden behind a stack of glowing hexagons early in the level, just before the first cloud bridge.
- The second snack is at the end of the Light-Bulb Mouth section. Near the exit, you’ll see a macaroon on a lowered platform that belongs to the ghosties.
- In the next room, the third and final ghost snack is behind the hexagons near the large gap on the right side of the stage.
Invasion at the House of Horrors Hidden Mission 3: Destroy 13 Aliens Using Vending Mouth
The final section of the stage requires you to be Vending Machine Kirby. You must navigate a series of moving platforms that take you forward while cardboard aliens pop out on each side of you. Destroy all 13 to complete this Hidden Mission.
All Hidden Missions in Wondaria Remains’ The Wondaria Dream Parade
There are three Hidden Missions in The Wondaria Dream Parade.
Wondaria Dream Parade Hidden Mission 1: Help the Lost Fucklings Find Their Mama
- This duckling hunt is trickier than the first. The first duckling, however, can be found on a bench at the level’s start.
- The second duckling can be found just past the first robot crossing. If you get hit by these, your ducklings will scatter and you’ll have to retrieve them.
- Head up the hill past the parade of robots. You’ll be able to see the third and fourth ducklings on benches in the next section. The latter duckling will be next to a sleepy enemy.
- Look for a suspicious coin leading to a secret path up ahead to find the fifth and final duckling. Once you retrieve it, head back the way you came and up the stairs ahead to find their mama.
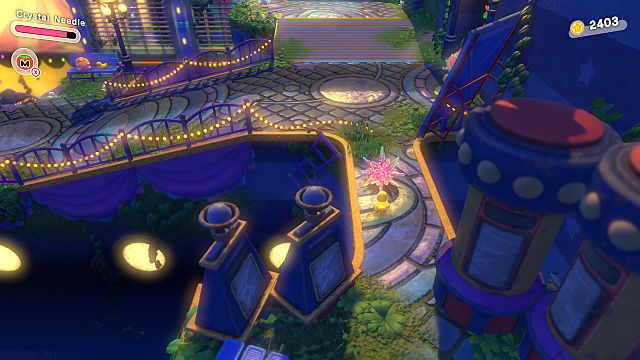
Wondraia Dream Parade Hidden Mission 2: Remove Elfilin’s Wanted Poster
After the race in this stage, you’ll come across a Hidden Waddle Dee that can only be accessed using the Tornado ability. You can find a wanted poster on the left sidewall near this tower and one level below.
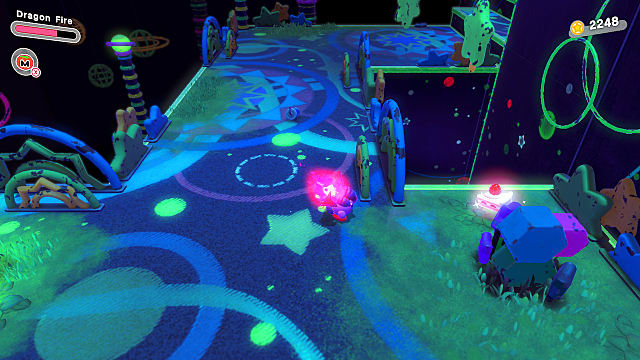
Wondraia Dream Parade Hidden Mission 3: Clear Without Stepping on Any Mud
One of the hardest Hidden Missions in Kirby and the Forgotten Land comes right after you rescue the ducklings. There are triangular neon platforms you must land on between large patches of mud. If you step on the mud even once, you cannot complete this Hidden Mission.
The most efficient way to complete this Hidden Mission is to use the Tornado ability, holding B and forward for quick bursts of movement.
All Hidden Missions in Wondaria Remains’ Danger Under the Big Top

There are four Hidden Missions in Danger Under the Big Top in Wondaria Remains. All of these are achieved by mastering the world’s boss, Clawroline.
This giant cat can be challenging, but there are Copy Abilities that make it easy. As with all the final levels in Kirby and the Forgotten Land, you’ll likely have to do the fight multiple times to complete all of the Hidden Missions.
- Defeat Clawroline without hovering.
- Hit high-up Clawroline using Ranger.
- Clear the boss fight within 1:30.
- Clear the boss fight without taking any damage.
The first Hidden Mission is tricky because one of the best ways to avoid Clawroline’s attacks is to float above them. Instead, you’ll have to dodge quickly by pressing the guard button (right bumper by default) and moving the analog stick in whichever direction you wish to dodge. Timing these dodges perfectly will leave Clawroline open for massive damage.
For the second Hidden Mission, you must pick the Ranger ability when starting the fight. During her second phase, Clawroline will hop up onto the rafters. The only way to damage her from here is if you have the Ranger ability equipped.
The final two Hidden Missions are standard across the game’s boss stages and as always, we recommend revisiting the fight with upgraded Copy Abilities to complete them.
Those are all of the Hidden Missions in Wondaris Remains. Since you’ll need upgraded abilities, check out our guide on where to find all the blueprints in the game. For more, including Hidden Waddle Dee locations, look no further than our Kirby and the Forgotten Land dedicated tips page.


Published: Apr 4, 2022 11:20 am