
In week two of Destiny 2 Season of Defiance, Guardians everywhere can delve into the Vex Network and complete a new Exotic mission called NODE OVRD AVALON.
It’s quite the doozy of a mission and will take even dedicated players at least twenty to thirty minutes to finish on their first run-through, though it’s probably easier with a fireteam. The activity follows the Whisper and Zero Hour design philosophy more than it does Season 19’s Seraph Station, with more platforming and puzzle-solving.
We’ll cover everything you need to know about completing NODE OVRD AVALON in this guide.
How to Complete NODE OVRD AVALON Exotic Mission in Destiny 2 Season of Defiance
The NODE OVRD AVALON mission is the third part of The Variable quest, following the discovery of six Vex data traces. Our guide to the larger quest goes over finding those. The mission begins immediately after you speak to the blue-eyed Vex Harpy in the cave.
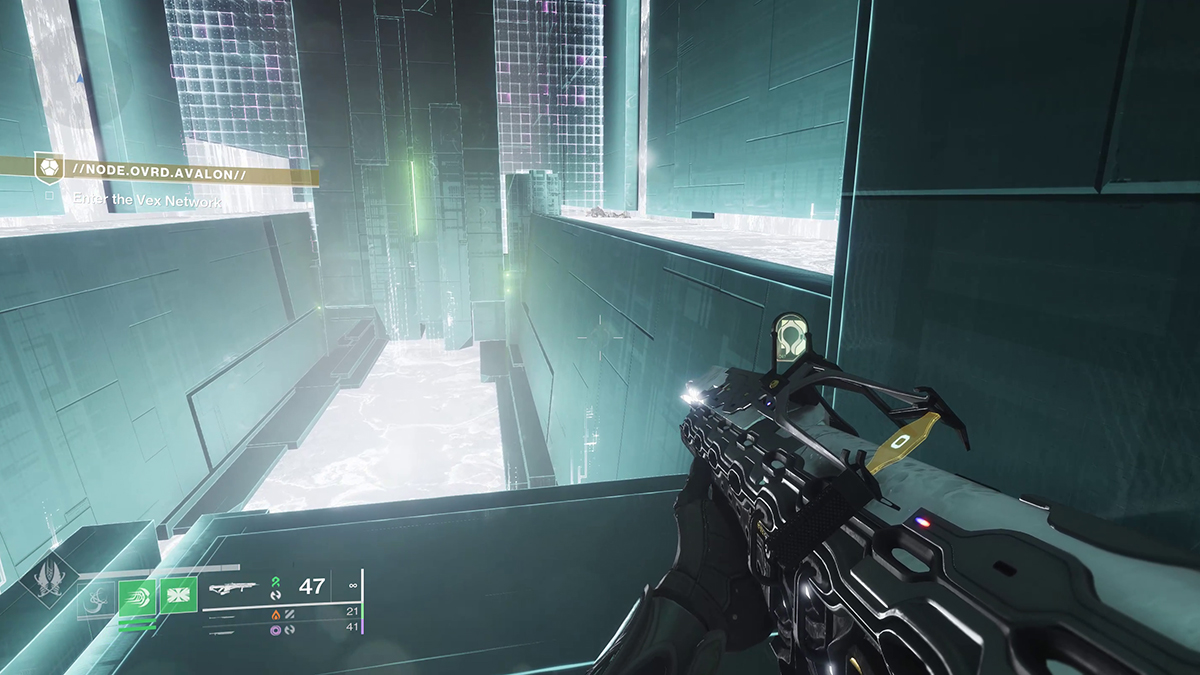
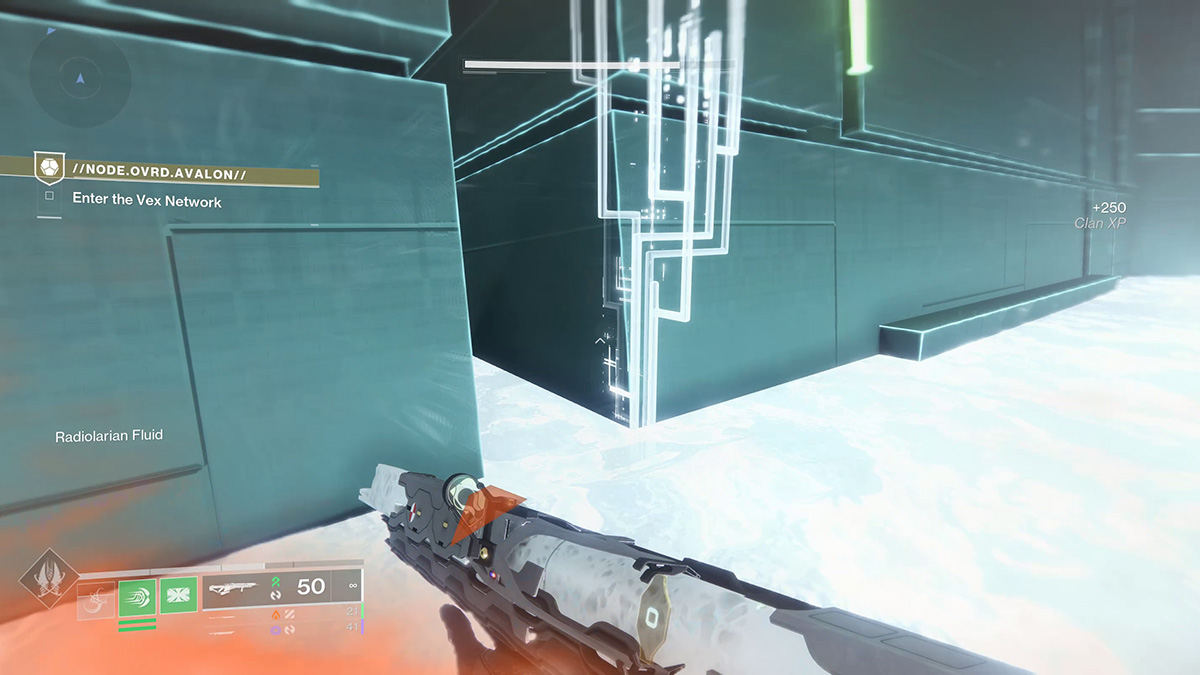
From the starting point, jump down into the data tunnel. The tunnel will ferry you into a small hallway that leads to a short gap. Jump across the gap, and you’ll be in a room with two upper platforms filled with white radiolaria fluid and a central, lower area with two side platforms you can stand on. Take to the lower part and crouch through the hole on either side of the central pillar.
Screenshot by GameSkinny
Beware that the openings have shutters that, if they close on you, will likely kill you from the acceleration. Head through the door in the middle of the area beyond the sliding shutters and turn in either direction. At the end of the hallway will be another hallway leading to a small room with a single Harpy. Destroy the Vex and take the thin passage nearby.
 Screenshot by GameSkinny
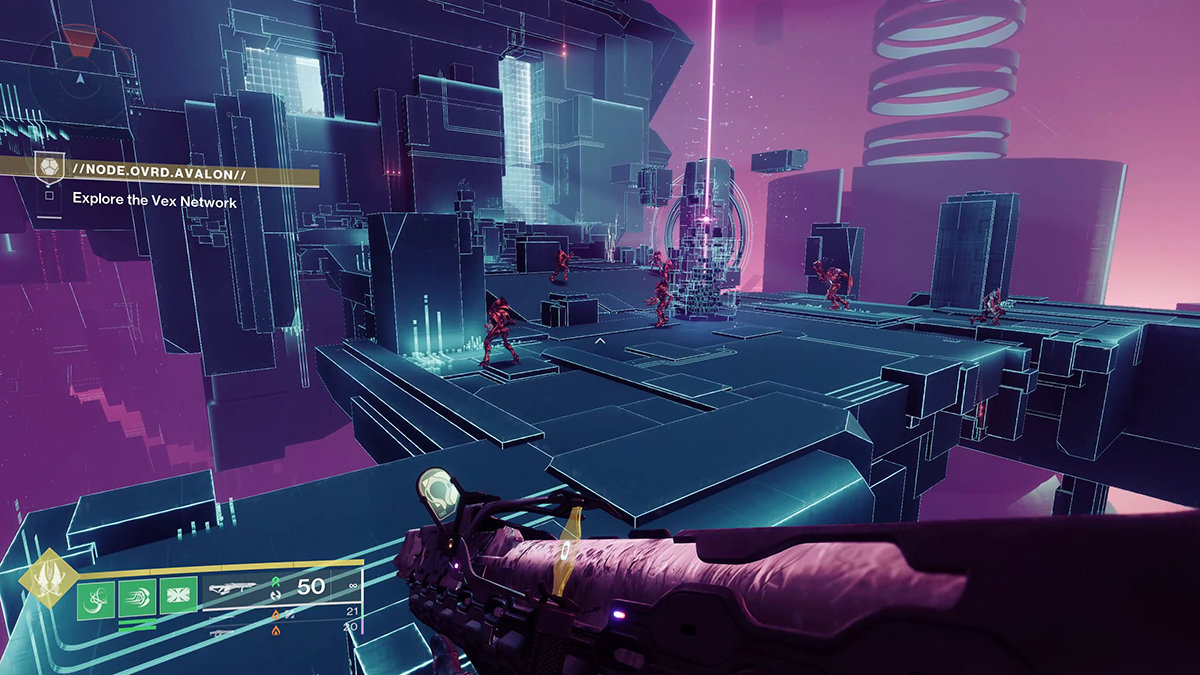
Follow the passage until you reach a pit, and jump down. Continue forward until you reach another pit, and jump down again. You’ll reach a place called Variant Security Protocol, and it’s here where you’ll learn the mission’s central mechanic.
How to Enter the Access Codes in the NODE OVRD AVALON Exotic Mission
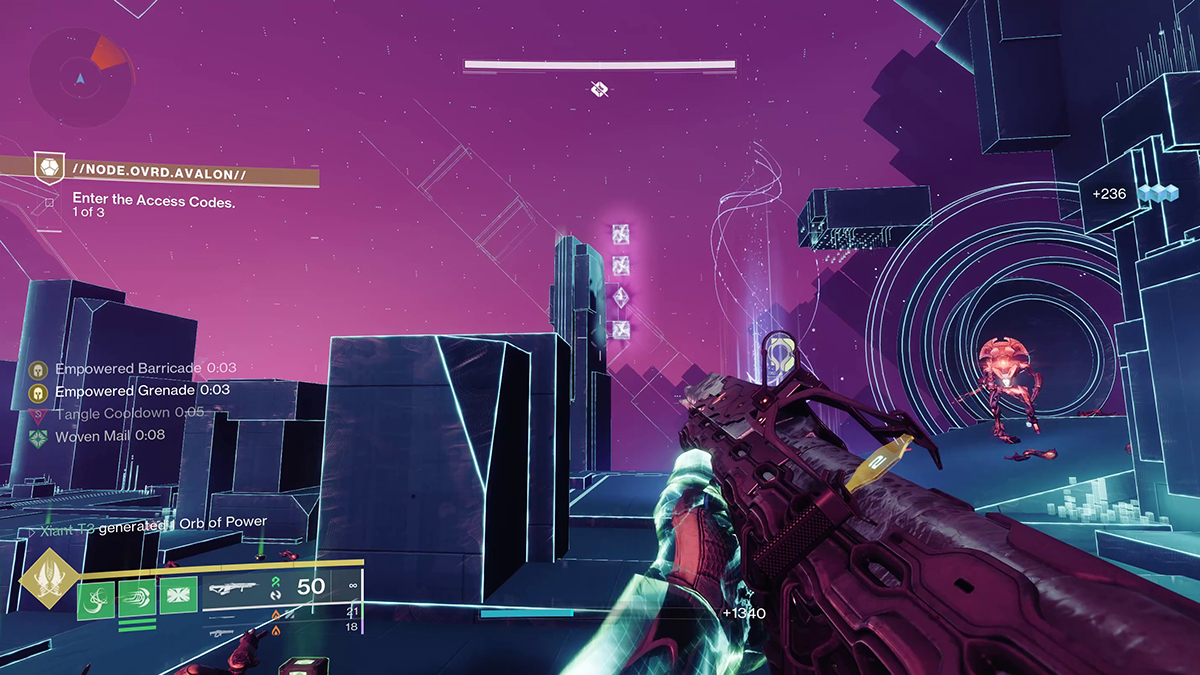
At the center of the arena in front of you is a digital structure with a purple beam shooting out of it and into the sky.
 Screenshot by GameSkinny
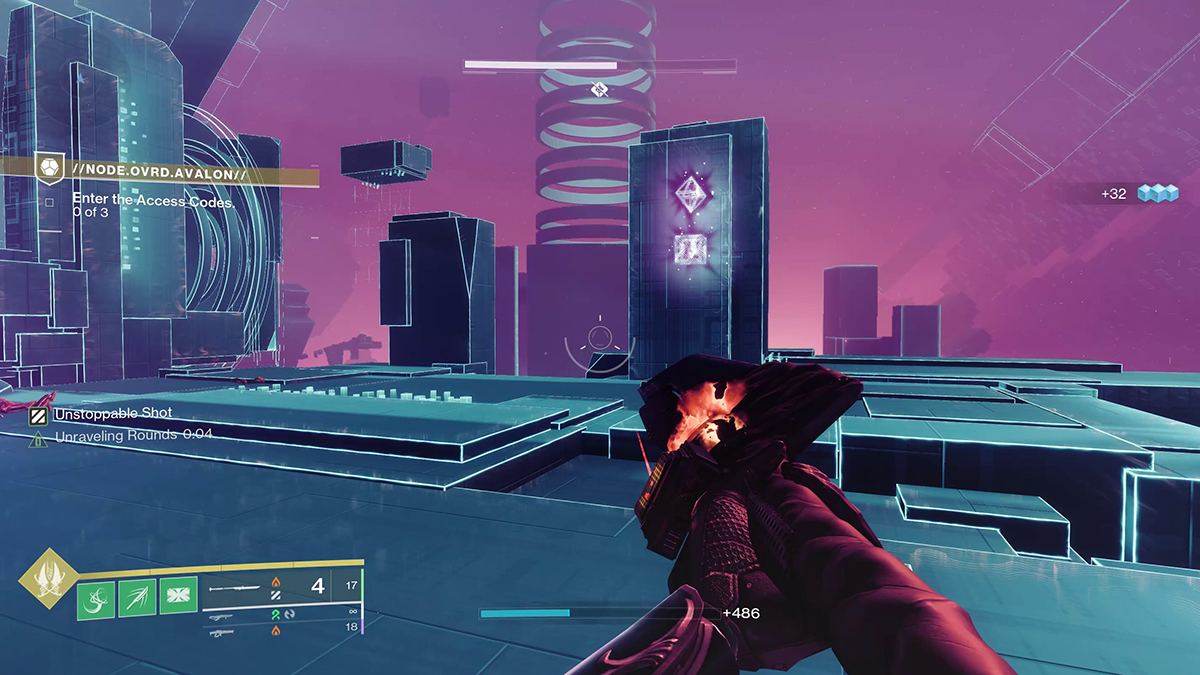
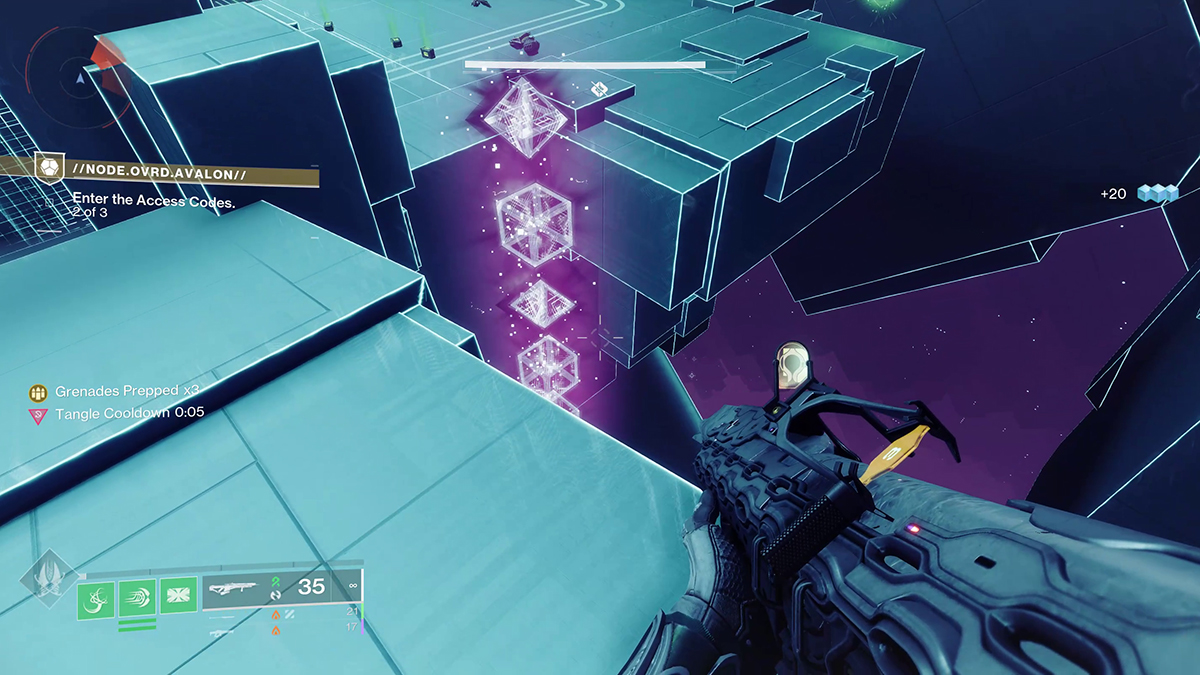
Once the encounter starts and the mission objective changes to Enter Access Codes, look to the right of the platform. You’ll see two floating symbols, not unlike the ones you used to solve the Vex Harpy puzzle during the Headlong mission.
Screenshot by GameSkinny
These symbols correspond to the Vex structures you need to destroy to progress the puzzle and are to be read from the top down. For instance, if you see a diamond above a square, destroy it when the diamond structure appears around the pink laser pillar. Then destroy the cube. If you do it right, you’ll move forward, and the Enter Access Codes step will go to 1 of 3.
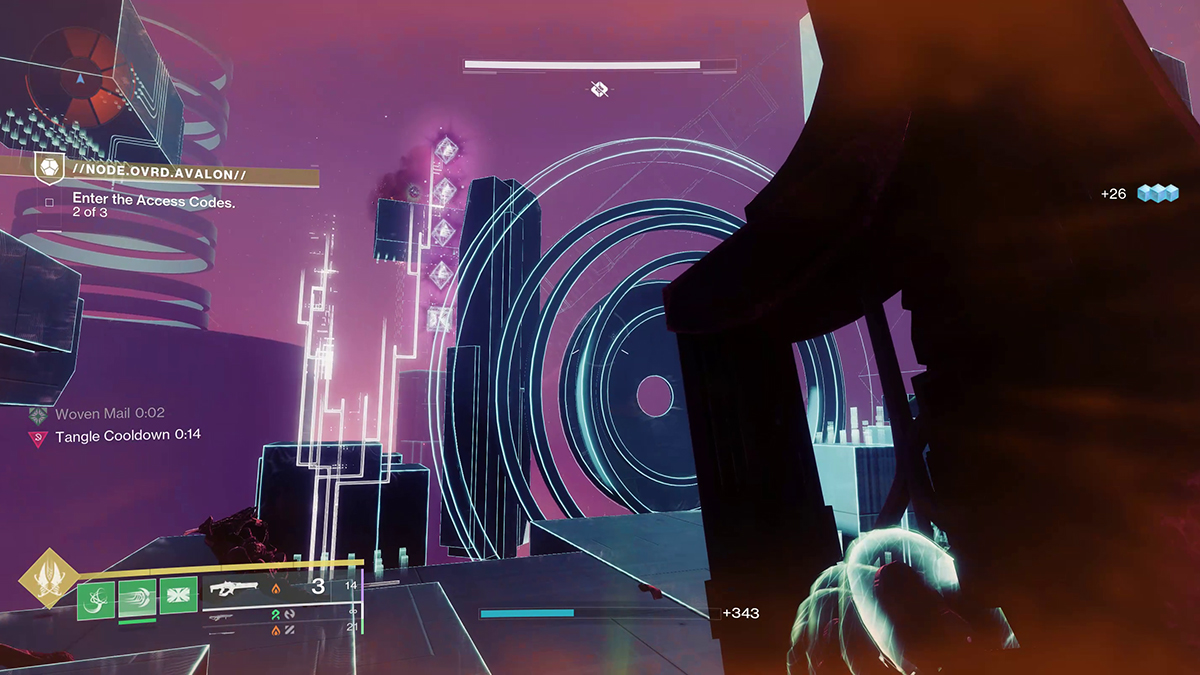
Now, more and tougher enemies will begin to spawn, with additional difficulty increases for the third code. The answer to the next two codes will also move around the arena. The second set will be in the back left behind a pillar near the uppermost Vex gate.
Screenshot by GameSkinny
The third set of symbols will be almost directly across from the second, behind a pillar to the left of the Vex gate.
Screenshot by GameSkinny
Successfully enter all three codes, and the barrier at the back of the arena will dissipate. Defeat all the Vex as you progress until you reach another Access Code section. The first set of symbols will be on the left-hand wall, visible from almost anywhere.
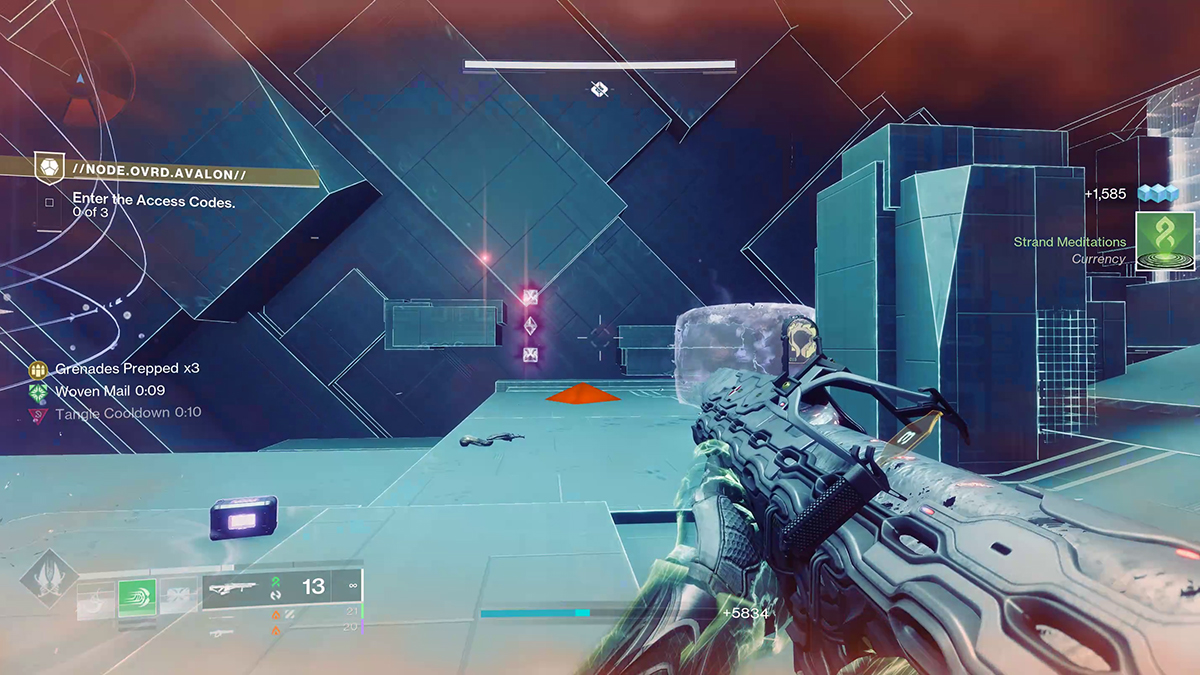
Screenshot by GameSkinny
The second set of symbols will be hanging over a bottomless pit near the back-right of the arena. You’ll need to look over the ledge to see them all.
Screenshot by GameSkinny
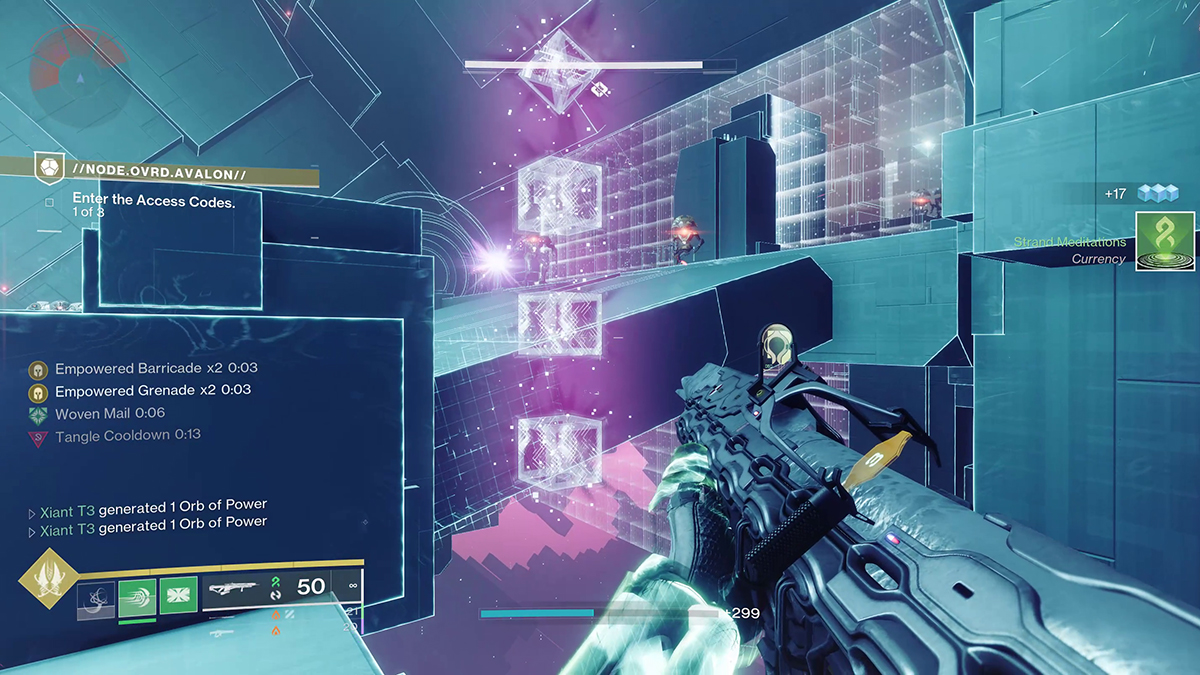
The third set of symbols will be to the left of the main walkway near the center of the arena. As before, you’ll need to look over the ledge to see them all.
Screenshot by GameSkinny
With the last set of symbols entered and access granted, you’ll need to defeat a new, tougher wave of Vex, including a pair of boss-level Wyverns.
Defeating the Vex opens the way to the next platforming section. Follow the path around and to your right, past the Vex Minotaur and through a small ductway accessible from a set of small platforms at the end of the path.
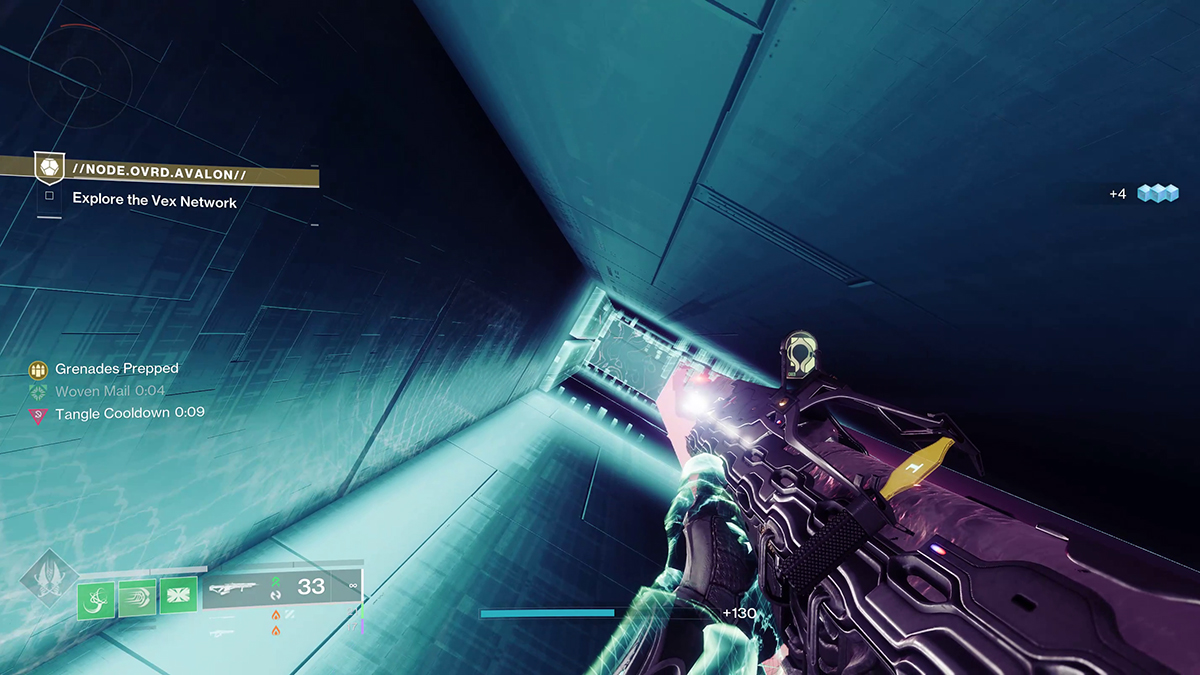
Avoid the triangular shutters (which will likely kill you if they hit you as they close), then jump down and to the left from the top of the radiolarian waterfall. Make your way across the disappearing platforms and crouch underneath the one accessible path on the left side of the passageway.
Beware that the sides of some parts of your ledge will try to eject you, but you’ll be able to see which as they’re a lighter shade of green and jut out from the wall before they attempt to push you off.
Screenshot by GameSkinny
Continue forward until you reach a man cannon atop a small rise. Be careful of the death pits leading to it. Take the cannon into the arena with the first boss fight.
How to Gather Data and Take Shelter and Defeat the Data Nullifier in the NODE OVRD AVALON Exotic Mission
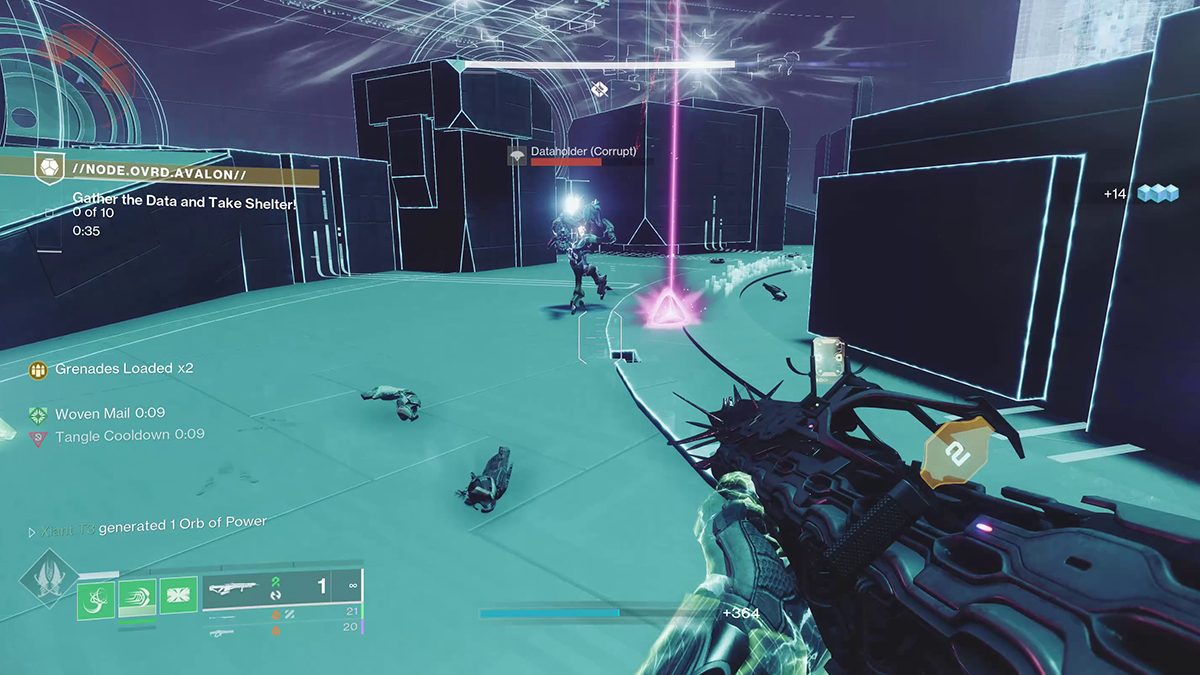
There are two phases two this first boss encounter. The first is to Gather Data and Take Shelter. Gathering data is easy. Enemies called Dataholder (Corrupt) will spawn alongside other Vex and drop pink motes when defeated.
Screenshot by GameSkinny
For the first part of the fight, you’ll need to collect eight and then 10 of these data motes and deposit them in the center conflux. Doing so will open a small pit in the middle of the arena, and you’ll see “Protected Area!” text on the left side of your screen.
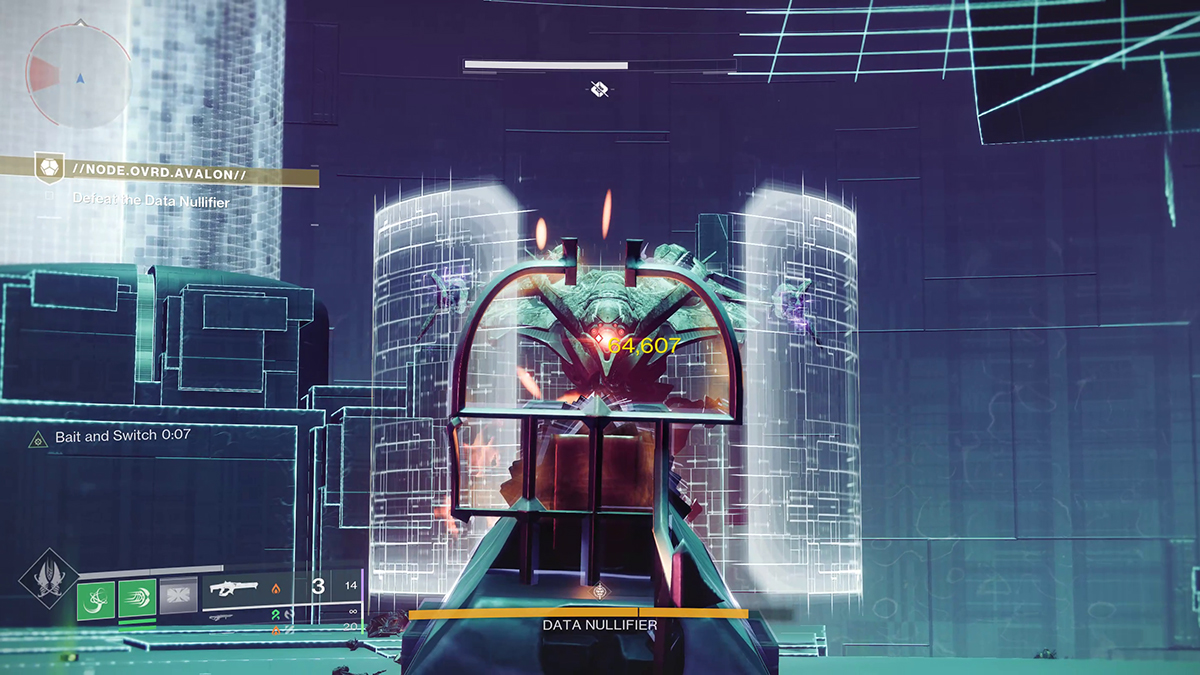
Stay inside this zone until the timer runs to zero, and the bottom of the pit will drop out, leading to a portal that will take you back into the fight. After the first two sets of data gathering, the Data Nullifier boss will come to fight you.
Screenshot by GameSkinny
Deal enough damage to the boss, and it will retreat behind its barrier again. Clear the area of Harpy enemies, and you’ll need to gather ten and then 12 sets of data motes, following the same process as before. With both sets of motes deposited and the Deletion Protocol avoided, you can finally kill the Data Nullifier.
Exit out the back of the arena and jump past the Wyvern, keeping to the wall on your left. Defeat or ignore the two Hobgoblins and through more sets of shutters. Take the man cannon you reach across the gap and continue your way down, being careful to always land on the platforms as they slide out of the wall.
Go around the barrier until you see a large cylindrical structure in the distance. Look down over the ledge and take the long slide toward the structure. You’ll be guided inside, then take the portal there.
How to Defeat Variant Stalker Brakion, Repurposed Mind
Destiny 2 veterans will remember most of this fight from the sunset Strike called the Pyramidion. Your goal here is much the same: defeat Brakion.
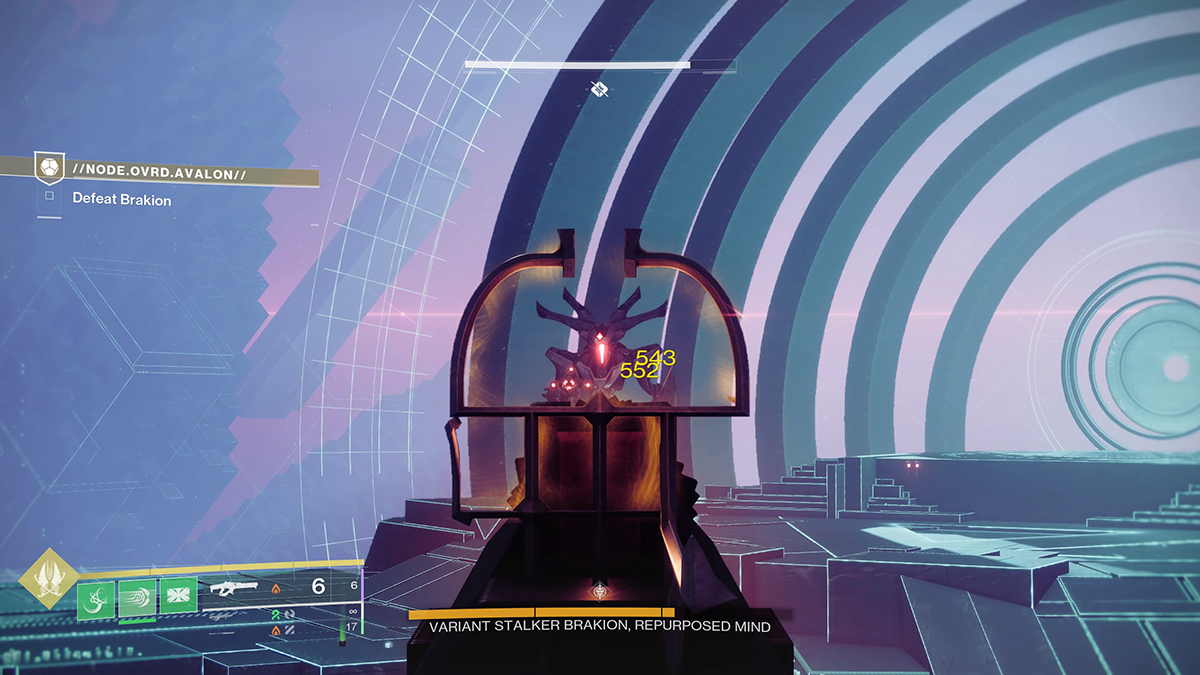
Screenshot by GameSkinny
This huge Vex Hobgobling will teleport around the arena as you fight it until you remove ⅓ of its health. It will teleport away at ⅔ health, and the portal at the back of the initial arena will open. Take it to progress to the next section.
Brakion will be behind a large barrier. To break it, you have to enter more symbols. Head to the rightmost section of the arena, and you’ll see a triangular window showing you the five symbols you need.
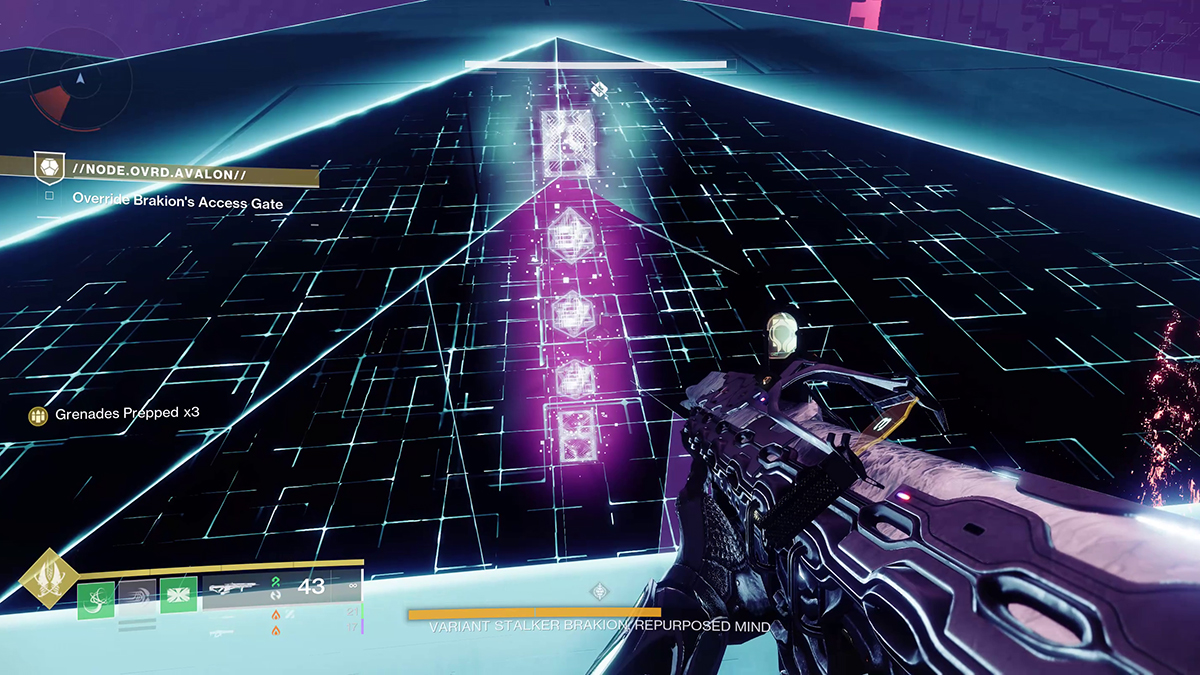
Screenshot by GameSkinny
Enter the symbols to lower Brakion’s shield, then take out another third of its health. The shield will go up again, and you’ll need to go to the left of the arena for a similar window on the floor for the new symbols you need. Enter these correctly to make Brakion vulnerable again. It will teleport away, and the portal behind it will open. Go through.
Dealing any damage to Brakion’s head at this point will cause it to shatter, opening up its weak point in the center of its chest and making it highly aggressive. Brakion will chase you around the arena, shooting lasers, stomping, and raining down fire until destroyed. Exploding Fanatic enemies will also spawn infinitely here, as will Minotaurs. Deal damage to the boss whenever possible until it’s dead.
With Brakion dead (again), head over to one of the Vex waterfalls with the neon-blue-colored Glaive in front of it and draw the weapon.
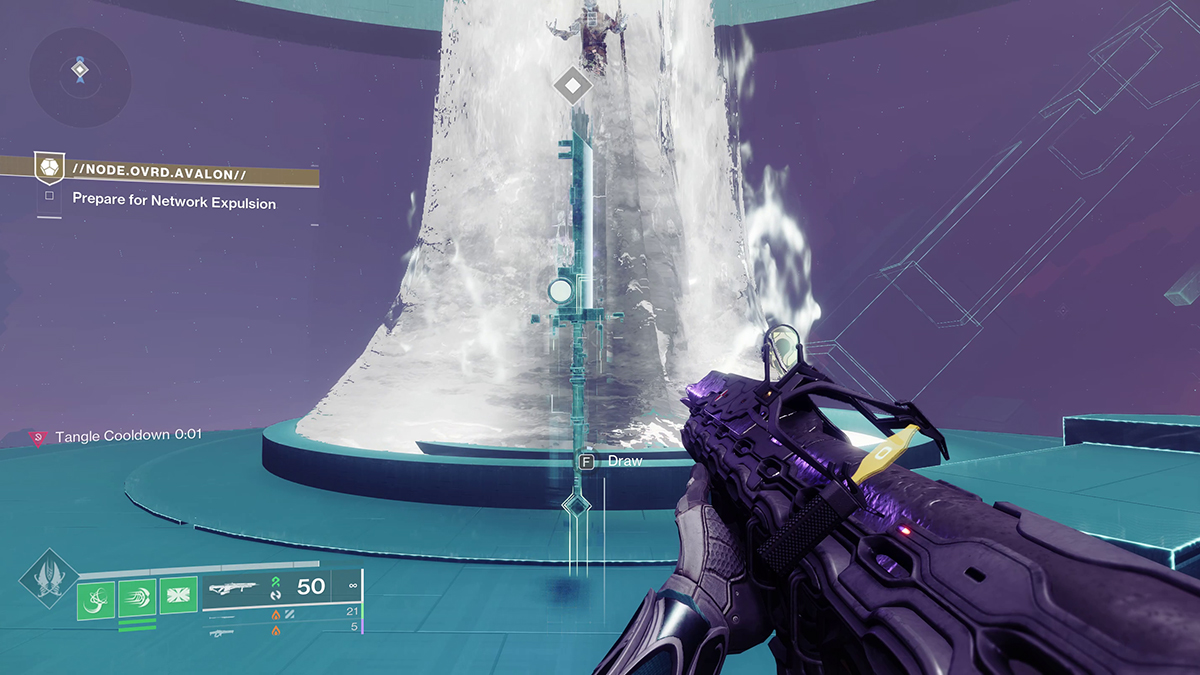
Screenshot by GameSkinny
After drawing Vexcalibur, the NODE OVRD AVALON Exotic Mission is officially complete. You’ll do it a few more times in the coming weeks to unlock additional Exotic Catalysts, but for now, be satisfied with your latest acquisition. For more Destiny 2 Exotic content, check out our guides to the Quicksilver Storm and Verglas Curve Exotic Catalysts and our guide to the Unfinished Business Exotic quest. Our Destiny 2 guides hub has even more.
Featured image via Bungie


Published: Mar 7, 2023 05:41 pm