Hellfire Citadel is a five wing instance that allows World of Warcraft players to face bosses in a somewhat non-linear order. Unlike previous guides, we cannot provide the most optimal order raid teams should encounter these 13 bosses. Refer to the in-game raid journal (shift J) determining which order to face them depending on team composition and skill.
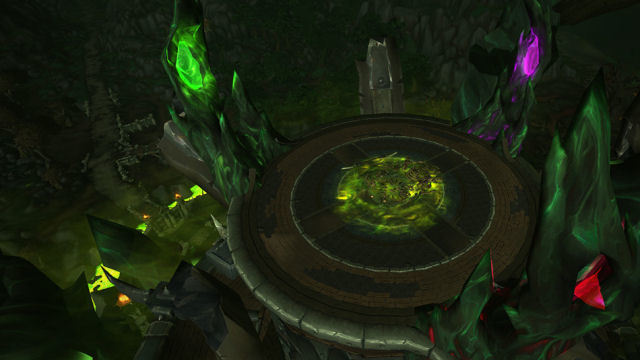
Destructor’s Rise is the fourth wing of this encounter. Fel-Lord Zakuun and Xhul’horac can be accessed in Normal, Heroic, and Mythic difficulty, but the final boss of this wing will require all previous bosses to be defeated.
The other wings for Hellfire Citadel includes: Hell Breach, Halls of Blood, Bastion of Shadows, and The Black Gate. The following ratings are based on a first impression and defeat of each boss.
Fel Lord Zakuun

This encounter is a two-phase, single-target, tank-and-spank, but with heavy raid awareness. Fel Lord Zakuun will alternate between being armed with his powerful axe and tossing it aside to deal heavy fisted blows to the raid. While he is a fairly simple boss encounter, he provides several hazards from his environment.
Environmental Hazards
 Throughout the encounter, Zakuun will create Rumbling Fissures on the ground nearby. Players who stand within its area of effect for 5 seconds will absorb the Fel energy as Latent Energy. Latent Energy is an unstable energy within a player. Should they enter a Rumbling Fissure again, they will unleash this energy. Unleashed Energy will cause the affected player to be stunned and explode, inflicting heavy Fire damage to all players.
 The last Rumbling Fissure present will transform into a Fel Crystal. This crystal is laced with Latent Energy and standing near one will inflict moderate Fire damage every second. However, as long as the crystal stands, it will inflict minor Fire damage to the entire raid every 3 seconds. One Rumbling Fissure should be left untouched since a Fel Crystal will always form.
 Armed
Armed
Zakuun will be armed with his massive axe at the start of the encounter. While he is armed, he will focus his melee attacks on a single target and use three different abilities along with Rumbling Fissures throughout.
Tanks should have the boss opposite of where Grommash Hellscream is chained. The rest of the raid will want to spread out behind him.
 He will swing his axe towards random enemies with Cavitation. This will cause Wake of Destruction waves to roll out. When it comes in contact with a player, it will inflict major Shadow damage to all players within 3 yards. If a Fel Crystal or those with Latent Energy are caught in a wave, it will cause Unleashed Energy to explode on the entire raid.
 He will also cast Befouled on random players that will absorb healing received. Once the target effected with this debuff has been healed enough, they will release a Foul Explosion. This is where Latent Shadow energy is released and deals heavy Shadow damage to any within 6 yards.

Twice per phase, Fel Lord Zakuun will cast Soul Cleave that will inflict moderate Shadow damage to his current target and add Cloven Soul debuff that increases Shadow damage taken by 100% for 1.5 minutes. Those hit with Soul Cleave will be Disembodied where the soul is removed from the body and transported into the Shadow Realm. This will be a forced tank swap and mitigation CDs should be used for this ability.
Shadow Realm
While inside the Shadow Realm, the primary goal will to avoid being hit by Wake of Destructions as well as a new expanding Ring of Destruction. Players should jump over the Ring to avoid its Shadow damage. Failing to dodge the Rings and Wakes will deal damage not only to those in the Shadow Realm but outside of it as well.
Those who return from the Shadow Realm will leave behind any Latent Energy in the form of Residual Energy. These will continually fire either Wakes of Destructions or Rings of Destruction.
Disarmed

 In about 90 seconds, the boss will Throw Axe into the ground and leap away from it. During this phase, range should group together in the center of the encounter area. Those afflicted with Latent Energy will want to be in the very center while the rest will form a circle protecting them.
While Disarmed, he will gain 30% haste and attack with both fists. With the axe lodge in the ground, it will release a violent Fel Explosion every 3 seconds that will inflict moderate Fire damage to all for 30 seconds.
Zakuun will be able to deal Heavy Handed attacks to primary target and the nearest ally simultaneously for heavy damage.
If there is no other player found, he will strike the same target twice that will result in death. Tanks must stack together to split the Heavy Handed damage.

During the Disarmed phase, he will choose 5 targets and infect them with Seed of Destruction. This will cause them to emit 8 Wakes of Destruction after 5 seconds.
Enrage
At 30% health or at the end of his second Disarmed phase, Zakuun will Enrage this will cause his axe to unleash Fel Explosions even while being wielded. The Fel Lord will also be Heavily Armed to where he’ll deal Heavy Handed attacks even armed with his axe.
The raid will still need to be careful of Rumbling Fissures, Befouled debuff, Cavitations, and Seeds of Destruction while he is enrage. However, players will no longer be banished to the Shadow Realm.
Tips
- Place the first pillar as close to the boss as possible. Any other crystals should be formed as close to the first one as possible.
- Save Bloodlust/Heroism/Time Warp for when the boss enters Enrage.
- DPS Legendary ring does not need to used during a mechanic line up, but should be used during Enrage phase.
- Healer Legendary ring should be used during Disarmed phase to heal up Fel Explosion.
- Tank Legendary ring should use during Disarmed and Enraged to mitigate Heavy Handed damage.
- Players effect by Befouled or Seeds of Destruction should move away from Fel Crystals and along the outer wall.
- Those not affected with Latent Energy should intercept Wakes from hitting Fel Crystals.
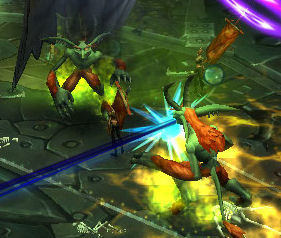
Xhul’horac

Xhul’horac is a multi-phase encounter with high priority targets and heavy raid awareness. This boss will switch his ability arsenal depending on which portal he chooses to be empowered. These abilities will leave lingering debuffs and ground effects that can have a catastrophic impact should they meet.
He’ll begin the encounter by being empowered by the Fel portal and wielding Fel powers and summon fel-flame minions. At 65% health, he’ll use the power of the Void portal dealing shadow damage and shadow minions. Once Xhul’horac hits 35%, he’ll switch between both Fel and Void powers, summoning the low-health minions only. When he is below 20%, he’ll be affected by Overwhelming Chaos, continuing to switch between Fel and Void, but will no longer summon any adds.
Stage One: The Legion’s Flame
 At the beginning of the fight, Xhul’horac will become tainted with Fel energy. This will be evident by the coloration of his body and “wings”. The boss will need to be moved to either side of the entrance area to maximize the encounter area usage.
While he is empowered by the Fel portal, he will only have two abilities: Fel Surge and Fel Strike. Those who take Fire damage will have latent Fel energy within them and will become Feltouched.
Periodically, he’ll target several players with Fel Surge that will fill them with Fel energy and inflict moderate Fire damage every 1 second for 5 seconds. After this effect expires, a small patch of Chaotic Felblaze will appear under them. Players affected with Fel Surge will want to move to the outer edge of the platform.
 This Chaotic Felblaze will slowly spread over time. Those who touch the Felfire will gain a stacking debuff of Felsinged that inflicts moderate Fire damage every second for 8 seconds. Xhul’horac should be moved if the Felfire becomes too much.
Fel Strike will inflict heavy Fire damage to his current target (tanks). Active mitigation abilities should be used for each strike.
 He will also call forth servants of the Legion. Wild Pyromaniacs are low-health imp adds that will conjure Fel Orbs. These can travel long distances before falling to the ground and create Chaotic Felblaze. If a player intercepts it, they will be afflicted with moderate Fire damage every second for 15 seconds with stacking Ablaze. This cast should be interrupted and the adds burned down quickly.
 Players will only have to content with Vanguard Akkelion during the first stage when Xhul’horac is at 90% health. He will do a series of rapid strikes at his primary threat that will inflict major Fire damage with Felblaze Flurry. This effect stacks and will increase damage taken from Felblaze Flurry and Withering Gaze by 50% for 7 seconds.
One of the tanks will want to keep control of Xhul’horac while the other picks up Akkelion. The cast time between Felblaze Flurry will be enough for the debuff to fall off before the next Flurry.
 The rest of the raid will need to be careful of Chains of Fel. This will target a random player and chain them to two of their nearest allies inflicting periodic Fire damage every second per stack. This chain should be broken by affected players moving away from each other.
Again, all of these Fire based abilities will cause players to become Feltouched. If a player takes Shadow damage while Feltouched, they will cause an explosion of energy but also lose the debuff.
Stage Two: Grasp of the Void
 At 65% health, Xhul’horac will become empowered by the Void portal, his body taking on a shade of purple. Tanks will need to move him towards a clear quarter of the platform to prepare for his next environment mechanics.
Instead of the Fel powers, he will now wield Void abilities and inflict Shadow damage. Again, he will only use two abilities throughout this stage: Void Surge and Void Strike. Any who take Shadow damage will become Voidtouched.
Similar to Fel Surge, Void Surge will fill a player with void energy, inflicting moderate Shadow damage every 2.5 seconds for 5 seconds. When this expires, Creeping Void will appear under the affected player. Players with this debuff should treat it like Chaotic Felblaze and keep it to the edge of the platform.
 Creeping Void will spread over time. Players who touch the void will gain the debuff Wasting Void that will deal moderate stacking Shadow damage every 1 second for 8 seconds.
Void Strike will inflict heavy Shadow damage to the current threatening target. Mitigation abilities should be rotated for each strike to the tank.
 With the Void portal open, Xhul’horac will summon forth fellow Void creatures. Unstable Voidfiends will spawn in random locations. They will target the nearest player and being to cast Volatile Voidstep that will cause the add to teleport to targeted location and explode. Players caught in Voidstep will have moderate Shadow damage dealt and have Creeping Void appear. Since they cannot be stunned or interrupted, these low-health adds should be killed quickly.
 When the boss reaches 60% health, Omnus the Voidlord will come to his aid. He will fix his Withering Gaze on his primary threat inflicting major Shadow damage every 4 seconds. This effect stacks and will increase damage taken from Withering Gaze and Felblaze Flurry by 20% for 4 seconds.
Again, one tank will need to keep the boss under control while the other picks up Omnus. Since Withering Gaze has a short duration, the debuff will drop off during its cooldown period.

The raid will need to watch for a hole in the fabric of reality, dealing moderate Physical damage to all players every second, slowly pulling them towards the Black Hole.
If any player enters the Black Hole, they will unleash Singularity that inflicts heavy Shadow damage that can be dividing among any players within 11 yards. Entering the Black Hole will cause it to be destroyed. Personal mitigation cooldowns should be used when entering the Black Holes.
Any players who take Shadow damage from any of these abilities will become Voidtouched. If a player is also afflicted with Feltouch, they will unleash a massive explosion, but also lose the debuffs.
Shadowfel Annihilation
 Whenever the energies of Fel and Shadow react, it will unleash a massive explosion from Shadowfel Annihilation. Any players within a 20 yard radius of the explosion will suffer moderate Shadowflame damage. Those within a 5 yard (Mythic: 20 yard) radius will increase damage taken from future Shadowfel Annihilations by 50% (Heroic: 75%, Mythic: 100%) for 30 seconds (Heroic: 1 min, Mythic: 2 mins). All other players outside of that radius will have minor Shadowflame damage dealt, but will not gain the increased damage debuff.
This Shadowfel Annihilation can happen when a player gains both Feltouched and Voidtouched debuff or Chaotic Felblaze and Creeping Void make contact. When this happens, the debuffs are removed and the Chaotic and Creeping patches are destroyed.
The raid team should assign a few players with personal mitigation abilities to keep the ground effects under control and away from the rest of the raid. Those who are clearing the ground effects should not take more than 1 stack of Shadowfel Annihilation. The only exception to this rule is with Rogues who properly use Fade and Cloak of Shadows.
Stage Three: The Shadowfel Amalgamation
 At 35% health, Xhul’horac will rapidly shift forms between Fel and Void energies and enter Shadowfel Phasing. He will continue to use his Fel abilities while his body glows green and use his Void abilities while his body glows purple. Also, both types of low-health adds will continue to be an issue throughout this phase.
Every 7 seconds, tanks will need to swap so they don’t trigger Shadowfel Annihilation. That means one tank will take every Fel Strike while the other will get hit with Void Strike.
The rest of the raid should continue to place Chaotic Felblaze and Creeping Void along the outer edge of the encounter. Wild Pyromaniacs and Unstable Voidfiends should remain priority over the boss as he approaches Stage 4.
Stage Four: Tearing Apart
At roughly 20% health, will become overwhelmed by the energy of the Fel and Void Portals, closing them off and halting the Wild Pyromaniacs and Unstable Voidfiends from spawning. But he will also gain a new stacking buff from the combined energies.
Overwhelming Chaos will cause the boss to unleash a burst of pure energy every 10 seconds. This will increase his damage dealt by 20% and inflict major Chaos damage to all players.
Tips
- Bloodlust/ Heroism/Time Warp at the beginning of the final stage.
- DPS Legendary ring should be used to burn through Akkelion and Omnus.
- Healer Legendary ring should be used during Omnus’s Black Hole, any planned Shadowfel Annihilation, and during the final stage.
- Tank Legendary ring should be used to survive during Akkelion Felblaze Flurry, Omnus Withering Gaze, and extremely high tank damage during the remaining stages.
- Kill priority is Wild Pyromaniacs > Unstable Voidfiends > Vanguard Akkelion > Omnus > Xhul’horac.
- Outside of Mythic mode, kill the named mini-bosses before pushing the Xhul’horac to the next phase.
- Do not tripper Shadowfel Annihilation during stage 4 and Overwhelming Chaos.
- During stage 4, run Fel Surge and Void Surge to opposite sides.
Mannoroth

Mannoroth is a long, multi-phase encounter that will require target priority, movement, and high raid awareness. This is a long boss encounter with a quick burn phase during the last stage.
Around the encounter area are Fel Spires that will be used to help resurrect Mannoroth and empower him with new abilities. However, while these Fel Spires are active, they will provide a different minion of the Legion to appear. The red Fel Spire will summon Doomlords, the purple Fel Spire will summon Fel Imps, and the green Fel Spire will Dread Infernals. As the Fel Spires break, these associated adds will no longer appear.
Stage One: The Legion’s Might
 In the beginning of the encounter, three Fel Iron Summoners are attempting to aid in resurrecting the pit lord Mannoroth. These Summoners do not have any active abilities, but they do use the power of the Fel Spires to call aid. As each Summoner is defeated, they will no longer be able to summon their set of adds. The kill priority for each Fel Iron Summoner is as follows: Red > Purple > Green.
Red Fel Iron Summoner
This Fel Iron Summoner will apply a Curse of the Legion to a random target that will inflict major Shadow damage when removed. When this debuff expires after 12 seconds or is removed, a Doom Lord will appear at the player’s location.
Those with the debuff will want to move quickly to the tanks so they can pick this add up. Doom Lords melee attacks will apply stacking Doom Spikes to its current target. When this expires, Doom Spikes will explode dealing heavy Shadow damage per stack to the player. Tanks should try not to take more than 8 stacks of Doom Spikes.
The rest of the raid will need to be careful of their other two abilities: Mark of Doom and Shadow Bolt Volley.
Periodically, a Doom Lord will mark a target with Mark of Doom. If a player does not take damage during the 15 seconds of this debuff, the player will be Doomed and instantly die. Those marked with Doom should move towards the center area where Mannoroth’s bones lie to quick remove this debuff. When it is removed, it will detonate with moderate Shadow damage to all players within 20 yards.
Shadow Bolt Volley will deal moderate Shadow damage to all nearby players if it is not interrupted. Get a small team of players who can interrupt these casts until the red Fel Iron Summoner is defeated.
Purple Fel Iron Summoner
The purple Fel Iron Summoner will draw power from his spire to summon Fel Imps. When these guys spawn, they will cause Fel Imp-losion that will cause moderate Fire damage to enemies within 3 yards, so raid teams should be spread out to avoid getting one-shot.
The Fel Imps will spam Fel Blast which is similar to Fel Imp-losion in dealing moderate Fire damage to all enemies within 3 yards. This cast can be interrupted, but so long as players remained spread out, they shouldn’t pose too much of an issue.
Periodically, when these little guys reach full mana they will Phase Blink that will teleport the caster to a random location. This Blink will cause a Phase Explosion that will inflict heavy Arcane damage to enemies within 15 yards.
Green Fel Iron Summoner
From the green Fel Spire, the Fel Iron Summoner will call Dread Infernals to come crashing from the sky. This will cause an Inferno to deal moderate Fire damage to any within 10 yards of the impact.
 These Infernals will being to channel Fel Hellfire for 17 seconds. This will deal moderate Fire damage every second to any within 10 yards of the Infernals. Once this channel is complete, they will Fel Streak to a new targeted location and deal moderate Fire damage in a 10 yard radius of their destination.
Players will need to defeat all three Fel Iron Summoners before proceeding to the next stage.
Stage Two: The Resurrection
 Without the help of the Fel Iron Summoners, Gul’dan will be forced to harness the power of the red Fel Spire to resurrect Mannoroth. This will destroy the Fel Spire and in turn, close the portal to the Doom Lords (except on Mythic difficulty). The raid will still have to deal with Fel Imps and Dread Infernals as well as the newly revived, Mannoroth.
The Pit Lord is just a shell of his former self, literally walking bones. Tanks will need to position the boss so he is on the outer edge of his encounter area and face him towards the center. This is to deal with the boss’s abilities for tanks.
Mannoroth will unleash a flurry Glaive Combo using Glaive Thrust and Massive Blast. He’ll piece the armor of his current threat with Glaive Thrust. This will deal heavy Physical damage and inflict Punctured Wound debuff. This can be avoided by using an active mitigation ability otherwise, they will have moderate Physical damage every second for 10 seconds. Then he’ll follow up with Massive Blast that will deal massive Shadow damage to the target while knocking them back. This will cause the knocked back target to take 300% increased damage from any other Massive Blasts for 45 seconds.

Tanks will want to swap every Massive Blast dealt. This will not only keep Mannoroth stationary, but give enough time for the Massive Blast debuff to fall off. Only one tank should stand in front of the boss at a time while the other will be to one side of him with the rest of the raid on the other side of the boss.

While tanks are being blasted away in front of the boss, the rest of the is being horrified by Mannoroth’s Gaze. These targets appear to run towards the edges of the room for 4 seconds. Once the debuff expires, major Shadow damage is split to all within 8 yards. Only one or two players should follow those afflicted with Gaze to split the damage unless those affected have a personal mitigation ability.
 Mannoroth will call down Fel Hellstorm that will cause large fel meteors to fall and deal moderate Fire damage to any within 6 yards of the impact. This will be indicated with a shadow that will steady grow in size and can be avoided. It has a short duration, but he will constantly re-cast it throughout Stage 2 & 3.
 His final ability is Felseeker that will unleash consecutive blasts in quick succession and dealing increasing damage while knocking any hit with the ability. The larger the radius, the more Fire damage this ability will cause to those who fail to avoid it.
Stage Three: True Power
When the boss reaches 65% health, Gul’dan will harness the power of a Fel Spire, this time the purple one, causing it to be destroyed and break the portal connection to the Fel Imps. This will leave only the Dread Infernals as well as a fully restored Mannoroth.
Like the previous phase, Mannoroth will attempt to knock and fear the raid off the platform with all of his current abilities, but also a new channel ability.

The pit lord will begin to channel Shadowforce at 3-4 random players. This will start to push players off the platform and deal moderate Shadow damage every second. This channeled push-back will increase in strength, so either use speed boosts to run against this or position against the final Fel Spire.
Stage Four: EMPOWERMENT!
At 35% health, Mannoroth will become empowered as Gul’dan destroys the remaining green Fel Spire. This will empower all of the boss’s abilities while Dread Infernals will no longer spawn during the encounter. Any remaining adds from previous phases should be dealt with quickly.
At the start of this phase, the boss will cast Empowered Fel Hellstorm that has a longer duration and will steady increase intensity over time. He will not cast this again, meaning constant barrage of fel meteors.
 Tanks will need to be cautious as they swap during Empowered Glaive Combo. The boss’s Empowered Glaive Thrust will now deal major Physical damage to all enemies in front of him as well as inflict Puncture Wound if an active mitigation isn’t used. The current threat target will be knocked back even further with Empowered Massive Blast and send three waves to move across the platform that will behave like another Massive Blast if not avoided.
 Mannoroth’s Gaze will behave similarly to previous stages, however the Empowered Mannoroth’s Gaze that will now leave behind pools of Gazing Shadows based on the number of enemies who help split the damage. These pools will deal ticking Shadow damage to those standing in them. Again, only a maximum of two players should follow near horrified players if they don’t have a personal mitigation.
 Soon after the Gaze ends, he’ll begin to channel Empowered Shadowforce which will push the entire raid instead of only a few. The raid should be within melee range of the boss and pop any raid-wide speed boosts available to avoid being pushed off the platform. Once this channel is completed, the raid will gain a slight speed boost to move to the other side of the boss.
His final empowered ability is Empowered Felseeker. This should still be avoided at all costs, but healers should note that it deals addition damage to all enemies with each strike—meaning the raid should be topped off after this ability completes.
Tips
- Bloodlust/Heroism/Time Warp right after the first Empowered Shadowforce in stage 4.
- DPS Legendary ring should be used at the start of encounter then with each spawn of adds in later stages.
- Healer Legendary ring should be use to heal through Fel Hellstorm.
- Tank Legendary ring should be used to mitigate Glaive Combo abilities.
- Only have 1 or 2 players follow Mannoroth’s Gaze afflicted players to split damage.
- It is possible to use the green Fel Spire for either tanks or raid to be knocked into, however, players can still clip through the pillar and it will be gone by the start of stage 4.
Hell Breach | Halls of Blood | Bastion of Shadows | The Black Gate


Published: Jul 27, 2015 04:26 pm