The Ball is in Your Court is a Dying Light 2 side quest that becomes available after completing the Unruly Brother main story quest. It tasks you with finding a missing supplier for a character named Dodger. And once you find what you’re looking for, you’ll have to decide if you should split the goods or fight some unruly goons.
This quick walkthrough guides you through this side quest from start to finish and tells you the consequences for splitting the goods or fighting.
The Ball is in Your Court: Split the Goods or Fight?
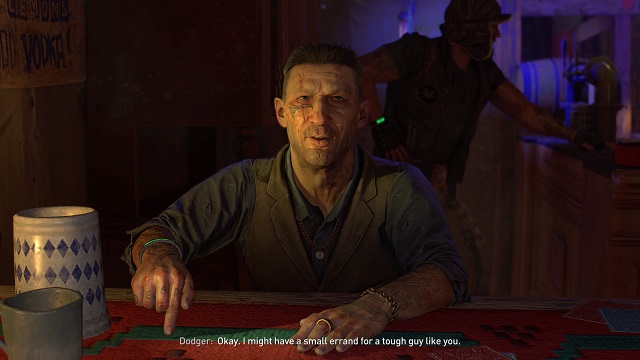
Go to the Bazaar. You can find Dodger at the bar to the left of Urban the bartender. Speak to Dodge to find out he’s looking for a missing supplier.
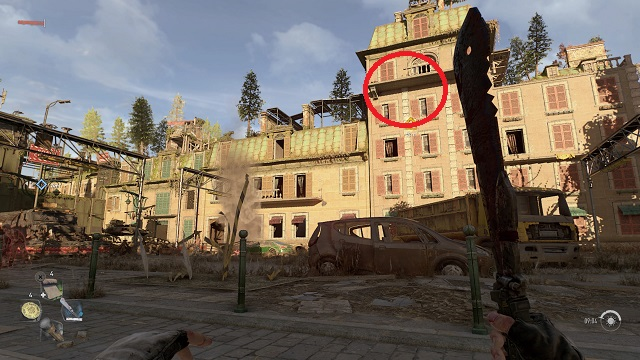
Follow the quest marker out of the Bazaar and 160 meters east to an apartment building just inside Houndfield, a Rank 2-4 zone. Go into the apartment building designated by the marker (it’s to the right of a military convoy you should definitely loot), and make your way to the fourth floor.
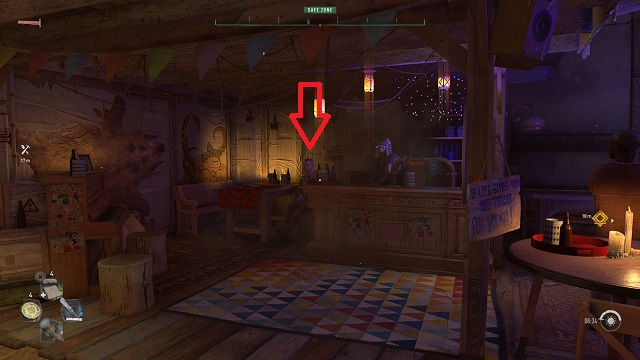
Doubleback at the top of the stairs, and enter the first door on the left. Then enter the first room on the left and turn left to see a hole at the bottom of the wall. If you get lost, use your Survivor Sense to follow the bloody prints.
Once through the hole in the wall, climb up the pipe two stories, and enter the room with the supplier in the back left corner. You’ll find out it’s Hubert, the same character you chased for the brass knuckles in The Only Way Out.
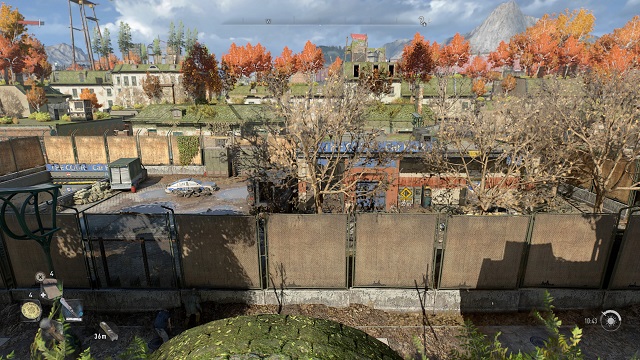
After you exhaust all of Hubert’s dialog, follow the marker 140 meters west further into Houndfield. You’ll eventually arrive at The Court Car Park, a fenced-off area with a police car and a military vehicle, among other pre-apocalypse remnants.
There’s a Nightrunner’s Hideout just north if you want to activate a respawn point. You can climb into the car park via the GRE transport container, which has an Inhibitor inside, on the same side of the car park.
Inside the car park, follow the marker to the door on the east side, the one that the Infected is pounding against. Defeat the Virals, and enter the door. You’ll meet Mark and Jonas. They’ll explain that the goods are further down in the car park and give you some lockpicks.
Go down the elevator shaft and follow the path in the car park. Stealth is key in this area, but you won’t be able to perform full takedowns on Infected since they’ll likely be a higher level than you. Also, be wary of the patrolling infected on the left and right sides; kill them immediately if they see you so they don’t alert the others.
Stay on the left side. Your goal is to make it to the very back of the parking garage on that side. Once you reach the back, go through the door there, and follow the path right. Go up the first set of stairs and through the hole in the wall in front of you. Follow the path around to the right and through the double doors. Then go left through a gap between a door and some stacked crates.
Once you make it through that gap, turn right and jump down. Go straight ahead through the Infected and around the corner to the right. You’ll see a gap between two large green doors that leads inside the storage area. Use your survivor sense to find the items marked with a magnifying glass and pick those up.
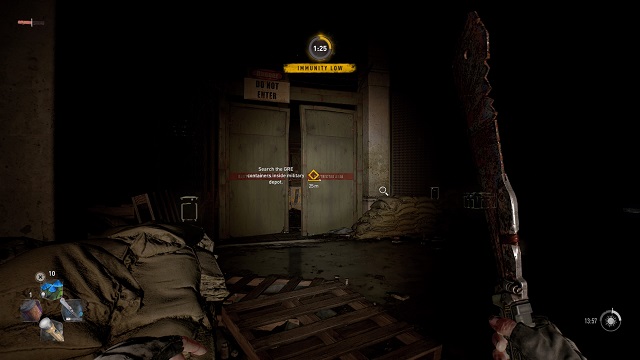
One is water filters on the right side and the others are in the GRE transport containers. Makes sure to grab the collectible mementos in each left container (one in the left and two in the right), as well as the rare weapons and military medkits here. Enter the left container through the front door and the right through the roof.
Collect everything, and exit the storage area through the same gate you entered. Turn left and go straight ahead to move the plywood blocking the entrance through another gate. Go back up the elevator shaft and go outside, where you’ll be met by Mark, Jonas, their leader Klaus, and two other goons.
The Ball is in Your Court Choices: Split the Goods or Fight?
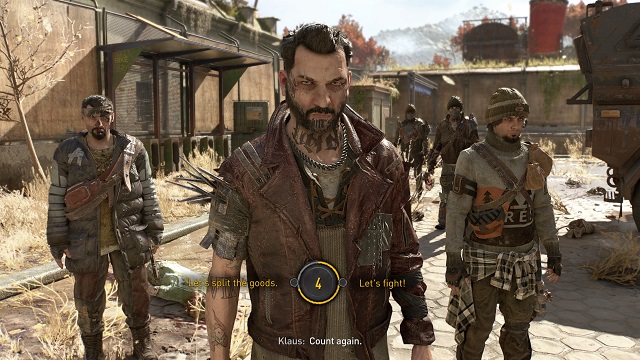
Klaus will eventually tell you to hand over the goods. You have two choices: Let’s Split the Goods and Let’s Fight. No matter what you choose, though, you’ll have to fight the goons. Mark and Jonas aren’t too tough, but the brutes that emerge from the back of the car park complicate things, especially if you’re Level 1. Focus on the brutes first; whittle them down with quick hits and dodges. Then focus on Mark and Jonas, who almost never attack.
Once they’re defeated, follow the marker back to the apartment complex, and return to Hubie on the top floor. Talk to Hubie, and then return to Dodger at the Bazaar. Here, you’ll then be able to tell Dodger about Hubie trying to cheat him or not, but both choices have the same outcome.
And that’s that for our walkthrough of The Ball is in Your Court side quest in Dying Light 2. The choice to split the goods here or fight doesn’t really matter and seems to have no bearing on the outcome of either the quest or the overall story, so feel free to pick whichever you choose. For more Dying Light 2 help, head over to our DL2 guides hub to stay human.


Published: Feb 5, 2022 03:40 pm