Welcome to our Chapter 2 walkthrough for the Stranger Things mobile game. When we left Chapter 1, Hopper had just departed the National Hawkins Laboratory and was tasked with finding Nancy.
Chapter 2 continues Hopper’s search for Nancy, which takes him into the Upside Down. But his adventure also leads him somewhere even more dangerous.
As with our Chapter 1 walkthrough, we’re going to go through getting through Chapter sections area by area. Chapter 2 is longer and more difficult than Chapter 1. Important directional bits are bolded so you can skim through for directions.
Stranger Things Chapter 2 — The Gate
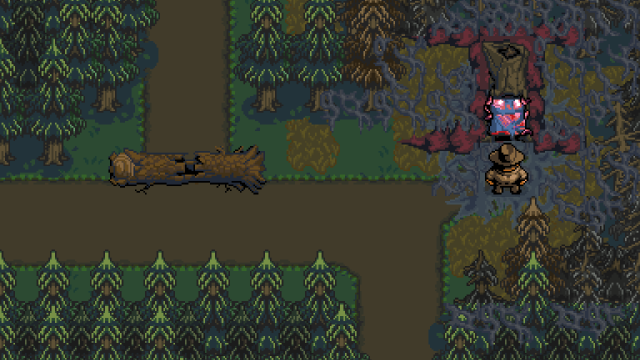
You start this chapter in the Upside Down. Luckily, you don’t have to be here for long. This area has a particular gimmick: knocking pods around to wipe out the tentacles in your path.
The very first section of this area has one of these pods. Each pod can be hit a total of three times, after which it will explode. Have Hopper punch this first one left twice, then up once to have it deal with those annoying tentacles.
The next room is a little trickier, but luckily, not by much. Punch the pods into the positions seen in the image below.
Then punch them each toward the tentacles at about the same time. With the tentacles taken out, you can exit the Upside Down.
Lucas will now rejoin you, and you can enter the next dungeon via the giant spooky tree stump.
Forest Maze
You can destroy bushes for money, hearts, and slingshot ammo in this dungeon. You want to try to stay at full health in this area so Lucas can one-shot birds from afar. Otherwise, you may have a tough time.
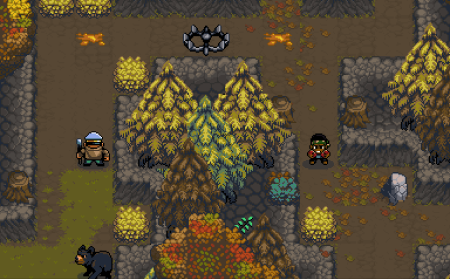
Knock out the first enemy you see and open the gate leading to the bear. You’re about to get your first taste of this dungeon’s gimmick.
Have Lucas shoot down the beehive closest to the bear (the one to the left in the image above), then the one on the other side of the cracked tree trunk to have the bear make a path for you.
Go right to get some coins and your first of this area’s collectibles, a birdhouse.
Head to the previous area, then go up and right to make your way to the next room.
First things first: Hit the bear trap, then shoot the bird before it comes at you. Then head south to pick up a keycard.
Head back up, then up again. Take out the enemies (be aware of the bird) and use the keycard to open the gate to your left. Kill the bird in this room then keep walking left.
This area is a little more complicated. First, take out the gunman at the top right and get the birdhouse. Then set off the bear trap at the bottom and take out the enemy on the other side.
What comes next has to be done quickly — and in order. Here are the steps:
- Shoot the beehive closest to the bear
- Set off the bear trap again
- Shoot the hive on the other side
- Go to the small area on the right and shoot the beehive in the upper area
If you’ve done it right, the bear will charge past the trap and through the log preventing your passage. Flip the switch and the first gate to the boss will open.
You went through a lot of work to flip that switch, but you’re not done yet. Head through the passage at the bottom left of the area. Take out both enemies then continue into the next room — hopefully with full health to shoot the birds out of the sky before they hit you. Grab the keycard, head back two rooms, then head north.
This is another room filled with birds. Being at full health will make this part much easier since Lucas can deal with all of the birds before getting pecked at. Go up once they’re all dispatched.
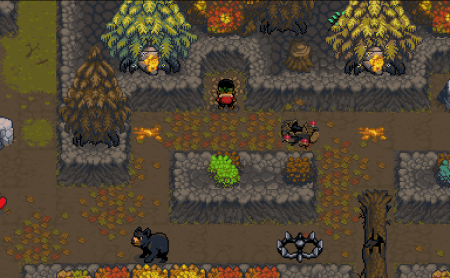
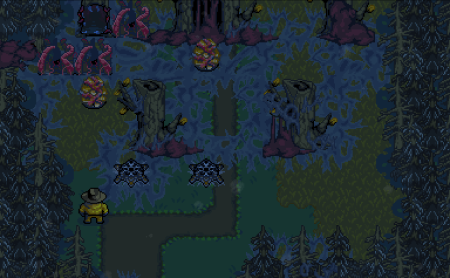
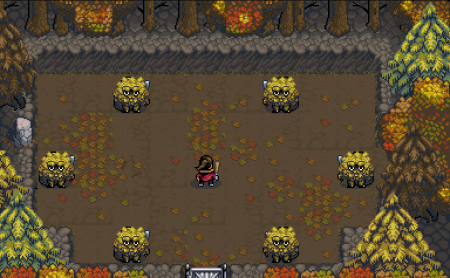
This is another puzzle room, and it’s not as complicated as it looks. Stand where you see in the image above, then shoot the left and then right beehives to get the bear to charge through. Once the bear resets, walk forward and set your sights on the next obstacles.
Hit the bear trap to the left, then the hive to the bottom right, and lastly the hive to the top right to get the bear to follow the correct path. Flip the switch to unlock another gate in front of the boss, then head up to the next area.
If you can, take out the birds here so they don’t bother you on your way back.(Those coins are pretty enticing, too.) Go north into the next area, take out the enemies here, grab the birdhouse, and keep going north.
This room has a few enemies, particularly birds and a gunman. It’s in your best interest to take them out before they kill you, so do so and make your way through the room to go to the north area. Take out the enemies here and grab the keycard found here.
Retrace your steps to the room with the pile of coins. Take a left and get ready for your next puzzle room.

Deal with enemies as you can here (don’t get near the bald guy) as you set off the bear trap next to the entrance and open the gate at the bottom of this area. This is one we’re going to go through step by step:
- Stand above the beehive all the way to the right
- Shoot the beehive all the way to the right
- Shoot the beehive next to the chest to have the bear take out the bald enemy
- Stand above the beehive next to the bear trap
- Set off the bear trap
- Shoot the beehive next to it
- Shoot the beehive on the opposite side of the fence
- Walk to the area the bear initially was
- Shoot the beehive at the top left of the area
Walk your way through this room to go through the passage to the top left. Take out the enemy there and Nancy will join your party. Have Nancy bash through the fallen tree to flip the switch and open a gate to the boss.
Put Nancy in your party so that you have Nancy and Lucas, then backtrack to the area with the stack of money. Whack through the tree, get the money, then head south two rooms.
Take out the enemy here and unlock the gate using the keycard in your inventory. The next room is another enemy room. Defeat them and head right.
Take out the enemies in the next room, then go through the bottom right passage to flip a switch. Go back to the last room, then go down the passage next to the one you just went through.
The next room is yet another that will take some speed on your part. You need to disarm the bear traps above before luring the bear. This has to be done with Lucas. I’ll walk you through this one step by step:
- Stay at the very bottom of the room
- Shoot the first trap
- Walk two spaces to the right and shoot the next one
- Take out the trap next to you
- Walk to the right-most section
- Walk up to the stump
- Shoot the beehive
Now go back two rooms and get back to where the switch is to make your way through this section without the bear blocking your path. Make sure to take out the birdhouse and flip the switch on the right side of the room to unlock the next gate to the boss.
Go right to pick up the Lens Filter Jonathan was looking for.
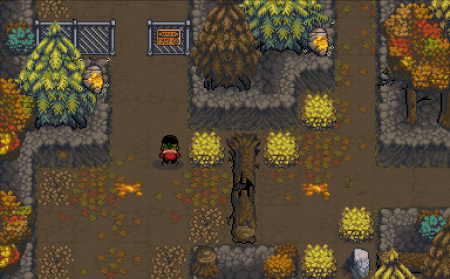
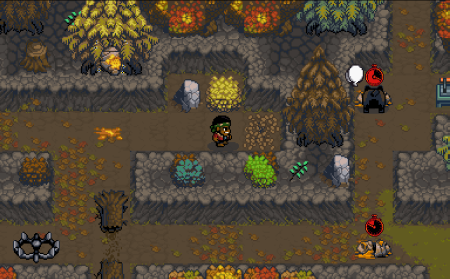
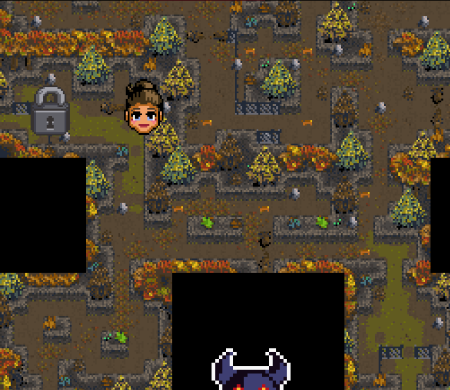
It’s time to backtrack a bit. Head to the room where you see Nancy’s face in the image below and use your last keycard on the gate here. Go left an pick up the VHS tape.
It’s now time to go fight the dungeon boss. Take a look at your map and make your way there.
Chapter 2 Boss Strategy
This boss fight is actually very easy.
Try to get some hits in while each soldier is going in circles, and after that phase, just stay out of their way and wait to get some hits in. Each soldier only takes a few hits to KO. It’s really that simple.
Outside the Dungeon
Exit the dungeon and head south instead of through the Upside Down now that you have Nancy. Destroy the tree trunk in your way, then keep going south to give Jonathan his lens. He’ll give you a backpack that increases Lucas’s rock capacity in return.
There are a couple of things you can do now — like go to the general store in town or Bradley’s shop to buy items people need and deliver them — but for the sake of this walkthrough, we’re going to stay on the story’s track.
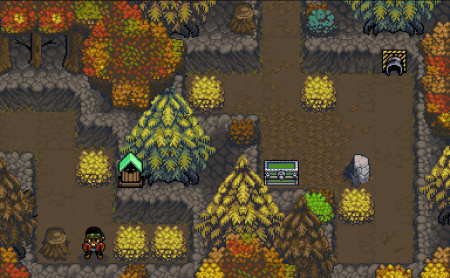
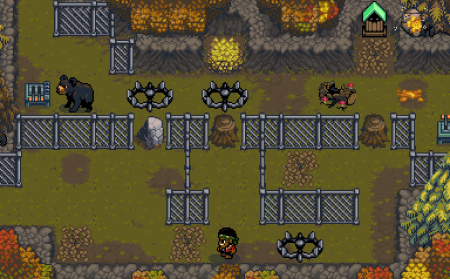
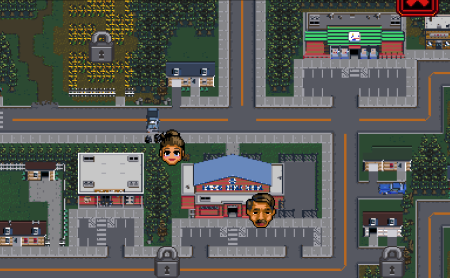
Walk left along the road until you get to the spot indicated in the image below and bust through the fallen tree blocking your path.

Walk to the location shown in the next image and bust the fallen tree to make a path to Hawkins Middle School. Once you enter, Chapter 3 will begin.
That’s it for Chapter 2 of the Stranger Things game. I highly recommend exploring on your own because a big part of the fun is exploring and finding things. Be sure to check out our other Stranger Things guides for more walkthroughs, tips, and tricks!


Published: Oct 11, 2017 07:15 pm