
One of the most important, but least explained, aspects of The Ascent is your cyberdeck. This piece of hardware is your key to unlocking your way to better weapons and equipment, as you build your ultimate killing machine in this dystopian cyberpunk RPG. What exactly does the cyberdeck do, and how to upgrade it? Let’s take in a look in our The Ascent Cyberdeck upgrades guide.
The cyberdeck is a hacking tool, and a very good one. This handy device can do everything from opening locks and robbing ATM, to taking over automated turrets and mortars. As long as you stand in close proximity to a hackable piece of tech and have a high enough cyberdeck level, you are in control.
Boosting your cyberdeck requires you to find cyberdeck upgrades. Each upgrades raises your cyberdeck level, up to a possible ten levels. Each level unlocks an additional ability for the cyberdeck. One level will allow you to open higher tiers of locks, another will enable turret hacks, and so on.
While your cyberdeck maxes out at level 10, there are more than ten upgrades to find. Some are easily located as you complete story missions, others are off of the beaten path, and a few require you have sufficient unlocking privileges (from prior cyberdeck upgrades) in order to access them.
The Ascent Cyberdeck Upgrades Locations
The Ascent Cluster 13 Cyberdeck Upgrade
The first and easiest Cyberdeck upgrade to find is in Cluster 13. This is in the urban area with all of the shops you arrive at following the first mission. Head toward the upper left corner, directly northwest of the armory. You will find the upgrade on the balcony at the top of the stairs.
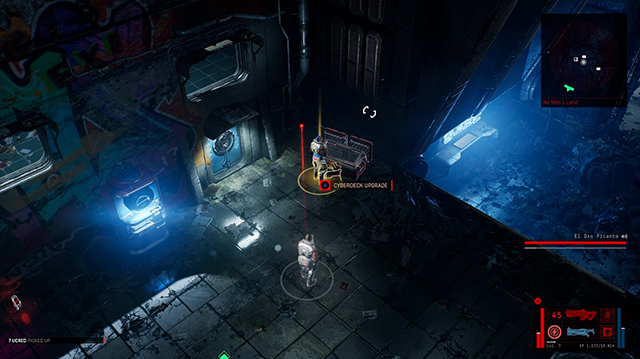
The Ascent No Man’s Land Cyberdeck Upgrade

This upgrade is easy to miss. On your way to the Grinder you will pass through an area called No Man’s Land. Look for a small, one-story building with “Q72” painted in large letters on the street in front of it.
The building is easy to locate from the large neon sign on the roof. To the left is a staircase. Take those stairs to the roof, head all the way to the top right corner, and locate the upgrade inside of the chest.
The Ascent Black Lake Towers Cyberdeck Upgrade
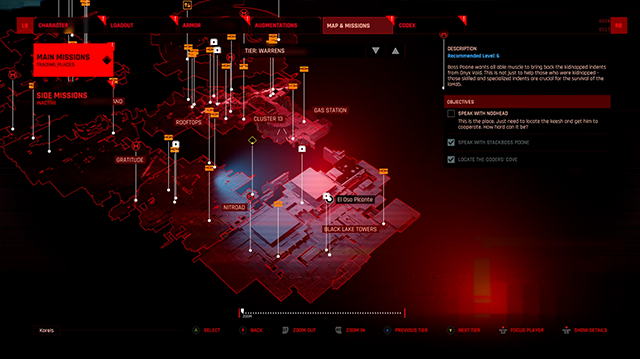
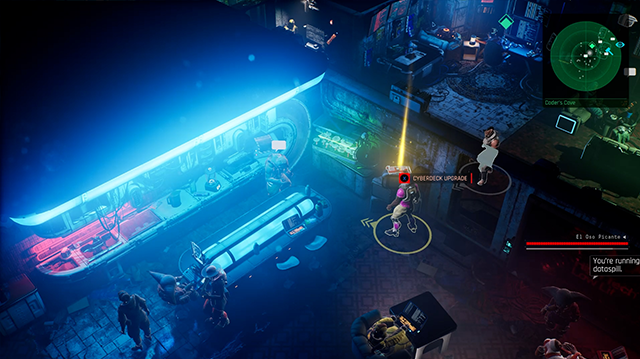
This upgrade is almost impossible to miss. Progress through the story. During the mission Trading Places you will be sent to the Black Lake Tower region, into a building called Coder’s Cove.
There will be a short cutscene, after which you can go through the door to your southwest, and find the upgrade sitting on some boxes.
The Ascent AG Vault Cyberdeck Upgrade
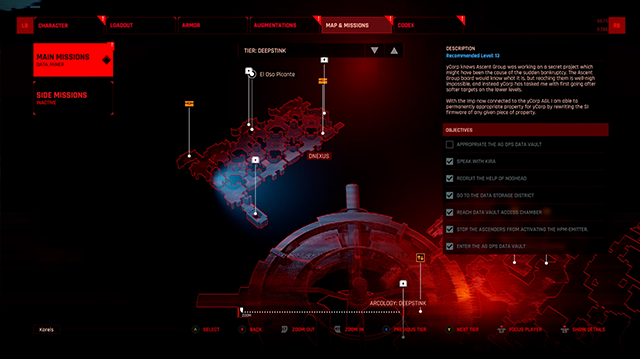
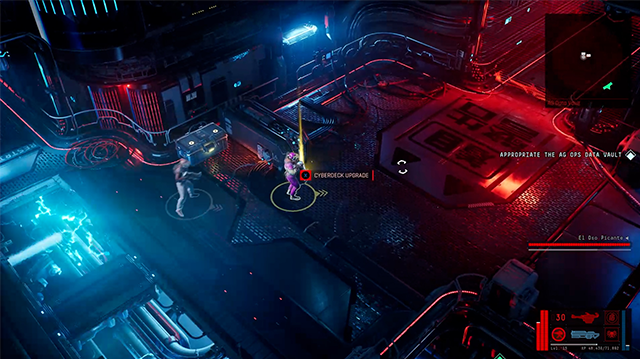
This is another hard to miss upgrade. Proceed through the Data Miner main story mission. Eventually you will reach a large elevator, which brings you to a lower level.
At the bottom follow the narrow hallway, into a nearby open room. You will see a chest locked with a level 2 lock. Directly next to the chest is the cyberdeck upgrade.
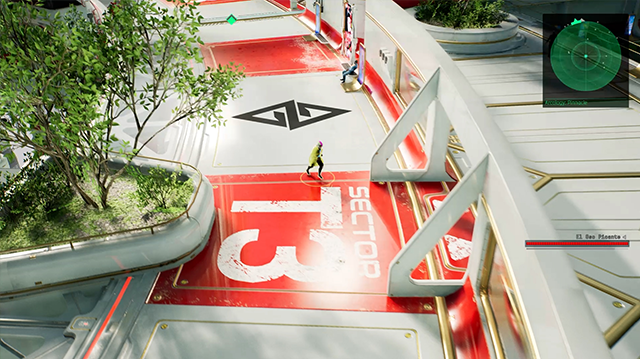
The Ascent Cosmodrome Cyberdeck Upgrade
This upgrade is easy to collect during the Foreign Code mission. In theory you are chasing someone who is trying to escape, but in practice they are nice enough to give you some time to explore.
Once you reach the Cosmodrome, pay attention the numbers and letters painted on the structures. In the northwest corner of the area there is a building labeled C6.
Head inside, and look for the two chests side-by-side on your map. Head that direction. Eventually you will come to a door with a level one lock. By now you should be able to hack that.
Open the door, and proceed inside. The upgrade is in a red chest in the north corner of the room.
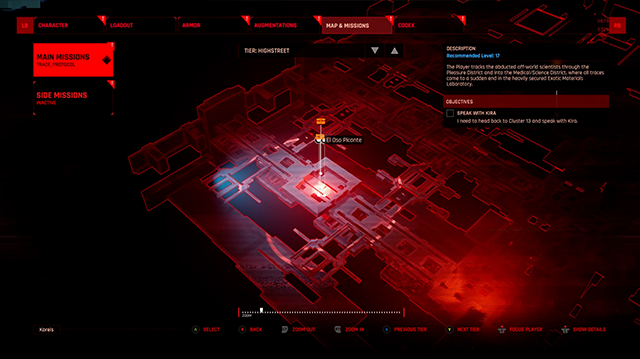
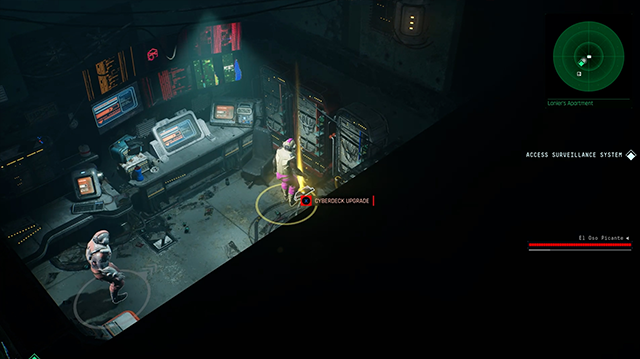
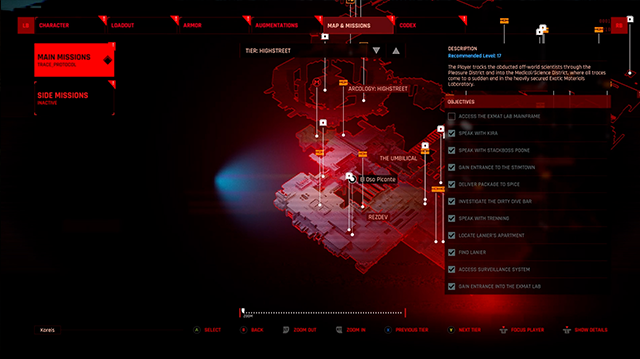
The Ascent Lanier’s Apartment Cyberdeck Upgrade
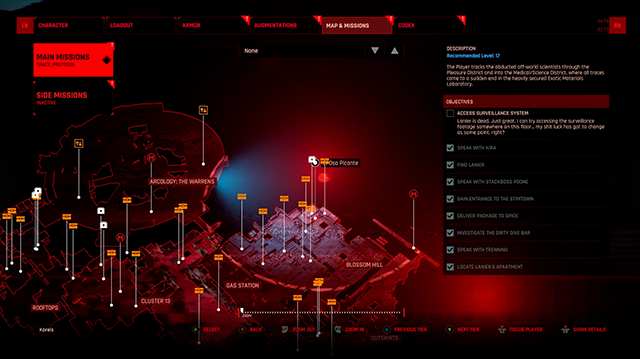
The mission Trace Protocol will send you into Lanier’s Apartment. After a bit of story, you will be tasked with checking out the security office. This one is very easy; the upgrade is sitting right in front of you once you enter the office.
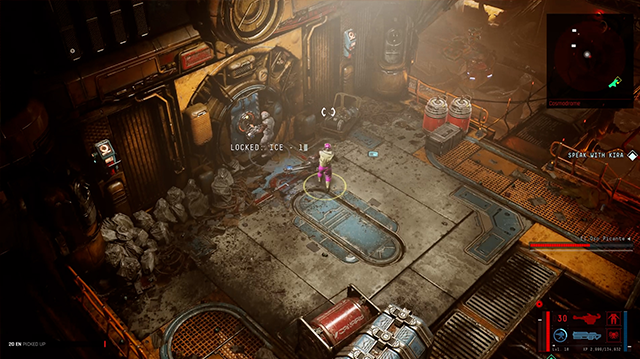
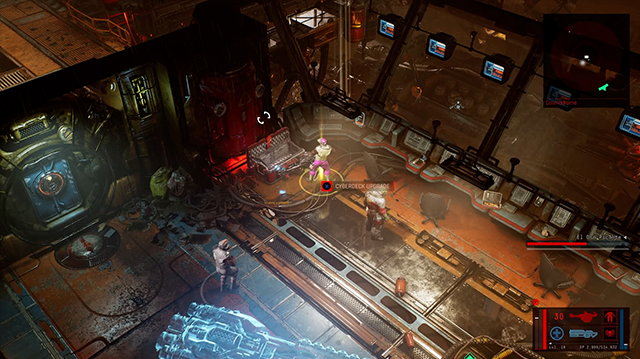
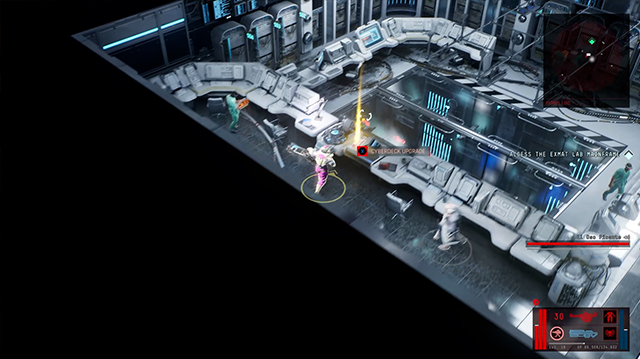
The Ascent ExMat Lab Cyberdeck Upgrade
This next upgrade is also part of Trace Protocol. You will enter into a lab (basically the only clean place in the entire game), fight through some enemies as you make your way forward.
Work your way to the northwest area, until you find a larger square shaped room with banks of computers around the perimeter. The upgrade Is on the left side of the room, sitting on one of the computers.
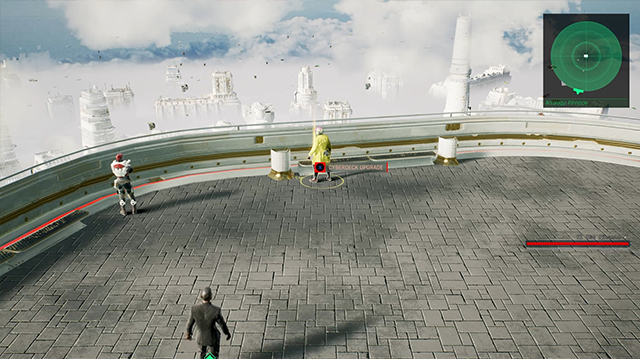
The Ascent Pinnacle Cyberdeck Upgrade

Toward the end of the game, you ascend to the highest tier of the city, called Pinnacle.
As soon as you arrive circle clockwise around the large circular opening in the floor. Once you arrive on the far-right side you can go through a doorway, onto a large open balcony.
While you enjoy the view (look, sky!) walk all the way to the railing. The upgrade is near the edge, at an outcropping.
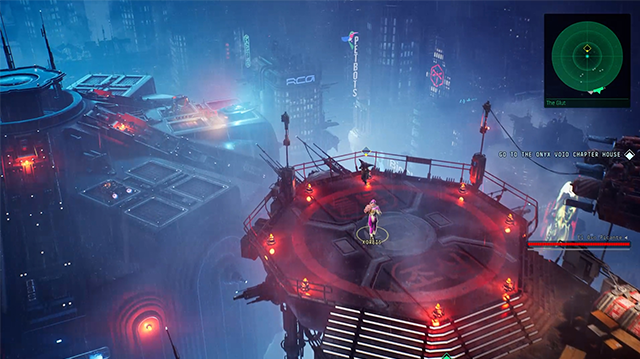
The Ascent The Glut Cyberdeck Upgrade

In the Glut, near the metro station, is a prison. The cyberdeck upgrade is inside, but the prison interior is only accessible once you start the Prison Break Sidequest.
Find Alex, an NPC standing on a helipad in the Glut. He will ask you to go take out a mech inside the prison.
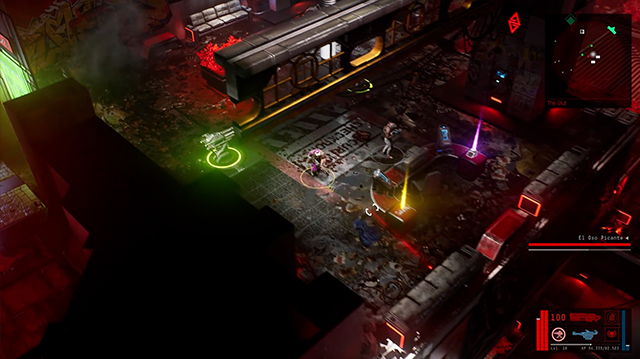
Once you have the quest, head to the metro station. The prison is just to the northeast. Go through the entrance, and follow the perimeter of the building as it circles all the way around.
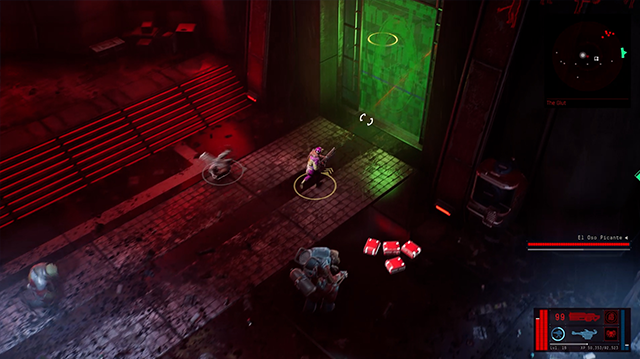
The cyberdeck itself is in the southwest corner of the building. You don’t need to kill the mech to get the cyberdeck upgrade, but you may as well get the side quest done while you are there.
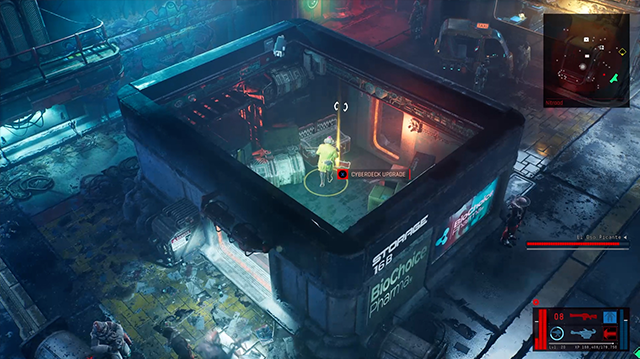
The Ascent Nitroad Cyberdeck Upgrade
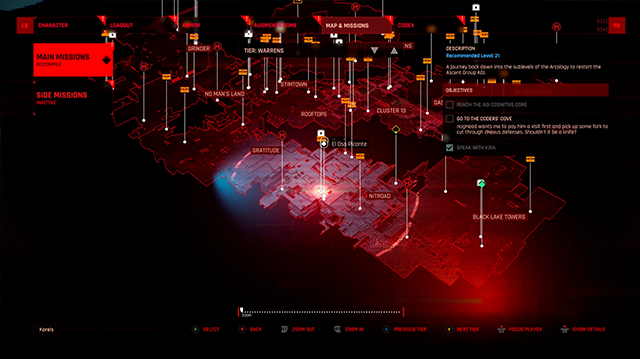
On the outskirts of the Warrens level, you will find Nitroad, a beaten-up industrial district near Black Lake Towers.
Look for a standalone building, labeled Storage 16B and BioChoice Pharma on the exterior. Opening the door requires the ability to open level 2 locks. Inside is a red chest, containing the upgrade.
Once you have picked up 9 upgrades your Cyberdeck will be fully powered, giving you maximum hacking ability. You are welcome to find the other upgrades, but you will not be able to pick them up. Now that you are an unstoppable hacking machine consider turning your attention to sidequests, and working on your perfect build. For those and more be sure to check out all of our The Ascent guides.


Published: Aug 5, 2021 10:25 pm