
Freeing every Mudokon in Oddworld: Soulstorm is no easy task, and that goes double for the later levels. From lethal minigames to legions of snipers and more than a few meatgrinders, the back half of Abe’s latest adventure doesn’t let up on the action.
That’s where we come in, and using this guide, you’ll find every Mudokon from stage nine right through to the end. Good luck! If you’re looking for Mudokon locations for stages two through eight, check here.
Oddworld Soulstorm Mudokon Locations Part 2
Stage 9 – Slig Barracks, 45 Mudokons
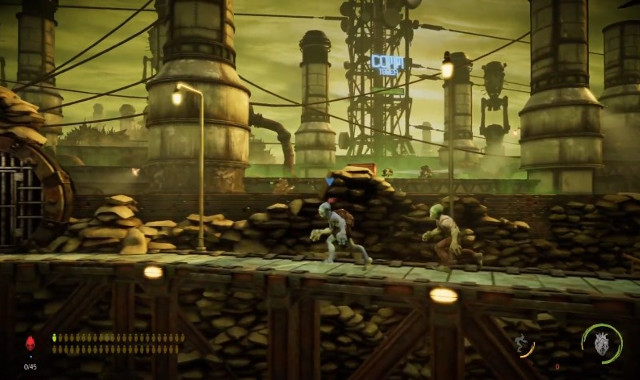
This is one of the toughest levels for keeping Mudokons alive. Lots of Sligs, mines, and other dangers make getting through a bit of a nightmare. We might not be able to stop the Sligs from firing at you, but we can make sure you know where every Mudokon is before you start.
Mudokon 1
More or less right in front of you, and you can find a corresponding Bird Portal nearby.
Mudokons 2 to 7
From top to bottom, you’ll find four right at the height of the first proper area, another on your journey down the rope, and the last is at the end of the rope. A Bird Portal sits beside your exit.
Mudokons 8 and 9
Just by the start of the oncoming minefield. Be careful deactivating those explosives!
Mudokon 10
On a platform below the next checkpoint, surrounded by two Sligs. Deal with the Sligs to enlist them to your party.
Mudokons 11 to 13
Keep heading left on the same platform, to be led to three more Mudokons, and some enemies skulking about the place. Two are covered by those evil, grinning robots – if all else fails, follow the maniacal smile.
You’ll need to get your timing right with the switch-activated door at the end. A Bird Portal sits just after for all six that you’ve wrangled together.
Mudokons 14 and 15
One is near the first enemy of the next section, the other is before the subsequent checkpoint.
Mudokons 16 to 18
Here’s where things get tight, because you’ve Sligs just blasting at you. Get into cover, then possess one to put a dent in their forces. These three can be found strewn throughout the area.
Mudokons 19
This is the Mudokon who points you towards Maintenance Storage. You can’t do much to help him now, but tell him to wait, because you will be back.
Mudokons 20 to 27
Near a Fizzy Pow machine is a door to a secret area that’s got yet more Sligs firing at you. Do they ever quit?
This is worth the risk, though, because eight of your brethren are in here. Use smoke bombs galore to traverse the danger, and keep your Mudokon comrades out of harm’s way.
Mudokon 28
This is another adviser, and you enlist them like the one who helped you toward the maintenance area. Hide them both for now, and continue on.
Mudokons 29 to 40
The next section is a big’un. Use all eight to turn off the furnace, then use Aggro to fend off the Sligs that arrive until you can get safely enough away to possess one of them. From there, annihilate the rest of the Sligs.
Use the lift that got you to the furnace, and head right back up to the top for a Bird Portal that’ll save every Mudokon, including the ones you hid, in your ranks.
Mudokons 41 to 45
As a last little surprise, you’ll have to protect five Mudokons from a frenetic wave of Sligs. Use Fizzy Pow to defeat them as they appear. This will likely take a couple of tries. A Bird Portal awaits for that sweet 100% rating. Well done!
Stage 10 – Necrum, 32 Mudokons
The only way is through, and this is one you’ll need to take your time with.
Mudokons 1 to 5
They’re quickly visible, but you’ll need to complete a puzzle using a Flying Slig first. Once that’s done, you’ll reach a Slig you’ve to possess to activate lever, then you can bring these five to safety.
Mudokons 6 and 7
These two help with a simple multi-switch puzzle, then you’ve to bring them past some very sharp machinery, for the Bird Portal ahead.
Mudokons 8 to 13
Ignore the three you’ll see next, and head for the doorway that’s above them. You’ll be brought to a secret area with six Mudokons, and a Bird Portal that’s in the top-right-most corner of the cave.
Mudokons 14 to 19
Go back and grab those other three Mudokons, and further on you’ll find another three, all the while dodging more heinous machinery. Using no small amount of patience, once you get these six past all those spinning blades, you can send them through a portal. Phew!
Mudokon 20
This straggler will need to be brought backward to the Bird Portal you just came from.
Mudokons 21 to 23
Another Slig possession is required to progress, and you’ll find another three Mudokons right there waiting for you. Bring them back to the same portal as above.
Mudokons 24 to 27
Another secret area through a door, this time giving you a long ladder climb full of blades to dodge. Four Mudokons are awaiting the antidote at the top, a Bird Portal floating right next to them.
Mudokons 28 to 31
A bit of good timing is needed to save the next four, in a very standard Abe puzzle featuring snipers, and a number of switches that need pressing. One button is on the bottom, another three higher up. Get everyone in place, and activate them to kill the snipers.
Mudokon 32
One last comrade is waiting near the end, near some sleeping Sligs. Dispense of the sleepers, and send the Mudokon, and the rest of your party, through the nearby Bird Portal.
Stage 11 – The Mines, 47 Mudokons
Essentially Necrum Part 2, and a lot of Mudokons besides. Mercifully, you don’t need to be too worried about secret areas and the like, bar one group towards the end.
Mudokons 1 to 6
Ignore the first three you spy towards the start, and head towards these six, who’re all turning valves. Guide them back through all the gnarly machinery.
Mudokons 7 to 9
You can retrieve those three from the start now, too.
Mudokons 10 to 15
You’ll find four as you make your around those crushers, and another two moving forward towards the lift.
Mudokons 16 to 18
Take the lift down to enter an area with three Mudokons for rescuring, and some Sligs.
Mudokons 19 to 20
One is near the electric gate, another between two of the crushers, pick up both, then lead the lot to the nearby Bird Portal
Mudokons 21 and 22
These are another two you can’t miss, you’ll find them sometime before you encounter the fire.
Mudokon 23
This is a classic Abe scenario: a lever in front of you, but a Mudokon under the crusher. Call them over before doing anything else.
Mudokons 24 to 30
Eventually, you’ll hit a structure that has a bunch of Mudokons working on it. Their stations are tied to a blade that moves faster the more that step away from their work. Get to the top, then call them all up, then start gradually climbing down. This might take a couple of tries, you need to be careful.
Mudokons 31 to 35
A huge, gnarly meat-grinder awaits the next section of Mudokons. You’ll need to be careful, and pick up a few on the other side, to get them all. It looks daunting, but the pattern’s easy to notice.
Mudokons 36 to 40
Standard breaking free of Mudokons around some sleeping Sligs here. All part of the regular path.
Mudokons 41 to 42
You’ll see two cleaners heading towards the end of the level.
Mudokons 43 to 47
Do not take the freight lift forward. Instead, go backward for a secret area, and the last of your comrades for this location.
Stage 12 – The Sanctum, 4 Mudokons

After dozens upon dozens of Mudokons, Soulstorm offers a breather as we get into the home stretch. Just a few here, all relatively straightforward.
Mudokons 1 to 4
The first two are near a Bird Portal at the start, make sure to chant and use your flashlight, and check everywhere.
The next is lower down, with a Bird Portal to its left. The fourth is around the checkpoint, through a gap you fall down for a secret area, and a second Bird Portal.
Stage 13 – Escape, 414 Mudokons
This sounds like a lot – and it is – but most are earned through getting through the 10 floors of the holding cell challenge you’re about to face. Your backup is composed of 14 that you gradually accumulate through each floor.
Mudokons 1 to 3
These are just at the start, when you break through the floor.
Mudokons 4 to 14
Found at various floors as you continue on. A good tip here is that giving your cohorts aggro isn’t your only option, you can possess the Sligs that spawn. Using a mix of these techniques should set you right. A Bird Portal sits at the end.
Mudokons 15 to 414
Set free through your actions here.
Stage 14 – FeeCo Depot, 25 Mudokons
You’re almost guaranteed to miss a few here first go around, because of several secret areas. Rest assured, we’ve got them all here to fill in your gaps. As one of the last levels, this is a tough one, but manageable when you know exactly where you’re going.
Mudokons 1 to 4
Right from the jump, we have a secret area. Jump to the left at the start, and you’ll find these four sickly brethren and a Bird Portal.
Mudokons 5 to 7
Another secret area, this time around the lift. Head to the right after it stops to drop down into an area with some Sligs, three Mudokons, and a Bird Portal.
Mudokons 8 to 12
Go in the other direction from where the lfit drops you off, and you’ll find a regular bit of platform puzzling to save some Mudokons. Five are in this area, and you’ve to pay to get access to the Bird Portal that’s lower down in this section.
Mudokons 13 to 16
Here’s where that backtracking happens. Getting the ingredients to Fizzy Pow means you can unlock an area from the start. Head back to your starting position, and blow up the red floor. You’ll find several Mudokons that need saving underneath.
Mudokons 17 to 21
Back on regular progress, not long after where you got the Fizzy Pow, you’ll find another section of five Mudokons to be saved. No Bird Portal, so you’ll have to bring them with you.
Mudokons 22 to 25
You’ll find the first pair at the first train crossing, and the second at the second. You’ll have to time the crossing for the trains, but the sniper section has cover if you run across as Abe and activate it.
A Bird Portal awaits for all at the end.
Stage 15 – The Yard, 27 Mudokons

All the snipers you could ever want abound in the last regular level in Oddworld: Soulstorm. As you’d expect, the challenge ramps up here, and you’ll likely find yourself more than a little frustrated at some of the situations presented. Keep calm, however, and a 100% rating will be yours.
Mudokons 1 to 5
Immediately, we have a secret area. When you hit the fork with an upper and lower trail, take the low road for passage to your first five Mudokons, and some early snipers for good measure.
Mudokons 6 to 10
Some non-secret Mudokons occur just after, each working away on some valves.
Mudokon 11
Once you’ve gotten past the possessed Slig puzzle, and taken the lift, you can find a small crevice you can drop down to find one single Mudokon, waiting for your help.
Mudokons 12 to 15
Two different Bird Portals are around the next area. The first is one the normal path, to free everyone you’ve gained thus far. The second is beyond the money bar you can see to the left, and four Mudokons to use it.
Mudokons 16 to 19
Once you reach a sign for a Maintenance Area, there are four Mudokons. Three are right in front of you, another is below the floors you can blow up using Fizzy Pow. Be careful, Sligs abound down there.
Mudokons 20 to 25
You’ll need some good ol’ fashioned coin for the next six Mudokons. They’re locked in a cage that requires 75 Moolah.
Mudokons 26 and 27
As you climb the ledges after one of the last puzzles, you’ll find one straggler, and another right at the end, after the last lift section.
Stage 16 – Brewery, 81 Mudokons
Things are intense now, and they’re staying that way. This is a hard level, but there’s nothing you can’t handle, and it’s fairly linear to boot.
Mudokons 1 to 3
More or less at the beginning, you’ll need to kill some Sligs to get to the Bird Portal.
Mudokons 4 to 9
The way the rooms in Brewery work is that in any room, a certain portion are in the open, and a certain portion are imprisoned. Once you free the prisoners, an attack ensues. You’ll need to quick in this first encounter to get on a ledge for safety, before possessing the Slig attacker.
Mudokon 10
Right towards the first Bird Portal, a Mudokon is cleaning on a platform.
Mudokons 11 to 16
The next Brewery room is the same as before – get everyone out of the way, then possess a Slig. A Bird Portal awaits.
Mudokons 17 to 50
Same as above, facing variations on Sligs and Slogs, depending. The same basic strategy carries through – find the nearest platform, get everyone up there, then figure out how to possess your enemies.
Mudokons 51
Between rooms, you’ll see a path that has Sligs patrolling it, and some mines around a door. Get around them to find this one outlier.
Mudokons 52 to 81
It’s more rooms the rest of the way, some with Flying Sligs now, too. The frequency of enemies might change, but not how to handle them. Gradually, you’ll get through, with everyone intact.
Stage 17 – Eye of the Storm, 50 Mudokons
Here we have it. The last level. The big climax. The thing you’ve been working towards since booting up Oddworld: Soulstorm, and the end of Abe’s almighty rebellion. No way around it, this is a toughie, and you’ll need your wits, and some Moolah, to save everyone. Rest assured, we can at least point you in the right direction for that sweet 100% trophy.
Mudokons 1 to 4
Right in front of you, when you start the level.
Mudokons 5 to 8
You need the first four to help get to the next four, in a puzzle that requires you to possess a slig. Get it done, and you’ll now have eight followers.
Mudokons 9 to 12
To get to this secret area, you need the Hard Candy vending machine, so you can smash a power conduit, then use the platform that appears.
Mudokons 13 and 14
These two Mudokons are your reward for surviving the first pump.
Mudokons 15 to 19
You’ll find five more Mudokons during the second pump, three at the entrance, two at the exit.
Mudokons 20 to 25
Another six Mudokons are around the third pump. Four are obfuscated by a wooden wall, and another two are near one of the switches.
Mudokons 26 to 30
Here’s where you need your Moolah. Take the pulley lift you encounter heading towards the fourth pump to go down, then Fizzy Pow the floor to find these six Mudokons. 100 Moolah adds them to your gang.
Mudokons 31 to 36
You can find these six at the fourth pump after you’ve activated it.
Mudokons 37 to 41
Coming up to the fifth pump, you’ll see a path heading left. Take it for five Mudokons that’ll cost you another 100 Moolah. Expansive business, this.
Mudokons 42 to 47
Your reward after the fifth pump.
Mudokons 48 to 50
Right before triggering the last boss, you’ll be greeted with three more Mudokons. And that’s it! Survive the upcoming battle, and everyone’s free. You’ll get the good ending, where the Sligs turn on the Glukkons, and all the Mudokons are freed.
And that’s it, the Mudokon uprising is complete. You have once again brought down the Glukkons. Time to sit back, relax, and grab a nice cool glass of SoulStorm brew to celebrate!


Published: May 6, 2021 04:14 pm