
In total, Kirby and the Forgotten Land has 18 Hidden Waddle Dees to find (not including Hidden Missions) in Originull Wasteland, the fifth world and the first of the game’s second, more challenging island.
Kirby and the Forgotten Land will have you replaying levels, scouring them to get each and every Waddle Dee hidden in those tight spaces. Finding them allows you to increase your total count and unlock everything Town has to offer. As you collect more of them, more stores and mini-games unlock in the hub.
Where to Find All Hidden Waddle Dees in Originull Wasteland
This Kirby and the Forgotten Land guide will show you where to find each of the 18 Hidden Waddle Dees in Originull Wasteland. If you’re looking for all of the Hidden Missions in this world, head over to our dedicated guide for that.
Use the links below to jump to each level in Originull Wasteland:
All Hidden Waddle Dees in The Wastes Where Life Began
There are three Hidden Waddle Dees in the Wastes Where Life Began.
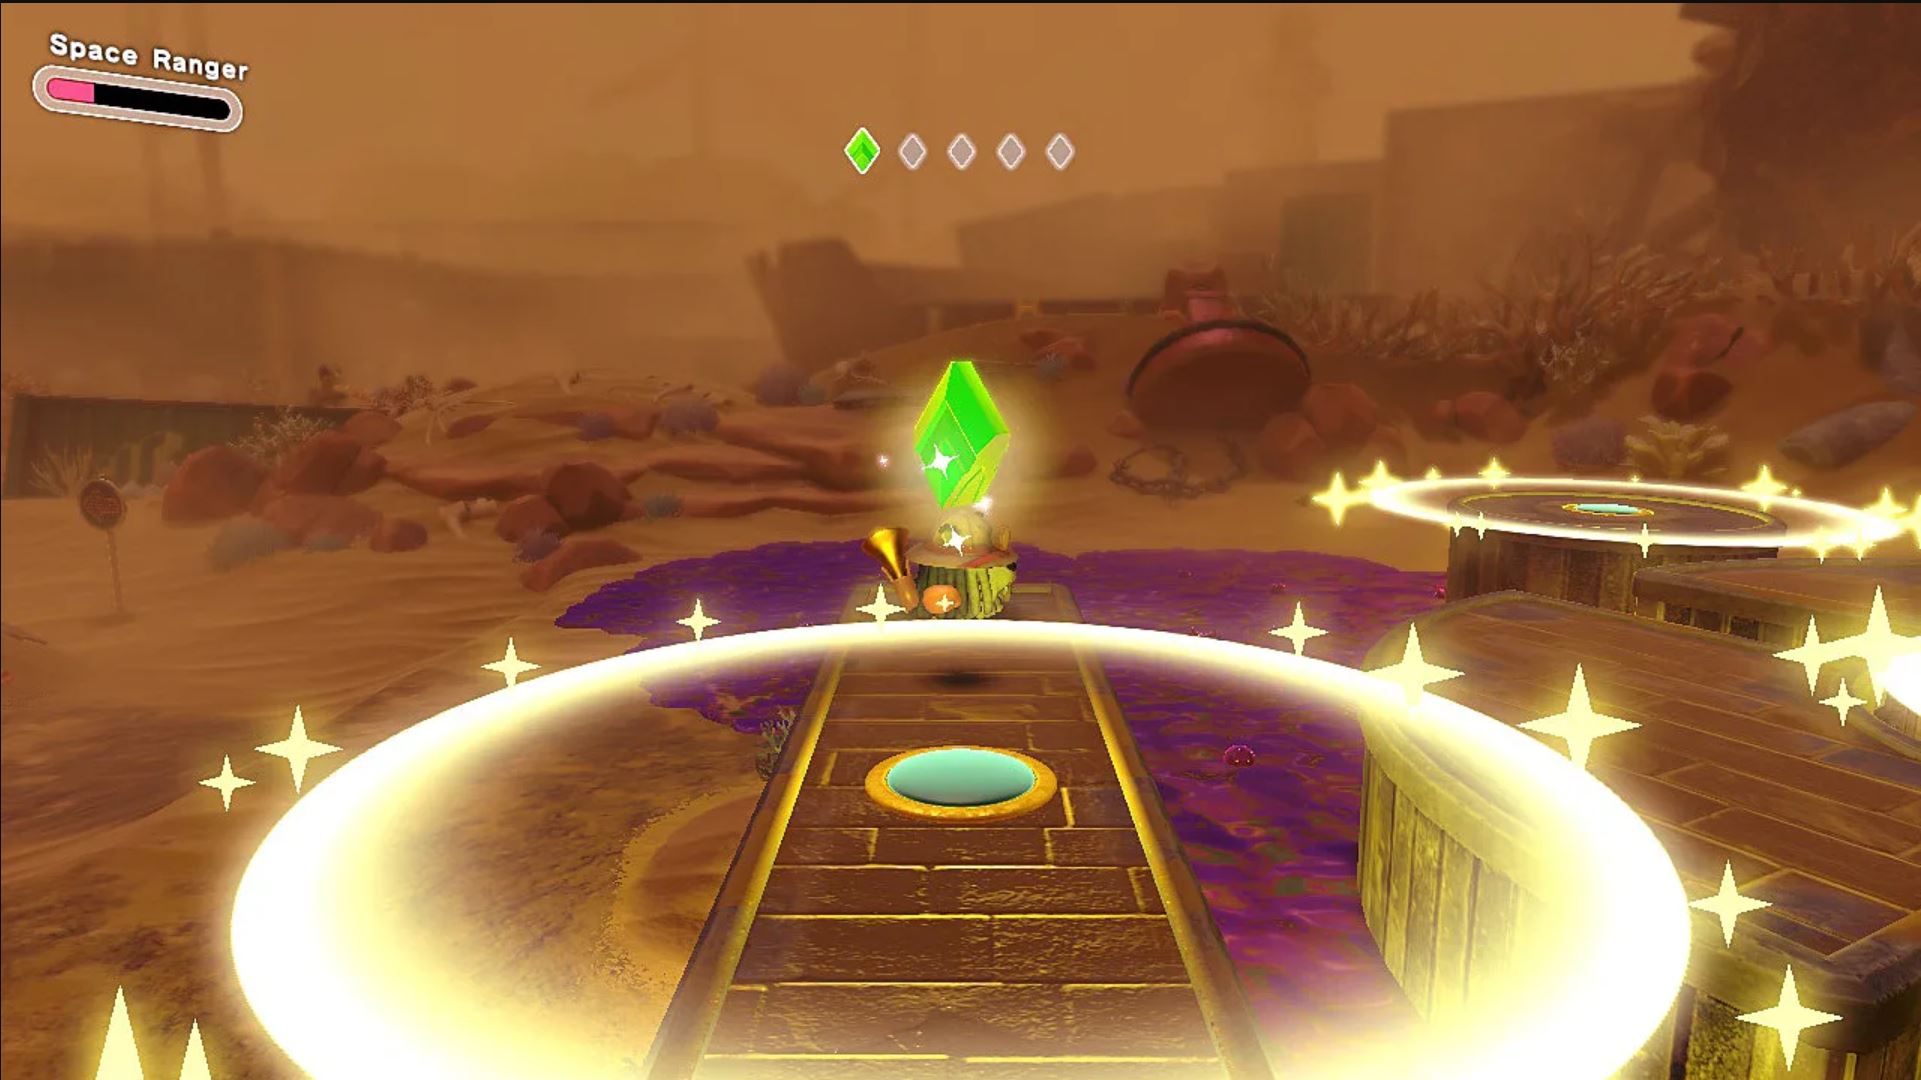
Wastes Where Life Began Waddle Dee 1: Collect Five Star Bits
- Star Bit 1: In the chest guarded by a snake near the start of the level.
- Star Bit 2: Hit the four green switches on the platforms over the poison swamp.
- Star Bit 3: Using Ring Mouth, make the three windmills blow on the platforms above the poison.
- Star Bit 4: In a hidden chest you must blast the sand using Ring Mouth to unlock.
- Star Bit 5: Defeat Fleurina on the ship.
Wastes Where Life Began Waddle Dee 2
Early on in the stage’s second area, you’ll see a crack in the floor. Above it is a column stuck in a patch of sand.
You’ll need to use the nearby Ring Mouth to blow the sand away and let the column fall to break the ground. The second Hidden Waddle Dee hides here.
Wastes Where Life Began Waddle Dee 3
You’ll see another cracked ground and column situation shortly after. Doing the same thing here will reveal a door to the hidden area where the final Waddle Dee can be won.
When you enter, turn right and jump across the platforms to the right. Once you reach the end, quickly turn and jump back to the platform on your left where the hidden friend awaits.
All Hidden Waddle Dees in Searching the Oasis
There are five hidden Waddle Dees to save in Searching the Oasis.
Searching the Oasis Waddle Dee 1
The first one of this level can be found a little ways in, past the dangerous snake guarding a secret path. Defeat it to proceed down the path to a secret swimming pool where the Hidden Waddle Dee is hanging out.
Searching the Oasis Waddle Dee 2
Past the first Poison Croakom in the level, look to the right to see a ladder on a tower detached from the main path. Climb it and navigate three moving platforms to obtain the second Hidden Waddle Dee.
Searching the Oasis Waddle Dee 3
On the other side of the aforementioned moving platforms, there is a dome. Defeat the enemies that spawn in the area and then go Mouthful on the dome to wriggle it open. This reveals a ladder down to a large pipe and an obstacle course you must navigate as Pipe Mouth Kirby.
The Hidden Waddle Dee is behind a cracked wall at the very end of the section. Make sure you nail the final jump on that last big wooden ramp so you don’t have to do this part over.
Searching the Oasis Waddle Dee 4
The fourth Hidden Waddle Dee is found in the stage’s secret room. This is found behind the fence that also has poison on it. This means you’ll need Water Balloon Mouth and the Drill ability to enter it.
Once you’re in you’ll need to collect five Green Star Bits. But this is a speed challenge as each Star Bit is on your path, the path just happens to be sinking into the poison lava.
One of the piles on a platform always has a Star Bit. So, as a general strategy, you’ll want to dig down on the first pile of a platform and come up at the last one in order to grab whatever was hiding under each.
Searching the Oasis Waddle Dee 5
You can find the final Hidden Waddle Dee of the level behind the last Poison Croakom. To find out how to solve the area’s puzzle and defeat this massive enemy, consult our Originull Wasteland Hidden Mission guide linked near the top of this guide.
All Hidden Waddle Dees in Alivel Mall (Staff Side)
There are five Hidden Waddle Dees to save in the Alivel Mall (Staff Side) stage.
Alivel Mall (Staff Side) Waddle Dee 1
When you find a wall with a bomb block in the center, attack it to reveal a Ring you can inhale. Retrace your steps as Ring Mouth Kirby until you find the room with the spinning platforms and a circular hole in the cracked wall. Jump into the hole as Ring Mouth Kirby to save the first Hidden Waddle Dee.
Alivel Mall (Staff Side) Waddle Dee 2
Past the platforms over the spikes, you’ll want to inhale a knight for a Sword ability. Keep going to your right until you see a bit of false ground tied to a vine.
Cut the vine and drop down to find a Vending Machine you’ll need to go Mouthful Mode on. Use the portal to get teleported back up the main level and go back to the platforms above the spikes.
Here you’ll see a rectangular indentation in the wall where you can jump in and save the second Hidden Waddle Dee.
Alivel Mall (Staff Side) Waddle Dee 3
In the next area, you’ll find an enemy you should inhale if you don’t have the Cutter equipped. Climb the ladder to the left and make a right here instead of heading through the door. This will take you to a hidden door to a challenge room containing a Wild Bonkers fight.
Once the mini-boss is defeated, you’ll be rewarded with a Hidden Waddle Dee. Make sure to grab the Hammer he drops for the next objective.
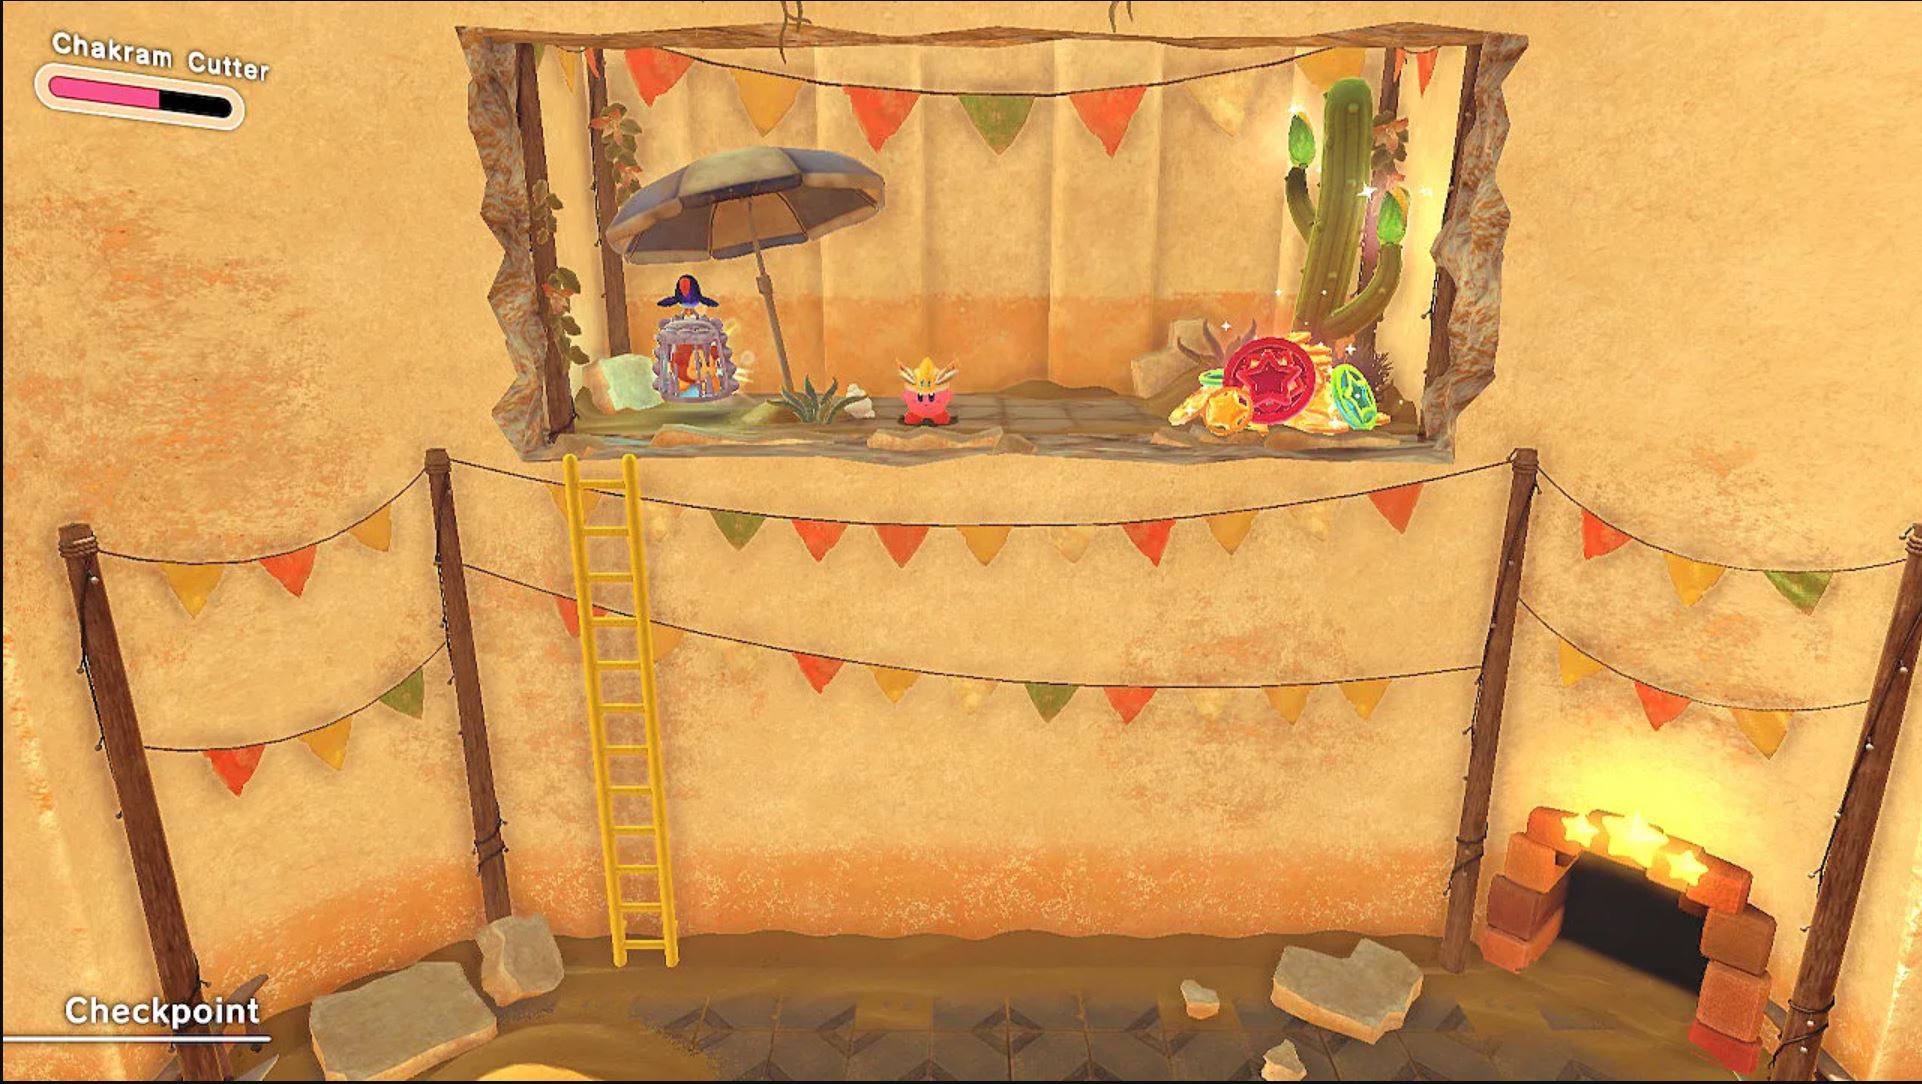
Alivel Mall (Staff Side) Waddle Dee 4
Break through the cardboard boxes in the next area to reveal a secret area with a stump switch in the upper right-hand corner of the ceiling. Jump up to hit it with the hammer (that you picked up from Wild Bonkers) to cause a ring to fall back in the main room.
Inhale it to go Ring mode and backtrack to your left a bit. Earlier you may have seen a treasure chest hidden in a pile of sand. You’ll want to return to it and blow on it to be able to rescue the Hidden Waddle Dee within.
Alivel Mall (Staff Side) Waddle Dee 5
Stay in Ring Mouth mode and go as far right as you can until you hit a giant hole in the floor. you’ll see you need to cross a spinning platform to reach a hole you can fit in on a side platform to the right. This will open up a small room where you can drink water to become Water Balloon Mouth Kirby.
Go back to the hole in the floor to find you’ll now fit perfectly. Doing so will reveal the final Hidden Waddle Dee of the level.
All Hidden Waddle Dees in Moonlight Canyon
There are five Hidden Waddle Dees in the Moonlight Canyon level.
Moonlight Canyon Waddle Dee 1
The first Hidden Waddle Dee of this return to the mall is found in the Light-Bulb Mouth Kirby section that you have to illuminate. Continue in this section until you find two canons. you’ll see a path of coins leading you around to the platform the canons are on.
The secret path behind the second canon leads to a battery. You must hold down B to charge it up. Doing this will reveal the stairs to the first hidden friendo.
Moonlight Canyon Waddle Dee 2
Later in the Light-Bulb Mouth section, you’ll find the next Waddle Dee near the exit door. Instead of going through it initially, head left to a hidden battery you need to charge. Charging it all the way will make the hidden friend appear.
Moonlight Canyon Waddle Dee 3
In the level’s next section, you’ll have to descend to a spot with a platform made of falling blocks below two ladders. Move towards the camera to reveal the Hidden Waddle Dee. Navigate the blocks carefully and go up the ladder on the right.
Moonlight Canyon Waddle Dee 4
As you pass some falling blocks and upward-facing canons, notice how a block path leads upwards. Follow this up to find an opportunity to find Scissor-Lift Kirby. Use the lift ability to hit a blue switch on the ceiling and then avoid the Gordos to make your way to the now unlocked Secret Room.
In the room, you must navigate past enemies on a disappearing bridge. Using the Scissor-Lift Mouth, stay in low mode for the first walkway. You’ll need to eject for the next two walkways where you must be Kirby. Avoid the Sleep power-ups that will make you fall and platform your way to the Hidden Waddle Dee at the end.
Moonlight Canyon Waddle Dee 5
At the end of the level’s Arc Mouth gliding section, you’ll see a pillar crash from the right-hand side of the screen. As it falls there are two holes you can enter to pass through it. Enter the one on the right to find a secret path full of coins and the final Hidden Waddle Dee.
That’s all you need to know about finding all of the Hidden Waddle Dees in Originull Wasteland. If you’re seeking out Hidden Waddle Dees in other areas or even Hidden Missions, check out our other Kirby and the Forgotten Land guides.


Published: Apr 7, 2022 04:23 pm