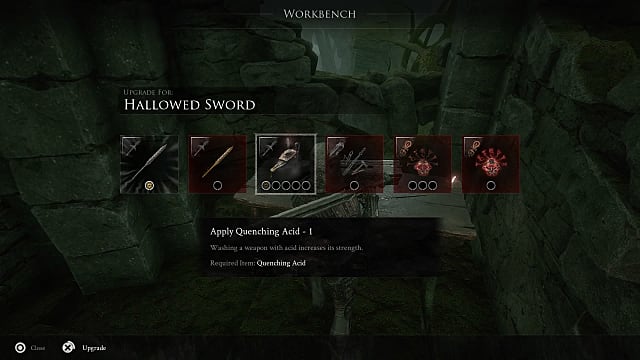
In Mortal Shell, you’ll want to take advantage of the game’s upgrade system to enhance your weapons. To do so, you’ll need to find an item called Quenching Acid, which is scattered around the game. In total, there are 11 Quenching Acids you can find throughout the world on your initial playthrough. You can find more in new game plus.
In this guide, we’ll show you where all 11 are, along with the easiest routes to find them. Once you’ve got a Quenching Acid, equip the weapon you’d like to upgrade and visit an anvil (or the workbench in Fallgrim’s tower) to enhance its damage output.
That said, these are the locations of the initial 11 Quenching Acids you can get on your first playthrough of Mortal Shell. Keep in mind that you don’t have to find them in the specific order we’ve listed below — this is simply the path we took.
Quenching Acid 1+2 — Fallgrim
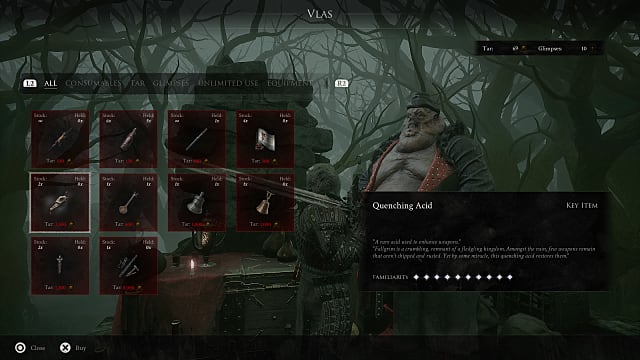
The first two Quenching Acids can be purchased from Vlas at the central tower in Fallgrim. Vlas is located at the top of the tower and can be located by taking the exterior spiral staircase from the second floor.
Each Quenching Acid costs 2,500 Tar, which is pricey — at least at the start of the game.
Quenching Acid 3 — Fallgrim
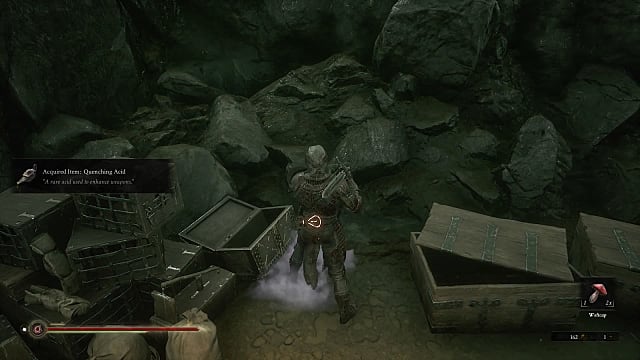
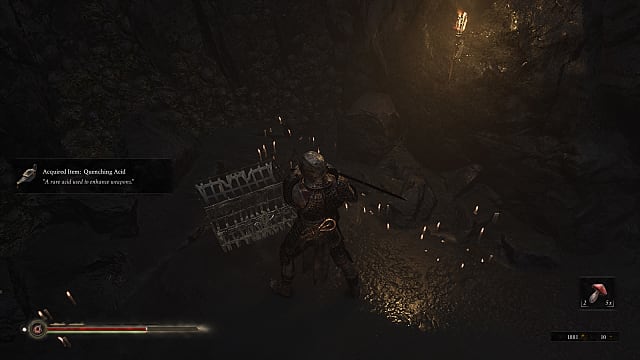
Use the giant burning monument that leads to the Temple Grounds as the landmark to find this Quenching Acid. With the front of the burning monument ahead of you, turn around and go back to a small camp where there will be enemies to defeat. The Quenching Acid is in a chest amongst a pile of sacks and crates against the crumbling cliff face.
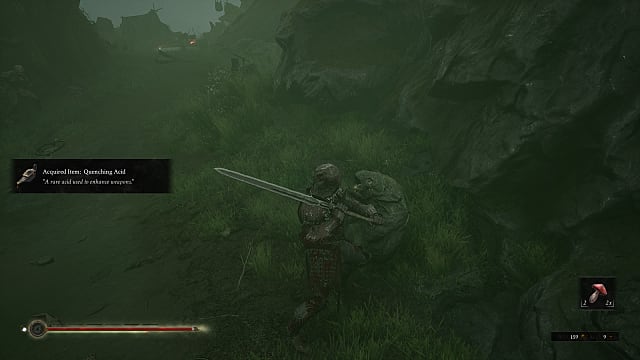
Quenching Acid 4 — Fallgrim (Mist Active)
You won’t be able to grab this Quenching Acid immediately. What you have to do for this one is activate the mist, which is done by defeating any of the main bosses in the game:
- Imrod, The Unrepentant
- Crucix, The Twiceborn
- Tarsus, The First Martyr
It doesn’t matter which boss you defeat first, but once you’ve obtained its gland, you can head back to the tower to speak with The Old Prisoner (the metallic creature with a long beak in the tower, where you obtain the Tarnished Seal for parrying).
Once you’ve done that, you’ll be able to trigger the fog whenever you’d like by speaking with the new NPC, Thestus, that appears on the second floor of the tower. For one glimpse, you can turn the mist on or off.
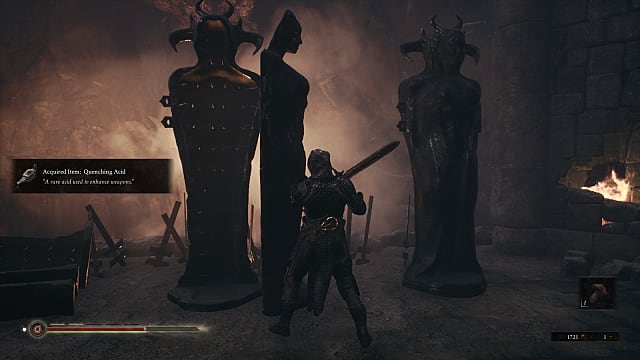
With the mist activated, leave the tower from the door to the right of Sester Genessa and take a right. Follow this path (past the Weltcap on the left), and you’ll come to a frog statue on your right. Interact with it to obtain this Quenching Acid.
Quenching Acid 5 — Monument of Ash
From the first Sester at the start of this area, follow the way ahead. Take the left path up the hill, and go through the door. Go up the small set of stairs, and when you get to a fork, take the left path down the steps.
From here, go into the next large room, and on the right, you’ll see a couple of Iron Maidens, one of which contains a Quenching Acid.
Quenching Acid 6 — Monument of Ash

From the last Quenching Acid, continue ahead through the room with the giant hole in the ground. Go into the large area with a ton of enemies. You’ll find those creatures who shoot flaming projectiles at you here.
Take the right door (you’ll need to wrap around the left side to reach it) and go up the steps into a room where you can trigger a shortcut. Another flaming projectile enemy will be on your right.
At the top of the steps, take a left into the next room, and you’ll find another Iron Maiden towards the back of it on the left side. It’s just before the hall narrows, leading into the next room. Interact with the Iron Maiden to get the Acid.
Quenching Acid 7 — Abandoned Chamber
From the Sester at the start of this area, follow the path until you reach a room with a few different ways you can go. You’ll find a pillar in the middle of this room, along with a handful of enemies.
Take the first path on the left through a narrow hall, and then take the next left. You’ll reach a larger open area with a huge enemy guarding a chest. Defeat the enemy and grab the Quenching Acid from the chest behind it.
Quenching Acid 8 — Enshrined Sanctum

From the Sester right next to the boss arena, head back towards the way you came, past the frog statues and up the stairs. Keep following the path up, and you’ll find another set of stairs. At the top of them, take the small tunnel immediately on the right.
Here, you’ll be in a large room with two enemies. The chest containing this Quenching Acid is in the back left of the area.
Quenching Acid 9 — Eternal Narthex

From the Sester at the start of this area, go towards the way ahead. Go through the narrow path and past the Faceless Clerik, the large enemy with a hammer. Once outside, take the teleporter on the left.
When you spawn, you’ll see a few ramps ahead that lead down. Go towards them and stick to the leftmost ramp, where you’ll want to take a left when you reach the bottom of it.
Here, you’ll see some enemies way off in the distance, along with one of the braziers you need to activate. Head towards this brazier and take a right when you reach it, towards the massive tree.
Ahead, there will be two very narrow paths. One goes left, and one goes right, terminating in a small alcove. Take the right one. The chest you’re looking for is straight ahead, against a wall. In it is the next Quenching Acid.
Quenching Acid 10 — Dim Gate
Finding this Quenching Acid is a bit of a journey, so stick with us. From the first Sester on the bottom floor, turn around and go back the way you came. You’ll want to take a right, up the steps that lead to the spiral staircase. This is the path you’d take to advance through the story.
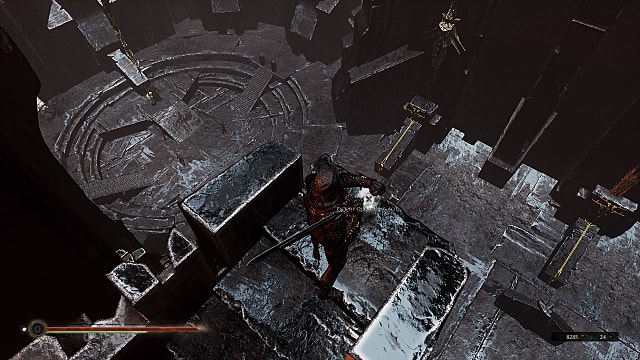
Keep going, and when you reach a fork where you can either go right up some more stairs or left through a narrow path, take the left path. Follow this up to the next area and up a few ramps. You’ll then come to a large circular section that almost resembles a stage.
Go down to the center of this circular area, take the steps on the left, and make a left into the next area. Keep going, and you’ll come to even more spiraling stairs. Take them up.
At the top, you’ll come to a section with metal grating on the floor. Take the ramp on the left, and you’ll reach another set of stairs. This leads to a larger section with two teleporters towards the back.
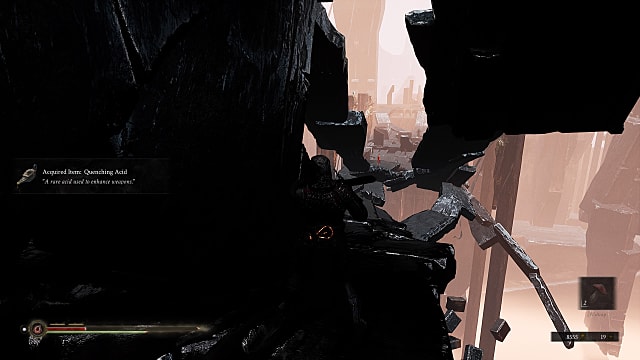
Take the teleporter on the right, and you’ll end up in a new place. Run down the ramp ahead, and follow it down until you reach some platforms you can drop down onto. Try to drop down onto the one directly below you, because you’ll take heavy damage if you skip any.
Keep dropping down, and you’ll come to a final teleporter. Take it, and the Quenching Acid will be on the edge of the platform ahead.
Quenching Acid 11 — Dim Gate
The final Quenching Acid is located just before you reach the Shifting Archives. In reference to the area with the metal grating on the ground (mentioned in the previous Quenching Acid location), take the ramp on the right, and when you reach the area at the top, take the ramp on the left. This leads to a massive open area.
From here, you’ll want to keep going ahead until you reach a narrow ramp that leads upward. Guarding it is a Faceless Clerik. Before you go up to continue the story, take the path directly behind the Clerik.
Keep following this path, and you’ll find the Quenching Acid on the ground at the end.
Quenching Acid on NG+
Once you’ve completed the game, you can start new game plus, which features more difficult enemies and allows you to carry over most of your equipment. If you speak with Sester Genessa in Fallgrim’s tower, you’ll be able to purchase 8 Quenching Acids from her for 10 glimpses each.
And that’s everything you need to know about finding every Quenching Acid in Mortal Shell. Since there are 11 in the initial playthrough, you’ll be able to fully upgrade the damage on two weapons, so make sure you pick one and stick with it for maximum efficiency. For more on Mortal Shell, including other tips and walkthroughs, be sure to visit its hub page here.


Published: Aug 24, 2020 12:53 pm