Every aspect of Darkest Dungeon is meant to push you to the absolute brink of your limits. You will have your health, your sanity, and yes, even your pocket book thoroughly tested.
Proper provisioning before a quest can be the difference between survival and disaster, but each area calls for different supplies to be purchased ahead of time. Below we explain how to properly provision for every area and how those provisioning strategies can change whether you are more focused on survival or on hauling more loot home.
Note that the provisions listed under each individual area are focused on that area’s specific creatures and curios, but there are minor exceptions. For instance, bandages aren’t as useful in the Ruins (for the most part) as the skeleton and necromancer enemies exclusive to the Ruins don’t usually cause bleed damage, but you can still run into generic enemies like brigands or the Fanatic who do have bleed effects.
There’s also one special provision added in the “Crimson Court” DLC to be considered: Blood can be found only by fighting enemies in areas where there’s currently an Infestation level, meaning you’ll have to hang out there for awhile to keep your roster alive. This also means more heroes are going to get cursed with vampirism, resulting in a spiraling cycle of needing ever more blood.
Survival in Darkest Dungeon
These are the basic provision needs for nearly any expedition whether short, medium, or long (for specifics on what you want for each distinct area of the game, see those sections below).
If you are low on funds and need to prioritize for survival, skip the provisions that help you with curios — since you can simply not interact with those curios — but in general, don’t skip bringing at least one shovel, since its not worth the potential damage and stress.
Short
- Torch x 5 — If you prefer always having an advantage in combat and have gold to spare, extra torches never hurt, so buy a few more
- Food x 8 — This is the minimum amount of food to provision, where you won’t ever take hunger damage and may still have one or two food to spare for minor healing between combat
- Curio provisions / shovel x 2 – 3 (see each specific section for what items are useful in that dungeon)
Medium
- Torch x 10
- Food x 16 — Don’t forget you can get excellent health and stress reduction if you use a full eight food while camping
- Curio provisions / shovel x 4 – 5
Long
- Torch x 14
- Food x 24
- Curio provisions / shovel x 8 – 10
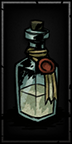
 Such A Simple Thing — To Die For Want Of A Piece Of Bread
Loot
For a high loot, high danger run, you want as much room in your inventory as possible for bringing all that loot back. First and foremost, ditch the torches entirely when provisioning, as you want to be in the dark as much as possible to increase the chance of finding treasure.
If you’re feeling particularly greedy, lower the amount of food from the quest guidelines below, but make sure you don’t skimp on the curio provisions, since curios tend to give better loot when you use their associated items.
 You Want Room For Shinies Like This!
Courtyard
Extremely Necessary Provisions:
- Blood — Bring as much as possible without letting your cursed heroes at home waste away. All the Courtyard expeditions after the first main quest feature absolutely huge labyrinths of rooms filled with enemies who will infect your heroes with curse
- Bandages — Many mosquito / vampire enemies cause bleed, and they can be used on the Pile of Bones curio. If you are using a Flagellant-based party though, these aren’t as necessary.
- Shovel — There are bone piles similar to the Rubble in the ruins, as well as several curios that offer better results when using the shovel
Somewhat Helpful Provisions:
- Torches — The Courtyard doesn’t use the same torch light mechanic as the other areas of the game, so these aren’t required. However, they do offer a bonus to accuracy, and can be used on Cocoons and Thronging Hives for stress reduction and finding treasure
- Medicinal Herbs — Using these on the food trays offer up large amounts of food if you are running low
- Antivenom – A handful of enemies and curios can cause blight
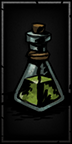
 The Blood – I Must Have It!
Cove
Extremely Necessary Provisions:
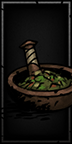
- Medicinal Herbs — Many creatures, traps, and curios here cause diseases and debuffs, provision these to be safe
- Bandages — Several fish enemies cause bleed damage
Somewhat Helpful Provisions:
- Holy Water — If you come across the Fish Idol curio, this cleanses it for a damage buff
Not Very Helpful Provisions:
- Skeleton Key — You will only rarely come across locked chests here
 Do You Really Want To Bleed To Death From A Fish Hook?
Ruins
Extremely Necessary Provisions:
- Keys — There are frequently locked chests in enemy rooms
- Holy Water — Several different curios in the Ruins offer better or exclusively positive results when using this provision
- Shovels — Rubble is found often in the Ruins, and your party will both lose health and gain stress if you have to break through bare handed
Somewhat Helpful Provisions:
- Medicinal Herb — Useful for the Iron Maiden curio, but otherwise not as helpful in the Ruins
- Extra food — Useful on medium and long quests, as unlike the Warrens or Weald, very few of the curios here provide food as a reward
Not Very Helpful Provisions:
- Antivenom — Unlike the Cove, most of the enemies here don’t deal blight damage and few of the curios require using this provision
- Bandages — The curios here don’t deal bleed damage, and there are fewer overall damage-over-time effects in the Ruins
 A Ruins Explorer’s Best Friend
Warrens
Extremely Necessary Provisions:
- Medicinal Herbs — A ton of curios here give better results if cleansed with herbs first, and several even offer up food so you can skimp on that provision
- Bandages — Many enemies cause bleed effects in the Warrens
Somewhat Helpful Provisions:
- Holy Water — A handful of lesser-found curios like the Eldritch Altar require Holy Water
Not Very Helpful Provisions:
- Torch — Although you should obviously bring some torches along, the hallways are actually shorter here so you can provision fewer torches
 Always Cleanse Demonic Pig Food Before Eating!
Weald
Extremely Necessary Provisions:
- Antivenom — Many enemies, traps, and curios cause Blight while traveling the Weald
Somewhat Helpful Provisions:
- Medicinal Herbs — Using this on the Beast Carcass provides lots of food, and at the higher level boss battles here, you will need to counter the Witch’s debuffs
- Bandages — A handful of enemies cause bleed here and curios like the Eerie Spiderweb give better results with using Bandages
- Holy Water — If you come across a Troubling Effigy, using Holy Water removes a random negative quirk
Not Very Helpful Provisions:
- Skeleton Key — Chests are rare here. Save your money and pick up the more important Antivenom instead
 Everything In The Forest Wants To Poison You!
Darkest Dungeon
Extremely Necessary Provisions:
- Antivenom — Many enemies in this final area of the game cause blight
- Bandages — Many enemies in this final area of the game cause bleed
Somewhat Helpful Provisions:
- Holy Water — Although there aren’t any curios that require it, the buffs provided by Holy Water (assuming you aren’t cursed with vampirism) can be helpful against many of the enemies here
Not Very Helpful Provisions:
- Shovel — You won’t come across any rubble blocking your passage, so provisioning these are pretty useless here
- Skeleton Key — There aren’t any curios here that require a key, so don’t waste your funds!
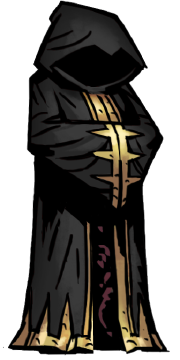 Get Ready To Bleed When You See What’s Under The Robe!
That’s all you need to know to provision your team of cannon fodder before being horribly killed by monsters!
Have any other provisioning tips and tricks to offer? Let us know what we missed in the comments!
And be sure to check out our other Darkest Dungeon guides. Here are some to get you started:
- Darkest Dungeon Curios Guide
- Darkest Dungeon Boss Guide
- Darkest Dungeon “Crimson Court” DLC: Guide to New Curios and Achievements


Published: Jul 4, 2017 03:56 pm