Items are the most complex part of SMITE, next to the gods and goddesses themselves. They change constantly, evolve with the game and the players, can be game-breaking or totally ignorable.
To put it simply, items are hard — especially in Season 4. They’re so hard that you can run yourself ragged trying to figure it out. What’s good? What isn’t? Am I tanking my ability to tank because my armor isn’t covering the right things?
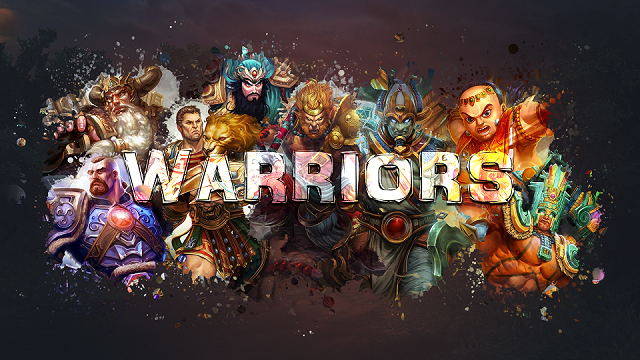
We have you covered, Warrior. If you’ve been here before for our God guides, or our best picks for mid lane, solo, ADC, or jungle, then you already know we took the hits so you don’t have to. So follow us as we charge into the common builds and core items of the Warrior class in SMITE Season 4.
How to Build Warriors in SMITE
Because they’re so open in terms of itemization, Warriors tend to get misbuilt — much like Guardians. And for that reason, Warrior builds operate on much the same principles as Guardian builds. Most of the time, your build is going to be a combination of what your character needs, and what the enemy team’s composition demands of you.
That said, there are strong cores of items you can rely on to do most of the heavy lifting and buy you valuable time to figure out the rest as the enemy’s strategy and playstyle become more clear. If there’s no clear problem and you’re just looking for a mess of good stats, there are builds for that, too. Like this one, for example:
Warrior Standard Build (No Healing)
Who wants it: Disruptive Warriors that need a good mix of stats. Brawlers.
Gods It’s Good For: Sun Wukong, Bellona, Nike

Main Items:
- Warrior’s Tabi
- Breastplate of Valor
- Jotunn’s Wrath
- Hide of the Urchin
- Titan’s Bane
- Bulwark of Hope
Starter items:
- Bluestone Pendant + Bumba’s Mask (if aggressive solo)
- Mark of the Vanguard + Bumba’s Mask (if defensive solo)
- Conqueror’s Flag + Bumba’s Mask (if supporting)
A solid middle-of-the-road build for a solid middle-of-the-road class, this build offers most Warriors a healthy dose of everything they need to get in the backline and generally disrupt the enemy.
A solid ball of good stats and protections, this build is perfect for those Warriors who mostly just want to be in the middle of the fight swinging at things. With only one passive proc, this build isn’t anything too flashy, and isn’t going to let you catch many people off guard — but you don’t always have to. Sometimes your job as a frontliner really is to sit there and soak enemy fire. And if all you need from your items is a hammer, this build nails it.
Other options to keep in mind, depending on the situation, include:
- Winged Blade against heavy slows like Poseidon.
- Pestilence against teams with powerful healers.
- Frostbound Hammer if you find your team needs more secure on their kill attempts.
- Shield of Regrowth if you’re a self-healer more concerned with absorbing damage than performing specific maneuvers.
Warrior Utility Build (Healing)
Who wants it: Warriors with self-heal that can function well offensively or defensively, or have a specific role to perform (like plucking enemies or driving out backlines) as opposed to just being a scary damage sponge.
Gods It’s Good For: Tyr, Hercules

Main Items:
- Warrior Tabi
- Hydra’s Lament
- Shield of Regrowth
- Spirit Robe
Starter Items:
- Bluestone Pendant + Bumba’s Mask (if aggressive solo)
- Mark of the Vanguard + Bumba’s Mask (if defensive solo)
- Conqueror’s Flag + Bumba’s Mask (if supporting)
With the same core set as Assassins that can heal play almost like Warriors, this build functions just as well for Warriors that play a little more like tanky Assassins. The speed boost from Shield of Regrowth helps keep you out of trouble — or catch up to targets in order to put the hurt on them with a Hydra’s Lament proc. Spirit Robe caps off CDR and offers a powerful defensive effect to make up for the lower-than-average protections.
As a downside, this build is going to require much more careful use of your mana. Without Jotunn’s Wrath and Breastplate of Valor around to make your blue bar essentially infinite, almost every skill has to count — though the Lament’s MP5 does at least give you a little wiggle room.
On the upswing, however, this build has something very important the “Big Ball o’ Stats” build doesn’t — insane flexibility. With a lot of your stat bases covered in the first four items (power, mana, mobility, survivability), the last two slots leave you plenty of room to itemize heavily against the enemy team while still retaining core Warrior functionality.
Just remember: these builds might be rock-solid for your Warrior, but they’re more like guidelines than hard and fast rules. Every god and every game is its own special snowflake that requires a little bit of adaptability if you’re going to build right. And though we can guide you, only you alone can take those final steps in determining exactly what to do in whatever sticky situation you find yourself in. But for the most part, these builds will keep you covered while you lead the way for the rest of your team.
Now go forth and Conquer, Warrior. We’re right behind you.


Published: Feb 26, 2017 06:59 pm