Luxurious Chests hold plenty of rewards in Genshin Impact, and each version update brings with it a slew of treasures to discover. This time around, you’ll explore more desert regions, as well as a lush oasis, to grab some goodies. Here’s our guide to help you find all version 3.6 Luxurious Chests in the Gavireh Lajavard and Realm of Farakhkert regions of Sumeru.
Where to Find All Version 3.6 Luxurious Chests in Genshin Impact
Several version 3.6 Luxurious Chests in Gavireh Lajavard and Realm of Farakhkert can be found as you’re casually exploring these regions. However, a select few require you to progress further in the Khvarena of Good and Evil quest just to make certain areas accessible.
Our Genshin Impact version 3.6 Luxurious Chests guide lists these treasures based on the ones that can be acquired through regular exploration and those that are part of quests.
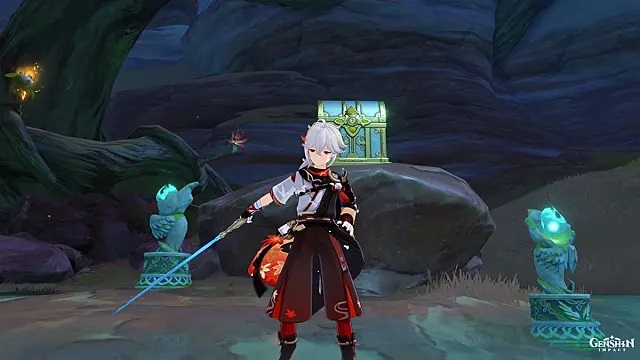
Luxurious Chest #1: Sumeru Shrine of Depths
 Screenshot by GameSkinny
Use the above-ground teleporter directly west of Asipattravana Swamp, and follow the sloping path as it loops around. Use a Shrine of Depths Key to remove the barrier.
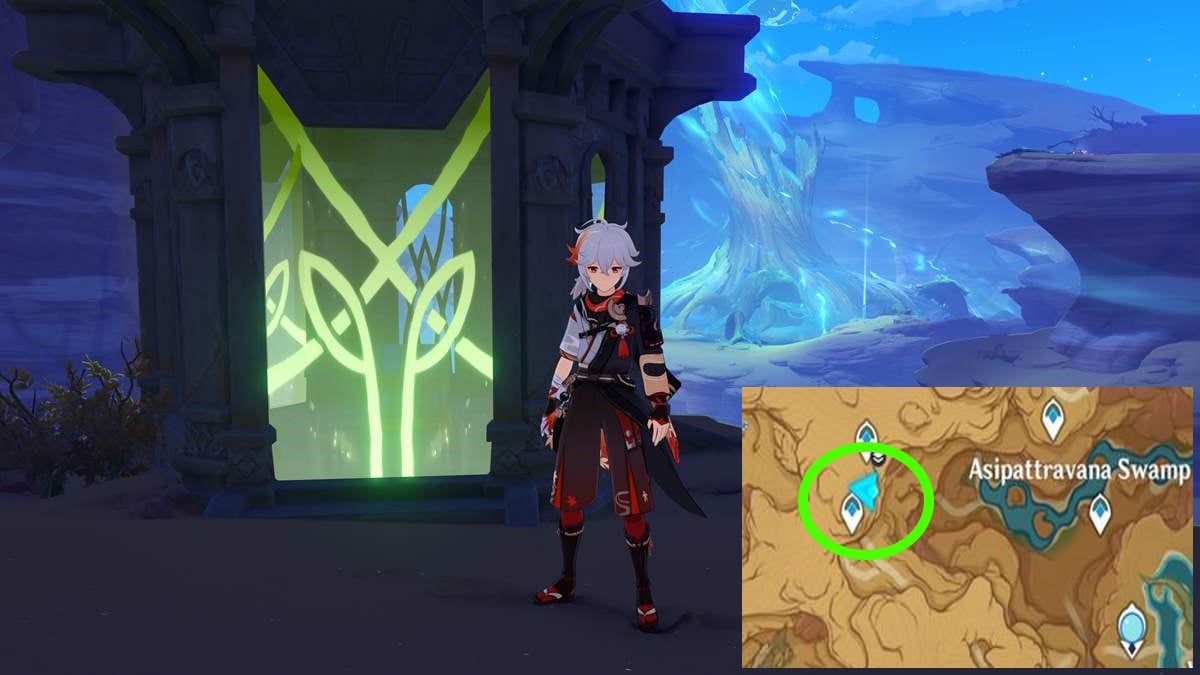
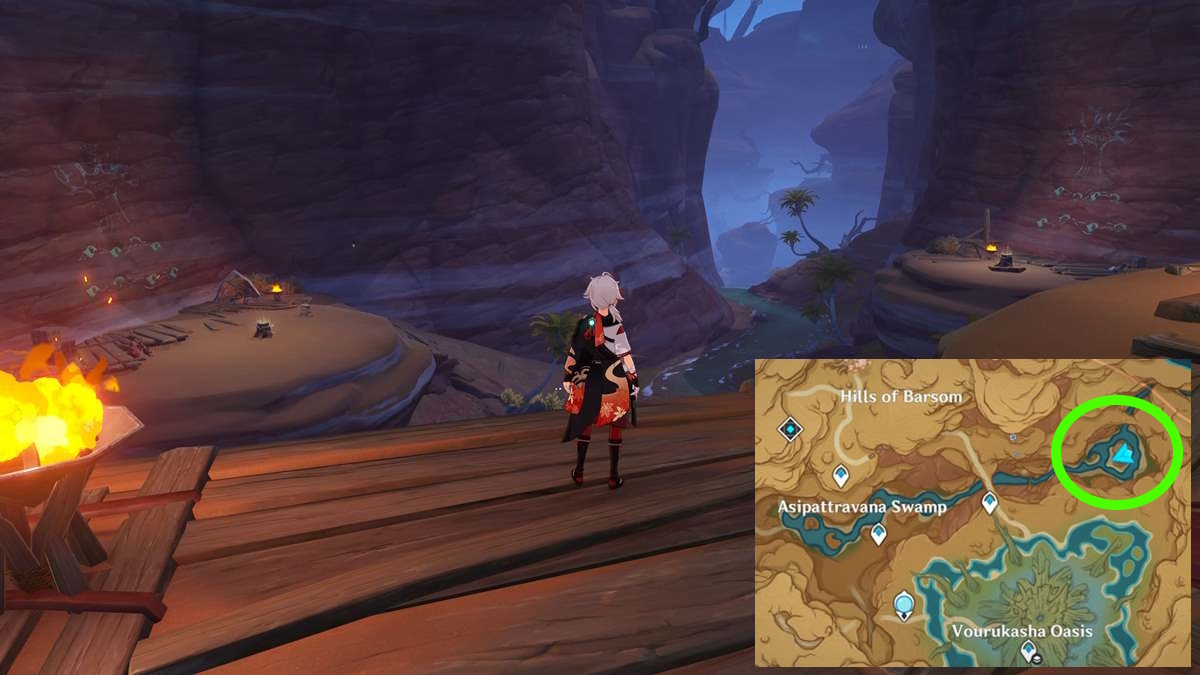
Luxurious Chest #2: Asipattravana Swamp Kory Drum Puzzles
 Screenshot by GameSkinny
Make your way to the eastern portion of Asipattravana Swamp. There, you’ll see three Kory Drum Puzzle diagrams. Two are already shown in the image above, and the third is closer to the waterfall.
Complete each Kory Drum puzzle normally via the usual mechanics. That means hitting the drum with a normal attack if the leaf has a small hole, and pausing for a couple of seconds (i.e., don’t do anything) if the leaf has a larger hole. These particular puzzles don’t require a plunging attack.
The solutions to these puzzles are as follows:
- Left side: Normal -> normal -> pause -> normal -> normal -> pause -> normal -> normal.
- Right side: Normal -> pause -> normal -> pause -> normal -> pause -> normal -> pause.
- Back/waterfall: Normal -> pause -> pause -> normal -> pause -> normal -> normal -> pause.
 Screenshot by GameSkinny
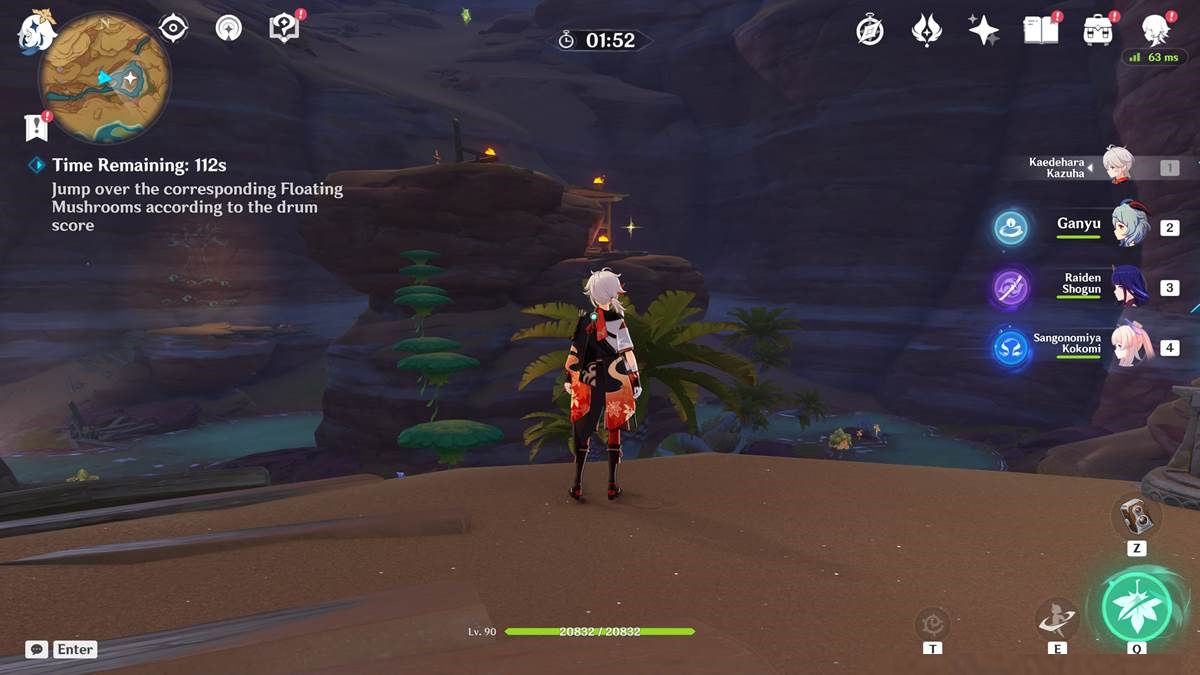
But, you’re not done yet. To spawn this Luxurious Chest, you need to do the jumping challenge as well.
Basically, each Kory Drum puzzle you complete will make a challenge marker appear. When you interact with it, you’ll see several mushroom platforms. You have to traverse the platforms based on the drum score/sequence that you just did. That means:
- Normal attack actions: These are replaced by a regular drop (i.e., you fall down from mid-air to land on the mushroom platform).
- Pause: The mushroom platform is skipped entirely. Don’t even land on it.
You’ll spawn a chest when you finish each challenge. Once you’re done with all three, a Luxurious Chest will appear in the center.
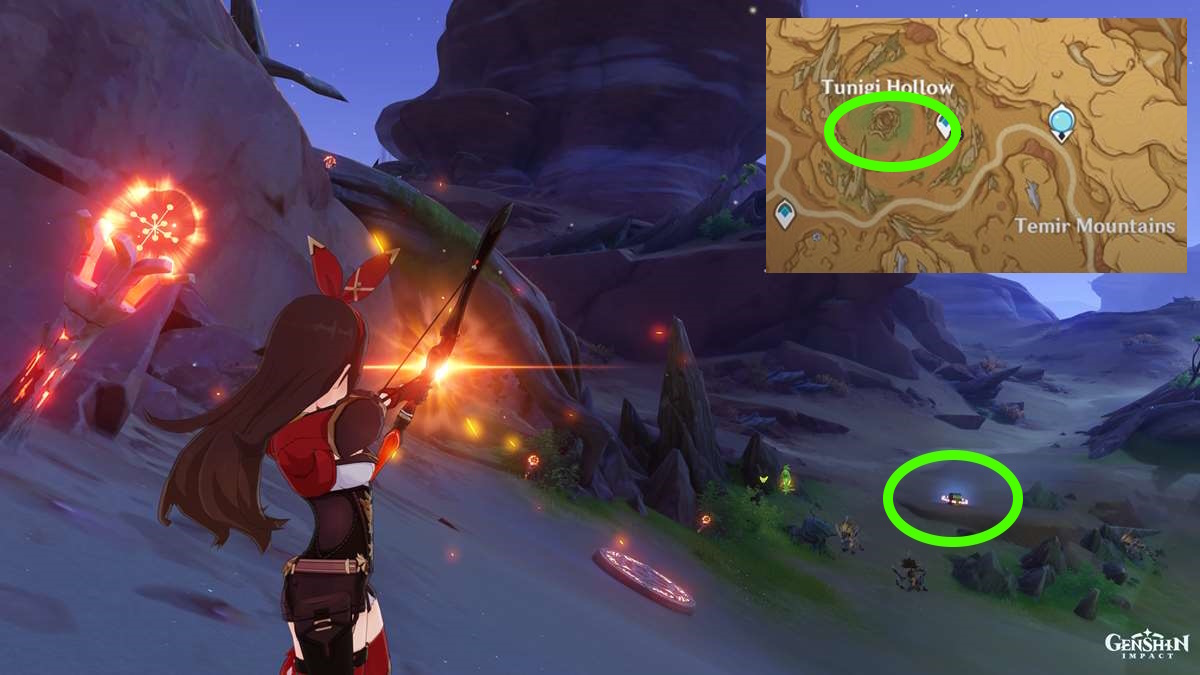
Luxurious Chest #3: Tunigi Hollow Farrwicks
 Screenshot by GameSkinny
This whole task takes place in the southern portion of Tunigi Hollow. In this area, you’ll see three Farrwicks (i.e., green snitches/orbs with wings). The goal is to follow them around until they reach their destination.
- The first Farrwick (seen in the image above) is circling around a plate. Use a Pyro character to light the four torches in a clockwise motion. Once you do that, it will move.
- The second and third Farrwicks are further down the slope, close to the Consecrated Beast.
 Screenshot by GameSkinny
Once each Farrwick moves, additional enemies will spawn. Just take them out so the Farrwicks reach their respective destinations. After completing this task, you can open the Luxurious Chest.
Likewise, note that there seems to be a bug where tagging only the first Farrwick — the one near the Pyro torches — will instantly let you open the Luxurious Chest.
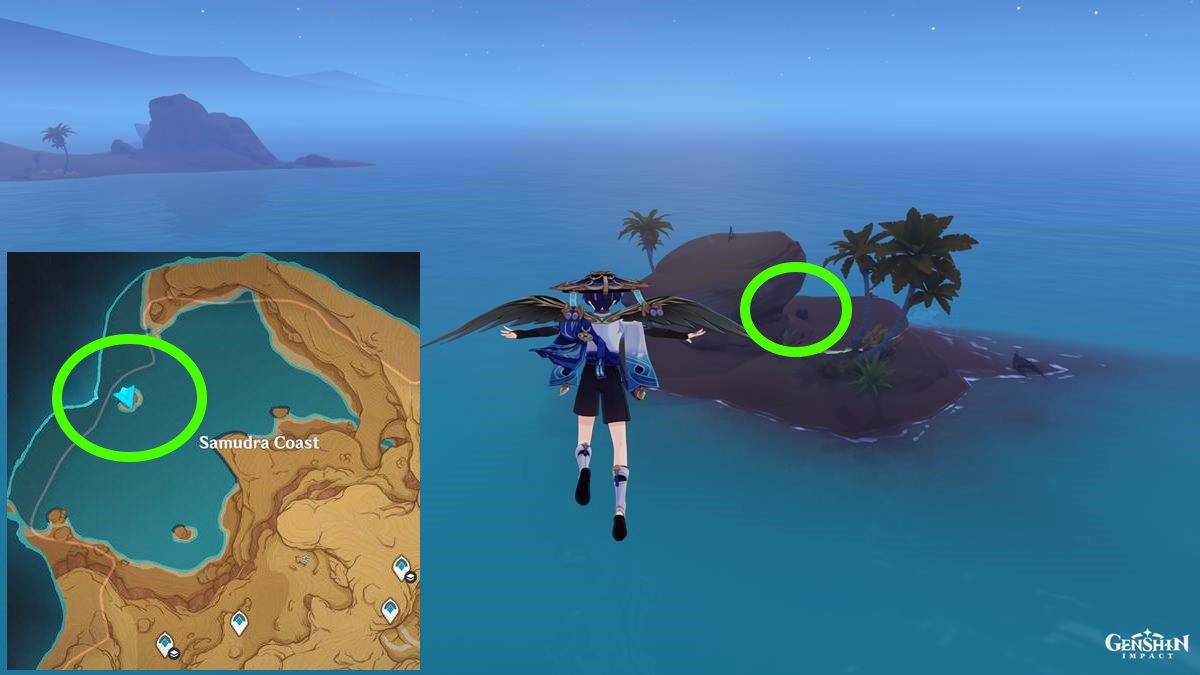
Luxurious Chest #4: Samudra Coast
 Screenshot by GameSkinny
There’s a small island at the northwestern edge of the map. The idea is to use nearby above-ground teleporters, then follow the sloping path up the plateau.
Eventually, you’ll reach the coast, and you’ll be able to glide all the way to the island. You can grab the treasure once you’re there.
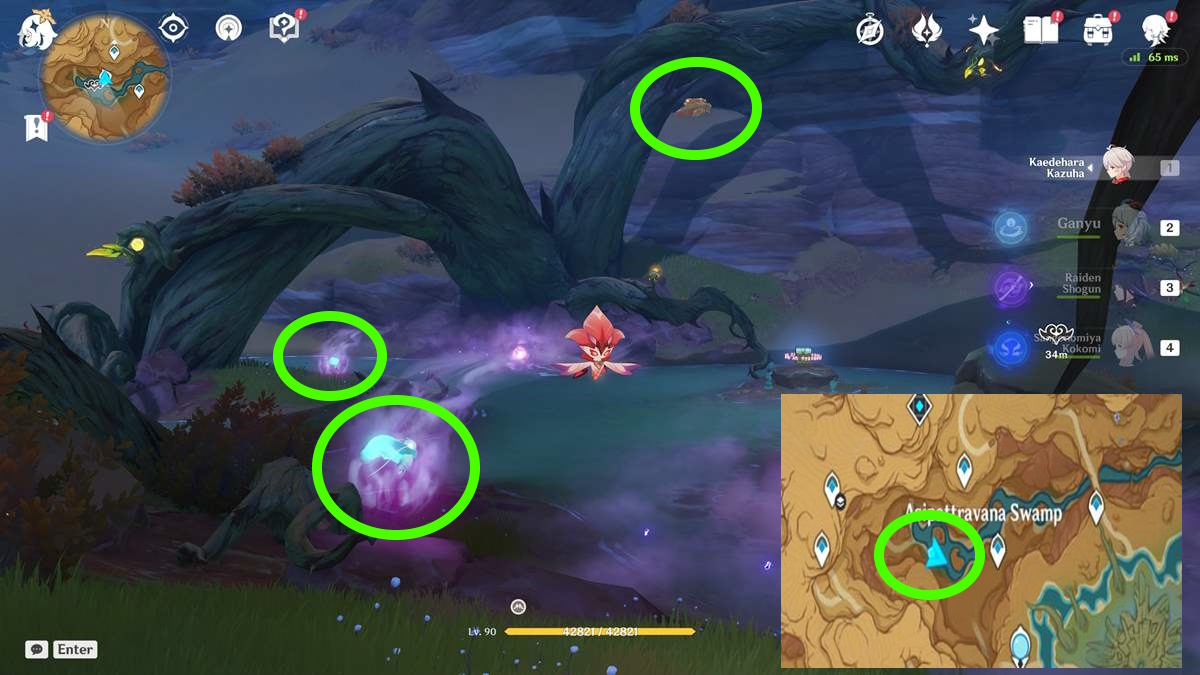
Luxurious Chest #5: Asipattravana Swamp Purple Mist
 Screenshot by GameSkinny
You’ll find three Seelie pedestals in the western portion of Asipattravana Swamp. However, you do need to start the Asipattravana Itihasa quest, as this allows Sorush to use her bombardment ability.
Interact with the large green bulbs to make the corrupted slimes appear from the purple mists. Then, interact with the Nirodha Fruit to give Sorush some bombs. Float above the slimes, then drop your payload to destroy them. You can free two of the Seelies in this manner.
As for the third and final Seelie, drop the Nirodha Bomb on the large amber deposit along the cliff. Once all three Seelies reach their pedestals, you’ll get your prize.
Luxurious Chest #6: Khvarena’s Light Shows — Nirodha
 Screenshot by GameSkinny
This Genshin Impact Luxurious Chest in version 3.6 requires the completion of As the Khvarena’s Light Shows: Nirodha. After exiting the ruins, you’ll spot the container in a hallway.
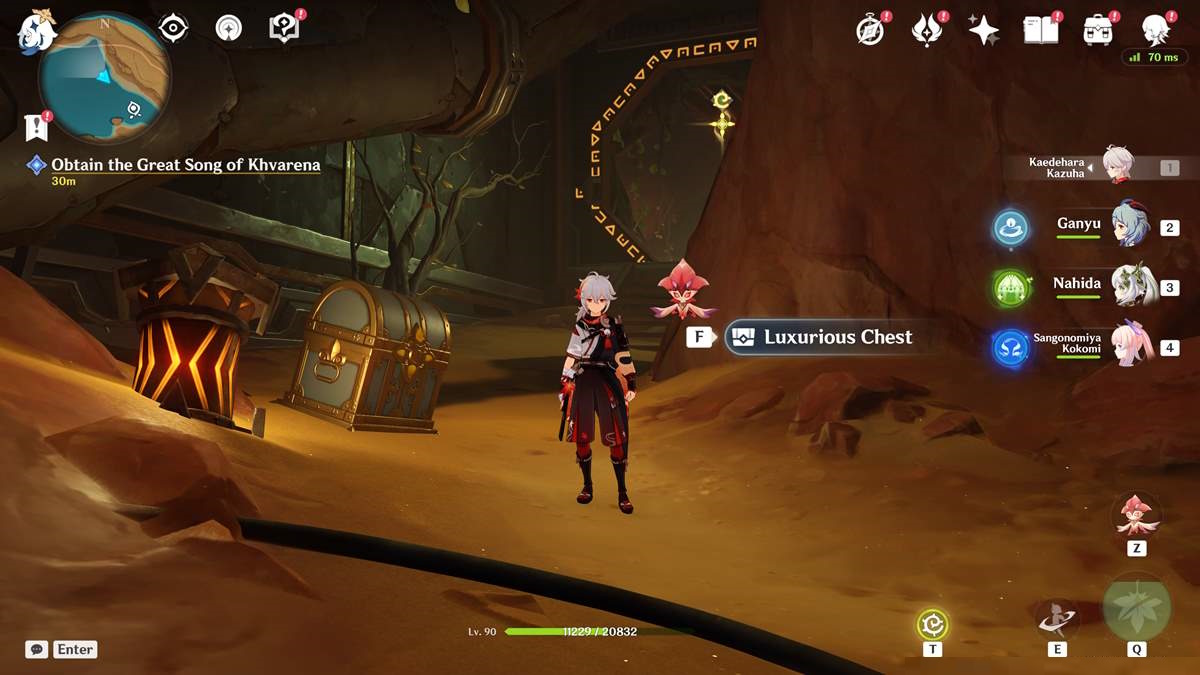
Luxurious Chest #7: Khvarena’s Light Shows — Completed
 Screenshot by GameSkinny
For this one, you have to complete the entirety of As the Khvarena’s Light Shows. At the end of this quest, you’ll battle Nasejuna and a Hydro Abyss Lector. After talking to Sorush, you’re given the next quest step, perhaps making you think that it’s time to head to another area.
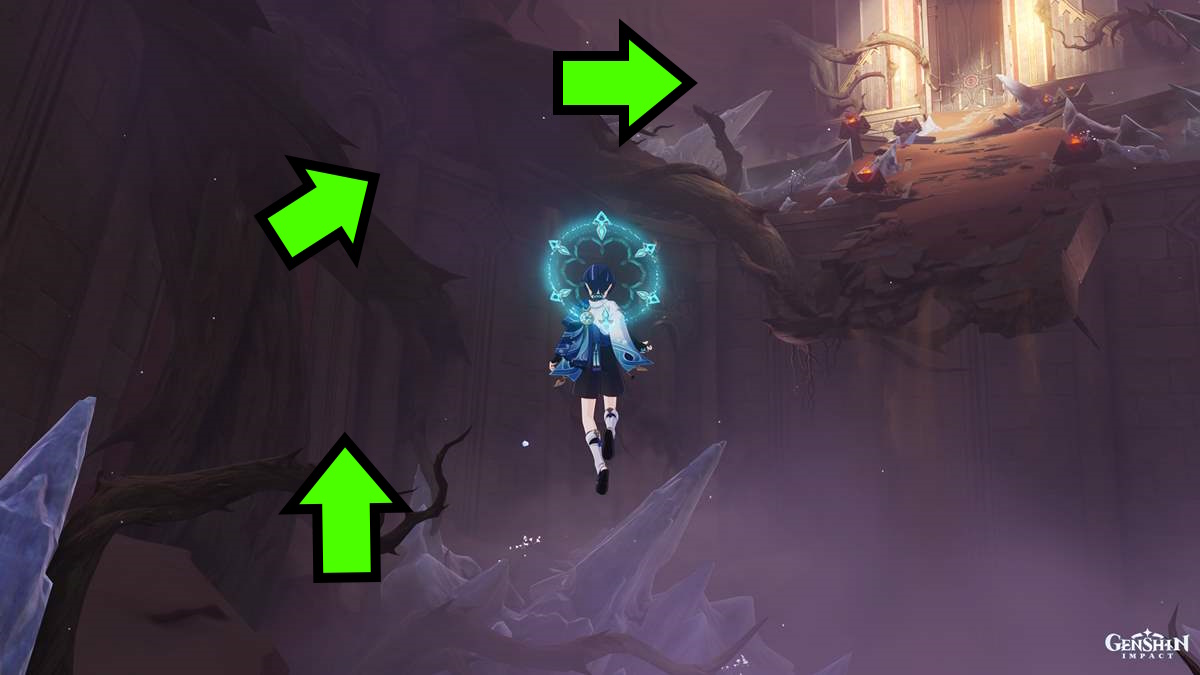
Don’t do that. Instead, head deeper into the inner recesses, and past the cave with the Hilichurl Rogue. You’ll reach an underground fortress with a gargantuan door.
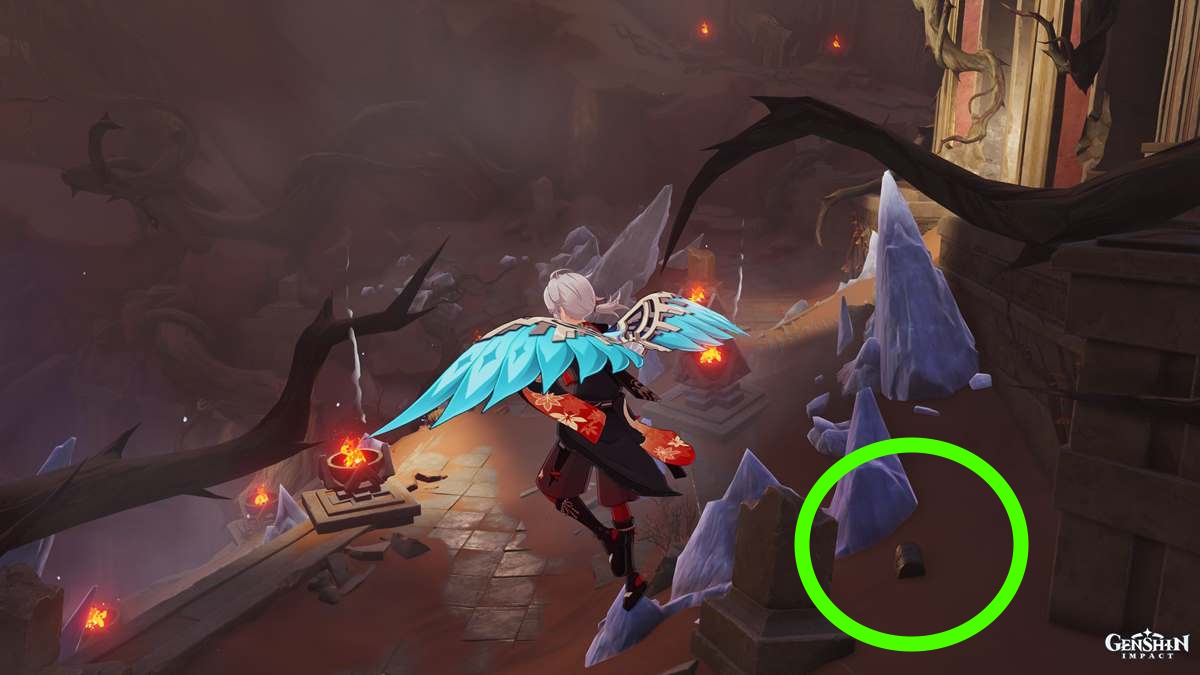
It seems there’s no way to cross the chasm, until you look to your left. There, you’ll be able to climb up the tree trunk, then its branches, and, finally, the stone ledges. On the opposite side, you’ll see the ornate container next to the flight of steps.
 Screenshot by GameSkinny
In any case, these are the Genshin Impact version 3.6 Luxurious Chests that we’ve found so far. We’ll update this article if we discover more. For now, you can visit our Genshin Impact guides hub for more on the game and A Parade of Providence.
Featured image by GameSkinny.


Published: Apr 14, 2023 01:45 pm