
The Zelda: Tears of the Kingdom Built to Carry puzzle will have you building with your Ultrahand ability in the Runakit Shrine. You’ll be moving a large orb with the help of some building materials and some cart tracks. This is our complete guide to the TotK Built to Carry Runakit Shrine puzzle solution.
Runakit Shrine Built to Carry Puzzle Solution in Zelda: Tears of the Kingdom
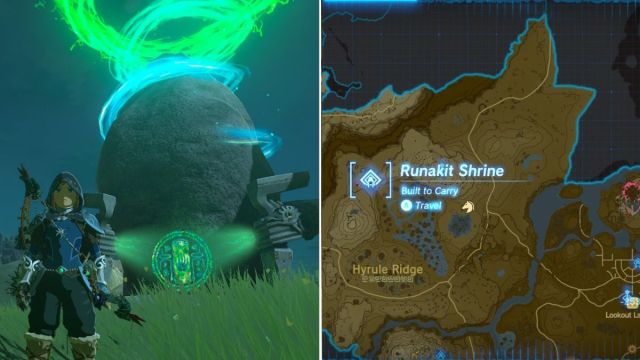
Runakit Shrine Location
The Runakit Shrine can be found directly north of Hyrule Ridge, which is northwest of Central Hyrule. The map above has its location marked, and the exact coordinates are -2530, 1170, 0178.
TotK Built to Carry Puzzle Walkthrough
You’ll be moving objects with Ultrahand and gliding from the get-go in Built to Carry. You’re going to move an orb around some railway tracks, but I quickly learned the orb won’t fit on its own. I found the puzzle to be pretty quick though, because you don’t have to deconstruct your build at any point. Here’s what you need to do:
- Enter the Shrine and you’ll see where the orb needs to go, but you need to get it first.
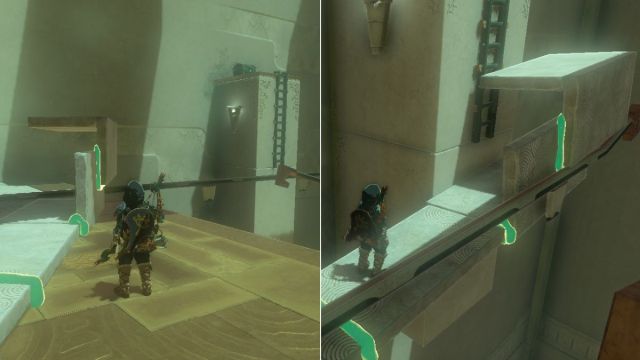
- Glide over to the platform with the large ladders across from the entrance.
- Climb the ladders, and you’ll see the orb on the next platform.
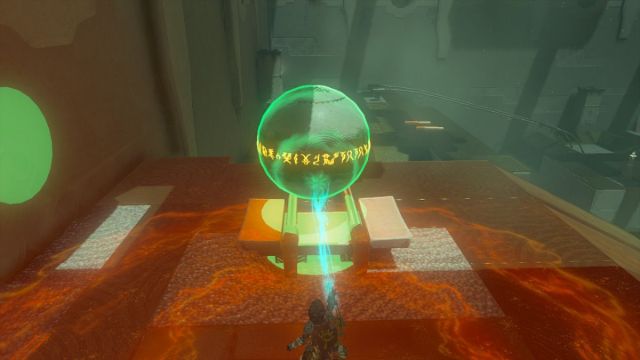
- Grab the orb with your Ultrahand ability and simply place it on the first tracks.
- Glide over to the Orb’s destination.
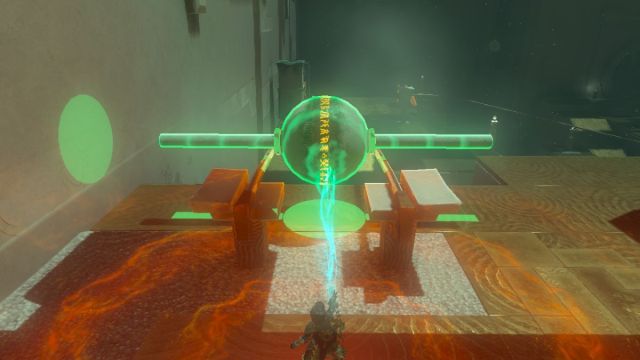
- Grab a pillar from the back wall of this platform with your Ultrahand ability.
- Attach it to the side of the ball with so that it’s connected by the very end of the pillar.
- Repeat that step for the other side of the orb.
- Move the orb onto the next set of tracks so that the pillars you attached keep it from falling through, as shown above.
- Glide over to the Orb’s destination.
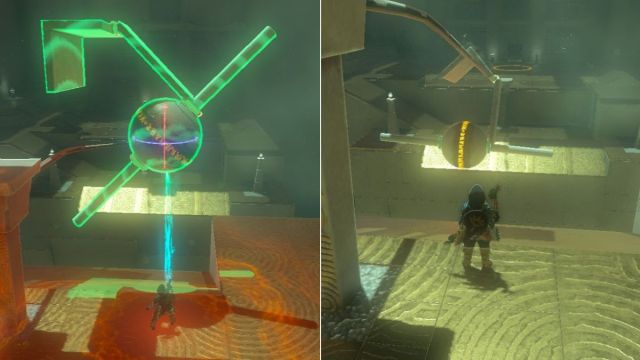
- Grab a rectangular stone from the back wall with your Ultrahand ability.
- Attach it to one of the pillars so that it stands lengthwise, as shown above.
- Grab one of the stone corner pieces from the back wall with your Ultrahand ability.
- Attach it to the rectangular stone so that it forms a makeshift roof over the orb.
- Move the orb to the track so that the archway grabs onto the rail, as shown above
How to Get the Built to Carry Runakit Shrine Treasure Chest
- You’ll notice extra materials left over on the platform, and the chest across from you connected by another rail in the corner.
- With your Ultrahand ability, connect two rectangular pieces to build a bridge-like structure.
- Connect the remaining corner pieces so that the side of one is parallel and on top of the other, as shown above.
- Connect the corner pieces to the bridge you built, and place it on the tracks so that the overhang catches the rail, and the rest leans on the wall.
- Walk across your bridge and climb to the ladder, carefully.
- The chest will contain a Construct Bow.

- Glide over to the Orb’s destination.
- Detach the orb from the rest of your build using your Ultrahand ability.
- Move the orb over to the drop-point.
- The final gate will open, you can enter it and receive your Light of Blessing!
Related: Missing Pathways Shrine Guide
Well, that’s it for our guide on solving the Zelda: Tears of the Kingdom Built to Carry puzzle in the Runakit Shrine. Be sure to check out our other guides at our Zelda: TotK guides hub.


Published: May 18, 2023 01:53 pm