Serious spoilers ahead: we’re talking about Vampire: The Masquerade – Swansong‘s late game, to get the No Survivors achievement.
Now that the vampires of Boston have figured out who their enemy is, Galeb Baxory has been sent to deal with them. His target is Walter Stanford, a leader within the Second Inquisition, but Galeb’s got a long way to go to reach Stanford.
Here’s how to mop up Stanford’s subordinates and unlock the No Survivors trophy / achievement.
How to Leave No Survivors in Swansong
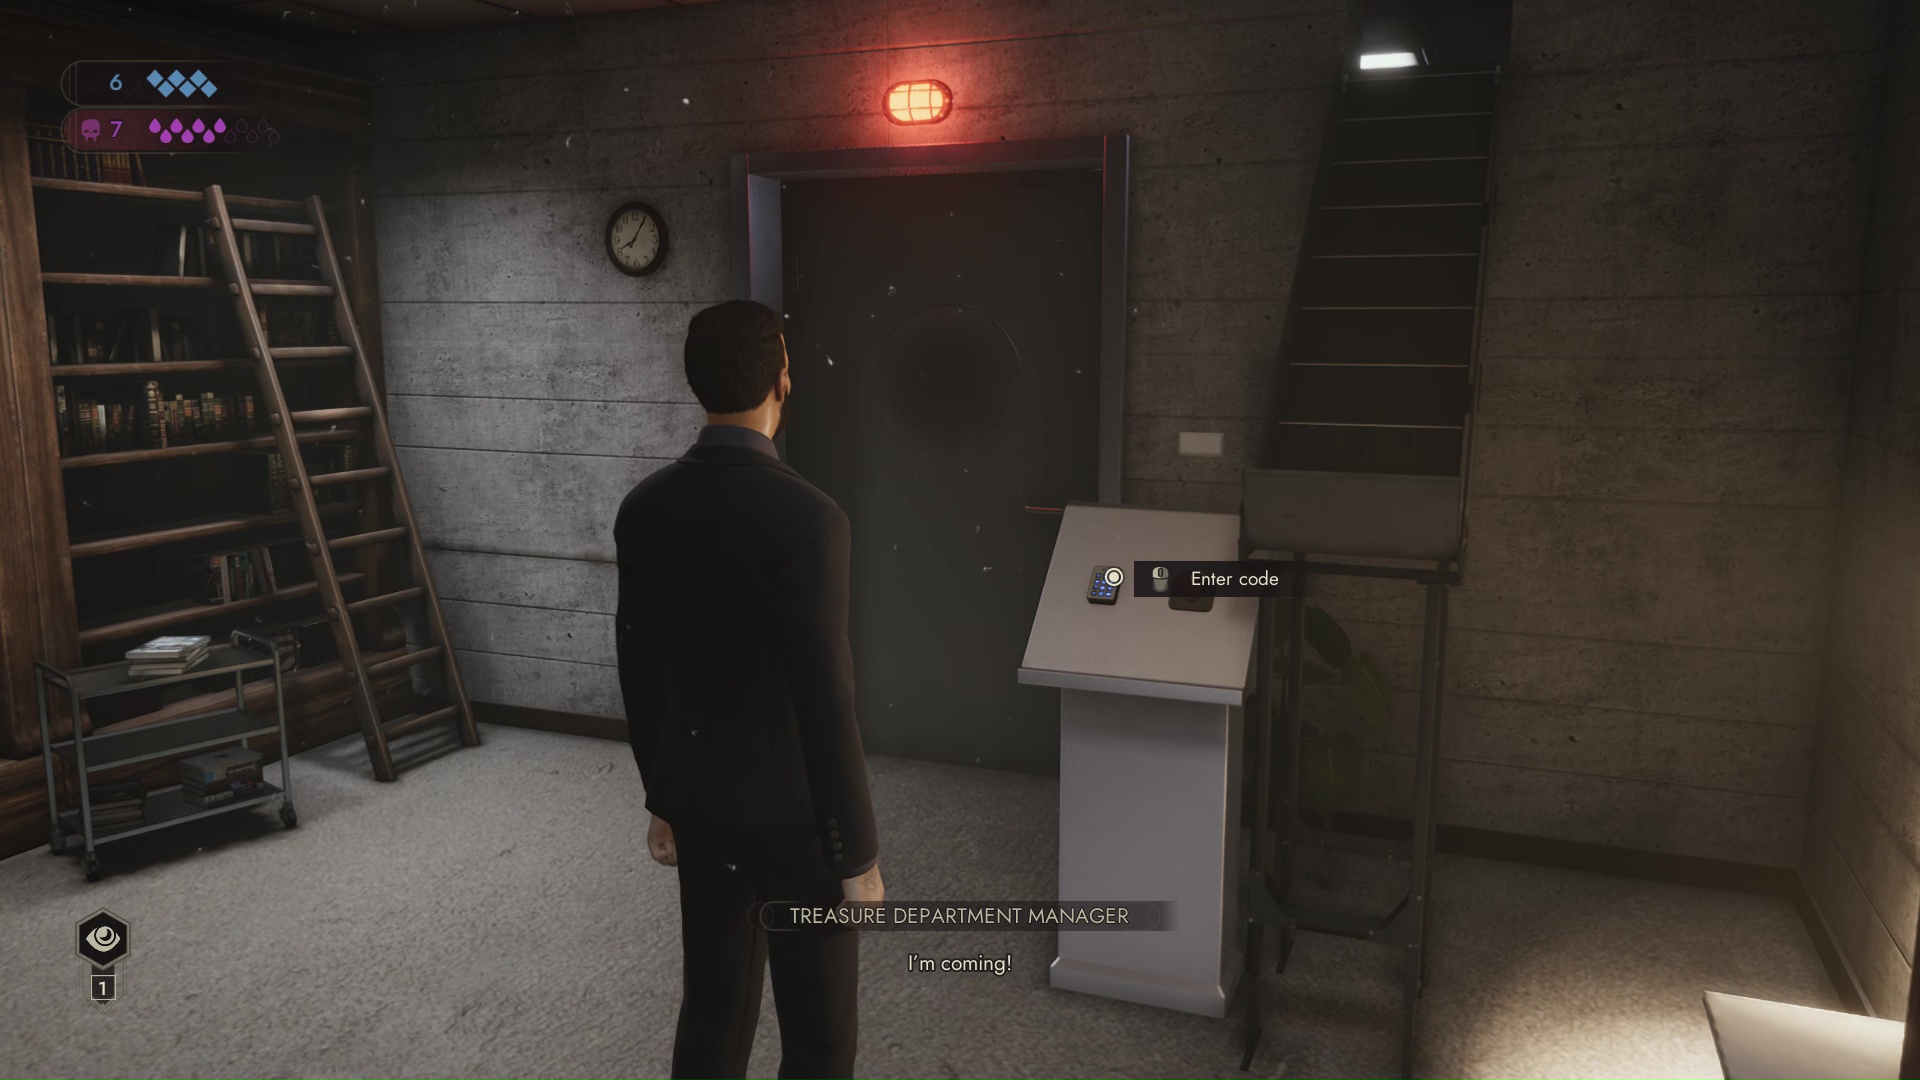
The primary challenge of Galeb’s first scene in the SAD base is how to get a security implant with the right level of clearance, in order to use the SAD central computer to track down Stanford.
The red implant you want is only held by three of the Inquisition’s operatives—Chiara Favarone, Joseph Manneh, and Elle Gallagher—all of whom are under lock and key. Your challenge is to figure out how to reach them, kill them, and take at least one of their implants, ideally without informing the entire base that you’re a vampire infiltrator.
In theory, you can go after these operatives in any order. On a blind run, however, you’re likely to luck into the solution for Favarone first, as it’s the most intuitive.
It also appears to be the developers’ intended path through the scene. You can reach Manneh without a red implant, but it’s not easy to figure out how; I actively thought it was impossible until I sat down to write this guide.
Similarly, it’s possible to kill Gallagher without an implant if you’ve got the right character build, but doing so uses up some Willpower points that you’d be better off saving for later. The “cheap” method of getting to Gallagher requires you to get at least halfway down Favarone’s path first.
More importantly, once you start messing around in this scene, you rapidly discover that not all red implants are created equal. While you can upgrade to either Manneh or Gallagher’s implant and use them to complete the scene, neither of them give you the same level of access that Favarone’s does.
Chiara Favarone first
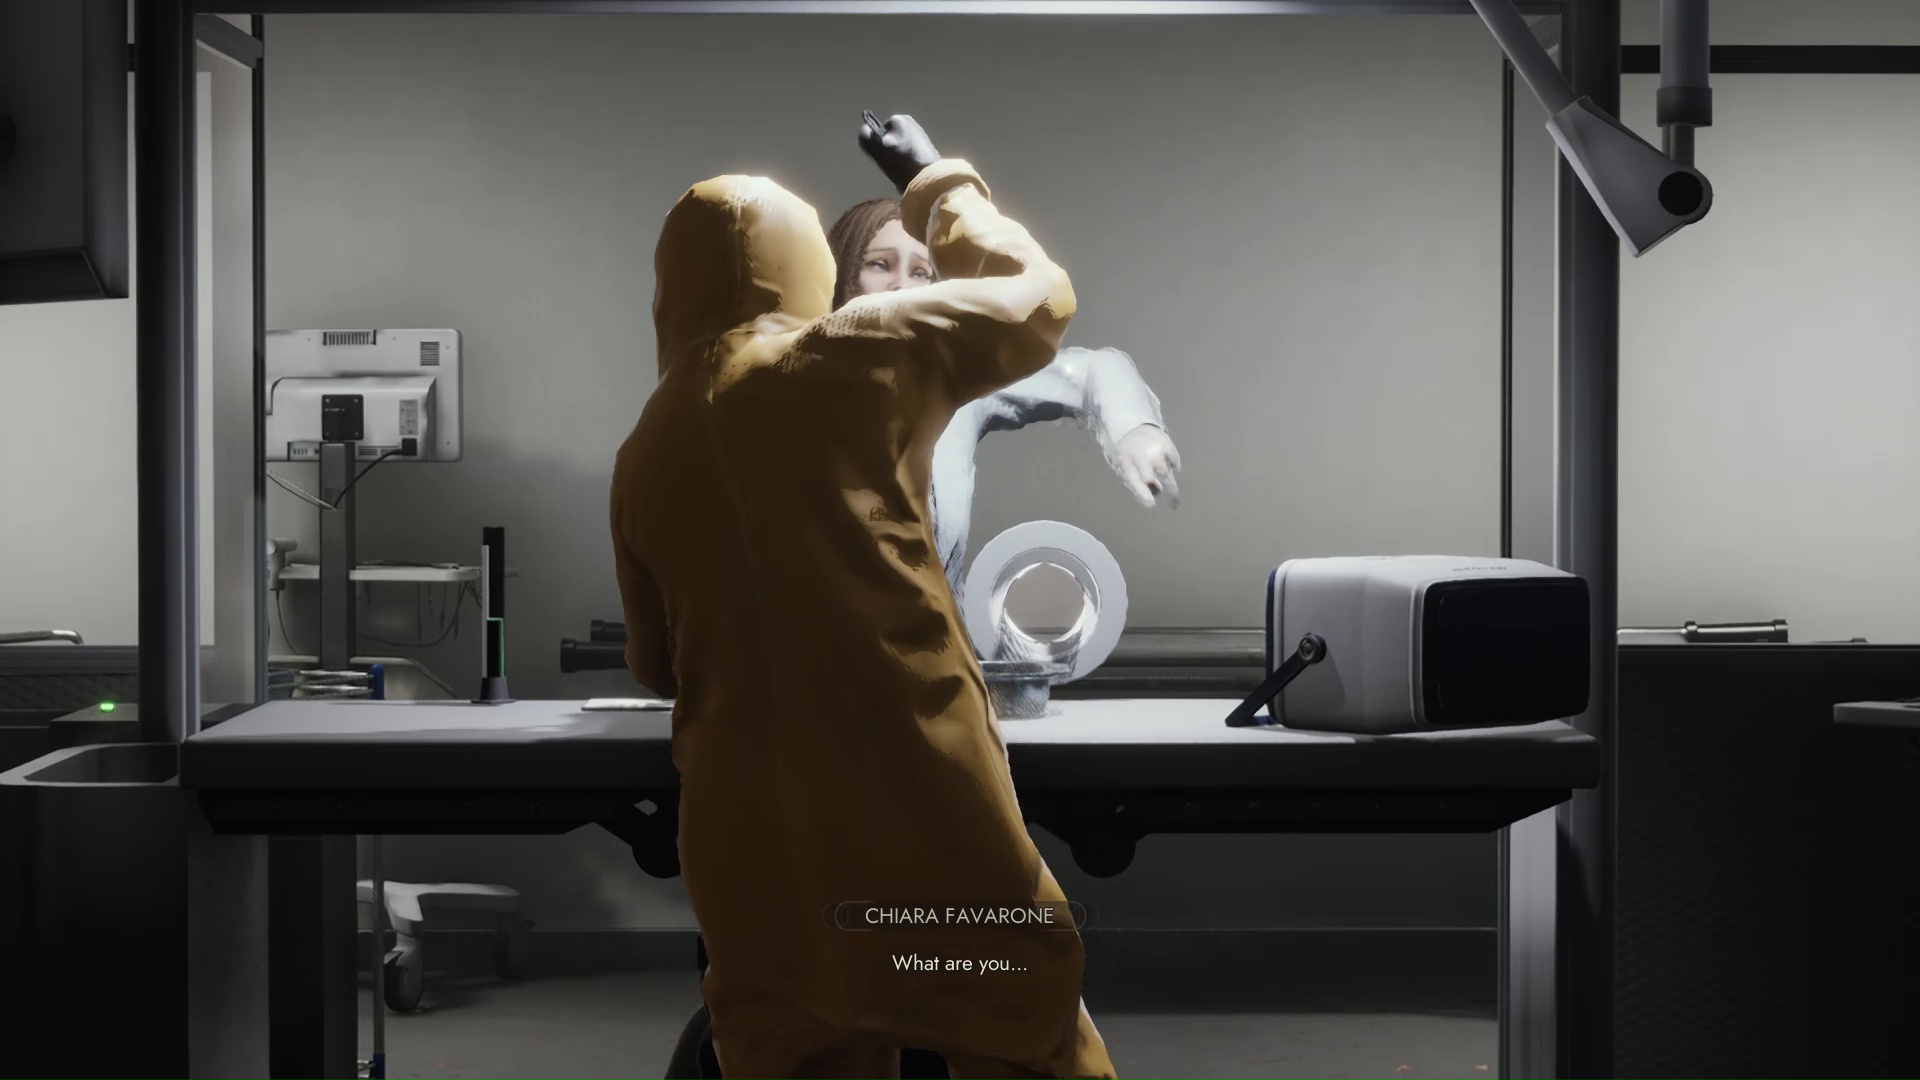
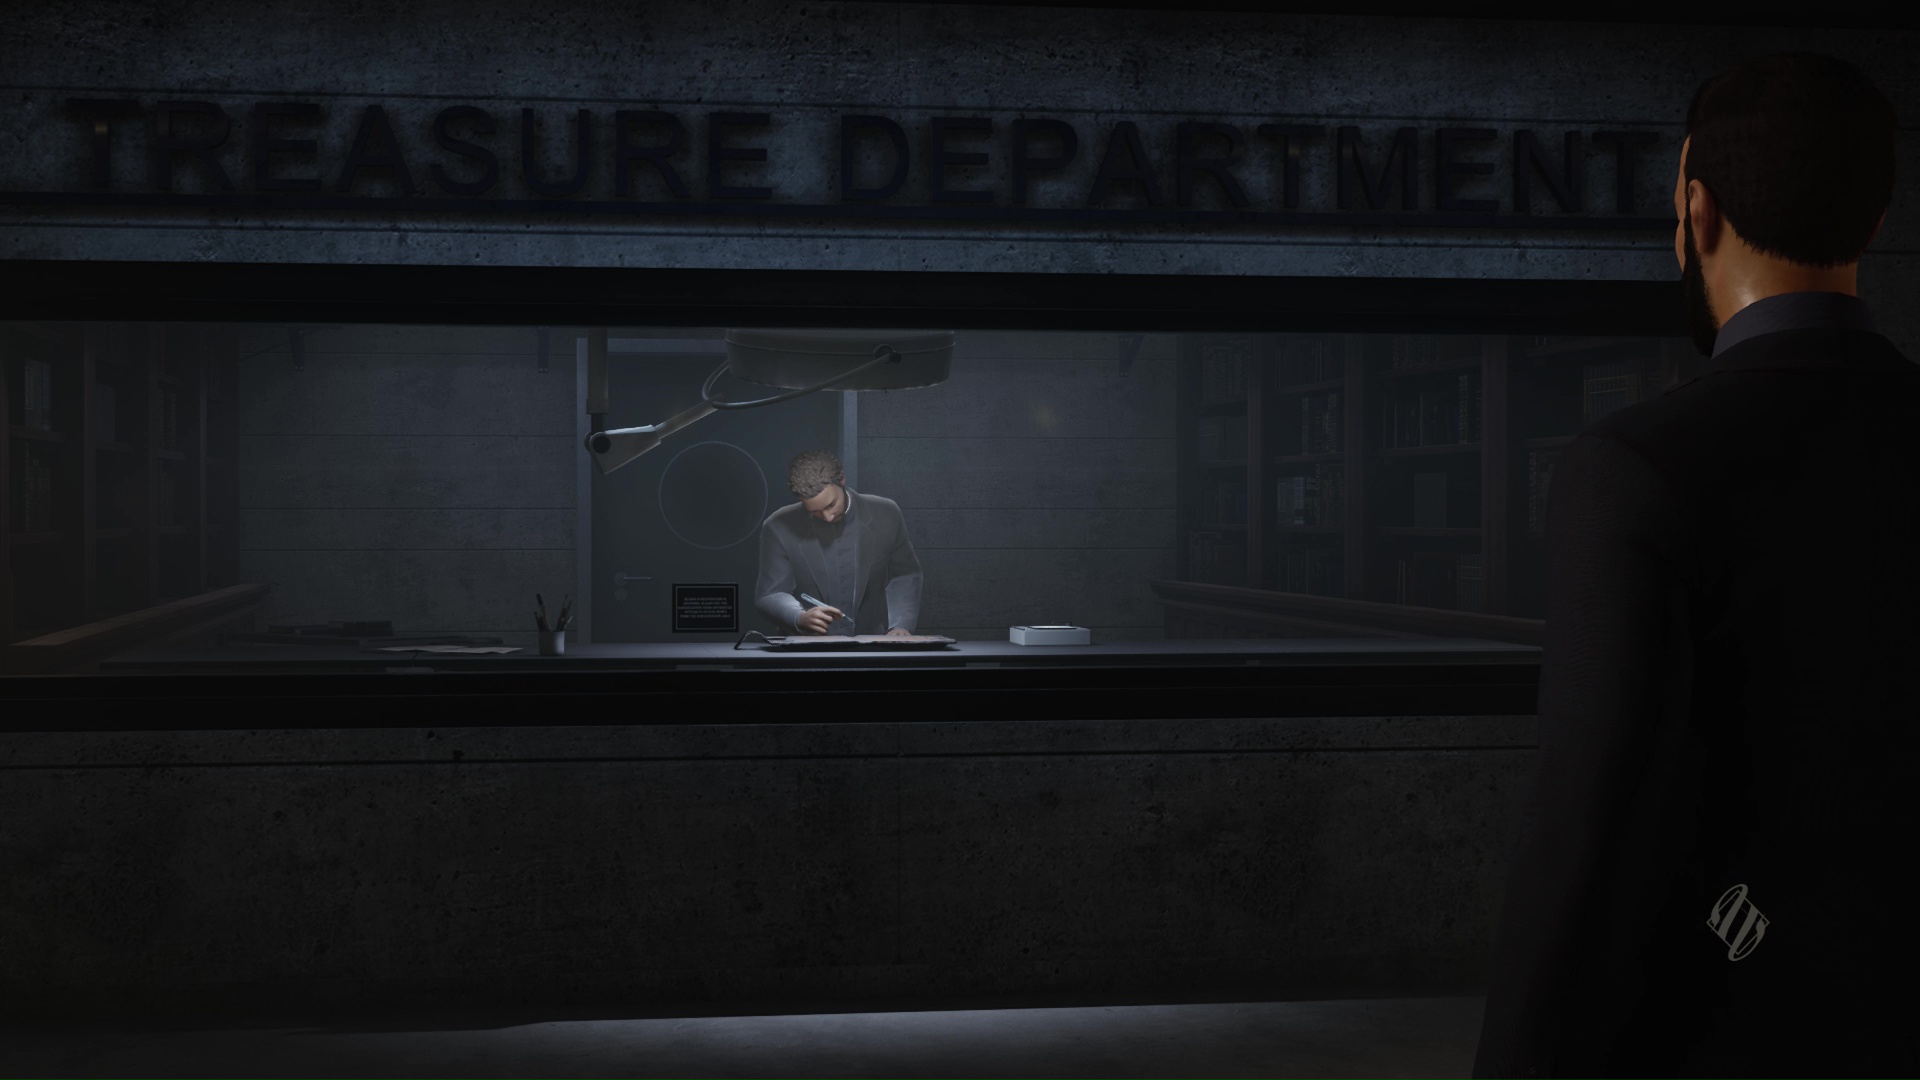
Hang a left from the entrance to find the clinic. Favarone is visible from the operating theater’s observation room, but she’s locked herself behind a door that requires her clearance.
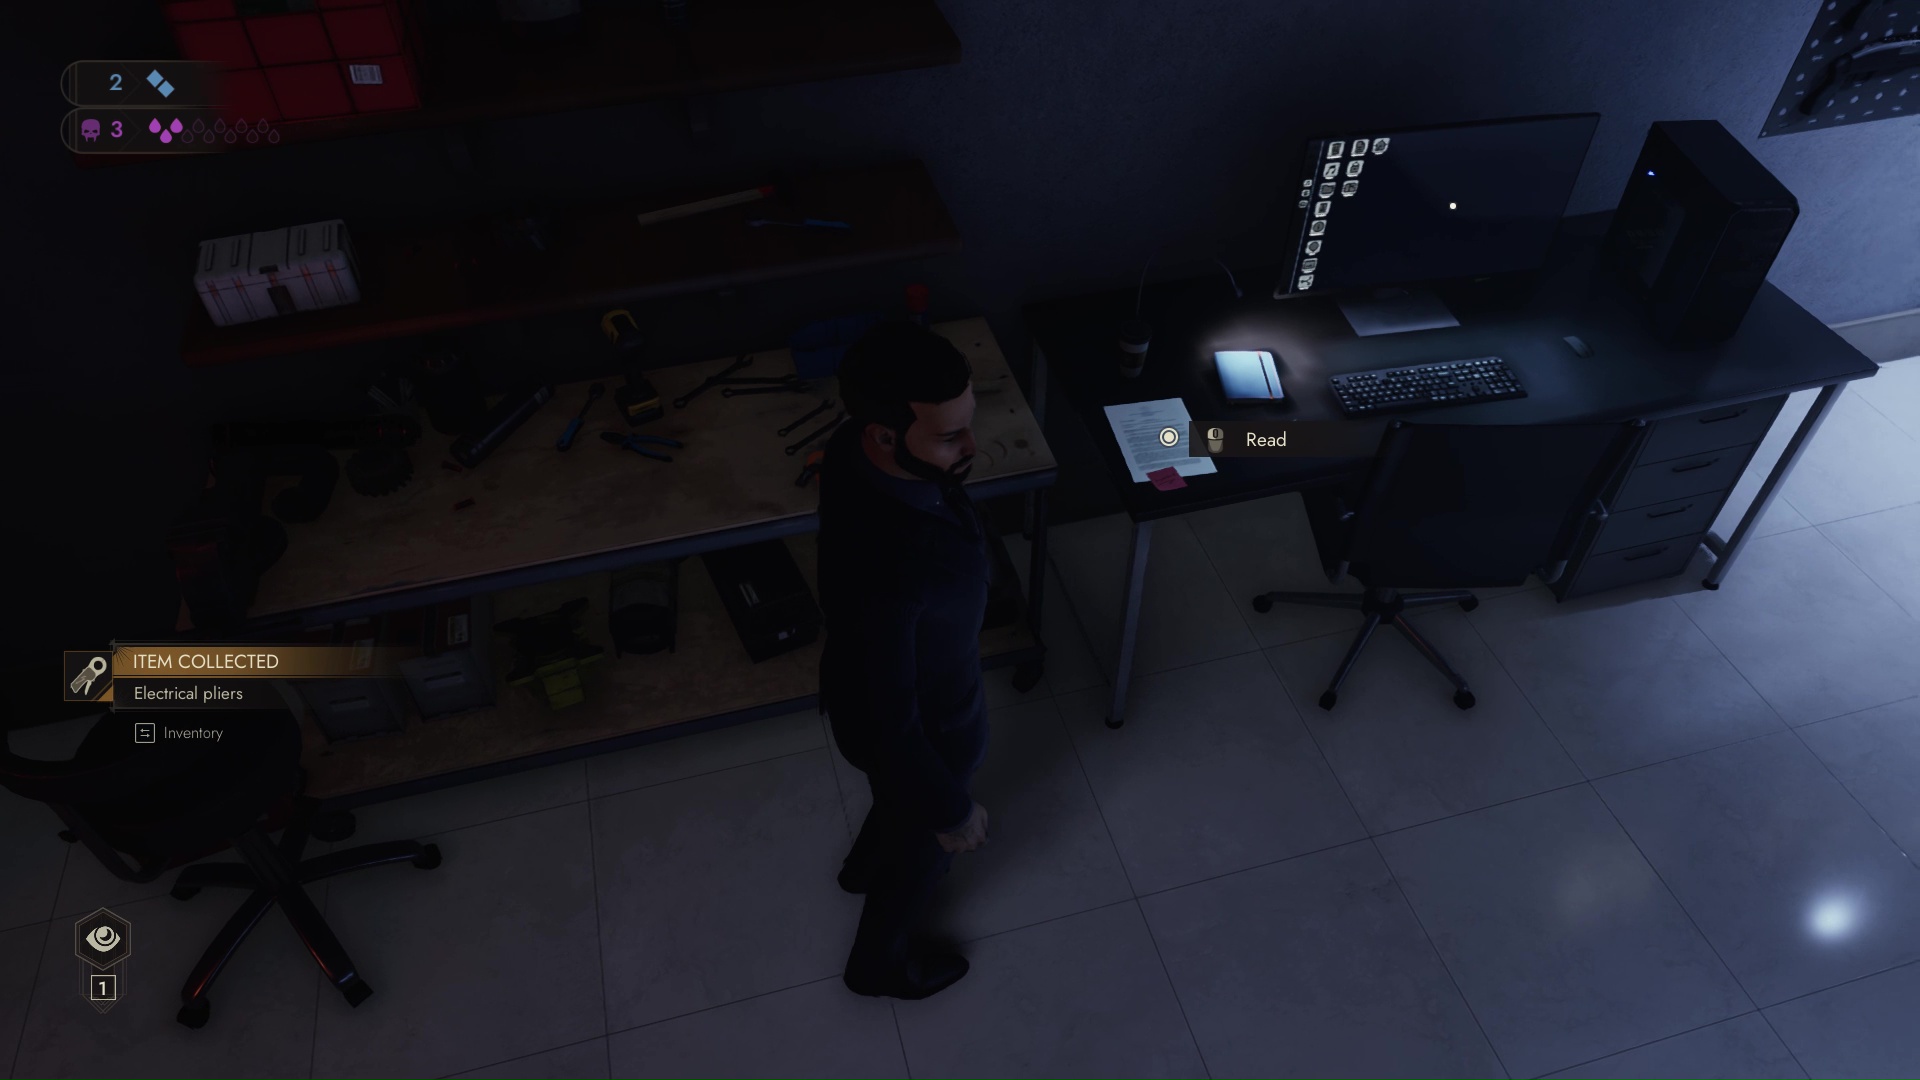
If you visit her long-suffering subordinate Dr. Henry’s room, you can find a hint to his locker code on a post-it note attached to a monitor: it’s the number for his “lucky patient.”

Go through Henry’s email (above) on the working computer — he’s too busy to complain — and you’ll find that that patient is #1492.
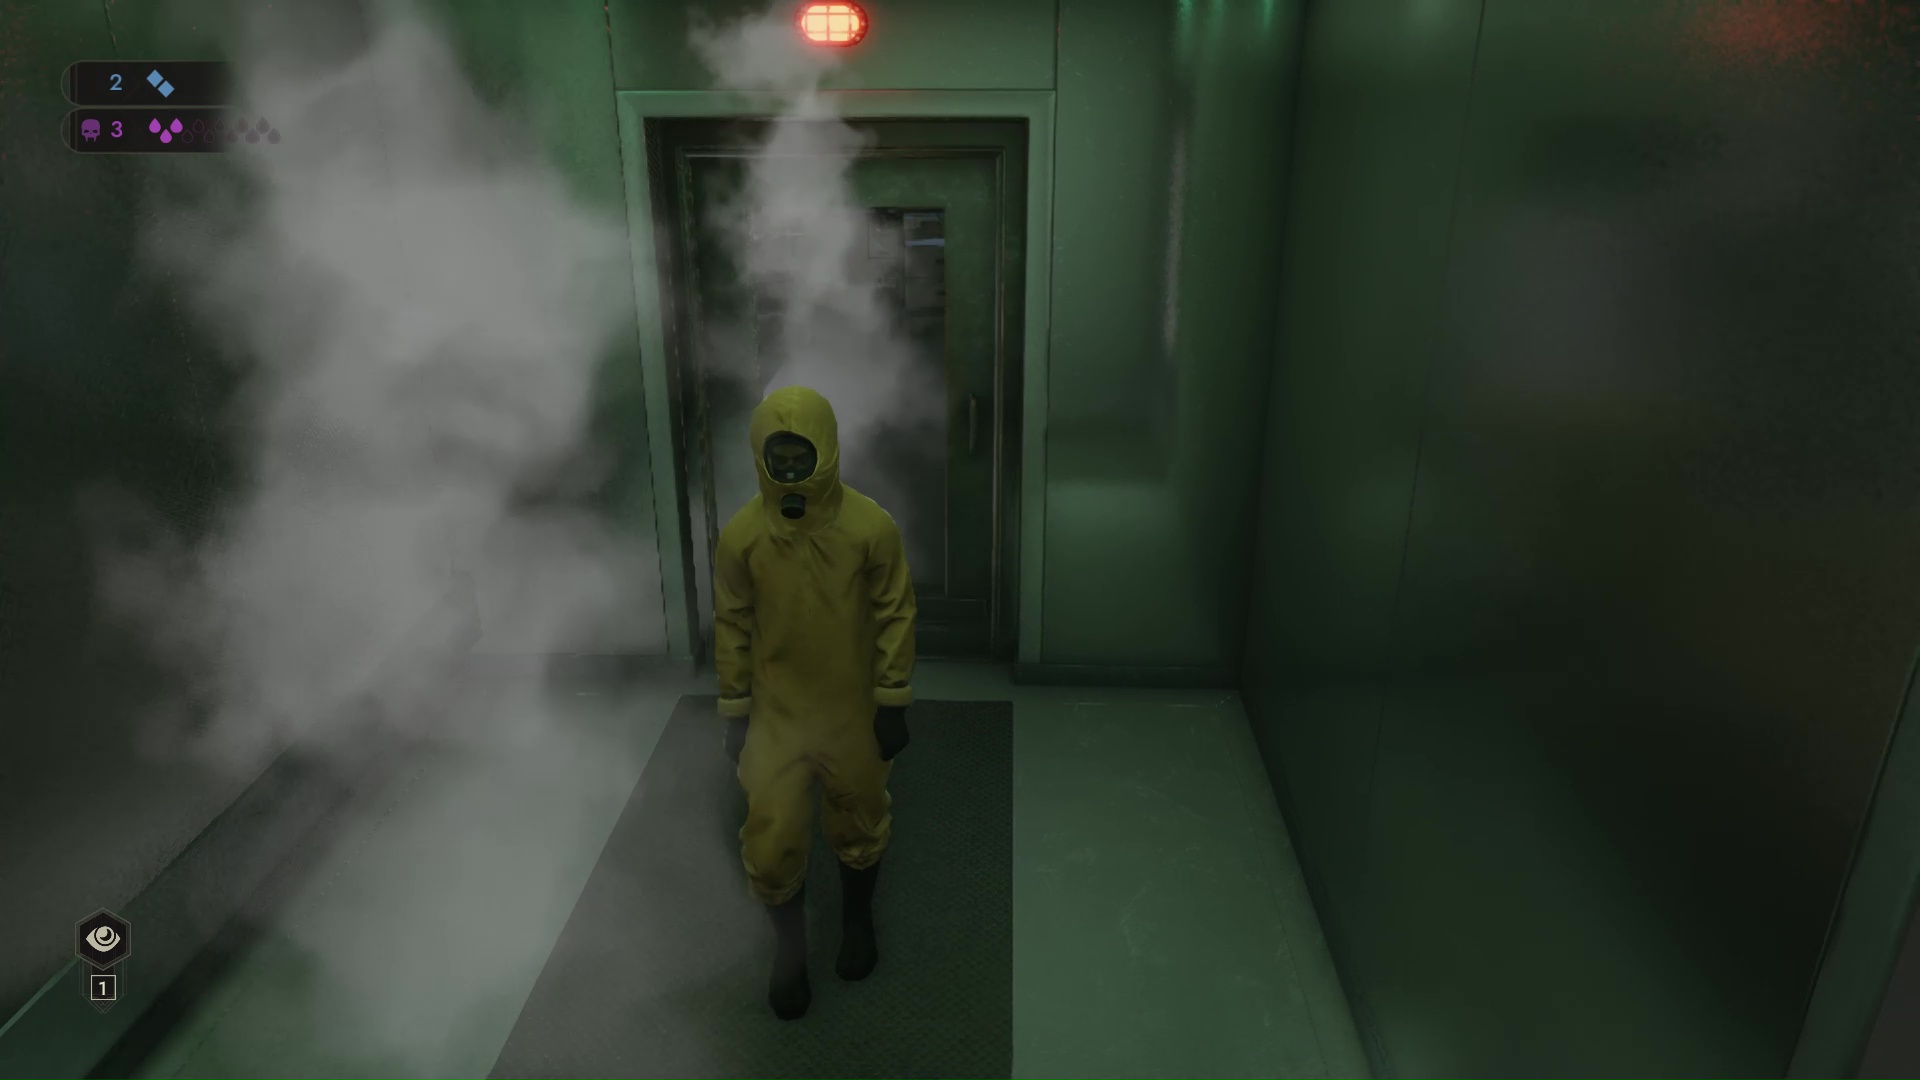
This code lets you open Henry’s nearby locker and put on his hazmat suit. Sit through the decontamination procedure and go into Favarone’s theater.
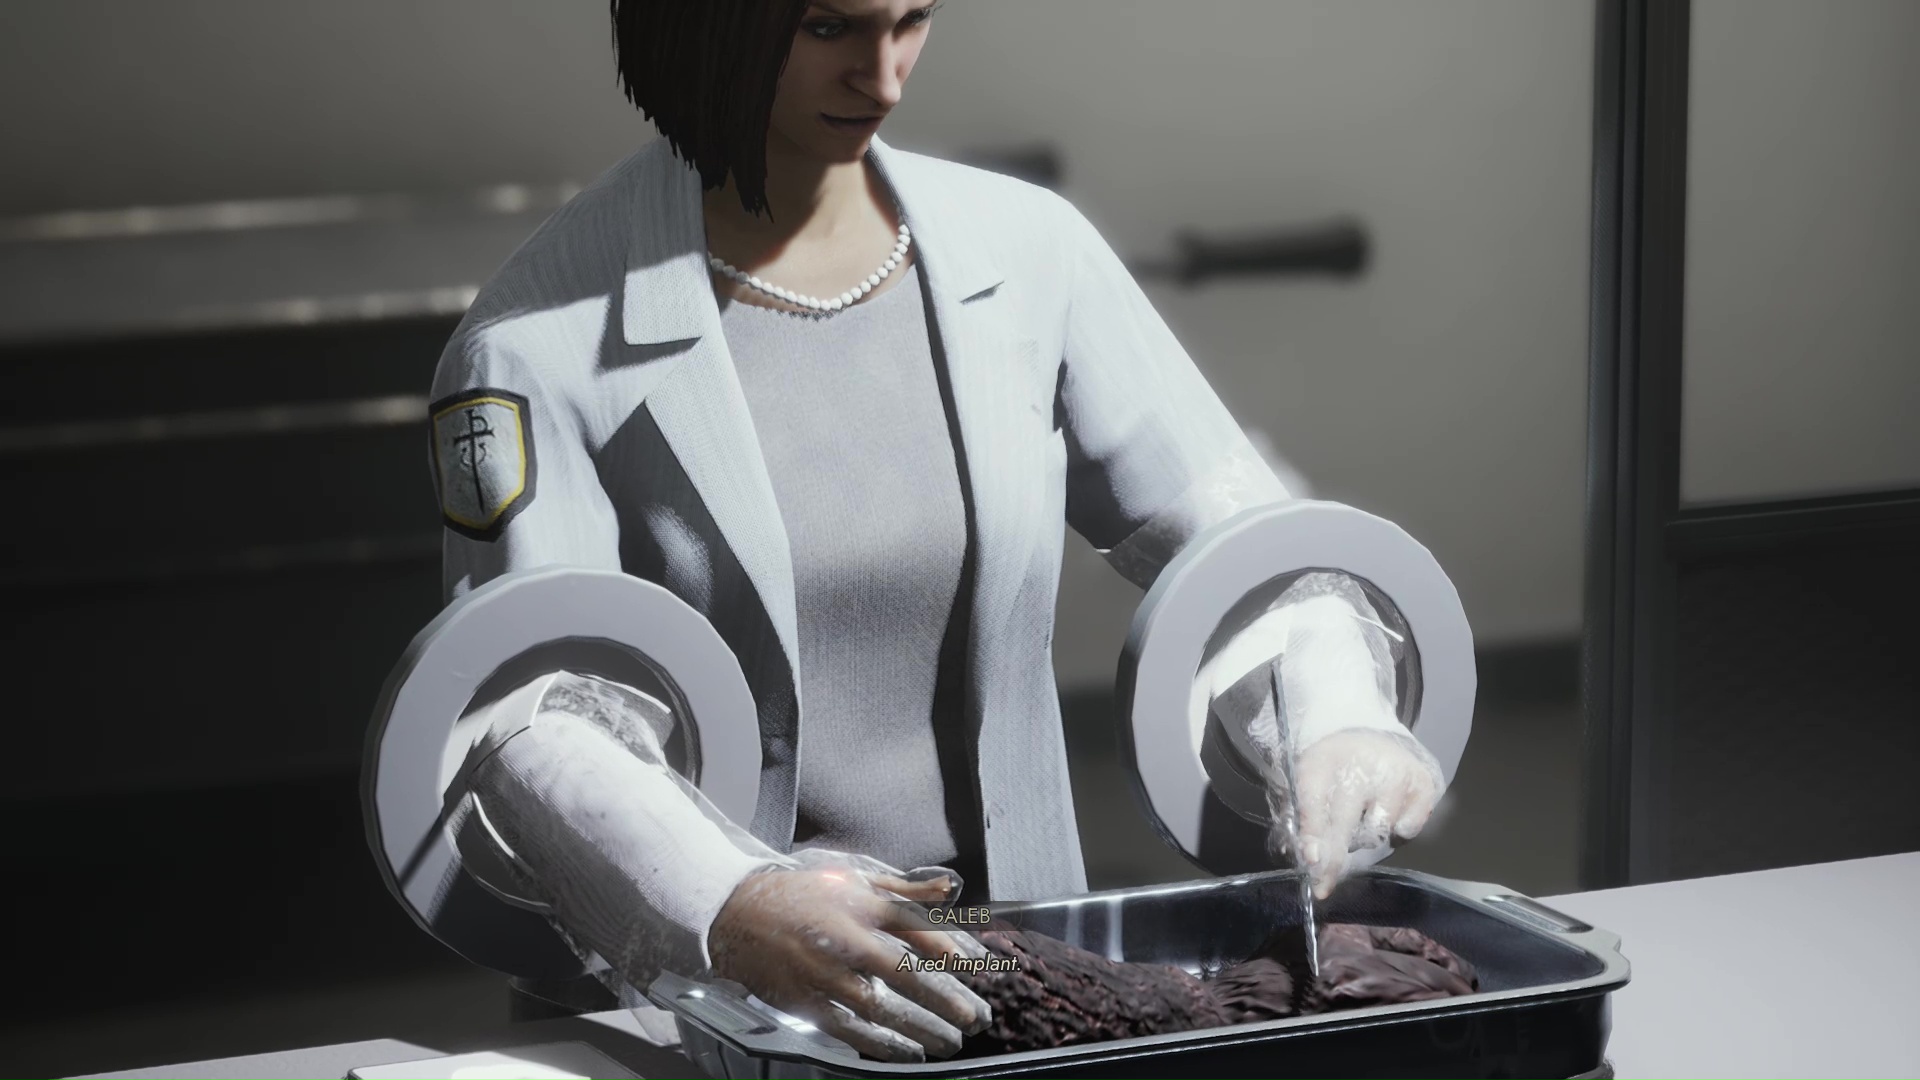
If you try to grab her implant, you’ll end up spoiling the experiment she’s working on. To replace it, she’ll give you the keycard for the cold storage room. This area is not only one of the three safe rooms in this scene, but on the shelf to your right as you enter, it contains the security key you need to deal with Gallagher.
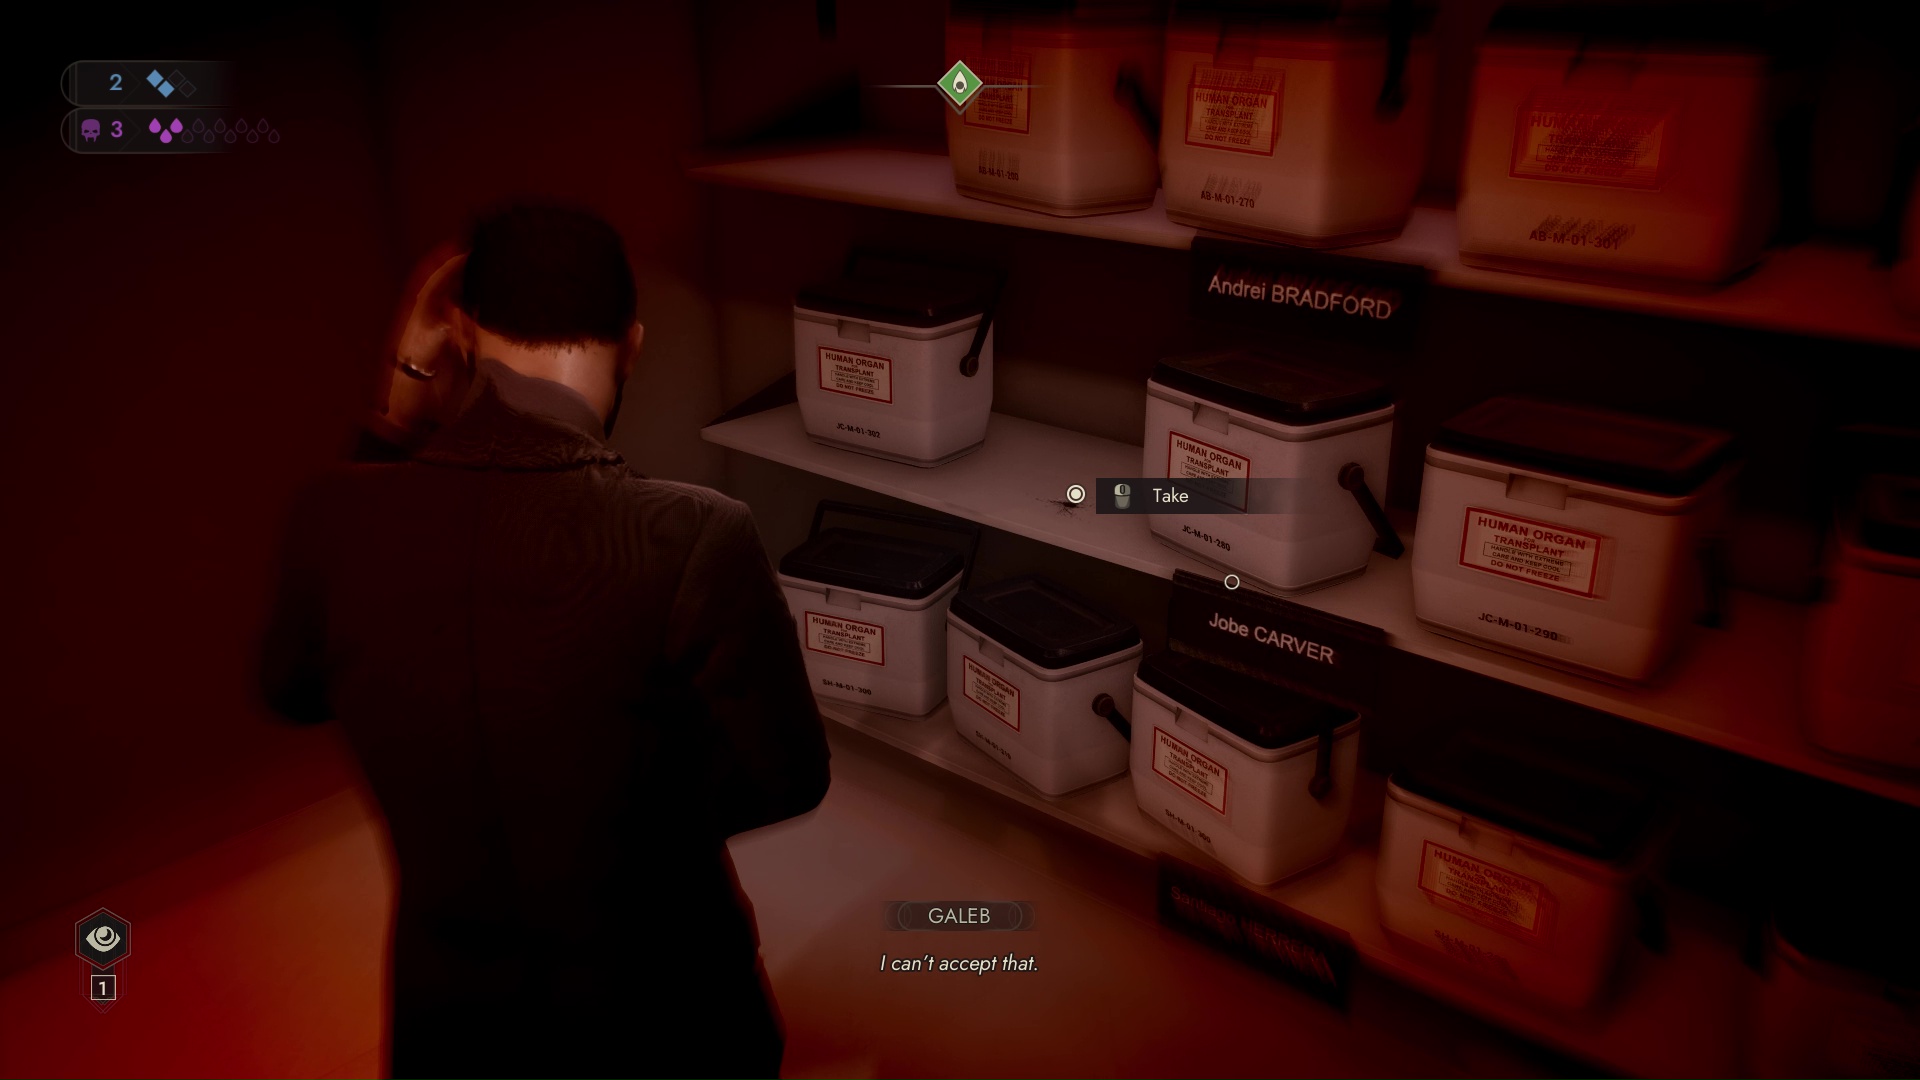
Go to the shelf marked with Jara Drory’s name and open the second cooler on the left to get Jara’s cerebellum. Return to the operating theater with it and place the brain in the drawer. Once Favarone starts her new experiment, you can grab her implant, which kills her in the process.
Now you can upgrade to Favarone’s implant using the console in the hub area, near the freight elevator. This gives you the run of this level, and makes it easy to reach and eliminate both remaining Inquisition members.
You can also circle around through the clinic and use Favarone’s implant to reach her corpse. While she isn’t carrying anything else you need, there’s a rare and valuable Tremere concoction in her workspace.
Note: If you duck out right now and check the central computer to finish the scene without doing anything else, you’ll unlock the Precision Job trophy/achievement. To get No Survivors, keep following along.
To take out Manneh, use the thermostat next to the observation window in the library to raise the humidity in his workspace. This destroys the rare books he’s working on, which counts as a bonus objective, and gets him out in the open.
Pick whatever you like during the ensuing Confrontation and once it’s over, opt to kill him. You can proceed past Manneh into his workspace and open the small safe on the bench, which requires either his implant or Favarone’s, to find a Tremere brooch.
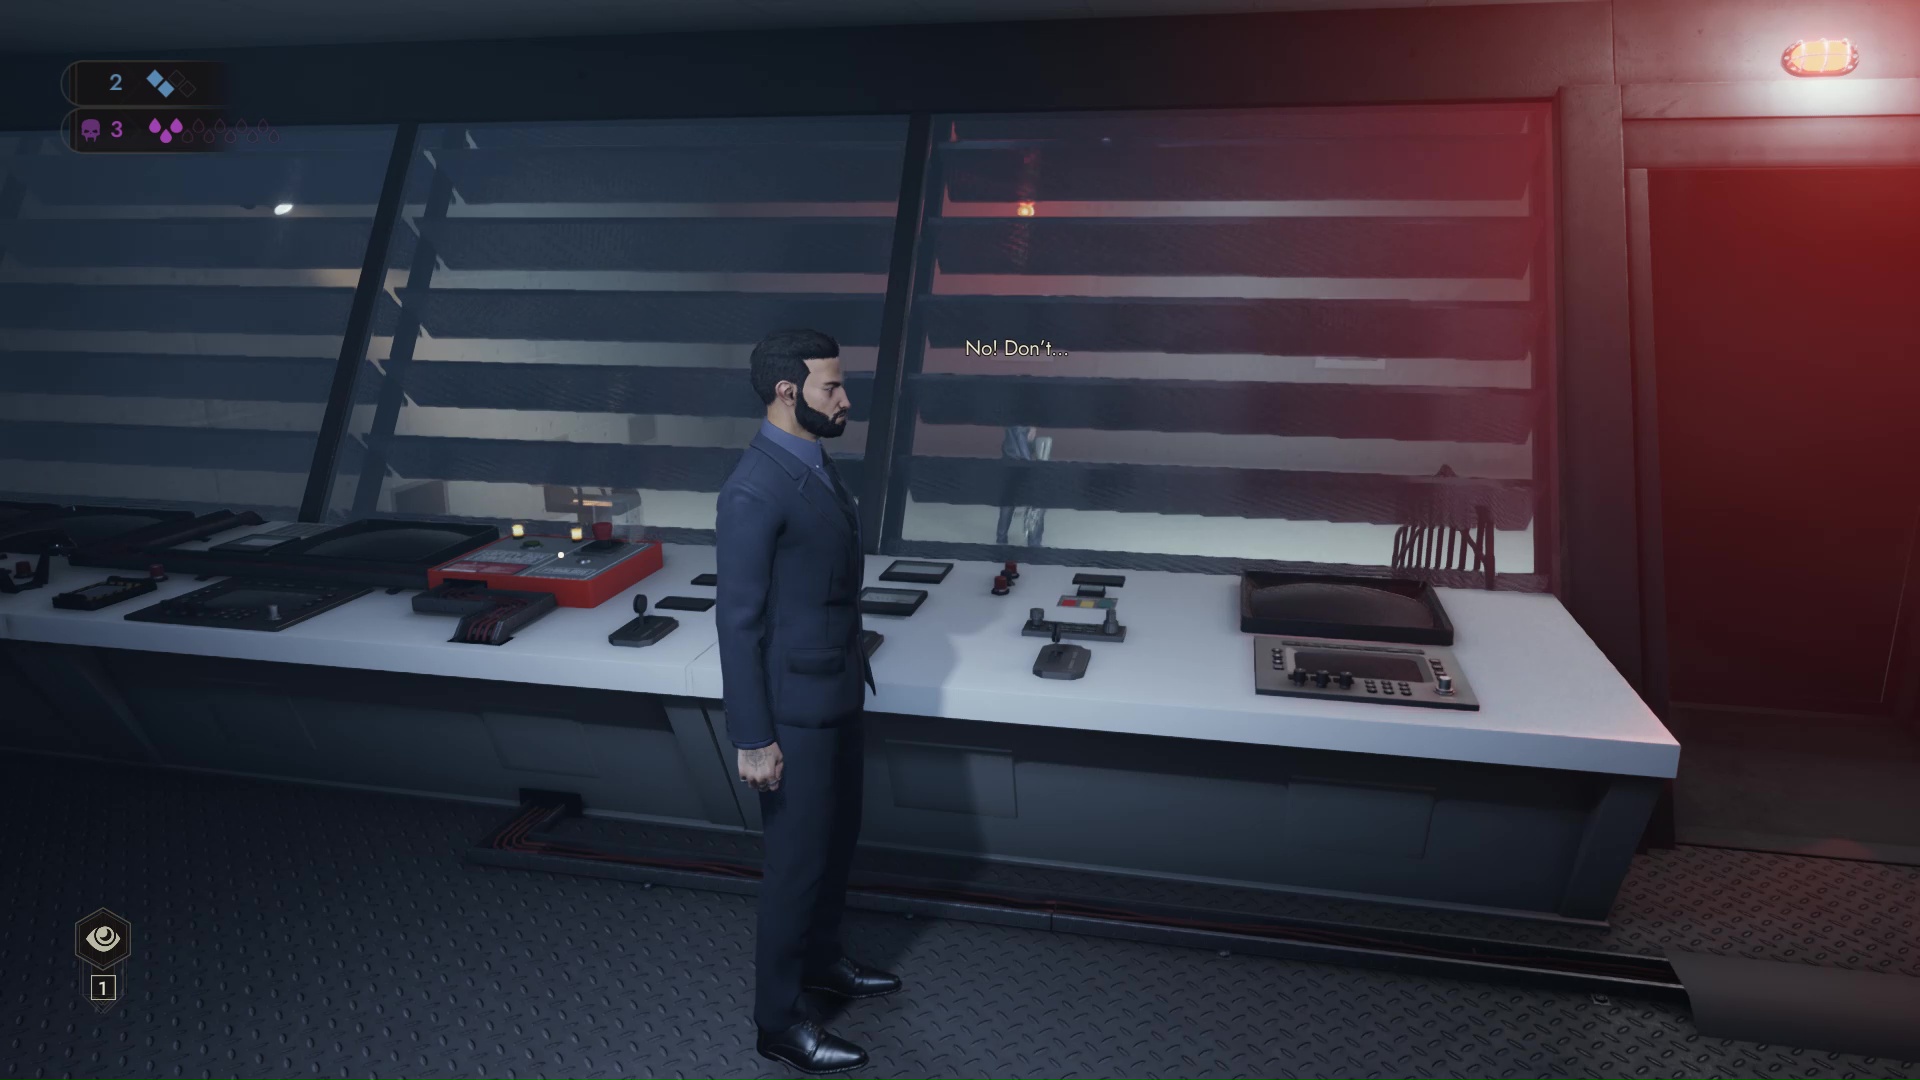
To get to Gallagher, head into the Pyre wing of the SAD base and go through the door on the far side. She’s test-firing weapons at the moment, and is locked behind a door that can only be opened from the inside. You’re going to have to pull some Agent 47 action here.
Your new security key fits the console on the left side of the test area, which lets you use its pyrolysis feature to incinerate Gallagher. Her implant, thankfully, will survive the experience.
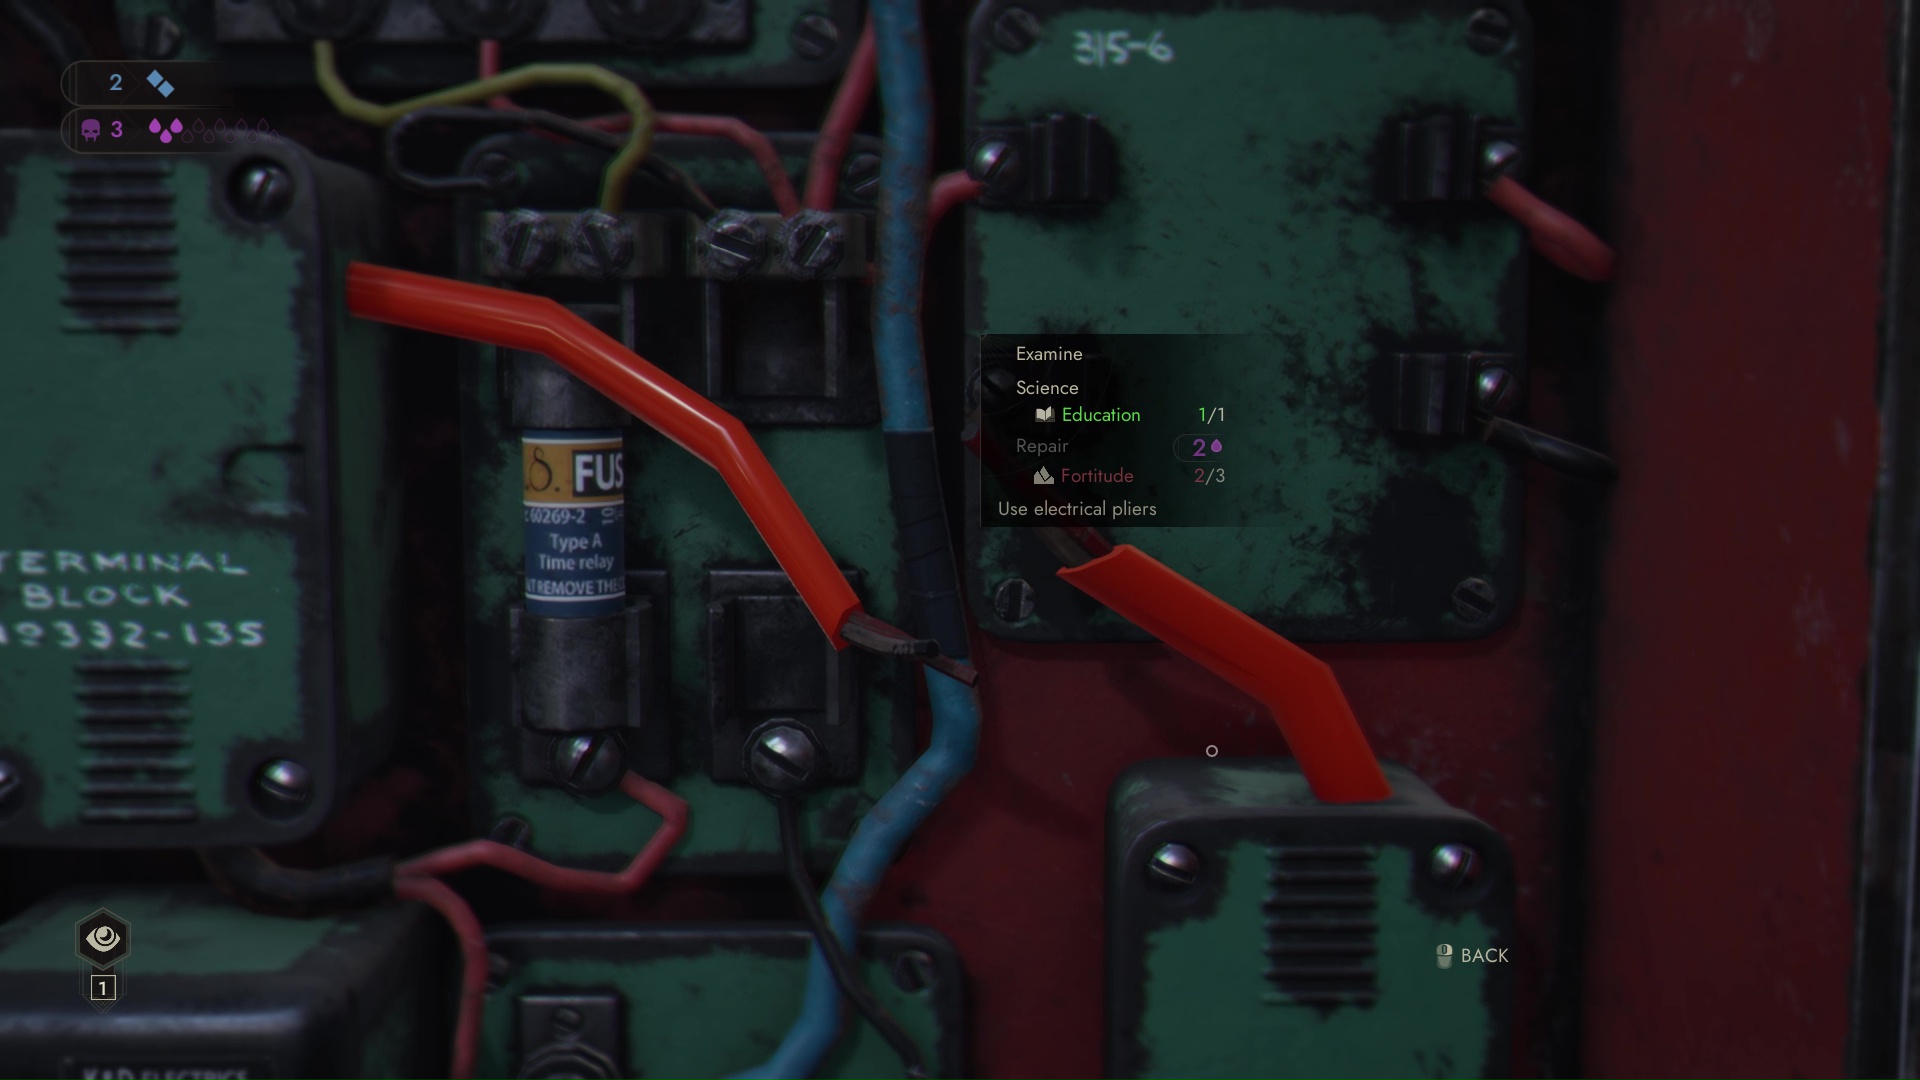
Before you kill Gallagher, however, open the storage room in the test area’s control booth with Favarone’s implant. Inside, grab the electrical pliers.
Back out in the test area, open the fusebox on the wall and use the pliers to fix the damaged wiring. Now the green button on the console will work, which shuts the door on the safety compartment in the test area.
Press it, then use the red button to fry Gallagher and press the green button again. Now you can read the book she brought into the test area with her, which fulfills a bonus objective.
That leaves you with nothing else to do but finish the scene, which should unlock No survivors. Just for fun, though, let’s talk about what we’d need to do if we were going to leave Favarone until last.
Elle Gallagher First
As noted above, you’ll need a fairly specialized build if you want to kill Gallagher first and get all that you need out of the process. Specifically, you need Security 3 and, of all things, Fortitude 3.
From the central computer room, you can walk down the stairs and straight into the test room’s control booth without incident. The Security skill lets you pick the lock on the console and fire the pyrolysis, but that destroys Gallagher’s book.
Since you can’t get to the electrical pliers, you instead have the option to fix the wiring in the fusebox by hand, which costs 2 Hunger and requires Fortitude 3, so Galeb’s tough enough to handle live current. This lets you close the safety compartment and protect the book.
Joseph Manneh first
You can get Manneh out of his workroom without Favarone’s implant, but it’s a little ridiculous. It’s technically a puzzle, but appears to only have three oblique hints.
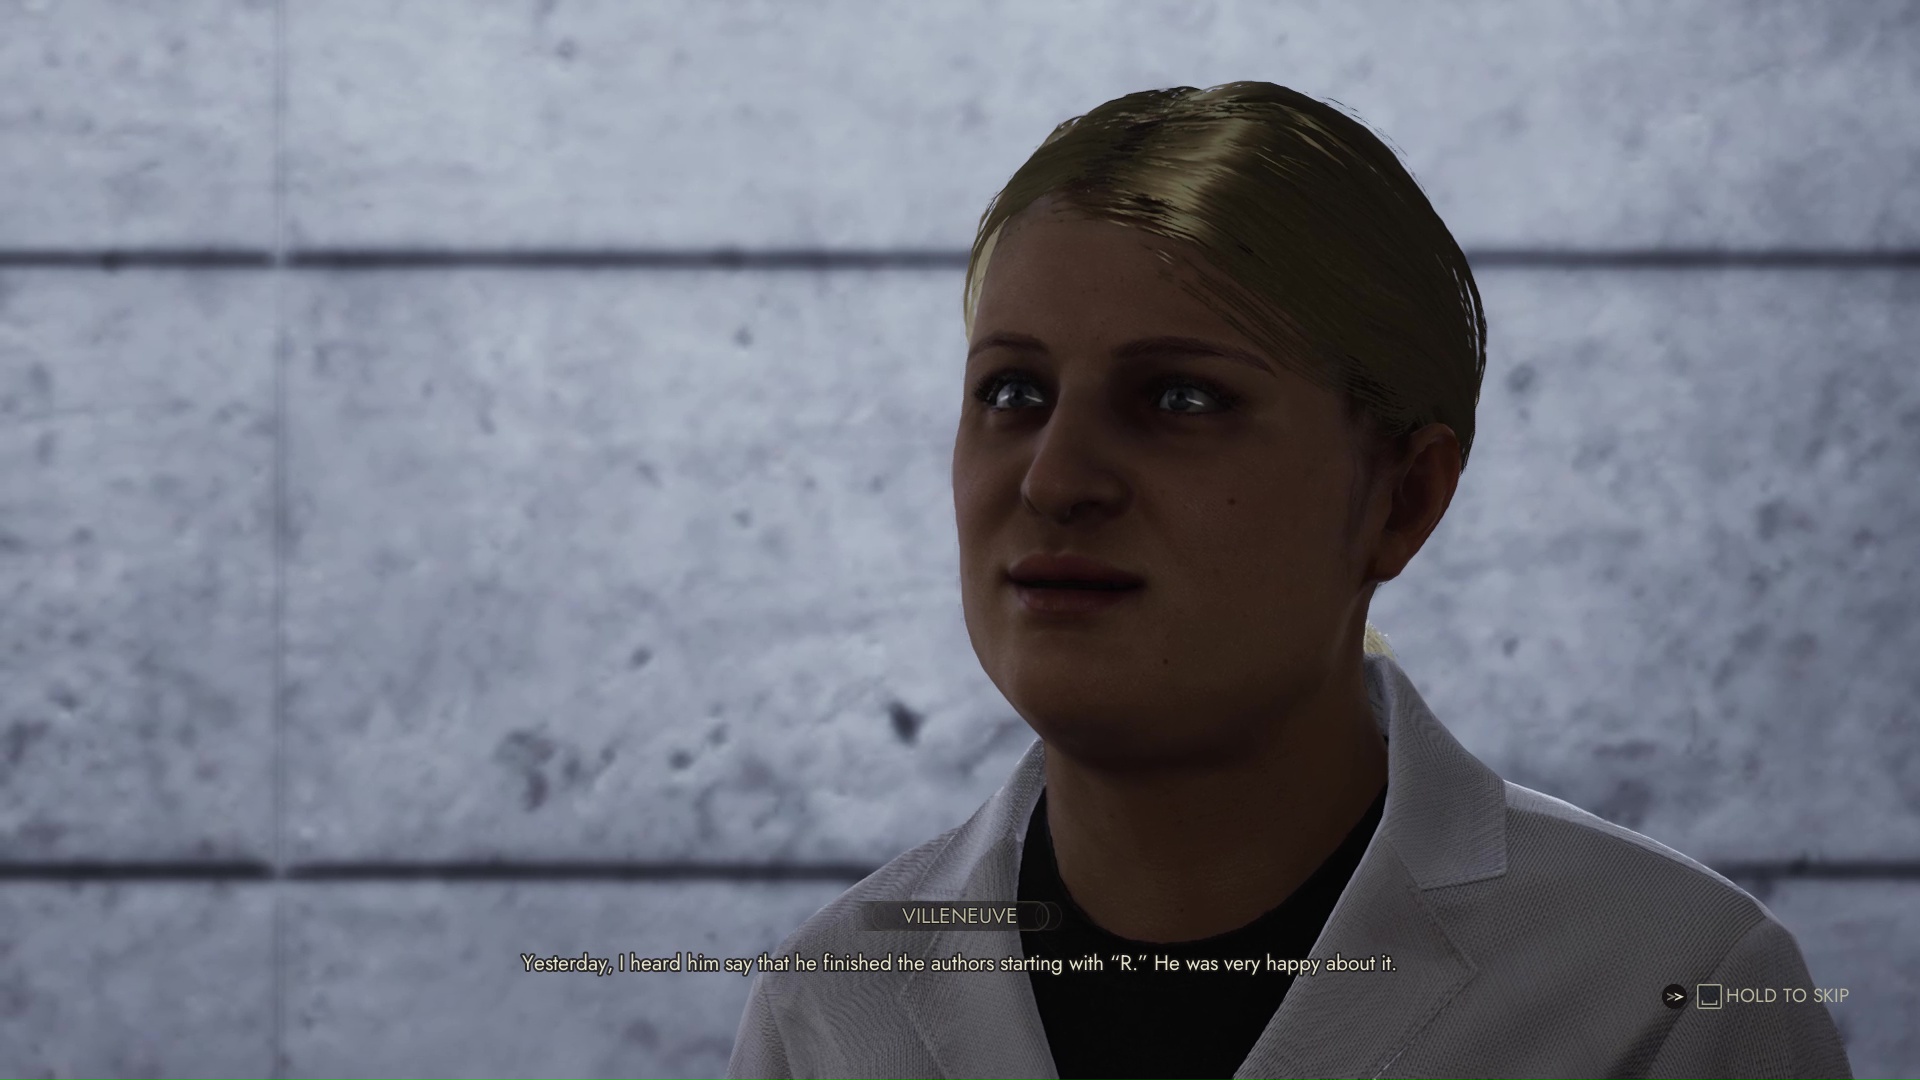
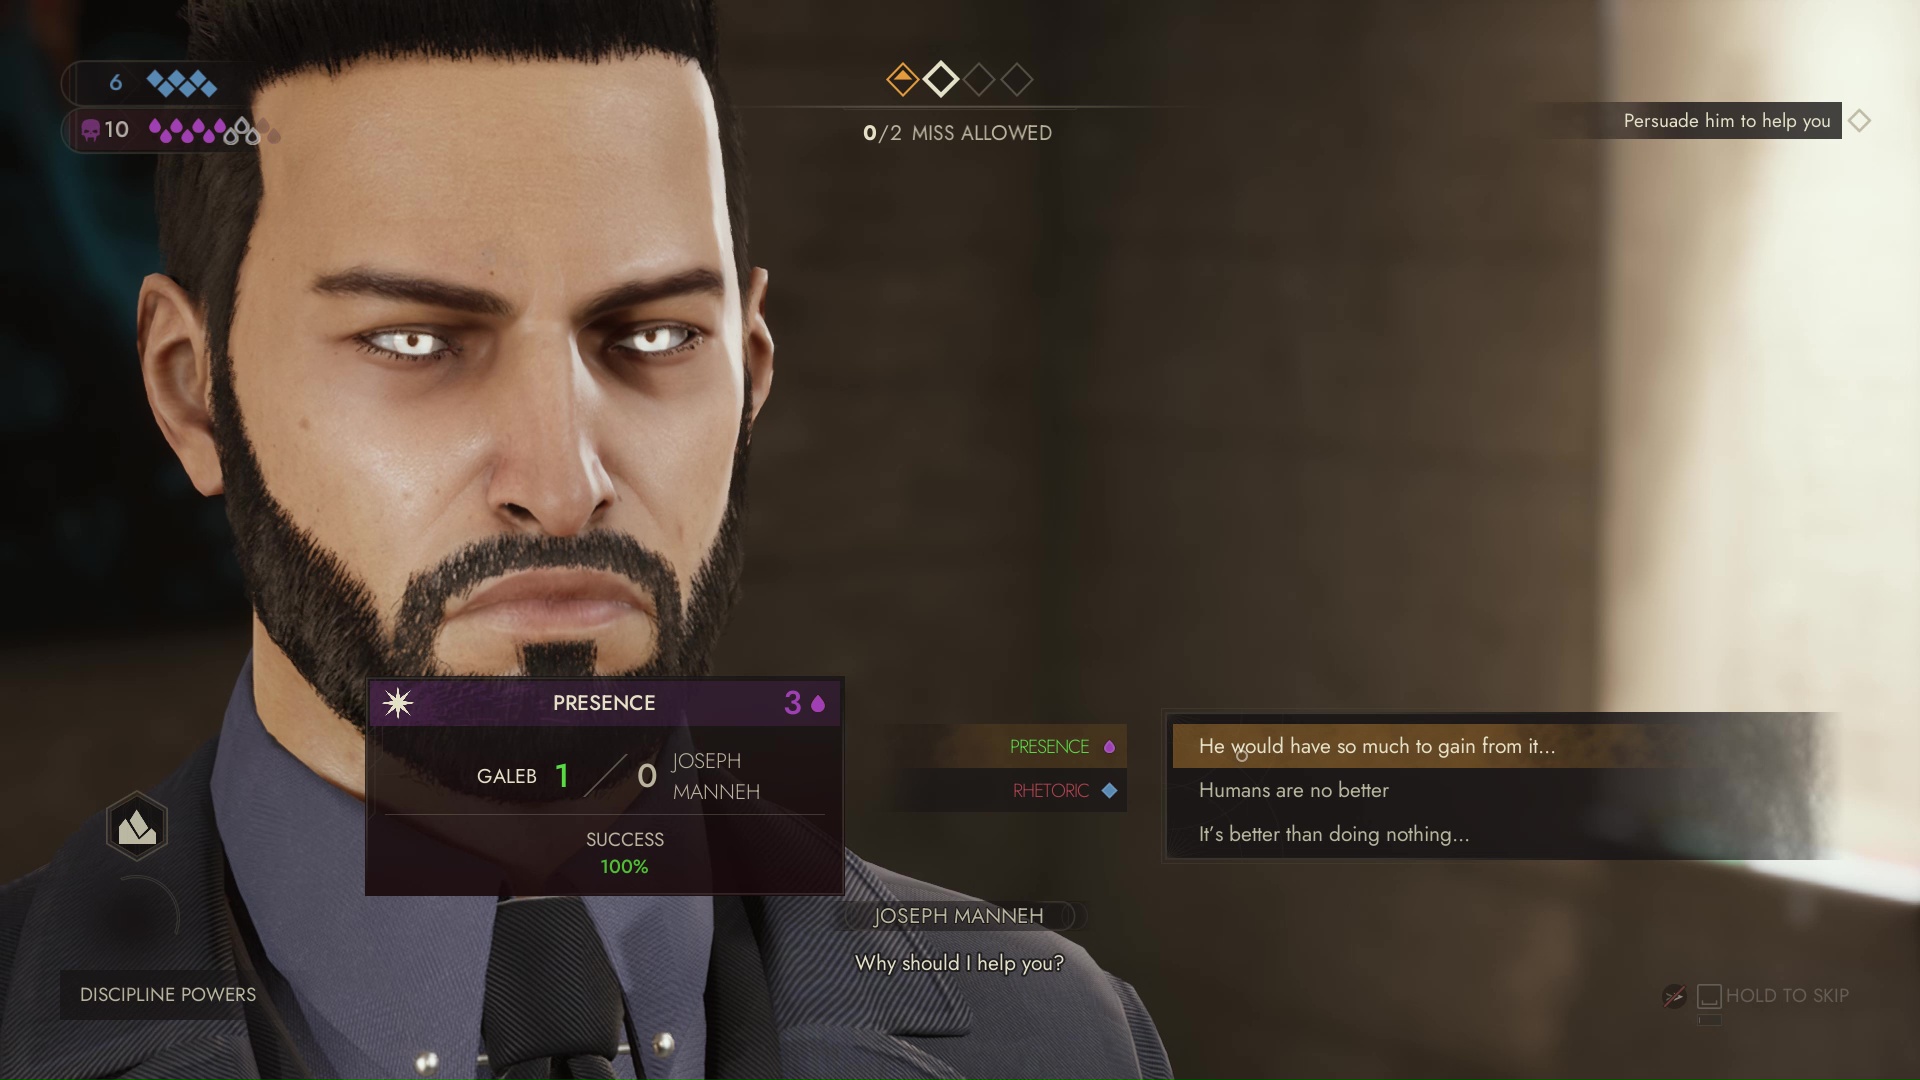
If you speak with Villeneuve, the blonde researcher in the library’s front area, she’ll explain the situation to you. Manneh has shut himself up to work and won’t come out until he’s finished his current project.
With a dose of Presence, Villeneuve will let it slip that Manneh recently completed work on the books in the R section. Logically, he’s currently on S.

Next, there’s a file on the right side of the library, written by Manneh, that mentions he’s a big fan of Dr. Seamus Sloan.
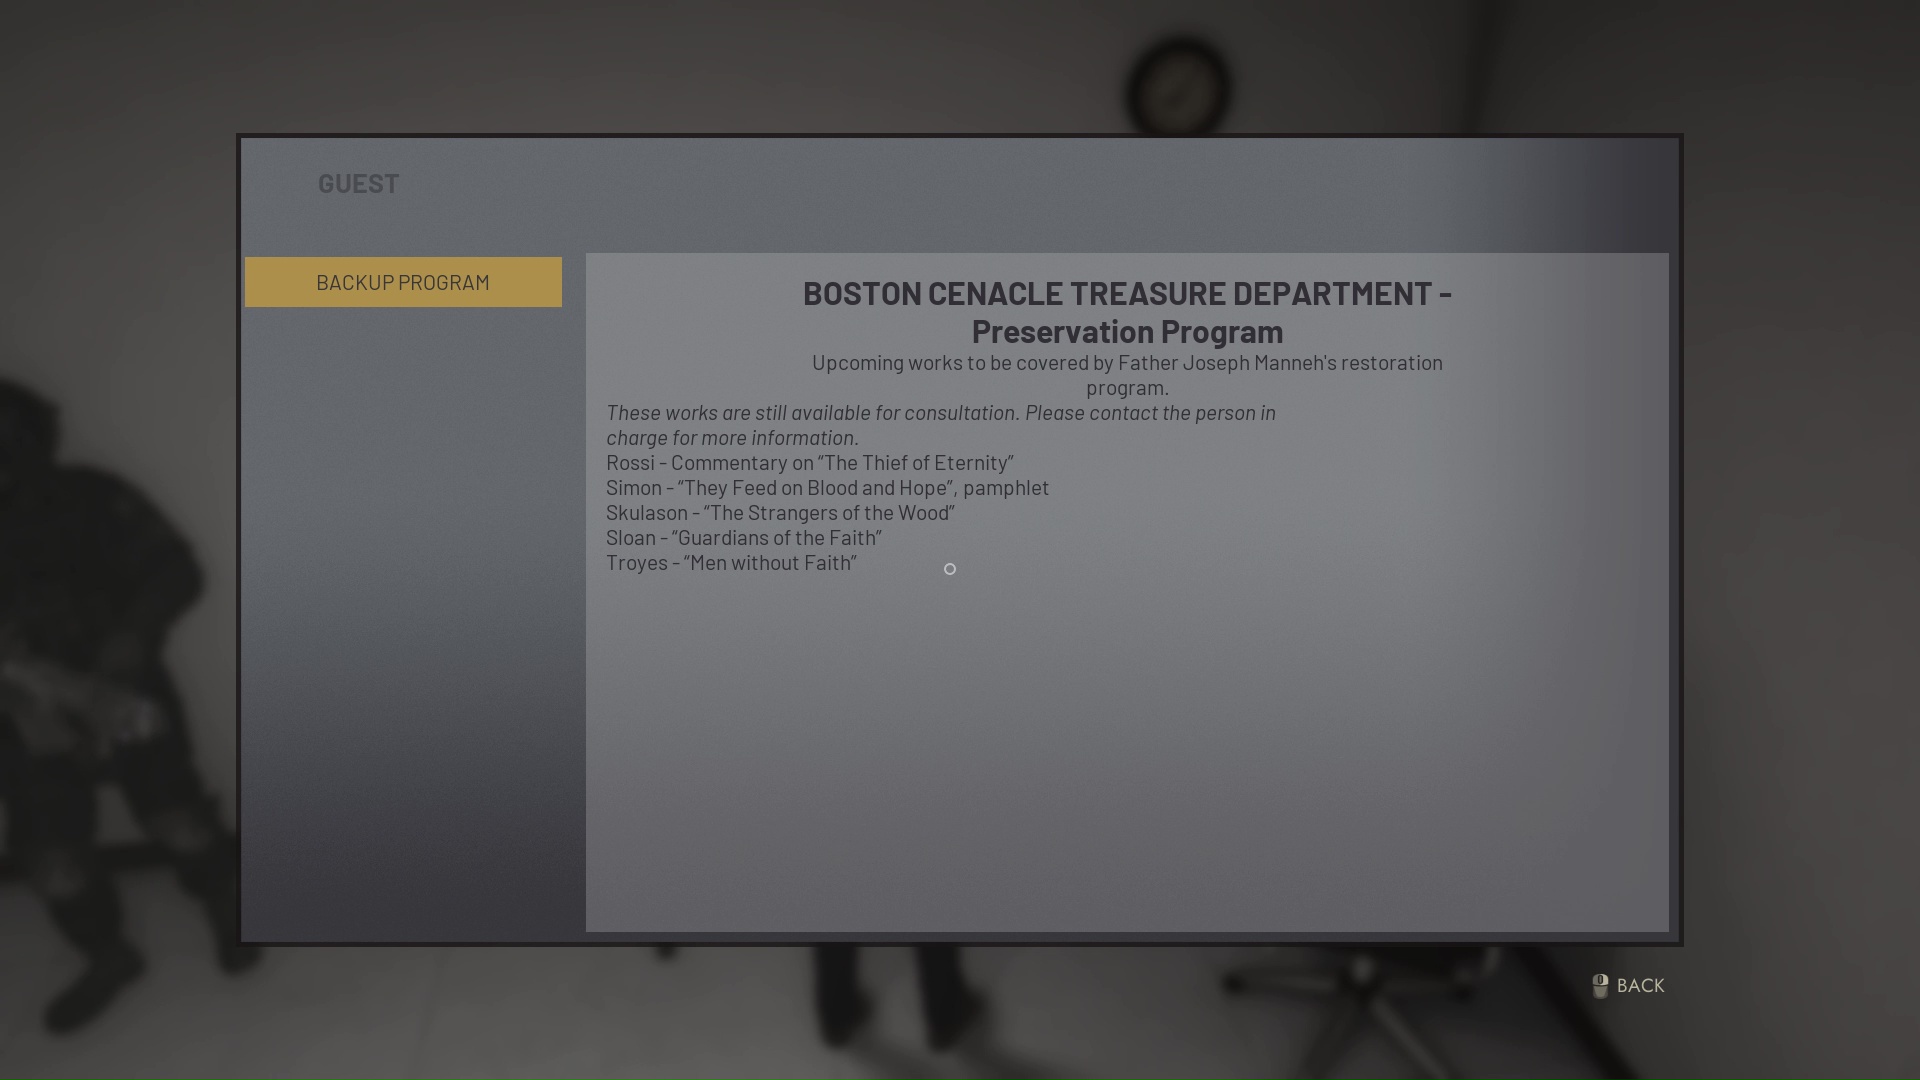
Finally, with either Gallagher or Favarone’s implant, you can use the reference computer in the back room and see that Sloan’s Guardians of the Faith is one of five books that’s available for consultation.
If you investigate the room behind Manneh, it contains an automatic request system for rare books and a list on the wall that matches the library’s current inventory with their reference numbers. Guardians of the Faith‘s number is 8070.
If you input that number into the request system, it will turn out to be the volume that Manneh is working on at the moment, which will encourage him to come out and see who’s trying to get his attention.
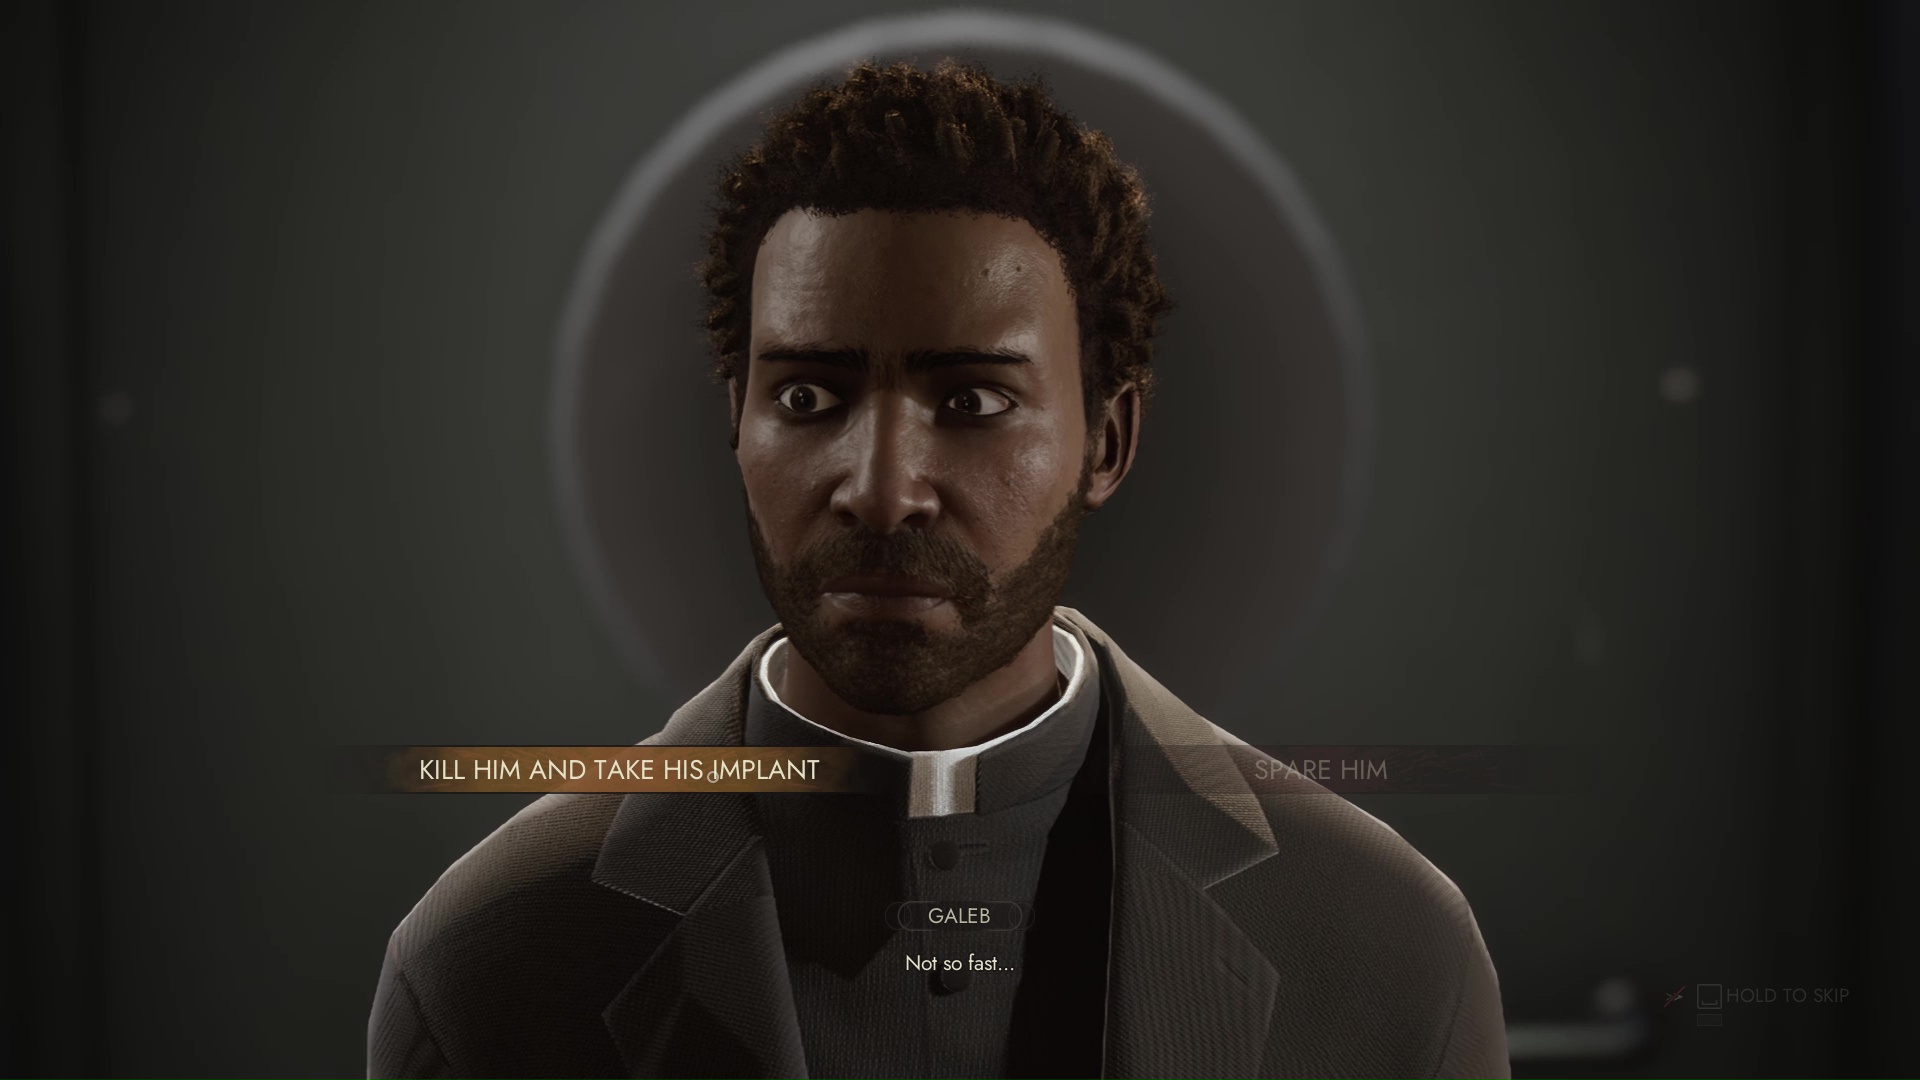 “Wait, do what? Take his what?”
This begins a Confrontation. Since we’re specifically here to kill Manneh, it doesn’t matter what you answer. Just pick whatever you like and snap his neck at the end of the conversation. However…
A word of warning
The path you take through this level has a significant impact on the rest of the game. As Galeb’s conversation with Manneh suggests, Manneh is a potential asset, and letting him live can have a significant payoff later on.
On an initial blind run, do whatever you like. If you’re aiming for the ending where all three vampires survive the game, however, which unlocks the “Let Us Show Them the Power of Immortality” trophy/achievement, that’s easier if Manneh’s on your side and still sucking air.
Galeb is by far the easiest of the three vampires to get killed on a blind run, and every single advantage you can wring out of the preceding scenes is going to be worth getting. Acing Manneh doesn’t necessarily lock you into an arc where Galeb dies, but it can only make things harder for you.
That’s how to get the No Survivors and Precision Job achievement/trophies in Swansong. For more guides on the puzzles of Vampire: The Masquerade – Swansongand more, keep an eye on our official tips hub for the game.


Published: May 26, 2022 06:50 pm