Pocket MapleStory launched on mobile recently, bringing the popular MMO IP to our pockets. There is a lot that players need to know, and we’re here to help.
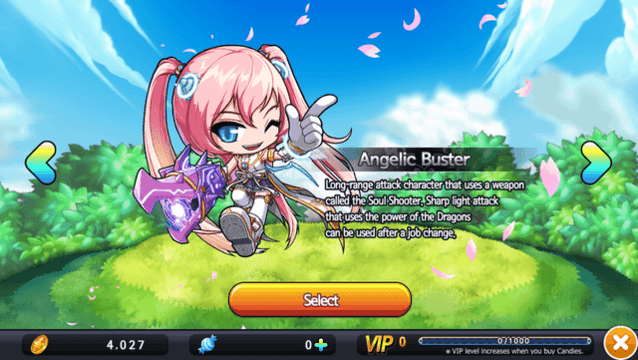
We started with a simple guide to getting started in the game and have posted guides for both the Demon Slayer and the Dual Blade. Now we’re giving you the third of our class guides — Levels 1-10 for the Angelic Buster.
This guide will consist of two parts, a spoiler-free (ish) summary section that will give you a general rundown on things and a more detailed section that outlines your quest objectives. Don’t worry, we’ll let you know when the spoilers are about to start.
The Basics
The first ten levels of the Angelic Buster takes place in and around the sacred city known as Pantheon. The first ten levels-worth of quests for the Angelic Buster will be made up of a nearly even mix of Main Story quests and side quests.
Because of the sidequests, you may not level at exactly the same rate as I did. But you should hit Level 10 around the time you turn in Quest 17 of the Main Story.
When the game starts, you’ll get to watch a brief prologue — in the form of a cutscene — explaining what happened to your character’s mother. Once that scene finishes, the story will catch up with an Angelic Buster name Tear in Pantheon. Tear is different from the others in her city, as you will soon find out. As a result, she’s picked on by most everyone you run into in the area — even the adults who should know better.
Skills
Skills in Pocket MapleStory are grouped into sets called Job Advancements. Skills can be “mastered” — with each skill requiring a different amount of skill points to master. As an Angelic Buster, you won’t have any skills until you complete the 1st Job Advancement quest, at which point you’ll get your first Job Advancement with five skills.
Job Advancement 1
You’ll get your first job advancement from a quest around LvL 6 — a little earlier or later depending on some options you take while leveling. This advancement will give you 13 new skills needing anywhere between 0 to 30 skill points to master. You’ll get your first skill point to invest when you hit LvL 10. Stats for these skills will increase as points are added.
It’s also important to note that some skills will not be usable until some other requirement has been met. These will be indicated by a small red “No” sign on the skill card.
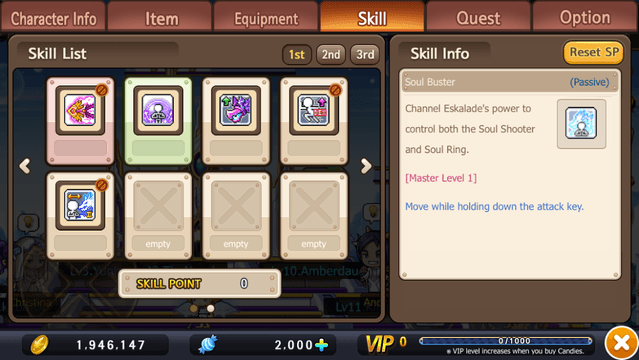
- Soul Buster (Master LvL 1) – Channel Eskalade’s power to controll both the Soul Shooter and Soul Ring.
- Dress Up (Master LvL 1) – Summon the power of Eskalade to transform into Angelic Buster.
- Grappling Heart (Master LvL 1) – Tosses a magical line above you to ascend to higher platforms.
- Star Bubble (Master LvL 30) – Fires a condensed stream of unrefined energy. Deals damage within a certain range when the projectile hits.
- Feather Hop (Master LvL 1) – Press the Jump key while in midair to jump in the direction you are moving.
- Melody Cross (Master LvL 30) – Uses the power of Eskalde to increase stats for a certain period.
- Affinity (Master Level 20) – Get closer to Eskalade to draw out strength and make your body lighter.
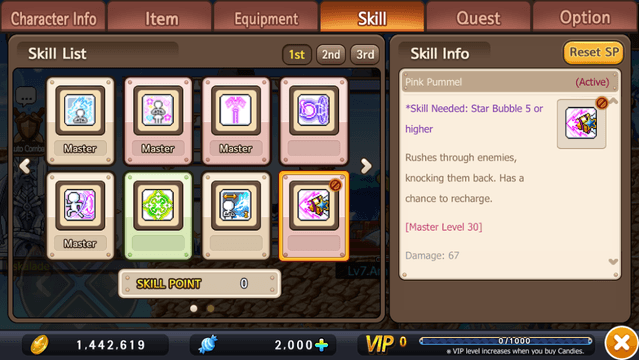
- Pink Pummel (Master Level 30) – Rushes through enemies, knocking them back. Has a chance to recharge. **Requires Star Bubble 5 or higher to unlock.
- Lovely Sting (Master Level 30) – Pierces enemies with a beam of pretty power and curses them. Use the skill again to detonate the curse. **Requires Star Bubble 5 or higher to unlock.
- Power Transfer (Master Level 20) – Generates a shield that absorbs a portion of damage dealt by the enemy.
- Soul Shooter Mastery (Master Level 30) – Increases Mastery and Accuracy of Soul Shooter.
- Beautiful Soul (Master Level 20) – Permanently increases DEX. **Requires Soul Shooter Mastery 10 or higher to unlock.
- Great Affinity (Master Level 20) – Get closer to Eskalde to receive battle experience and increase resistance. **Requires Affinity 10 or higher to unlock.
Non-Passive skills can be added to your ability/item bar by pressing the shortcut button in their info screen.
Gear
For your first few levels, you may be tempted to purchase weapons or equipment from the vendors in the village. DON’T. Your quests will provide you with the exact same gear before you’re even able to use it. Save your money for something else. That said. The minute you hit Level 8, swap that gear out.
Surviving
Similar to the Demon Slayer, the Angelic Buster can go a while before having to worry about being killed in a quest. Her quests are an even mix of fetch/talk to random people quests and kill missions, making the first few monsters you’ll run into lightweights. That said, it’s always best to stay on the safe side and keep an eye on that health bar. Be sure you have a decent number healing potions before heading out as well.
Making money (Mesos)
Level’s 1-10 are basically all still part of the introduction/tutorial area. There won’t be a ton of opportunity to make money just yet, but there doesn’t really need to be. Pocket MapleStory practically hands players Mesos every time they log in. There are rewards for logging in daily, different holiday “events” that will grant you items and cash, and more. Of course, you can earn extra by taking a little extra time to kill a few more things while out on quests and bringing back the loot to sell.
The Dirty Details: In-Depth Guide
Above we covered the basics for Levels 1-10. If you want to play and experience the story for yourself, what’s above (plus our Getting Started in MapleStory guide) will give you everything you need to survive the first ten levels of your life as a Dual Blade. So, stop here. Because anything beyond this point contains SPOILERS.
We’ll break this area down into sections based on levels. Keep in mind that depending on your own play-style, levels may vary slightly.
Level 1
Intro
As mentioned above the Angelic Buster’s story will start out with a bit of prologue. We join the playable character’s mother Victoria after a battle with a being named Magnus. The being has already killed Victoria’s partner Kaiser and attacks Victoria. There a back and forth of battle before Magnus retreats, saying he won’t give up until he controls Pantheon.

A while later we see Victoria again. She has lost her power and is with child. Able to feel Magnus’ power returning she worries for Pantheon and the future of her unborn. As she comes to a decision the cutscene ends and another begins.
Finally, we are with the playable character, Victoria’s child named Tear. We see Tear crying when a boy named Kyle finds her and asks if the other children are picking on her again for being a “mutant without a tail and magic powers.” He then tells her that they’re just jealous because she’s the daughter of a hero; adding that they don’t like him either.
At this point an adult named Carlos comes looking for them and informs them both they should ignore the others because they’re better than the rest. He then tells Kyle that Cartalion is looking for him and can be found at Nova’s Sanctum. As Kyle leaves, Tear can hear someone calling for her.
Tear goes to find out what she’s being called for, only to have the person requesting her presence — Anor — take some jabs at her, telling her he can’t believe they traded her mother for her. After this loving discussion, you’ll be offered your first quest.
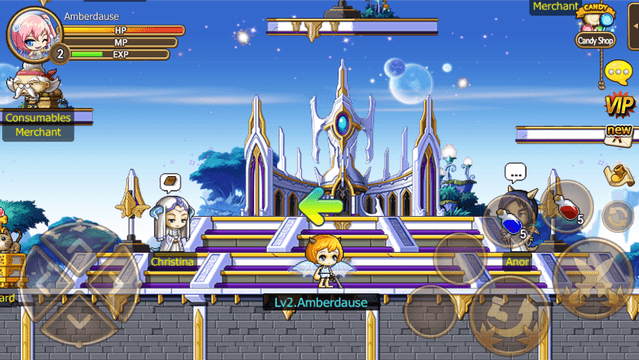
Quest 1 – Same Old, Same Old
- Objective: Talk to Anor
- Location: Pantheon
- Rewards:
- 80 XP
- 190 Mesos
Talk to Anor again and he’ll give Tear more grief before saying he wants some work done and offering the next quest.
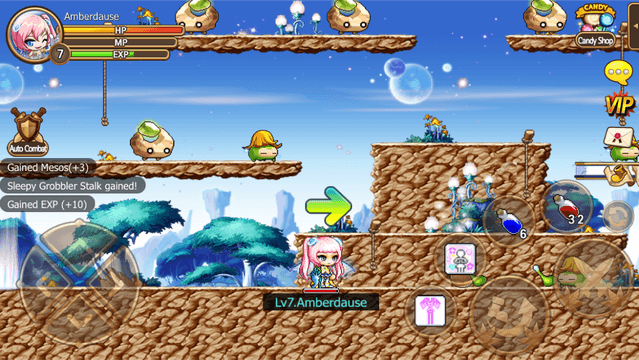
Quest 2 – Anor The Bully
- Objective: Kill 8 Sleepy Grobblers
- Location: West Pantheon Plains
- Rewards:
- 120 XP
- 248 Mesos
You’ll find the Sleepy Grobblers on the lower levels of the Plains. Dispatch 8 of them and return to Anor. Anor will opt to antagonize Tear some more before telling her she needs to go see Christina.
Quest 3 – The Relentless Jerk
- Objective – Talk to Christina
- Location: Pantheon
- Rewards:
- 60 XP
- 190 Mesos
You’ll level up after accepting this quest.
Level 2
Christina can be found just a bit to the left of Anor. Talk to her to complete the quest. She’ll chastise Tear as well. (Apparently Tear can’t do anything right for any of these people.) After a bit of needling, she’ll offer another quest.
Quest 4 – The Tokka Menace
- Objective: Kill 8 Limestone Tokka
- Location: West Pantheon Plains
- Reward:
- 120 XP
- 248 Mesos
Head to the West Pantheon Plains and you’ll find the Limestone Tokka’s on the upper platforms. You should ding another level while slaying the Tokka.
Level 3
Return and talk to Christina again. Shell give Tear grief before sending her back out on another errand.
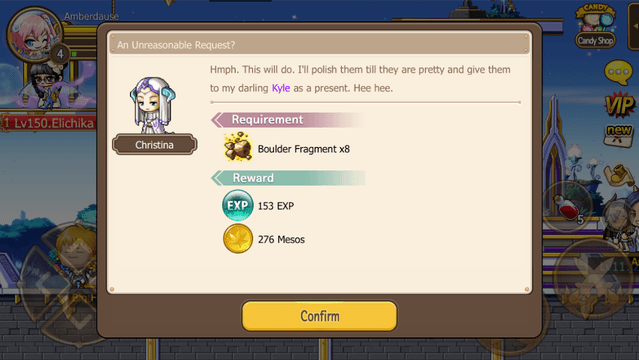
Quest 5 – An Unreasonable Request?
- Objective: Collect 8 Boulder Fragments
- Location: West Pantheon Plains
- Reward:
- 153 XP
- 276 Mesos
You may have already collected some of these fragments during your last quest. So you may not need to kill as many Tokka. However, if you’re halfway or more through Level 3, just go ahead and take down a few more so you can hit the next level before returning.
Level 4
Return to Christina and she’ll mention something about giving the boulders to Kyle as a present before mentioning that someone named Fenelle is looking for Tear. For once, Tear will actually be excited.
Quest 6 – A Call From Fenelle
- Objective: Talk to Fenelle
- Location: Nova’s Sanctum
- Reward:
- 77 XP
- 190 Mesos
Fenelle will ask Tear if the others have been picking on her and Tear will tell her not to worry, after which she will be tasked with taking Kyle his lunch box since he forgot to take it with him when he went out to train.
Quest 7 – A Kind Priestess
- Objective: Take Kyle his lunch box
- Location: South Pantheon Plains
- Rewards:
- 77 XP
- 190 Mesos
When you accept the quest, you’ll notice Fenelle has a second one for you. Go ahead and grab it.
Side Quest 1 – Threat On Pantheon
- Offered by: Fenelle
- Objective: Listen to Fenelle’s Dream
- Location: Nova’s Sanctum
- Rewards:
- 60 XP
- 190 Mesos
- 5 Red Potions
Since you’re already here, go ahead and listen to Fenelle’s dream. She’ll immediately offer another quest.
Side Quest 2 – Omens In The West Plains
- Offered by: Fenelle
- Objective: Find out what the dreams mean.
- Location: West Pantheon Plains
- Rewards:
- 60 XP
- 190 Mesos
Go to the West Pantheon Plains and tap on a sparkling area on a ledge. It will complete the side quest and you’ll level up.
Level 5
Tap the sparkling area again and receive another quest.
Side Quest 3 – Suspicious Light
- Offered by: Sparkling Light
- Objective: Report the suspicious light to Fenelle
- Location: Nova’s Sanctum
- Rewards:
- 60 XP
- 190 Mesos
Before returning to Fenelle, take Kyle his lunch box. You’ll find him on a ledge in the South Pantheon Plains.
Kyle thanks Tear for bringing his lunch and tells her he’s working hard to live up to having Nova Guardian Kaiser’s powers. Tear will then notice Kyle’s sword is in poor shape and he’ll tell her he just needs some Alert Grobbler Stalks to fix it.
Quest 8 – For A Friend
- Objective: Collect 8 Alert Grobbler Stalks
- Location: South Pantheon Plains
- Rewards:
- 160 XP
- 276 Mesos
- Brown Rocky Suit
Obtain the stalks and return to Kyle. After giving Kyle the stalks, he’ll tell Tear that she can try praying at Nova’s Sanctum to fix the tail and magic issue.
Quest 9 – Clutching At Straws
- Objective: Pray at Nova’s Sanctum
- Location: Nova’s Sanctum
- Rewards:
- 80 XP
- 190 Mesos
Return to Nova’s Sanctum.
As you pass through Pantheon on your way to Nova’s Sanctum, you’ll notice Anor has a quest available for you. It’s a repeatable side quest. Grab it and save it for later.
Side Quest 4 – Research Materials
- Offered by: Anor
- Objective: Collect 8 Onyx Stonegar Pieces
- Location: South Pantheon Forest
- Rewards:
- 336 XP
- 276 Mesos
Once you have the quest return to Nova’s Sanctum. Everyone will be gone, but you’ll see a sparkly area near where Fenelle would still be standing. Tap it to complete Clutching At Straws. It will immediately offer you a new quest.
Quest 10 – Praying To The Ancestors
- Objective: Tap On The Sparkles
- Location: Nova’s Sanctuary
- Rewards:
- 80 XP
- 190 Mesos
Tap on the sparkles again and you’ll get a cutscene. Tear will notice the Relic is shining and touch it. She’ll freak out for a bit, thinking she allowed Magnus to run away with the Relic and that she’s put Pantheon in danger. While fretting, she’ll hear someone she thinks is a ghost call her name. A statue-like dragon will tell her that she woke him.
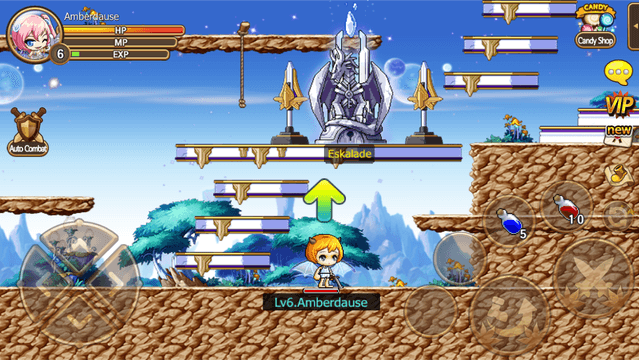
Quest 11 – Meet Eskalade
- Objective: Talk to Eskalade
- Location: Nova’s Sanctuary
- Rewards:
- 80 XP
- 190 Mesos
Accept this quest and you’ll ding Level 6.
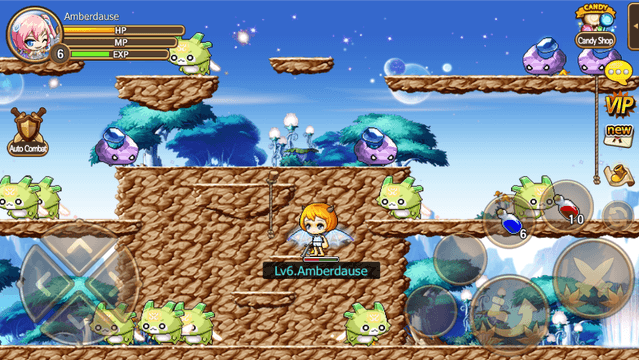
Level 6
Go to your right and tap on the dragon-statue, he’ll tell Tear that he’s the Great Guardian Dragon of the Novas who was stuck in the Relic. Tear suspects he’s the same guardian that fought alongside her mother. Eskalade can’t remember for certain but tells her she might be right, before offering the next quest.
Quest 12 – 1st Job Advancement
- Objective: Kill 8 Amethyst Tokka
- Location: Radiant Rock Forest
- Rewards:
- Soul Shouter Weapon
Proceed to the Radiant Rock Forest and you’ll see the Amethyst Tokka on the upper levels. Be careful while slaying these. They hit harder, so you’ll want to keep an eye on your health bar and use health potions when necessary.
Return to Eskalade and turn in the quest. He’ll tell Tear he remembers a pink haired girl that looks like her. Tear believes that was her mom.
He’ll end the conversation by telling her that Christina is looking for her and offer the next quest.

Quest 13 – Bully For You
- Objective: Talk to Christina
- Location: Pantheon
- Rewards:
- 96 XP
- 190 Mesos
At this point Fenelle and Cartalion will reappear in Nova’s Sanctuary. You can turn the Suspicious Light quest into Fenelle.
You should also ding Level 7 right around now.
Level 7
Both Fenelle and Cartalion will have side quests available for you. Grab them before going to see Christina.
Side Quest 5 – Becoming A Trainee
- Offered by: Cartalion
- Objective: Collect 8 Laloong Tails
- Location: South Pantheon Plains
- Rewards:
- 176 XP
- 276 Mesos
Side Quest 6 – The Crack
- Offered by: Fenelle
- Objective: Talk to Christina about the Shimmering Light
- Location: Pantheon
- Rewards:
- 60 XP
- 190 Mesos
When you’re done gathering quests, you can take a look at your first job advancement under skills. Two skills are active and can be slotted in your shortcut bar. Once you’re done with that, go find out what Christina wants. She’s upset with Tear because Kyle was apparently hurt and demands that she collect materials for potions to be made with.
Quest 14 – Christina’s Grief
- Objective: Collect 8 Grumpy Gobbler Stalks
- Location Grumpy Grobbler Habitat
- Rewards:
- 204 XP
- 276 Mesos
- Purple Hatchling
While talking to Christina, turn in The Crack quest and she’ll offer another.
Side Quest 7 – Soul Purification
- Offered by: Christina
- Objective: Collect 8 Sleepy Grobbler Stalks
- Location: West Pantheon Plains
- Rewards:
- 120 XP
- 276 Mesos
Chances are you’ll have already collected plenty of Sleepy Grobbler Stalks on your other quests. If so, go ahead and turn in Soul Purification and Christina will give you another quest.
Side Quest 8 – The Dimensional Crack
- Offered by: Christina
- Objective: Report to Cartalion
- Location: Nova’s Sanctum
- Rewards:
- 60 XP
- 190 Mesos
Go back and see Cartalion, turn in the quest and he’ll offer another.
Side Quest 9 – External Power
- Offered by: Cartalion
- Objective: Talk to Cartalion again
- Location: Nova’s Sanctum
- Rewards:
- 60 XP
- 190 Mesos
Talk to Cartalion again to turn in the quest and receive yet another.
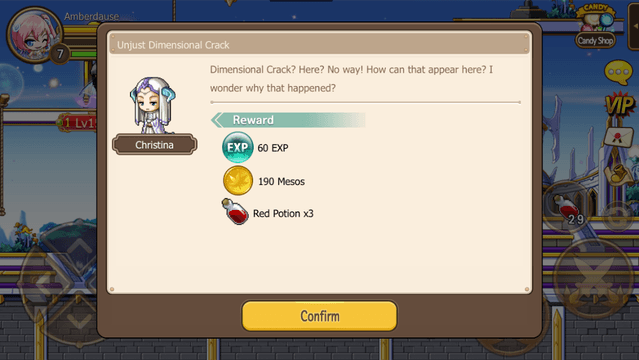
Side Quest 10 – Unjust Dimensional Crack
- Offered by: Cartalion
- Objective: Talk to Christina
- Location: Pantheon
- Rewards:
- 60 XP
- 190 Mesos
- 3 Red Potion
Return to Christina and turn in the side quest. She’ll seem surprised by this whole crack business and offer the next quest.
Side Quest 11 – Dark Energy
- Offered by: Christina
- Objective: Kill 8 Alert Grobblers
- Location: South Pantheon Plains
- Rewards
- 160 XP
- 248 Mesos
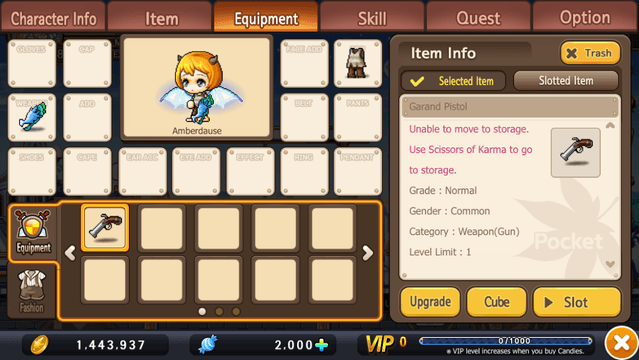
Before leaving, check your equipment and slot the Soul Shooter. When you tap your attack button, you’ll notice an immediate change in Tear’s appearance and that your weapon is much more powerful.
The South Pantheon Plains are on the way to the Grumpy Grobbler Habitat, so knock out Becoming A Trainee and Dark Energy on your way there. You should hit Level 8 while killing the critters for these, so when you do, remember to slot the armor you earned earlier.
Level 8
Continue to the Grumpy Grobbler Habitat and collect the Grumpy Grobbler Stalk before returning to Christina. Turn in Christina’s Grief. And she’ll comment on how quickly the job was done. Tear will lie to Christina about how she managed to do the job quickly, keeping her recently acquired abilities a secret.
Christina will then tell Tear that Cartalion is looking for her again.
Quest 15 – A Serious Warning
- Objective: Talk to Cartalion
- Location: Nova’s Sanctuary
- Rewards:
- 102 XP
- 190 Mesos
Before leaving, turn the Dark Energy Quest into Christina and she’ll offer another.
Side Quest 12 – Creatures In The South Plains
- Offered by: Christina
- Objective: Kill 8 Laloongs
- Location: South Pantheon Plains
- Rewards:
- 176 XP
- 248 Mesos
Don’t head to the Plains yet. Go see what Catalion wants first. When you talk to Catalion, he’ll say he thought Tear had run off. She’ll tell him she feels responsible for all the trouble, and he’ll tell her that the weakened barrier is allowing monsters into Pantheon, sending her off to slay some.
Quest 16 – The Wages Of Sin
- Objective: Kill 8 Onyx Stonegar
- Location: South Pantheon Forest
- Rewards:
- 336 XP
- 248 Mesos
After Cartalion issues the quest you can turn in Becoming A Trainee and pick up another side quest.
Side Quest 13 – Material For Armor
- Offered by: Cartalion
- Objective: Collect 8 Laloong Wing
- Location: Grumpy Grobbler Habitat
- Reward:
- 259 XP
- 276 Mesos
Take the quest and head out. You’ll go through the South Pantheon Plains and the Grumpy Grobler Habitat on your way to the South Pantheon Forest, so knock out Creatures In The South Plains and Material For Armor. You’ll ding Level 9 in the process.
Level 9
Continue to the South Pantheon Forest and you’ll b able to complete both Wages of Sin and Research Materials at the same time. Return to Cartalion and turn in your main quest. He’ll comment on how quickly the job was done and say he’s considering having Tear take up Kaiser/Kyle’s duties for a while since he’s gone after Magnus.
When Tear says she wants to say goodbye to Kyle, Cartalion will tell her that she might make it if she hurries to the West Pantheon Border.
Quest 17 – An Unexpected Notice
- Objective: Find Kyle/Kaiser
- Location: West Pantheon Border
- Rewards:
- 168 XP
- 190 Mesos
- 2 All-Cure Potion
Depending on how many mobs you have killed while running back and forth, you may hit Level 10 after this quest. Turn in the other quests you currently have and you’ll definitely ding level 10.
Level 10
You’ll get your first skill point when hitting Level 10, so don’t forget to apply it to a skill.
And there you have it. Levels 1-10 of your journey as a Angelic Buster. Of course when you hit levels may vary depending on whether whether or not you pick up the side quests and in what order you elect to do them.
In the meantime. Keep an eye out for the next guide.


Published: Dec 11, 2015 04:36 pm