
Destiny 2‘s Dares of Eternity is free to all players as part of the 30th Anniversary event. The activity comes loaded with some of the best new weapons D2 has seen, all taken from Bungie’s 30-year history of games.
This new six-player activity is also chock full of memes, references, and enough game-show cliches to make daytime TV cry. Dares of Eternity also takes lessons from both the Menagerie and Sundial activities.
In this Destiny 2 guide, we’ll cover what you need to know about the Dares of Eternity activity, leading you through all three encounters and explaining the rewards you’ll receive once you’ve made it through.
Destiny 2 Dares of Eternity Walkthrough
Dares of Eternity First Encounter
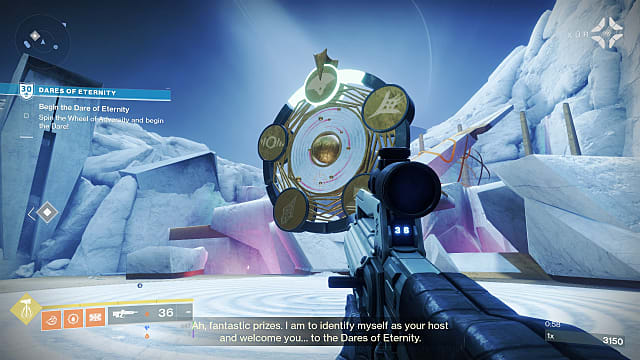
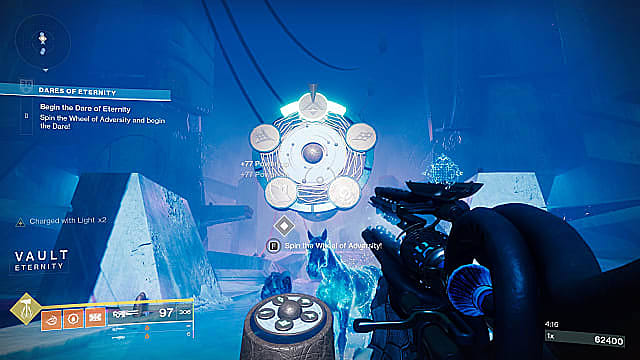
Dropping into a match of Dares of Eternity puts you in a large, golden room with Xur and Starhorse. Take the portal between them to the Eternal Valley, and clear the Taken you find there.
Once the Valley is free of enemies, the Wheel of Adversity will appear, a game-show selection wheel you spin to determine which enemy type you’ll face next. All enemy factions are represented, and the objectives vary somewhat between them.
The actual first Dares of Eternity encounter takes place in two parts. The first is a simple add wave you must defeat as quickly as possible. Yellow bar and Champion enemies spawn here, but they aren’t as powerful as in higher-level Nightfalls or Raids.
The second Dares of Eternity round in an encounter will have an objective, usually defeating a specific number of boss-level enemies. An immunity shield will protect each boss. To break it, find the yellow bar foes that glow with white light and have an X above their heads. Defeating glowing enemies will drop an item you can use to break the bosses’ shields.
The Obstacle Course
Finishing the first Dares of Eternity encounter sends you through a simple but sometimes annoying set of obstacles. The first always asks to make it through a rotating symbol. A man cannon just beyond the Valley arena will launch you toward it.
The trick to getting through the gaps involves the hemispheres on its edge. As the symbol spins, the hemisphere nearest it moves. When it aligns with the static hemisphere on the symbol’s right, jump. If you miss, use your jump to land on the spinning symbol, then jump across.
You could run back and try again if you fall, but you can also go through the cave beneath the spinning symbol. The obstacles are a little tougher to navigate, but they get you to the second encounter just as well. You could also wait for your team to pull you forward.
Dares of Eternity Second Encounter
The second Dares of Eternity encounter is the same as the first, with one extra wave. You’ll clear a wave of mobs to start. Next, you’ll take down several bosses or otherwise advance by completing objectives. If you’re not killing enemies to weaken a boss, you’ll be killing a boss to spawn objective items.
The third round of the second Dares of Eternity encounter is always a boss fight. A health bar will fill at the bottom of your HUD, and the boss will become immune after so much damage. At that point, you’ll have to defeat glowing enemies or complete objectives to damage the boss.
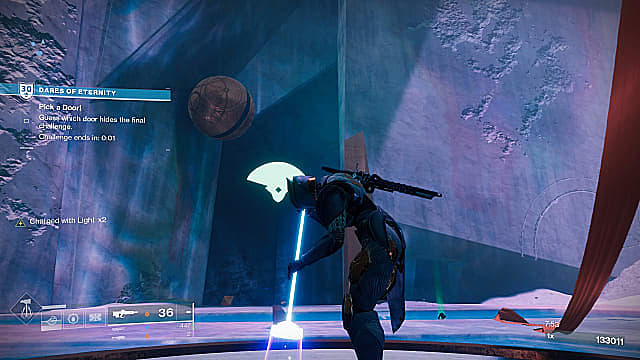
Choose the Correct Plate to Gain Starhorse’s Favor in Dares of Eternity
Once you complete the second encounter, you’ll need to step on one of three plates marked with a faction symbol. The game will randomly choose one, determining the faction you’ll fight in the final encounter.
If you choose the correct plate, you’ll receive Starhorse’s Favor. This long-term buff continually refills your Heavy ammo reserves until you die or you complete the Dares of Eternity.
Choose incorrectly, and you’ll have a debuff called Starhorse’s Penalty, giving you 30 seconds to make it to the final arena or die.
Beyond the door is another brief Dares of Eternity obstacle course. If you fall into the chasm, look for a path, and you’ll eventually reach a tunnel that will take you to the final arena.
Dares of Eternity Third Encounter
Your third trial in Dares of Eternity is always a boss fight. You’ll face an enemy familiar to veterans of the Destiny franchise, some of whom are more meme than they are a threat.
These fights follow the structure of the previous boss rounds. Damage the boss until it goes immune, then complete some task to make them vulnerable again. Like the fight against Crota, some require the same tactics as the original.
Xur and Starhorse Announce the Dares of Eternity Lightning Round
Sometimes, Xur and Starhorse will announce the Lightning Round, a fourth, high-intensity round where your success determines the value of your rewards. Failure here is as impossible as the rest of Dares of Eternity. But complete every obstacle and kill every enemy for maximum rewards.
The Lightning Round has three parts with similar tasks. Each part becomes more difficult, with additional enemies and more tasks to complete. There will be more bosses to take out, though none of the enemies will hit harder.
Dares of Eternity Rewards
The final chest in Dares of Eternity drops up to three items: a random rolled World loot pool item, maybe a blue engram, and a Treasure Key. Use the key to open chests in Xur’s Treasure Horde.
The chest nearest Xur awards one random 30th Anniversary weapon not tied to the Grasp of Avarice dungeon. The other chests cost multiple keys and require a certain Xur rank. They all grant Universal Ornament cosmetics from the event.
Every round in Dares of Eternity is scored based on the number of enemies killed, objective completed, and bonuses collected, meant to nullify the Starhorse bounties from Treasure Horde. These have a score requirement from 120,000 to 300,000, plus two other tasks you must complete in one Dare. Fail one, and you’ll have to go back into Dares of Eternity to try again.
Higher-difficulty Starhorse bounties grant Paraverse Packages in Dares of Eternity, which reward experience, gear, Treasure Keys, and/or Glimmer. You can also purchase Paraverse Packages from Starhorse with Strange Coins.
The other score-gated reward in Dares of Eternity is a Pinnacle gear drop. You’ll need 250,000 points during a single Dare to receive it.
Dares of Eternity has a Legend difficulty with a minimum power of 1320. Matchmaking is off, enemies hit harder, there are more Champions, and the boss rotation is fixed. Lightning Rounds are easier to come by here, meaning the rewards are technically more numerous, though the main draw of Legend is Triumph score and Seal progress.
Related guides:
- Destiny 2: How to Get Gjallarhorn in And Out Fly the Wolves
- Destiny 2: Eyasluna God Roll Best Perks for PvP & PvE
- Destiny 2: How to Get the Gjallarhorn Catalyst in the Grasp of Avarice
And that complete our Destiny 2 Dares of Eternity walkthrough guide. Now that you know what you’re up against, you can focus on creating a strategy that works best for your team to dominate the trials and reap the best rewards. For more, check out the links above or head over to our Destiny 2 guides hub.


Published: Dec 10, 2021 10:04 pm