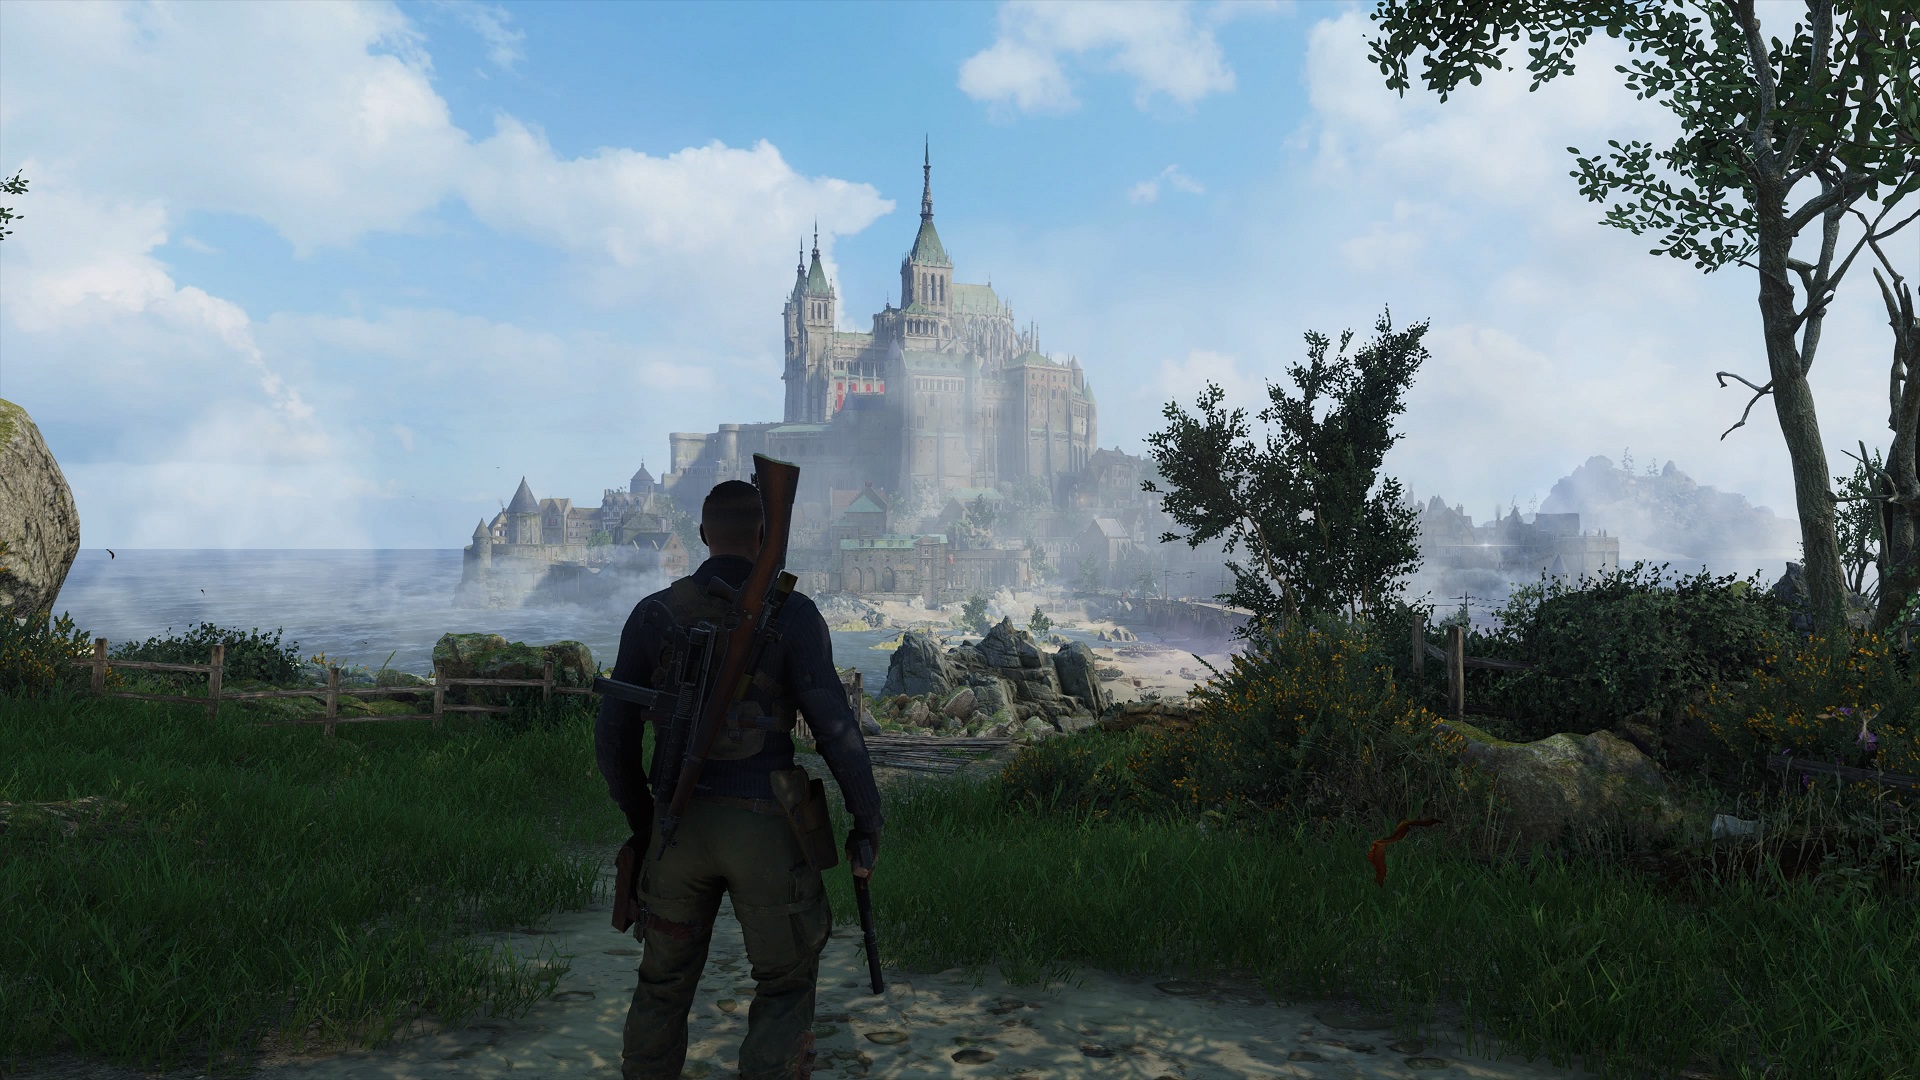
Spy Academy is perhaps Sniper Elite 5‘s most intricate and confusing level. Finding all of the classified documents, hidden items, letters, and workbenches in the Nazi-riddled labyrinth that is Mission 3 can be a test of will and patience. Luckily, the stone eagles are fairly easy to find and there are only two starting locations to discover, one on each side of the island.
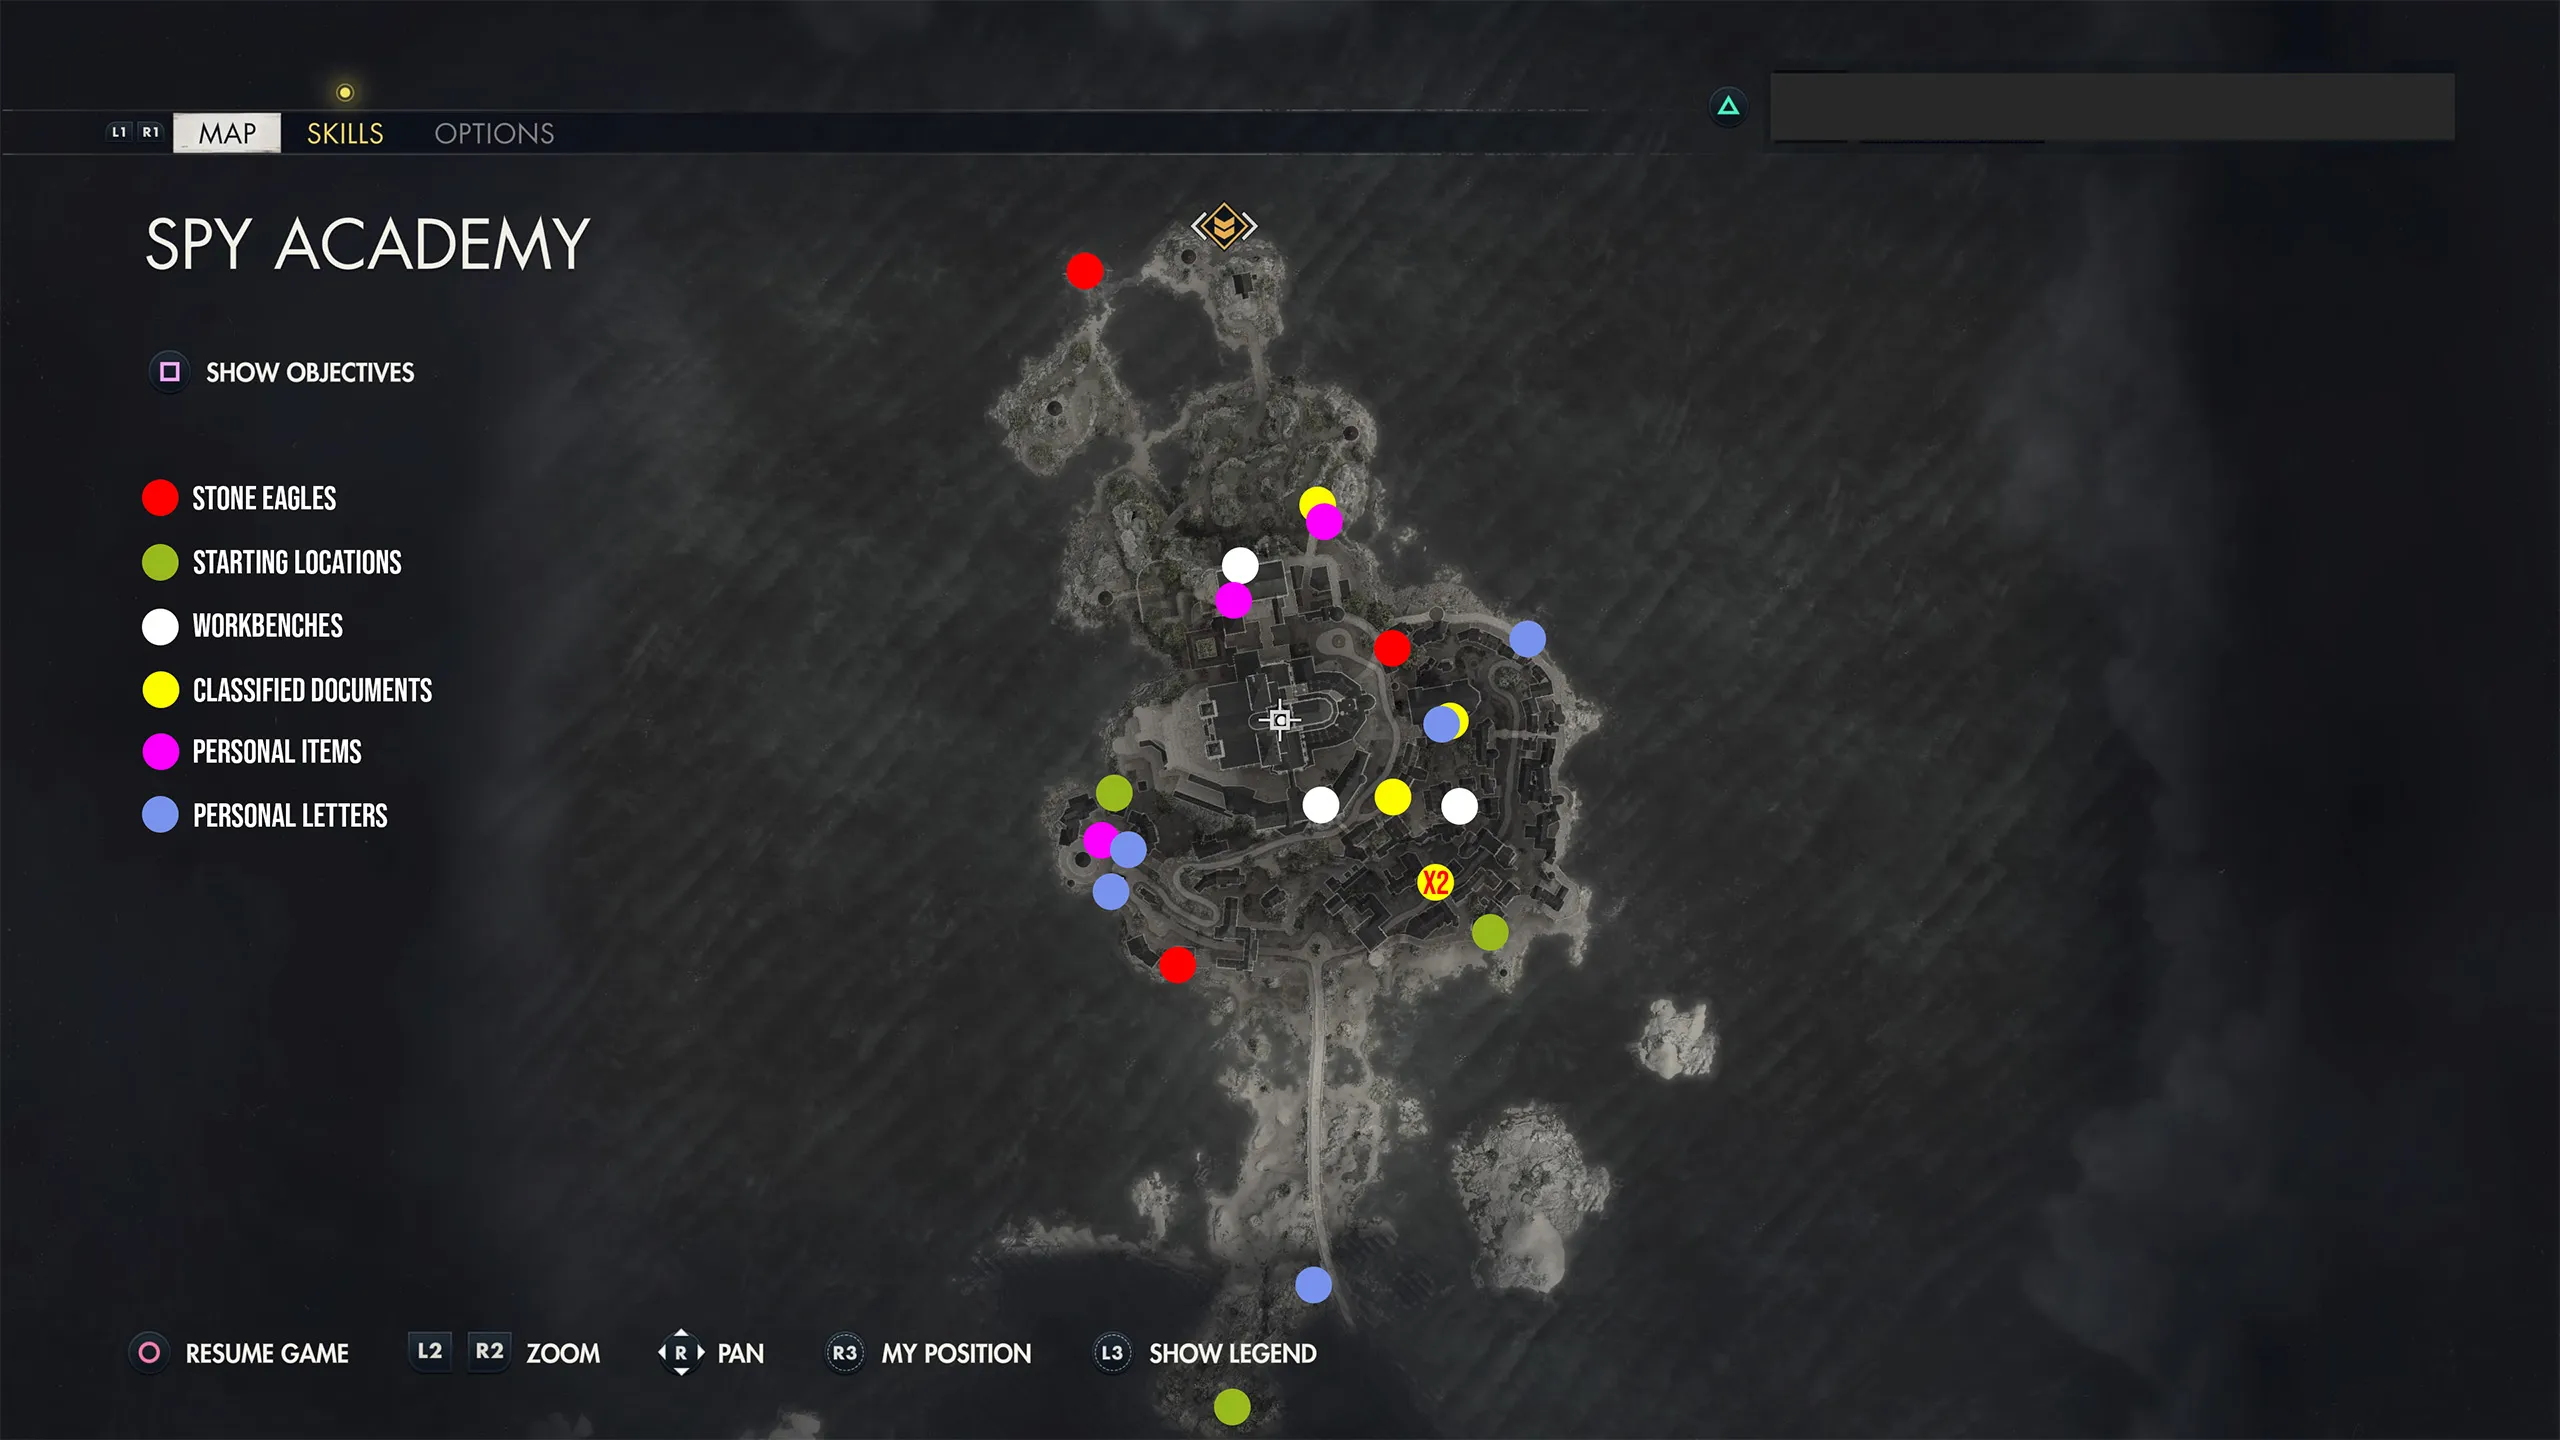
As with our collectibles guides for The Atlantic Wall and Occupied Residence, we’ll be going counterclockwise, from right to left, as it’s the easier of the paths to follow. Though, of course, you can go any which way you like! As a sidebar, it’s worth going ahead and melee killing Richter since he’s at the primary objective.
*Note: the map below says personal items when it should say hidden items.
Spy Academy Collectibles and Starting Locations
Stone Eagle 1

From the Beaumont Marshland starting point, follow the path until it opens up to reveal the cathedral and Spy Academy island. This stone eagle is on the roof of a house on the left side of the island, along the seawall, snipeable from here.
Fragile, Do Not Break (Personal Letter 1)
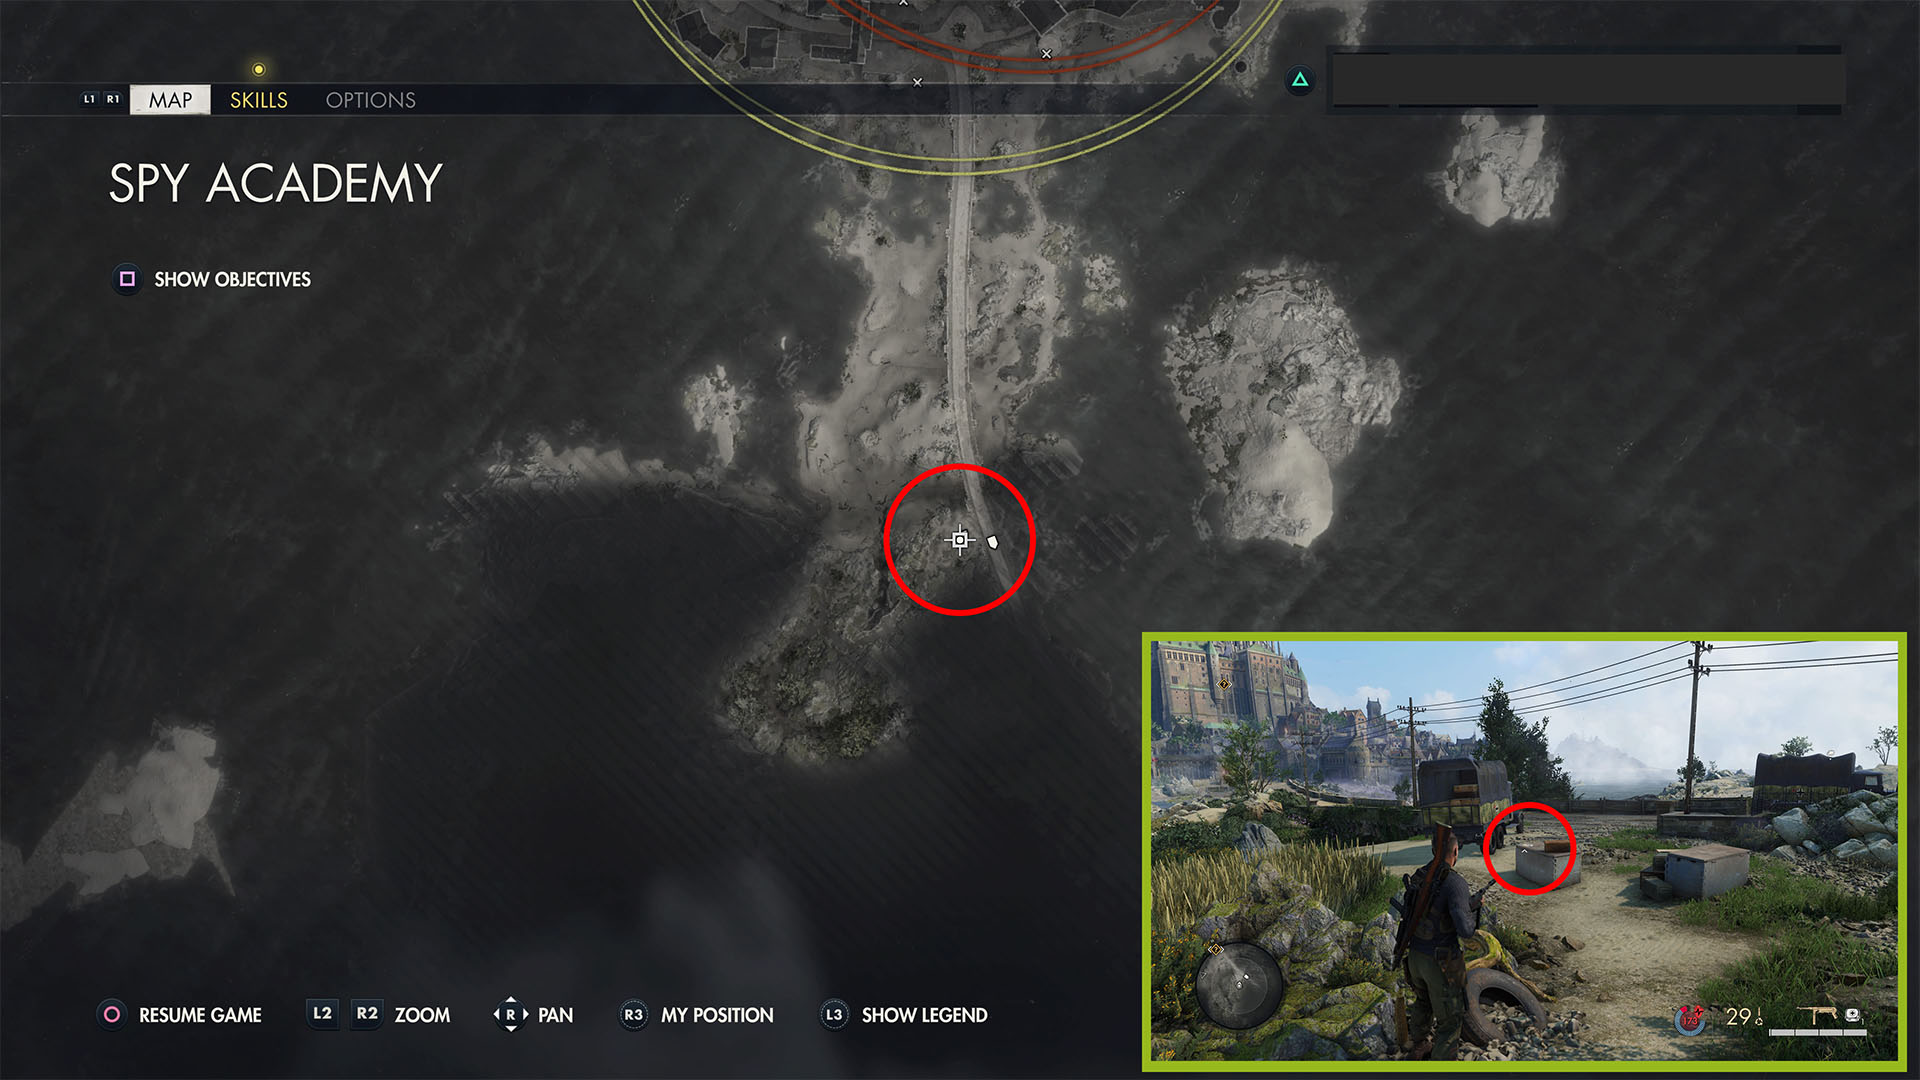
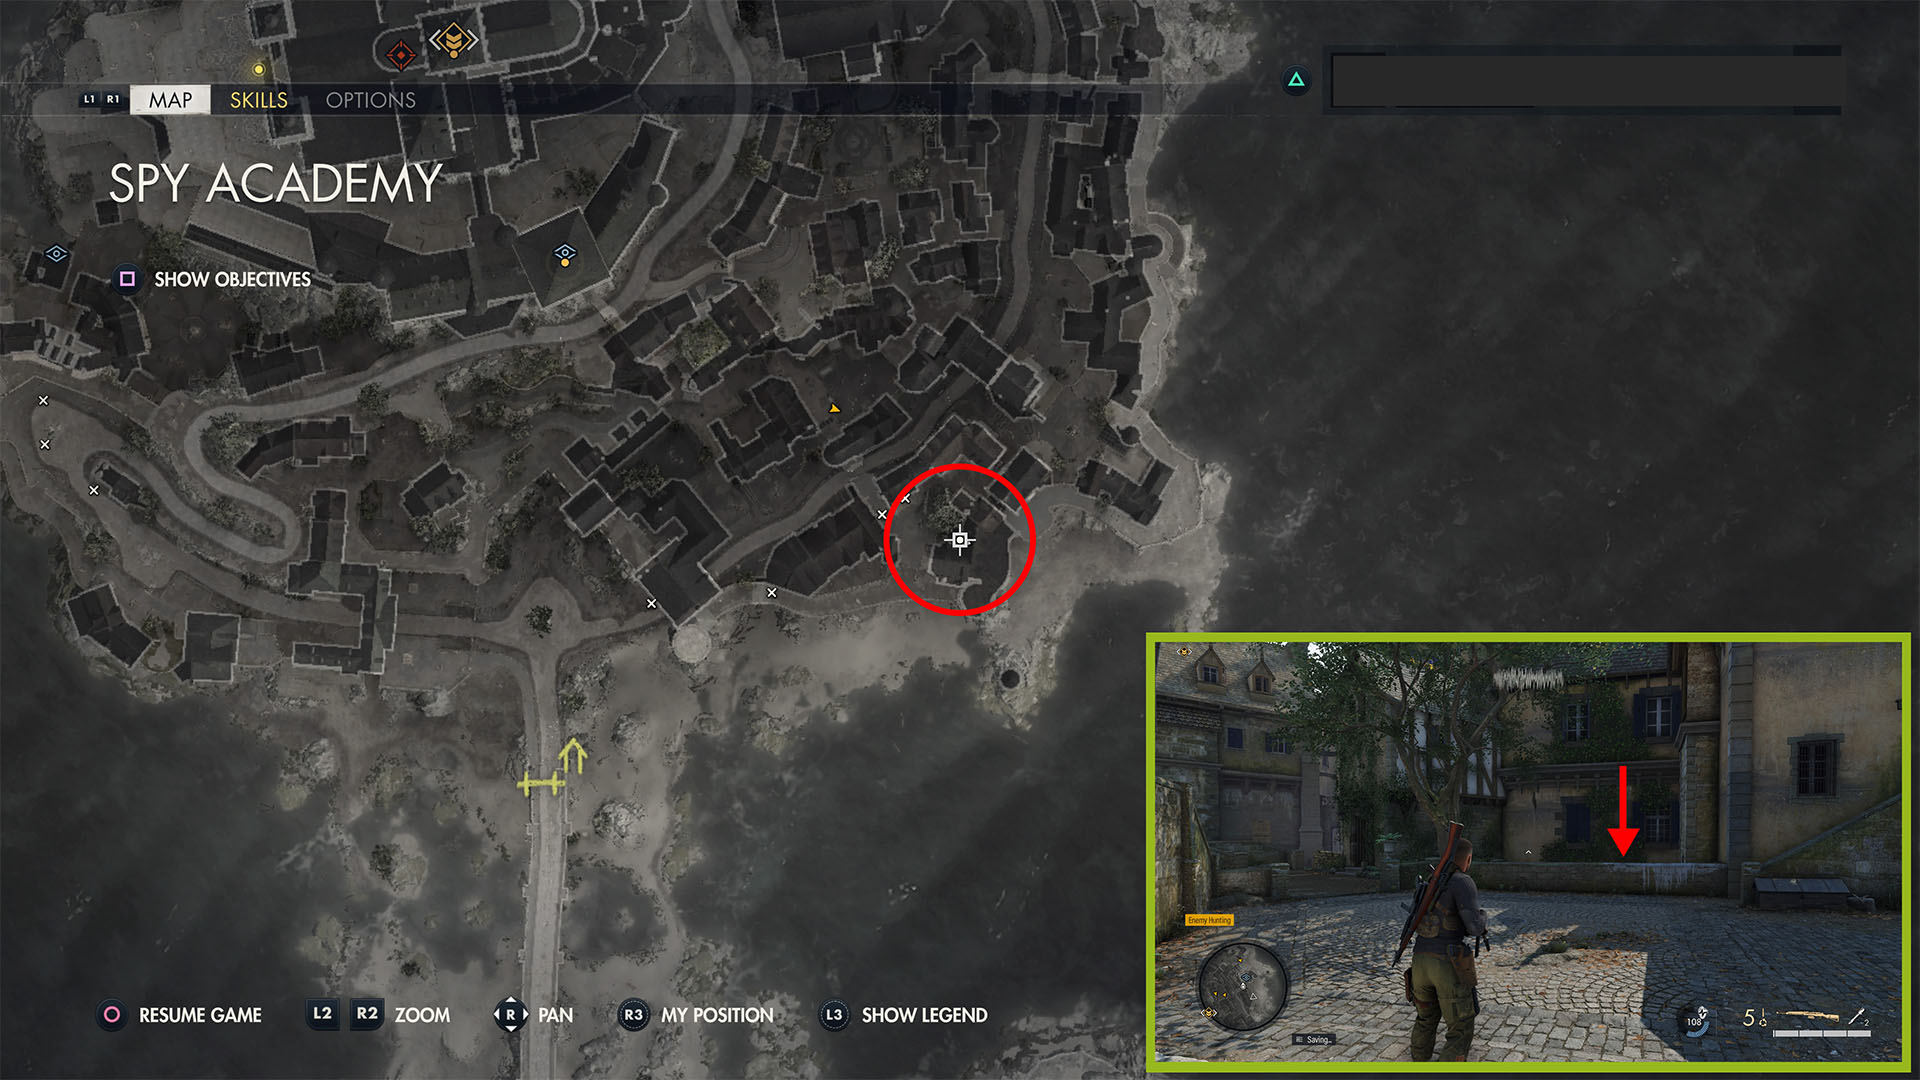
From there, go down the right path toward the bridge. You’ll see a truck and several crates just before the bridge, with this personal letter on the stack of crates nearby.
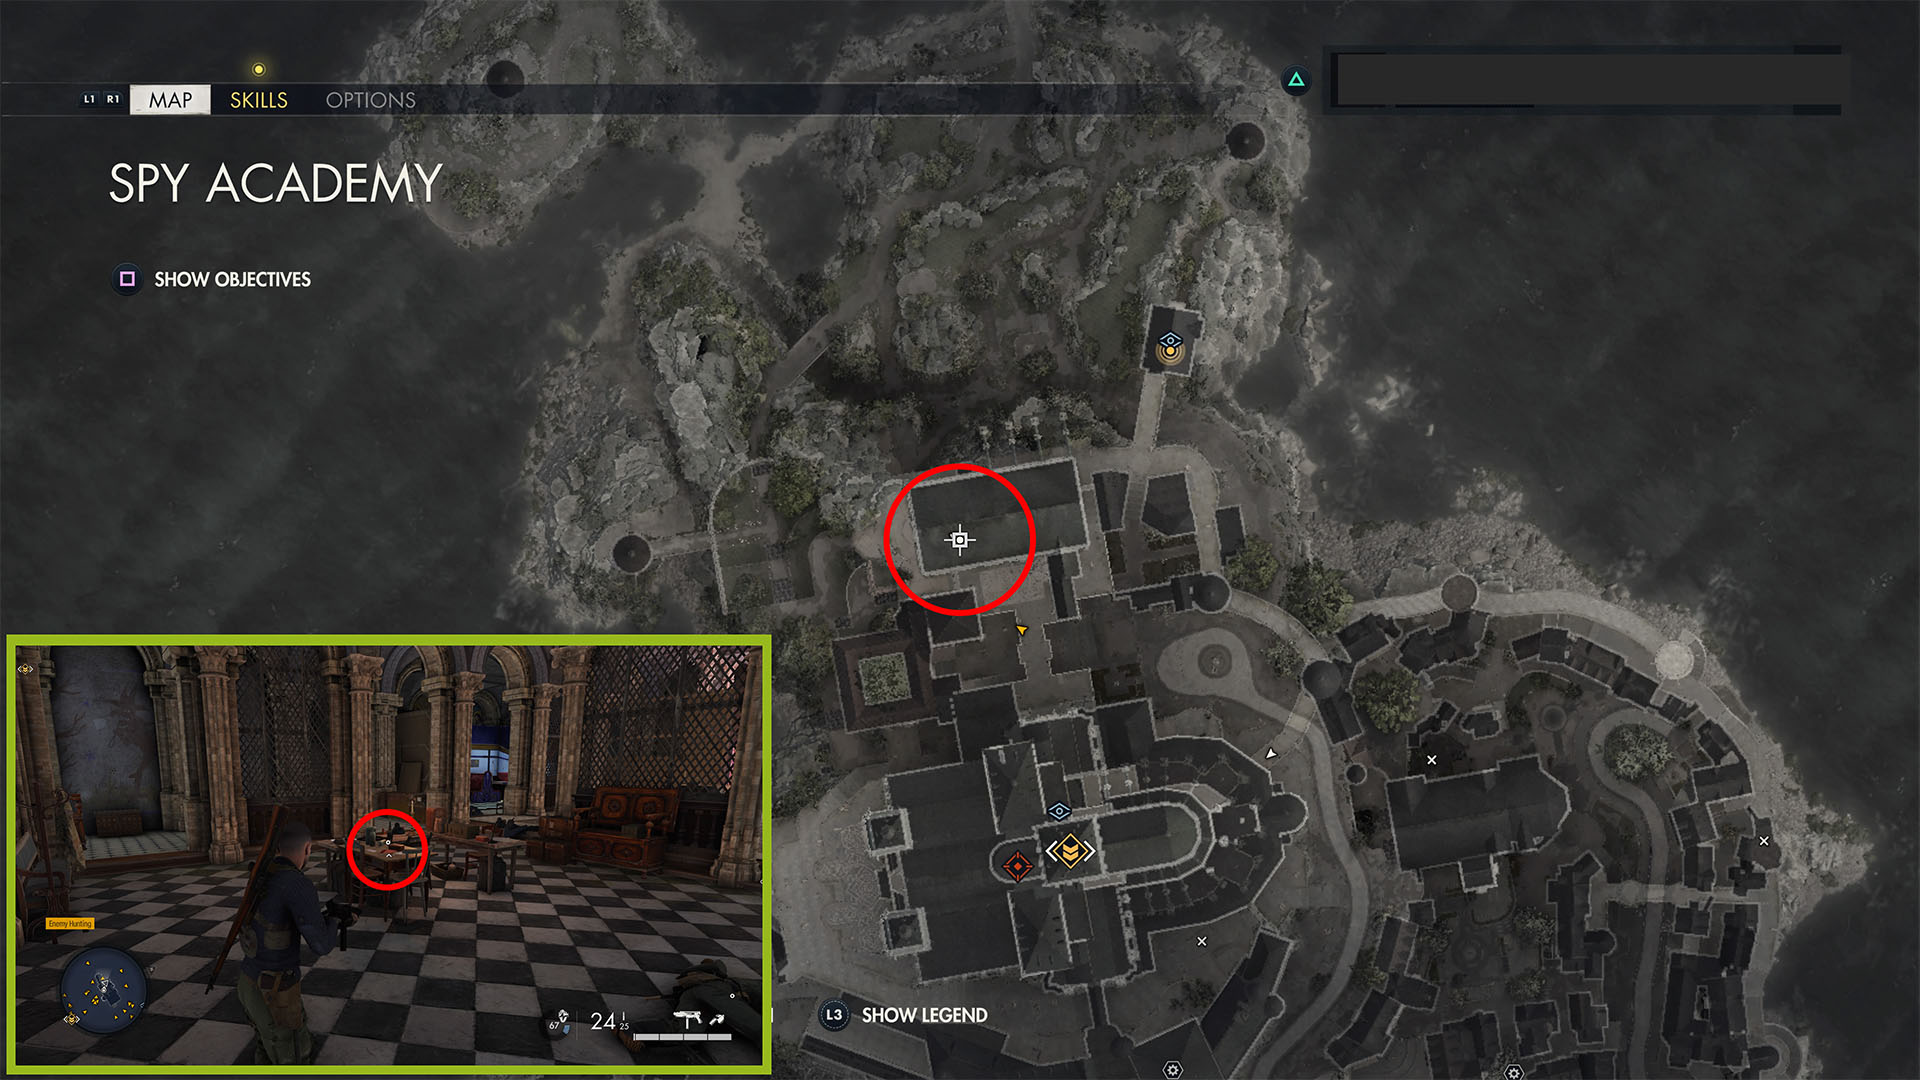
Won’t Be Attending and Armoury Exposed (Classified Documents 1+2)
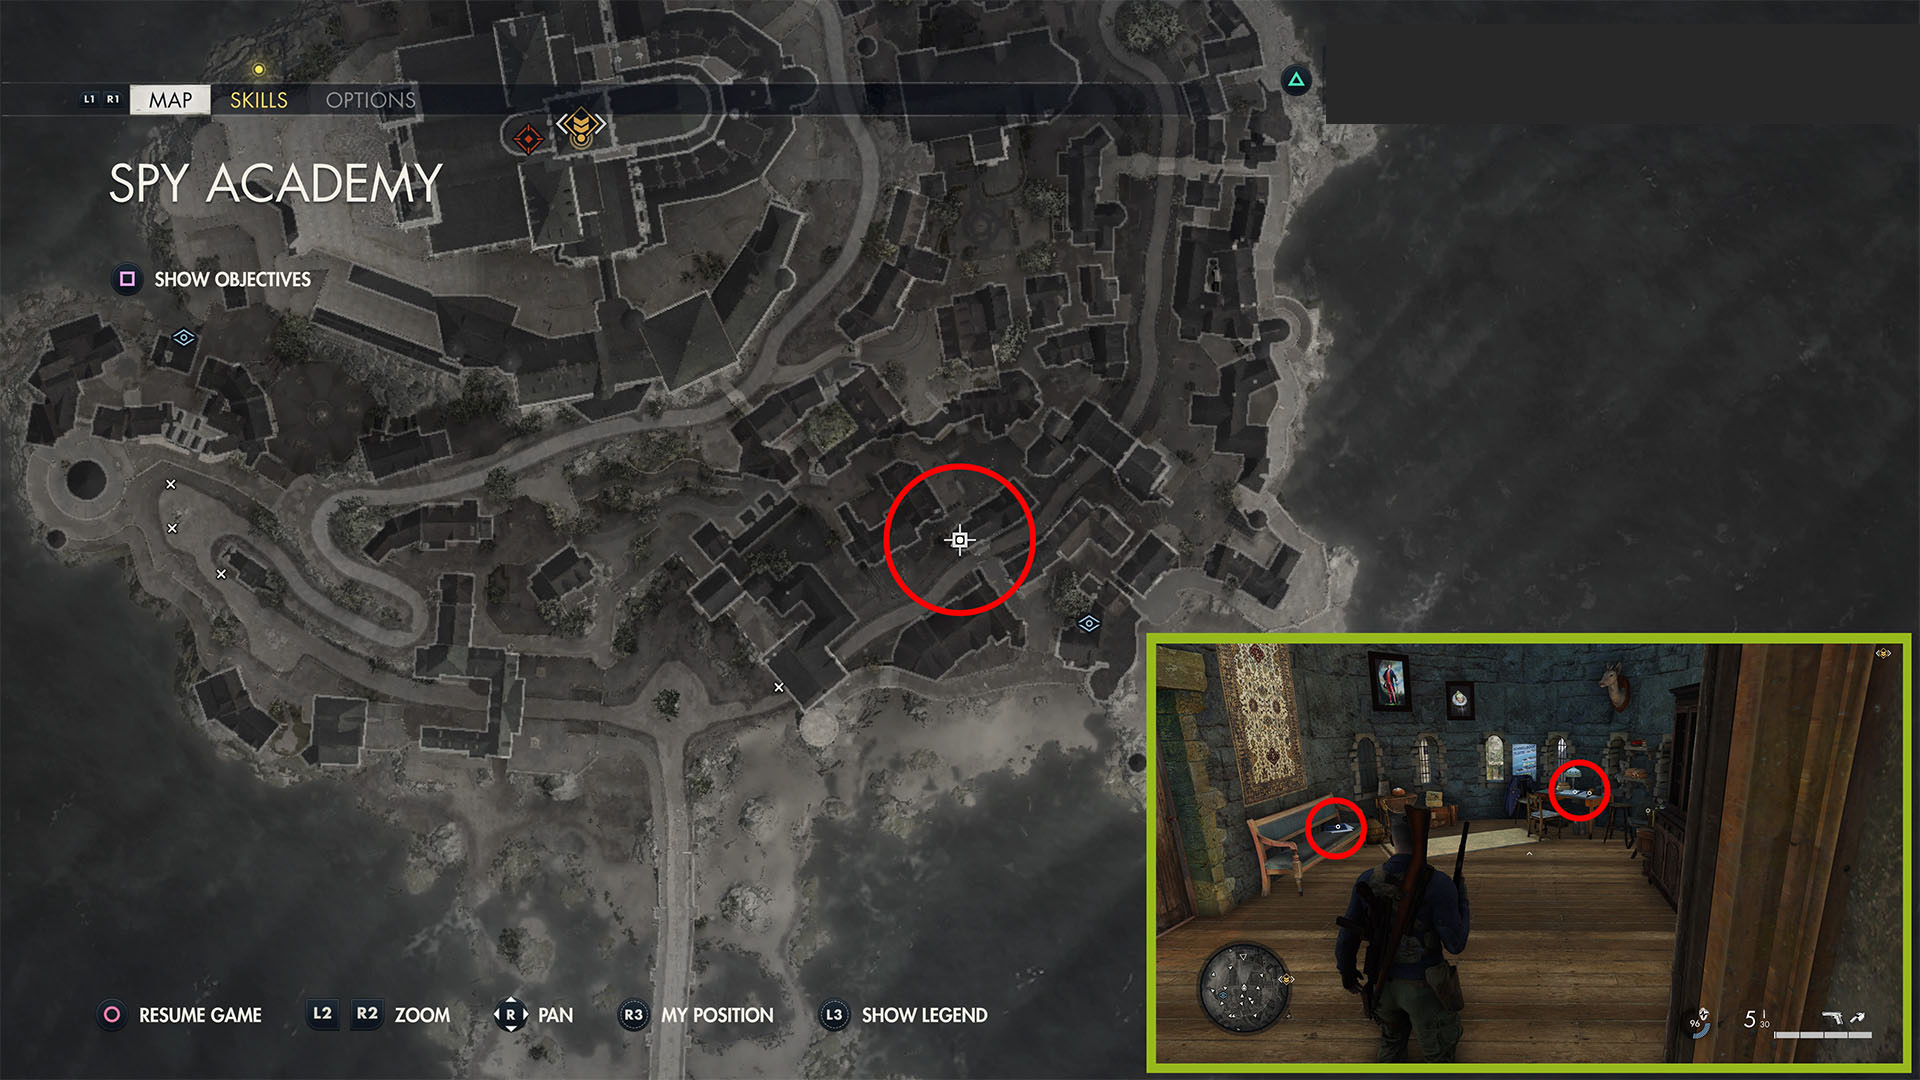
Stay along the sand on the right side of the bridge, and head toward the island. As you approach the craggy beach, you’ll see a round castle tower and a castle gate on the right side. Go through the door to the left of the gate, through the gatehouse, and up the road toward a parked truck (Karl will remark that it will make a hell of a distraction).
There is another castle tower to the left of the truck. Climb to the top of it to find both of these documents on a couch and a desk, one on the left and one on the right.
Town Wall Starting Location
After picking up those classified documents, go back down two floors, and go out the left side of the tower. Cross the small bridge going over the road below, and follow the path down and left. At the bottom of the stairs, you’ll see a low wall with white paint on it in front of you. Drop down to the bottom and open the gate.
SMG Workbench
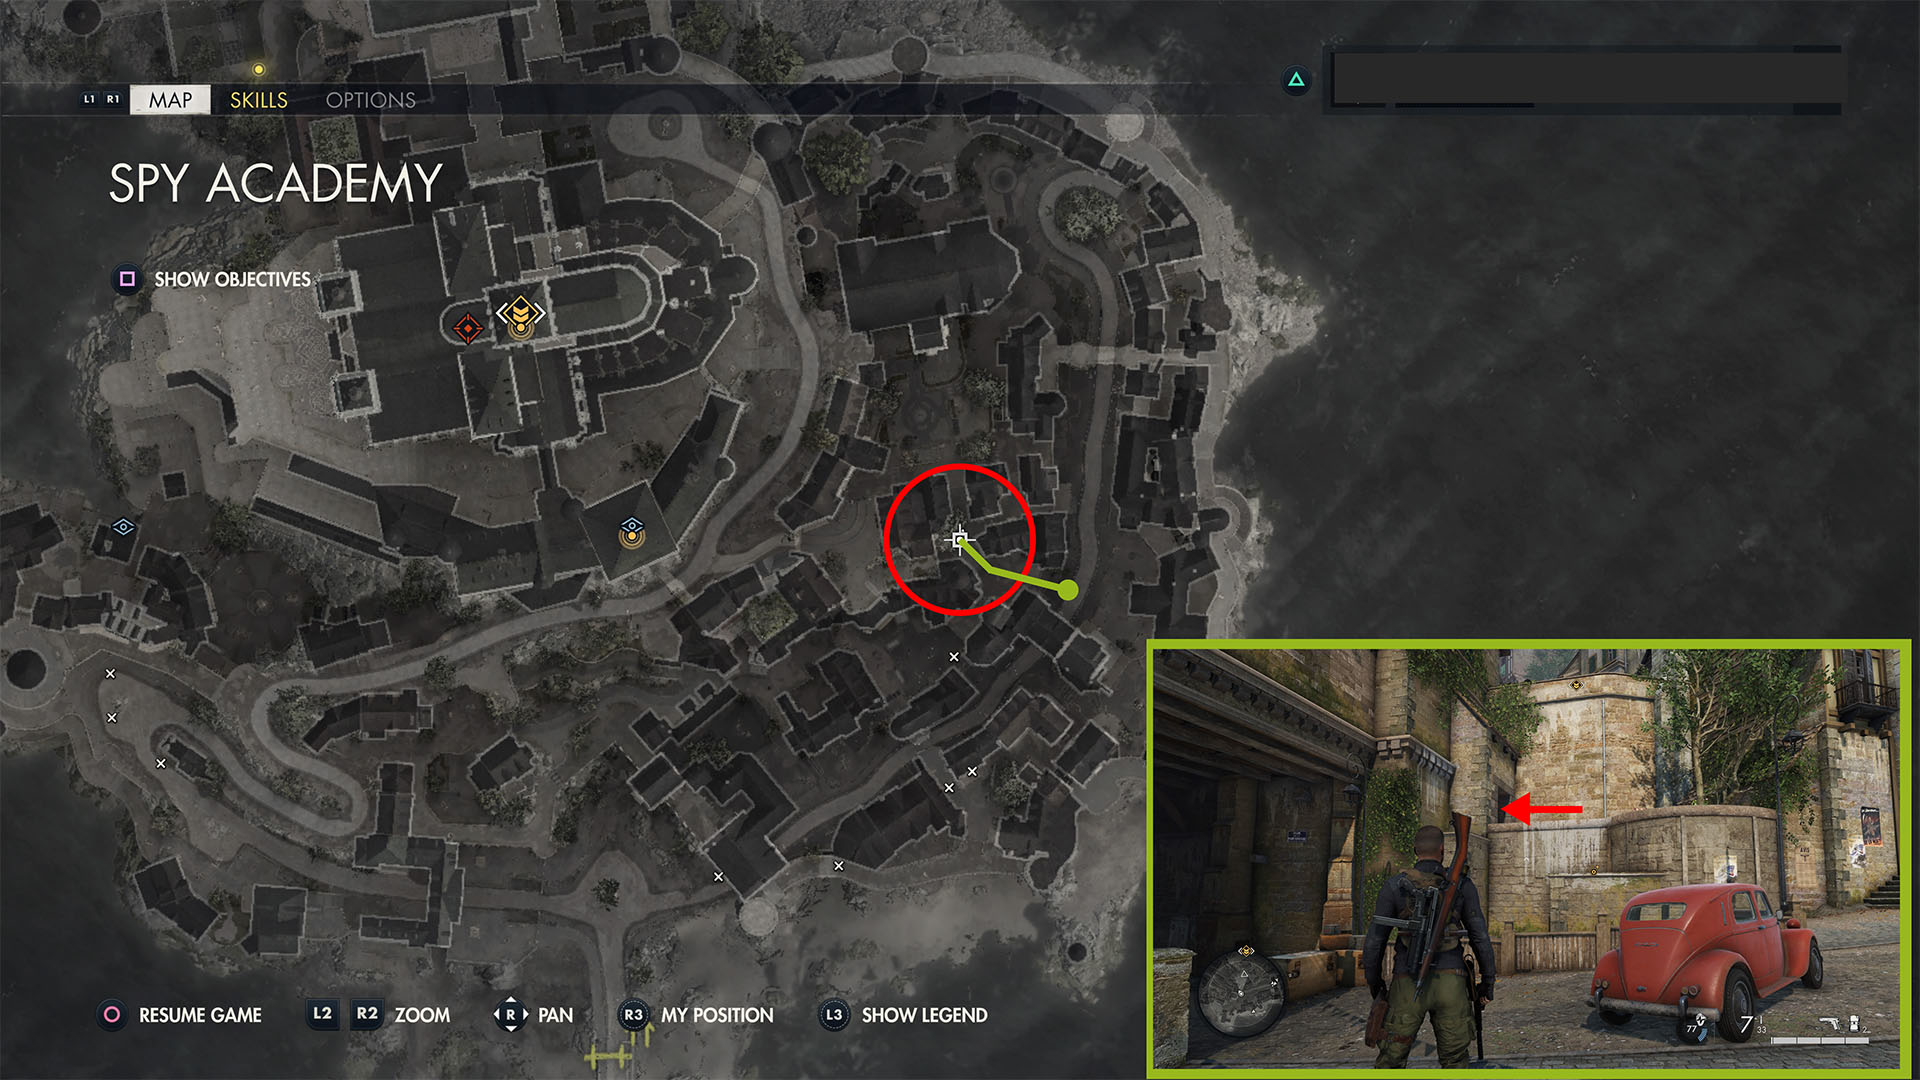
From there, follow the path left and back out to the road. You’ll see a hotel in front of you (and the truck Karl spoke about further down on your left). Turn right and climb up the wall with the white paint on it; the wall is to the left of a red car in the street. Once you climb up, turn left into a room inside the castle wall. Follow the path down to an armory, with this workbench just inside the door.
Just Attend One! and Resource Request (Personal Letter 2 and Classified Document 3)
Go back outside, and when you exit, use the pipe on the left to climb the wall. At the top, follow the path forward and up to the right. Continue through the iron gates at the top of the stairs into a small courtyard with a statue in the middle. Continue ahead and slightly left, heading toward the chapel in front of you with a black X’s on the outside.
Go through a small graveyard on the way, through a window, and turn right. At the wooden lectern, turn right again through a door, then left. Follow the stairs to the top and kill the officer for Just Attend One, then search the desk for Resource Request.
It’s Easy Money (Personal Letter 3)
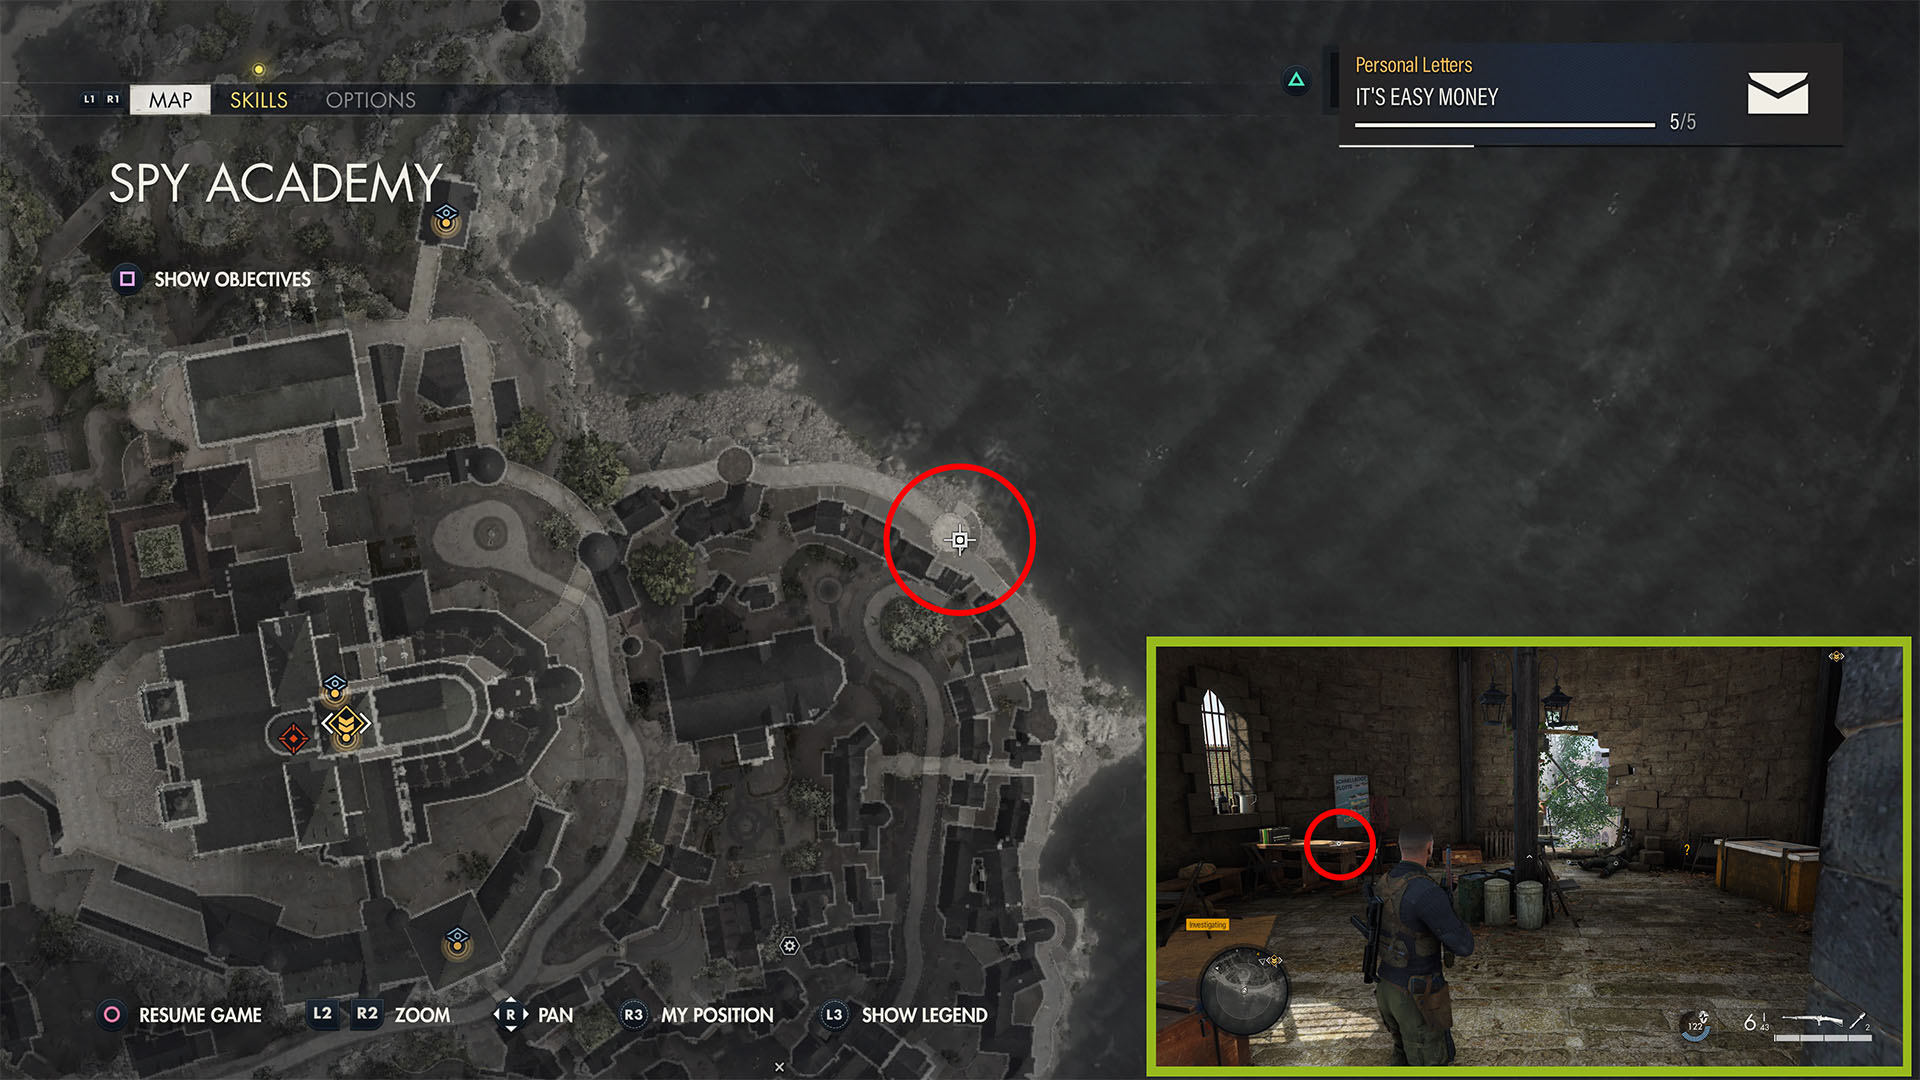
Use the zipline to get down from the tower. Turn left when you land, and go down the stairs to the right. Take the next set of stairs in front of you up, and follow the path outside and to the right. Continue up, then double back and go into the tower in the seawall. Kill the sniper and pick this document up from the tan table on the left.
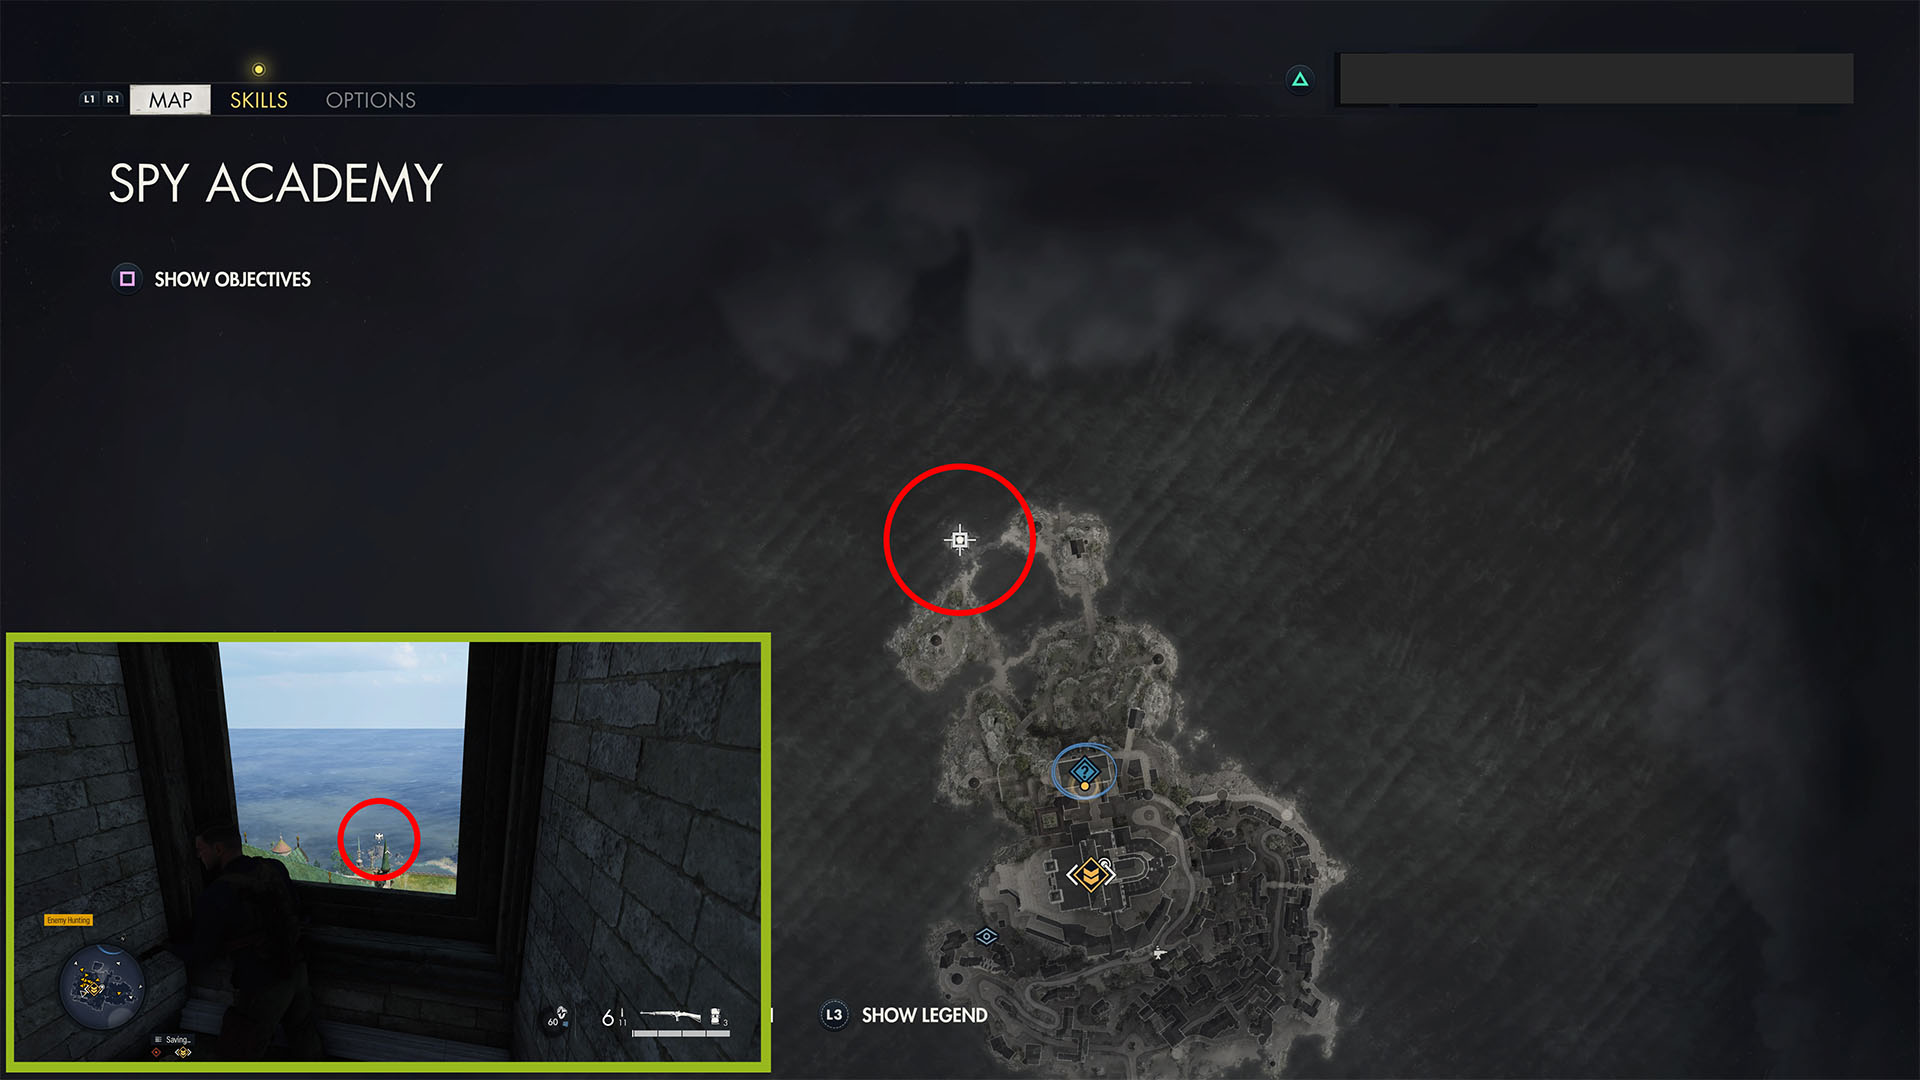
Stone Eagle 2
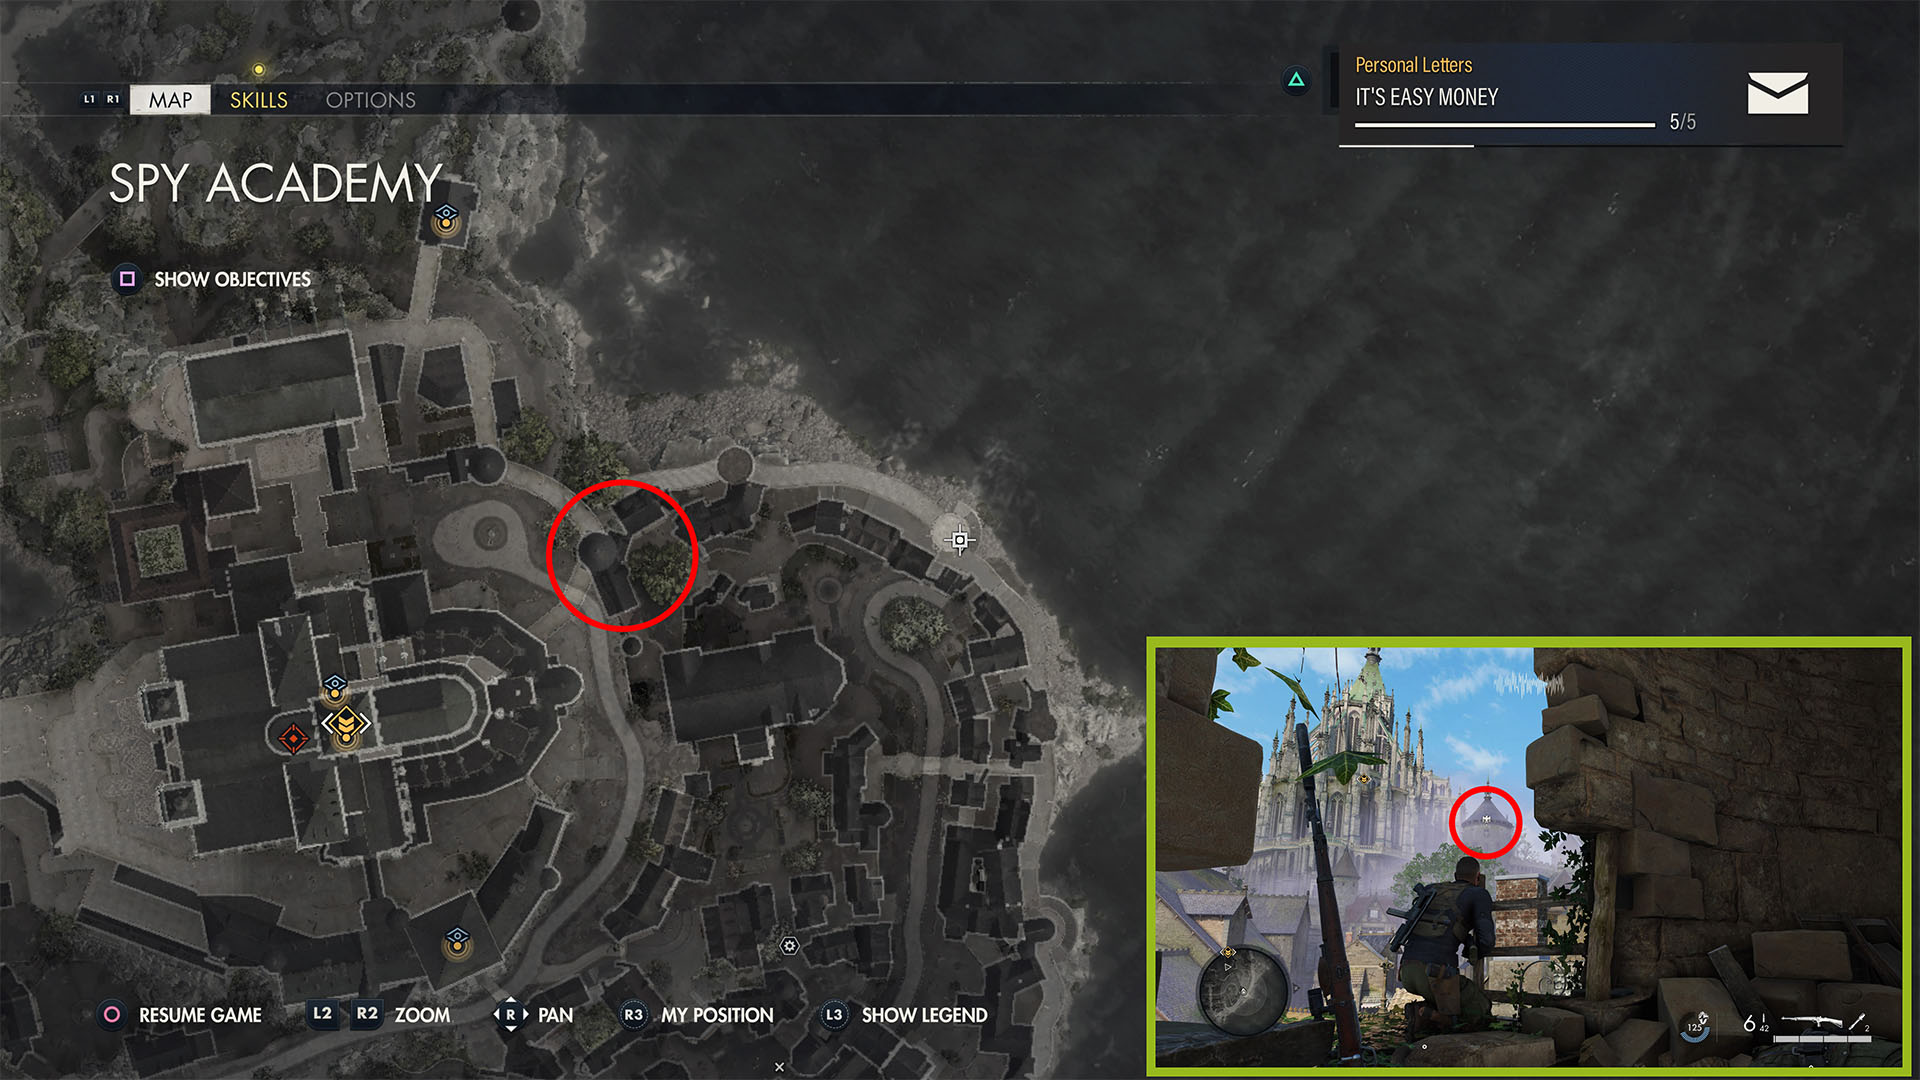
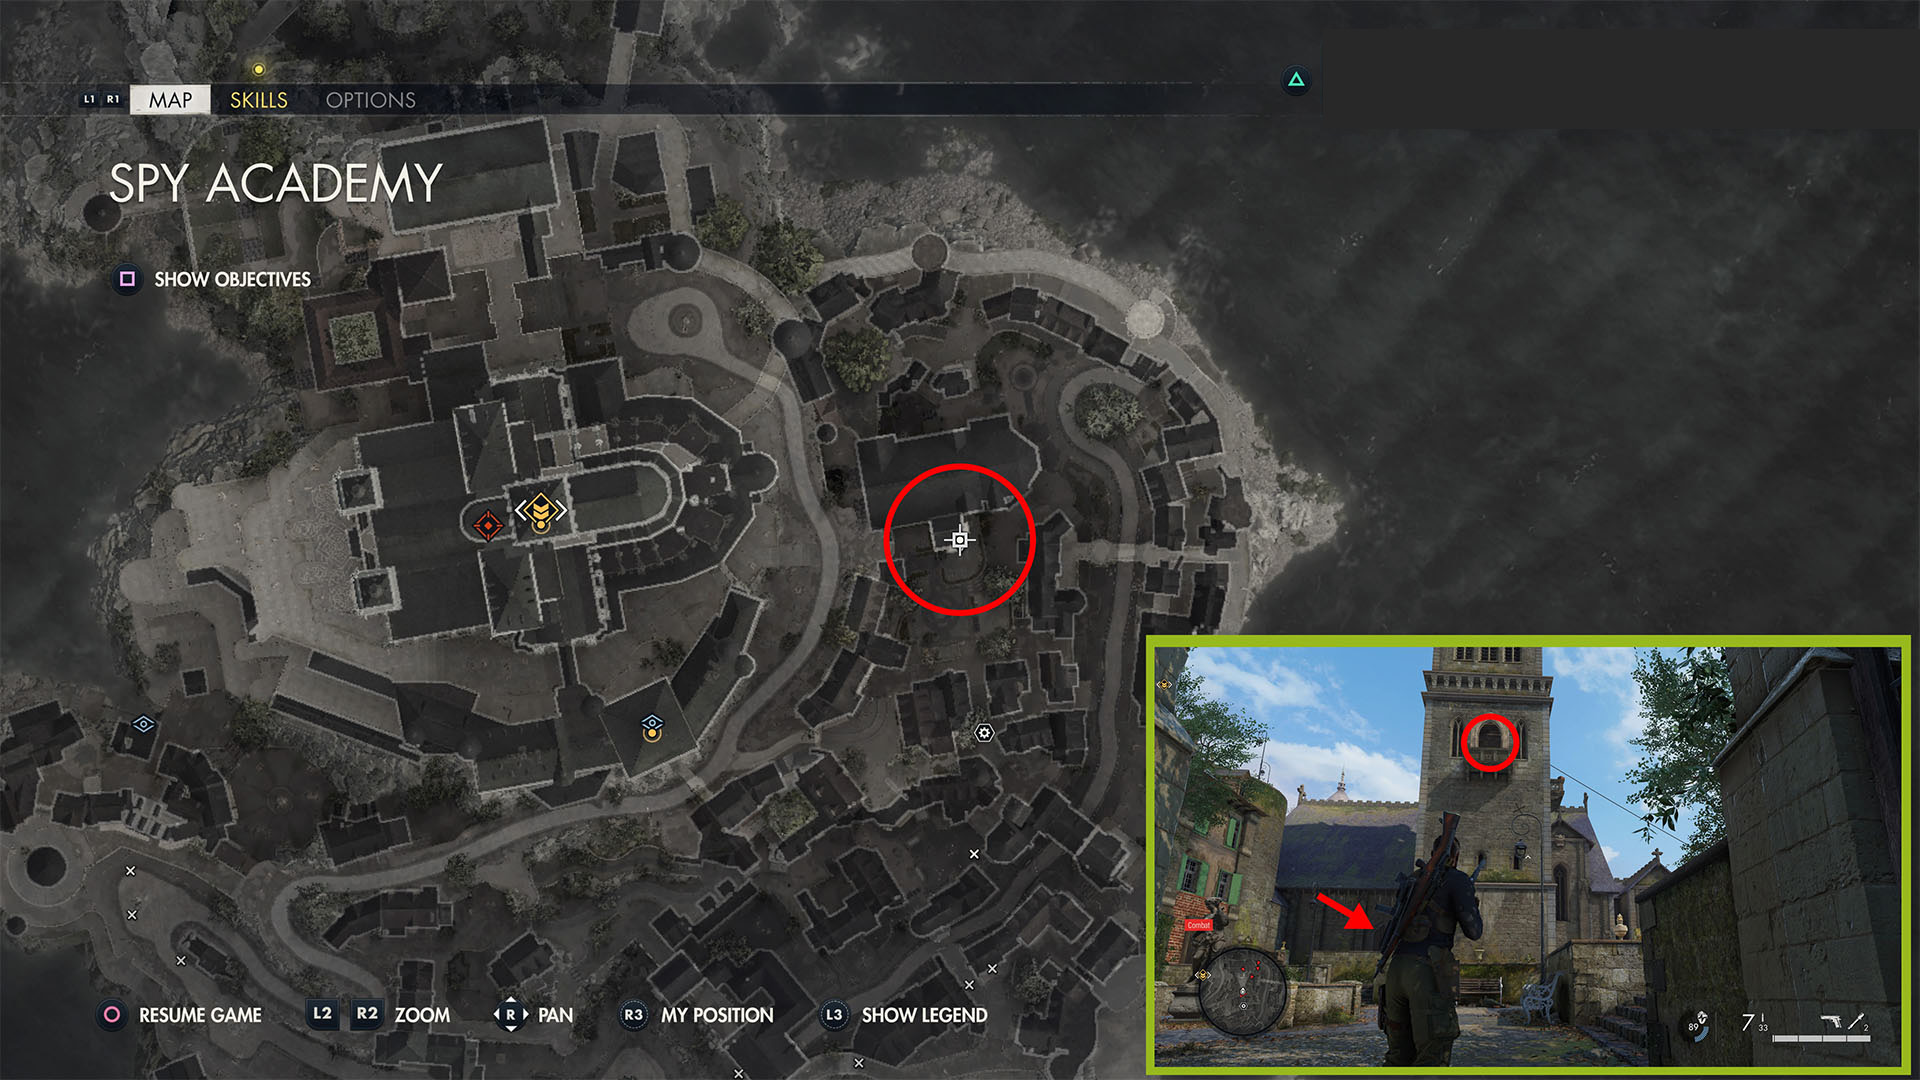
Go to the opening in the tower wall, and look toward the Cathedral, west/slightly northwest. You’ll see a tree with green leaves and a tower with a blue roof behind it. The eagle is above the central window of the tower from your vantage point.
Priority Package! (Classified Document 4)
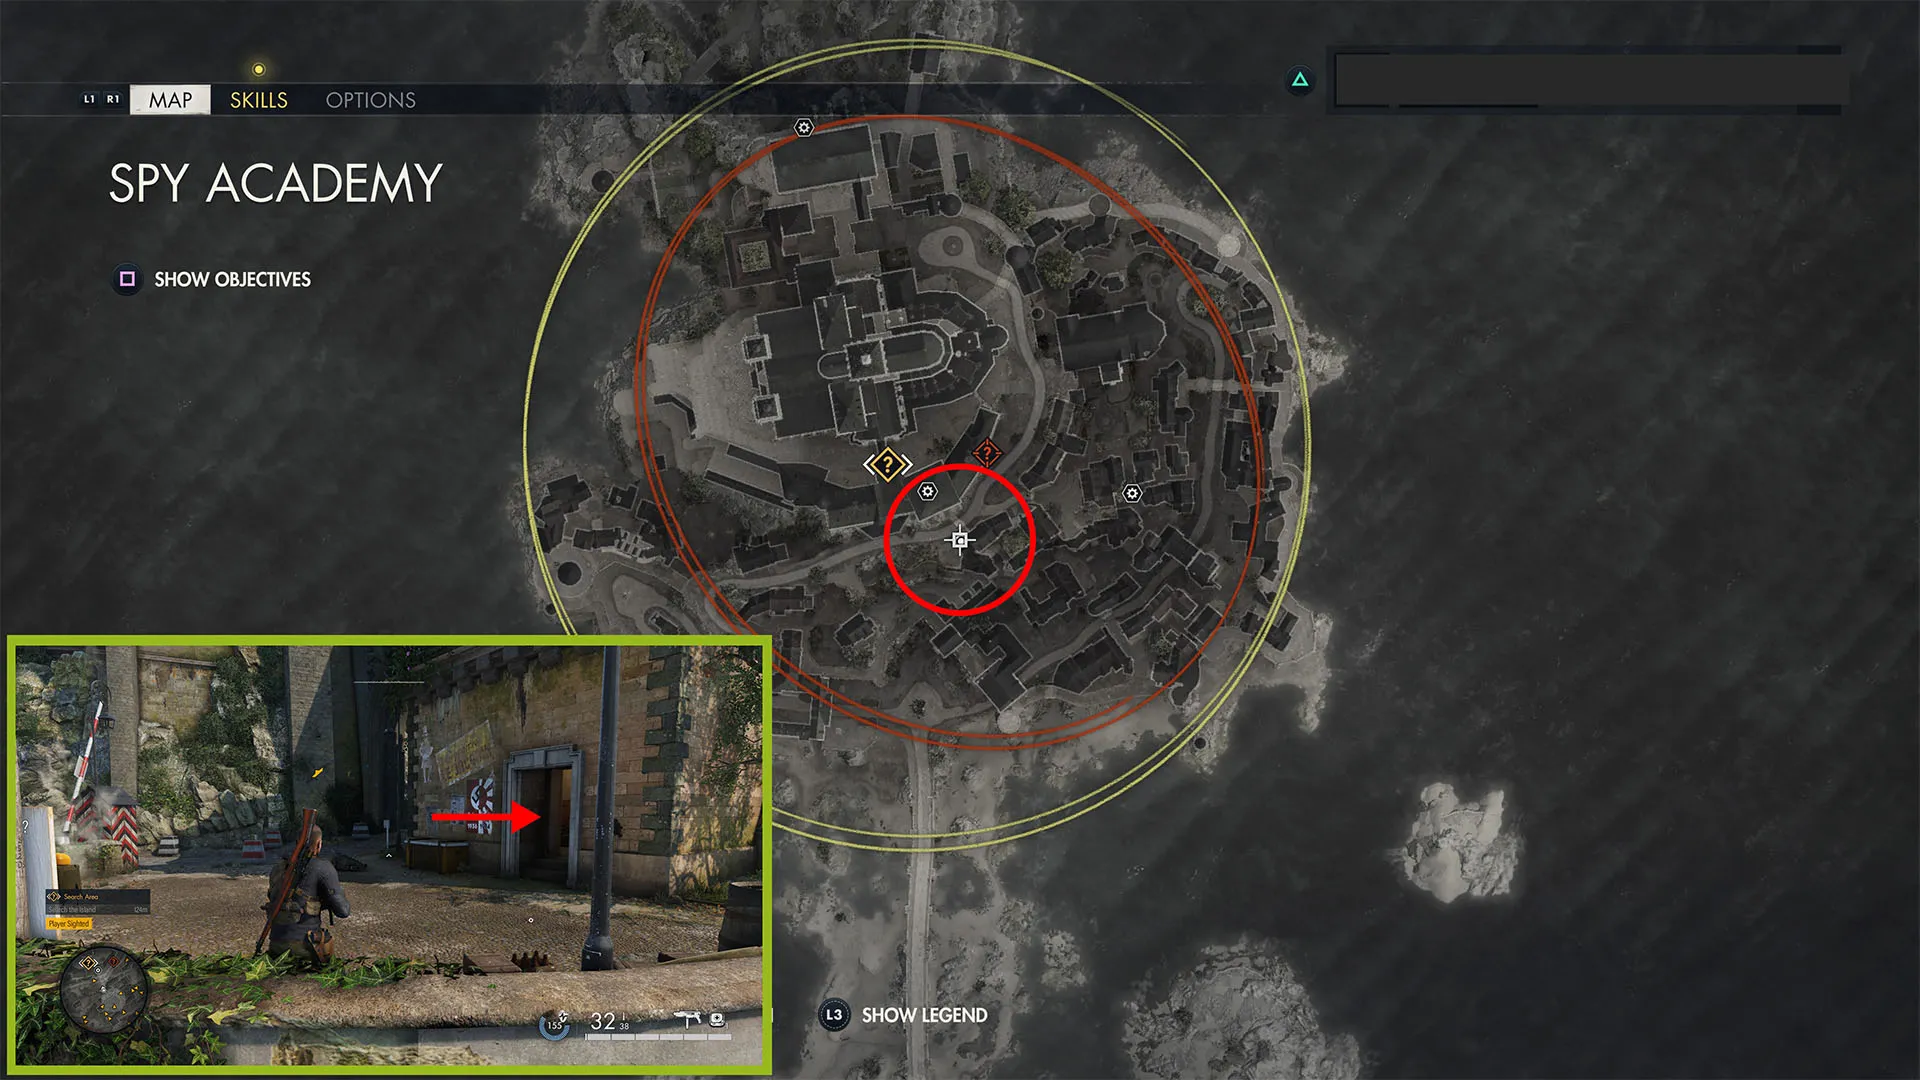
Take the zipline down from the tower back to the chapel. Exit the chapel back into the small courtyard with the statue where you originally entered. Take the small path through the graveyard and low walls on the southwestern side of the area.
Turn right, then left – you’ll see a blue car and a red car past an open iron gate. Turn right, and you’ll see that you’re behind an MG42 emplacement a little ways ahead on the left. Go through the house to your left (the one with the open back door and the visible bookcase), then down a set of stairs.
You’ll see an alarm ahead of you; turn right at the alarm (there will be a striped guardhouse by the road), then immediately right again through a doorway. Inside, you’ll find this classified document on a set of drawers by the window.
Do Not Be Late (Personal Letter 4)

Continue west by way of the main road, and go past the house with the red shutters on the right, then cross the bridge. On the other side of the bridge, you’ll see a bar/cafe on your right. There should be a soldier wearing a fieldcap here; this is Fregattenkapitan Seidl’s driver. Kill him for the note.
Note: If soldiers in the area become alerted, the driver could meet you on the bridge, near the house with the red shutters, or by the state car (more below).
Kriegsmarine Playing Cards (Hidden Item 1)
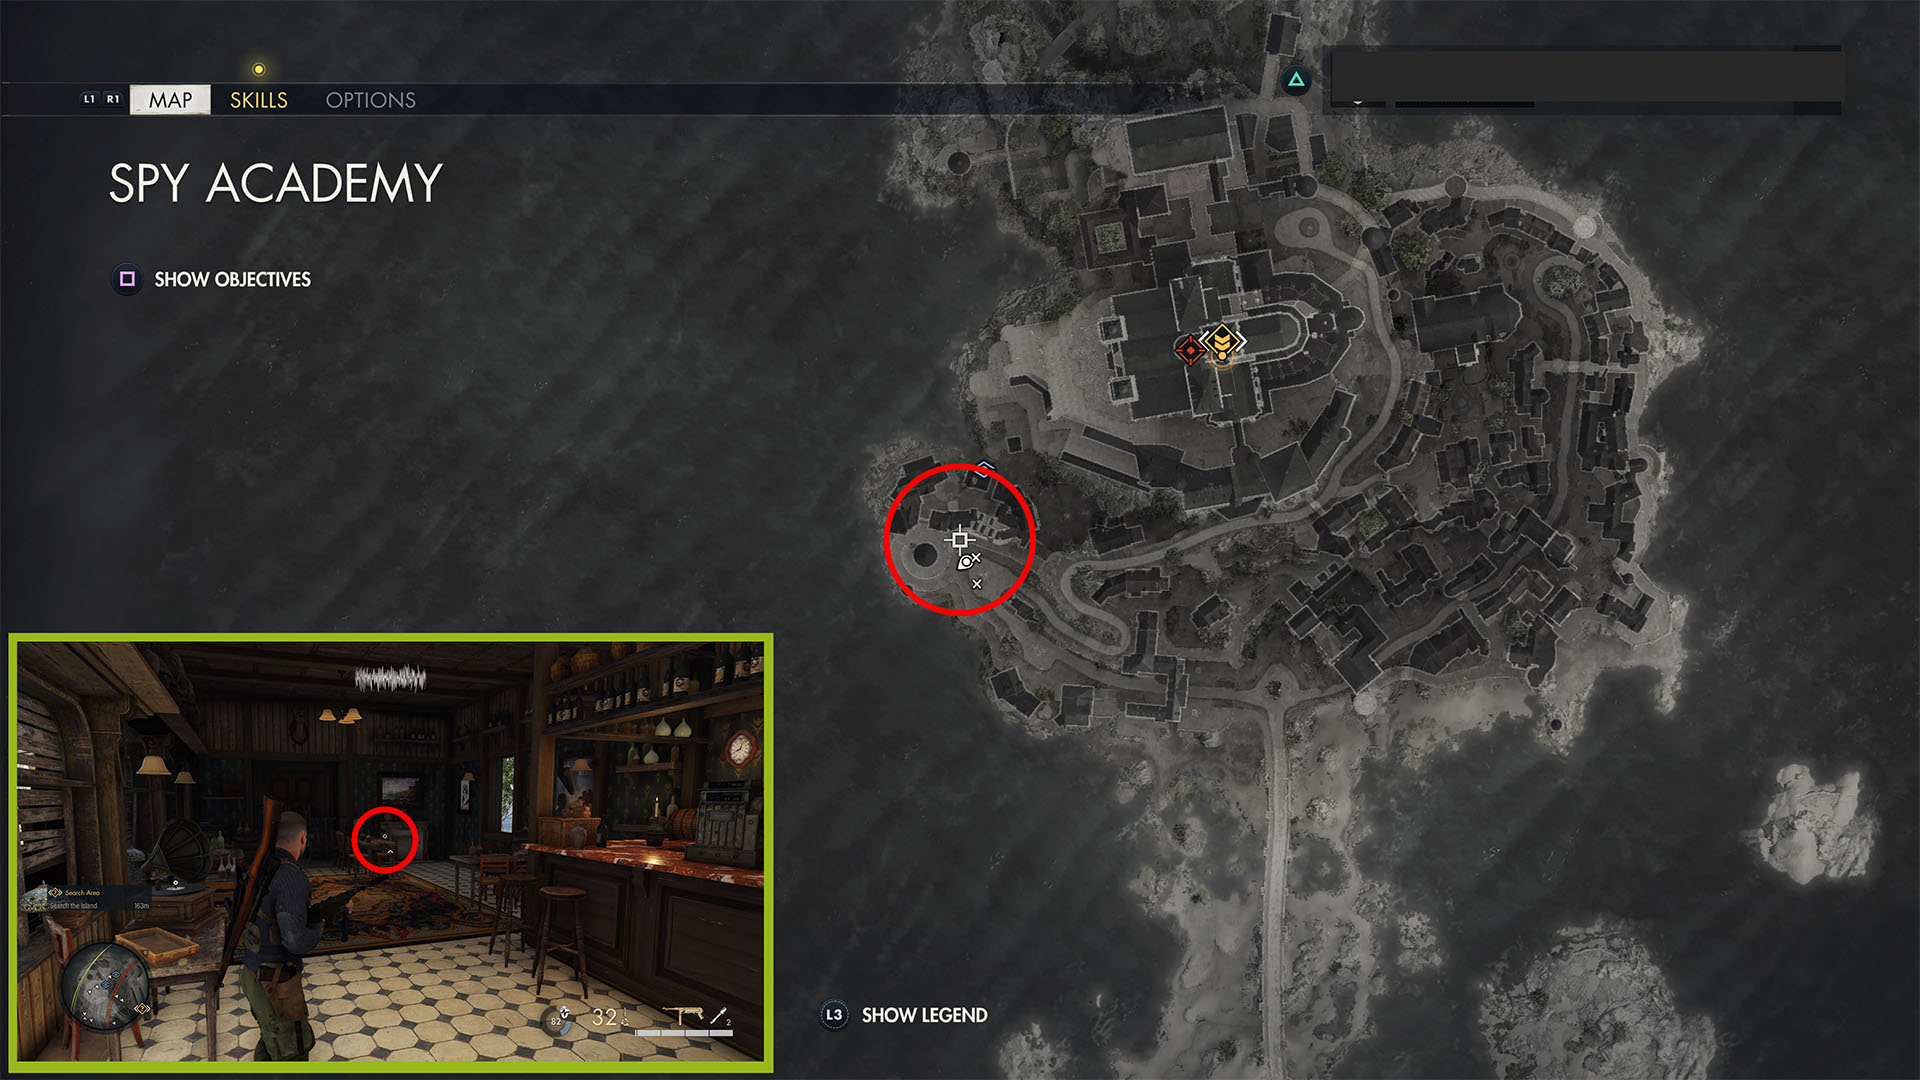
These cards are in the same building/cafe on a table to the left of the bar.
Parking Problems (Personal Letter 5)

This personal letter is in a trashcan where the state car is parked below the bar/cafe. The trashcan is to the left of the state car, between two benches along a low wall. There is a lightpost and barrel near the benches.
Smugglers Landing Starting Location
Go back up toward the bar/cafe. At the top of the incline leading up from the parking area, go through the archway to the left of the tower (just west of the bar/cafe). Follow the path down four flights of stairs. At the bottom, there will be a gate on your left. Open the gate to secure this starting point.
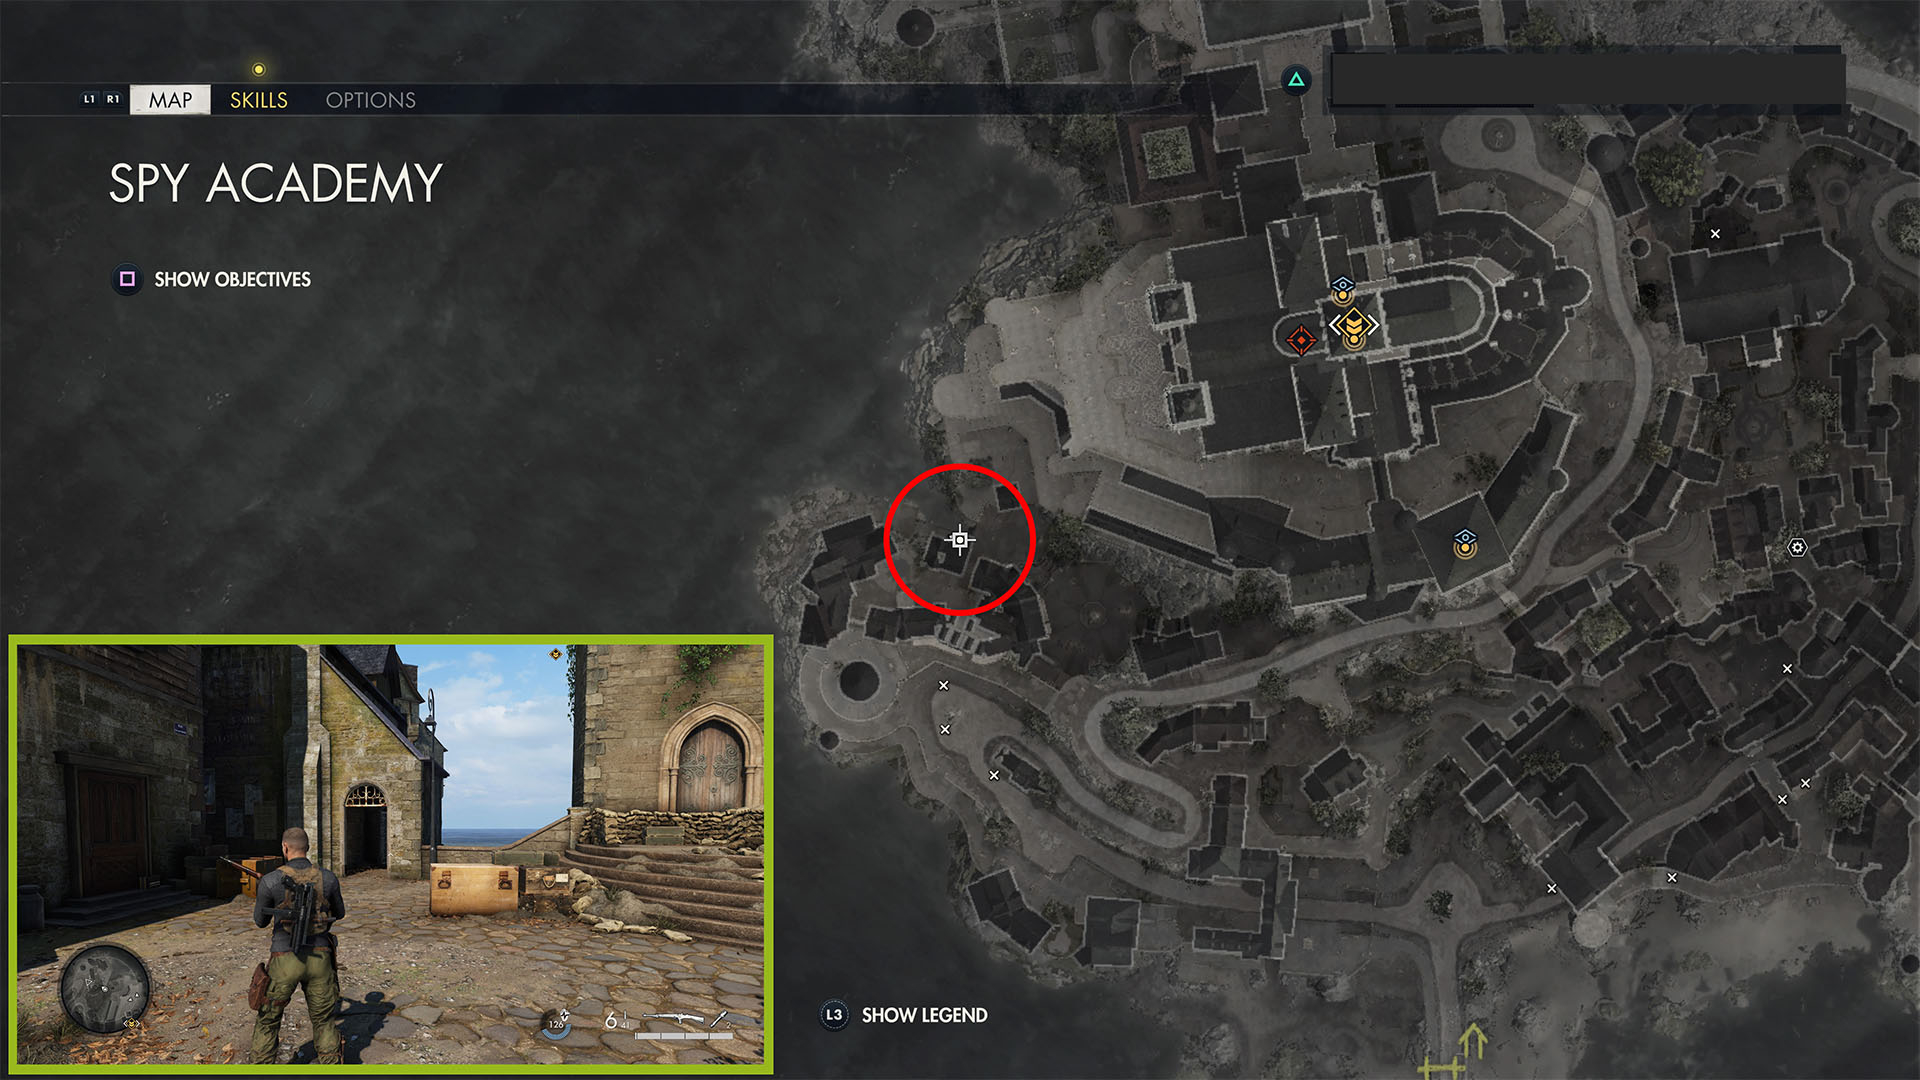
Pistol Workbench

Now we’re going to the upper-most level of the island for the remaining collectibles. Go back to the MG42 emplacement near the alarm (where you found Priority Package!, and follow the road up past a second MG42 emplacement.
Take the large set of stairs on the left, and follow the path left and up three more sets of stairs. At the top of the third, turn right to see a steel door with a Waffenkammer sign above it. The workbench is inside on the right.
Covert Ops Field Manual (Hidden Item 2)
From the pistol workbench, you’re headed to the rectangular building north of the cathedral, against the northern cliffs. Instead of going through the cathedral, go around the back, western side of it. Pass through the area with the alarm, then continue down the stairs.
Go through the garden area with the tree in the middle, and through the right side door. Go down the steps, then left at the boxes, past the statue. Follow the path right, then down a set of stairs, then left and through another doorway.
Go up a small set of stairs and turn right at the top. You’ll see three tables pushed together in front of you, with this on one of them.
Training Scenarios and Ornate Compass (Classified Document 5 + Hidden Item 3)
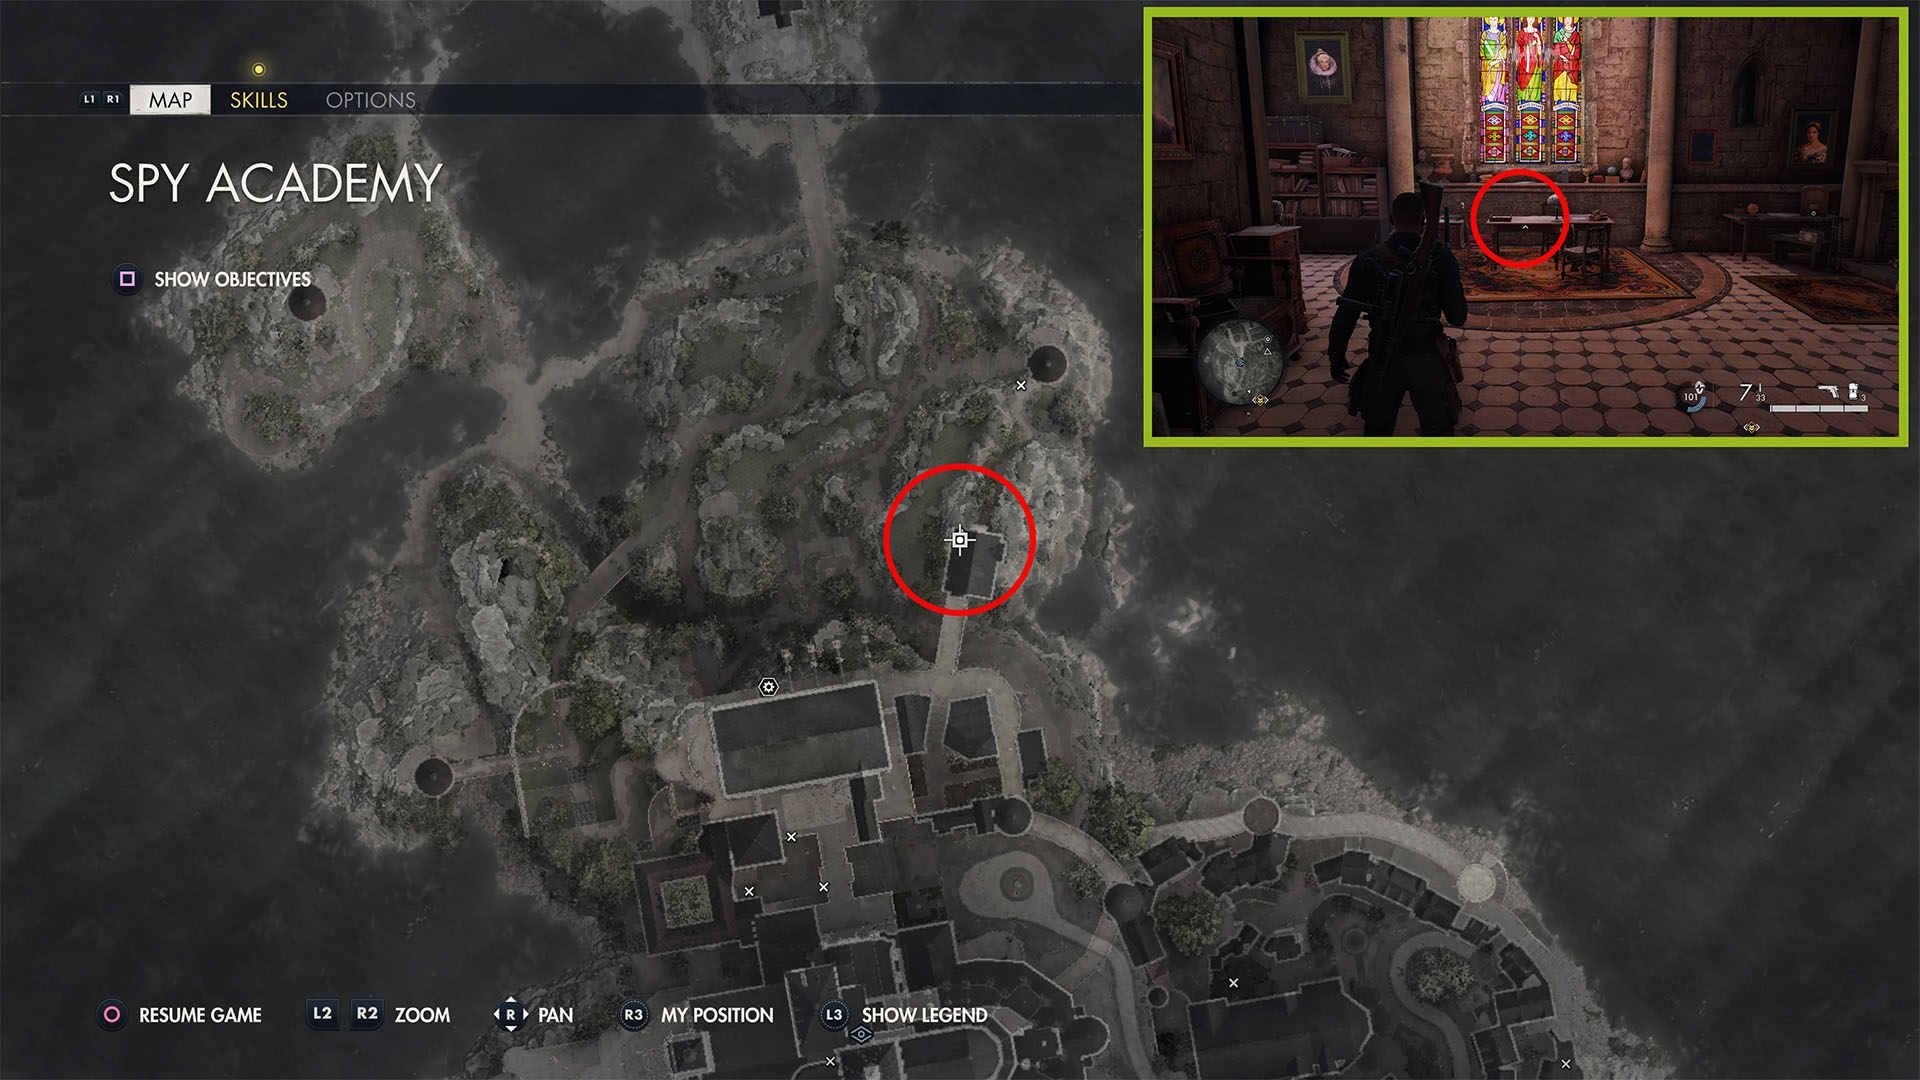
Turn around from the previous intel, and go back outside the way you came. Turn left in the area with all of the columns, then go down a set of stairs into a small garden are with statues and benches, then left up a set of stairs.
Go straight ahead into the spymaster’s office. Continue upstairs and get Training Scenarios off of the desk underneath the stained glass windows, and retrieve the ornate compass from the safe in the room adjacent to the entrance.
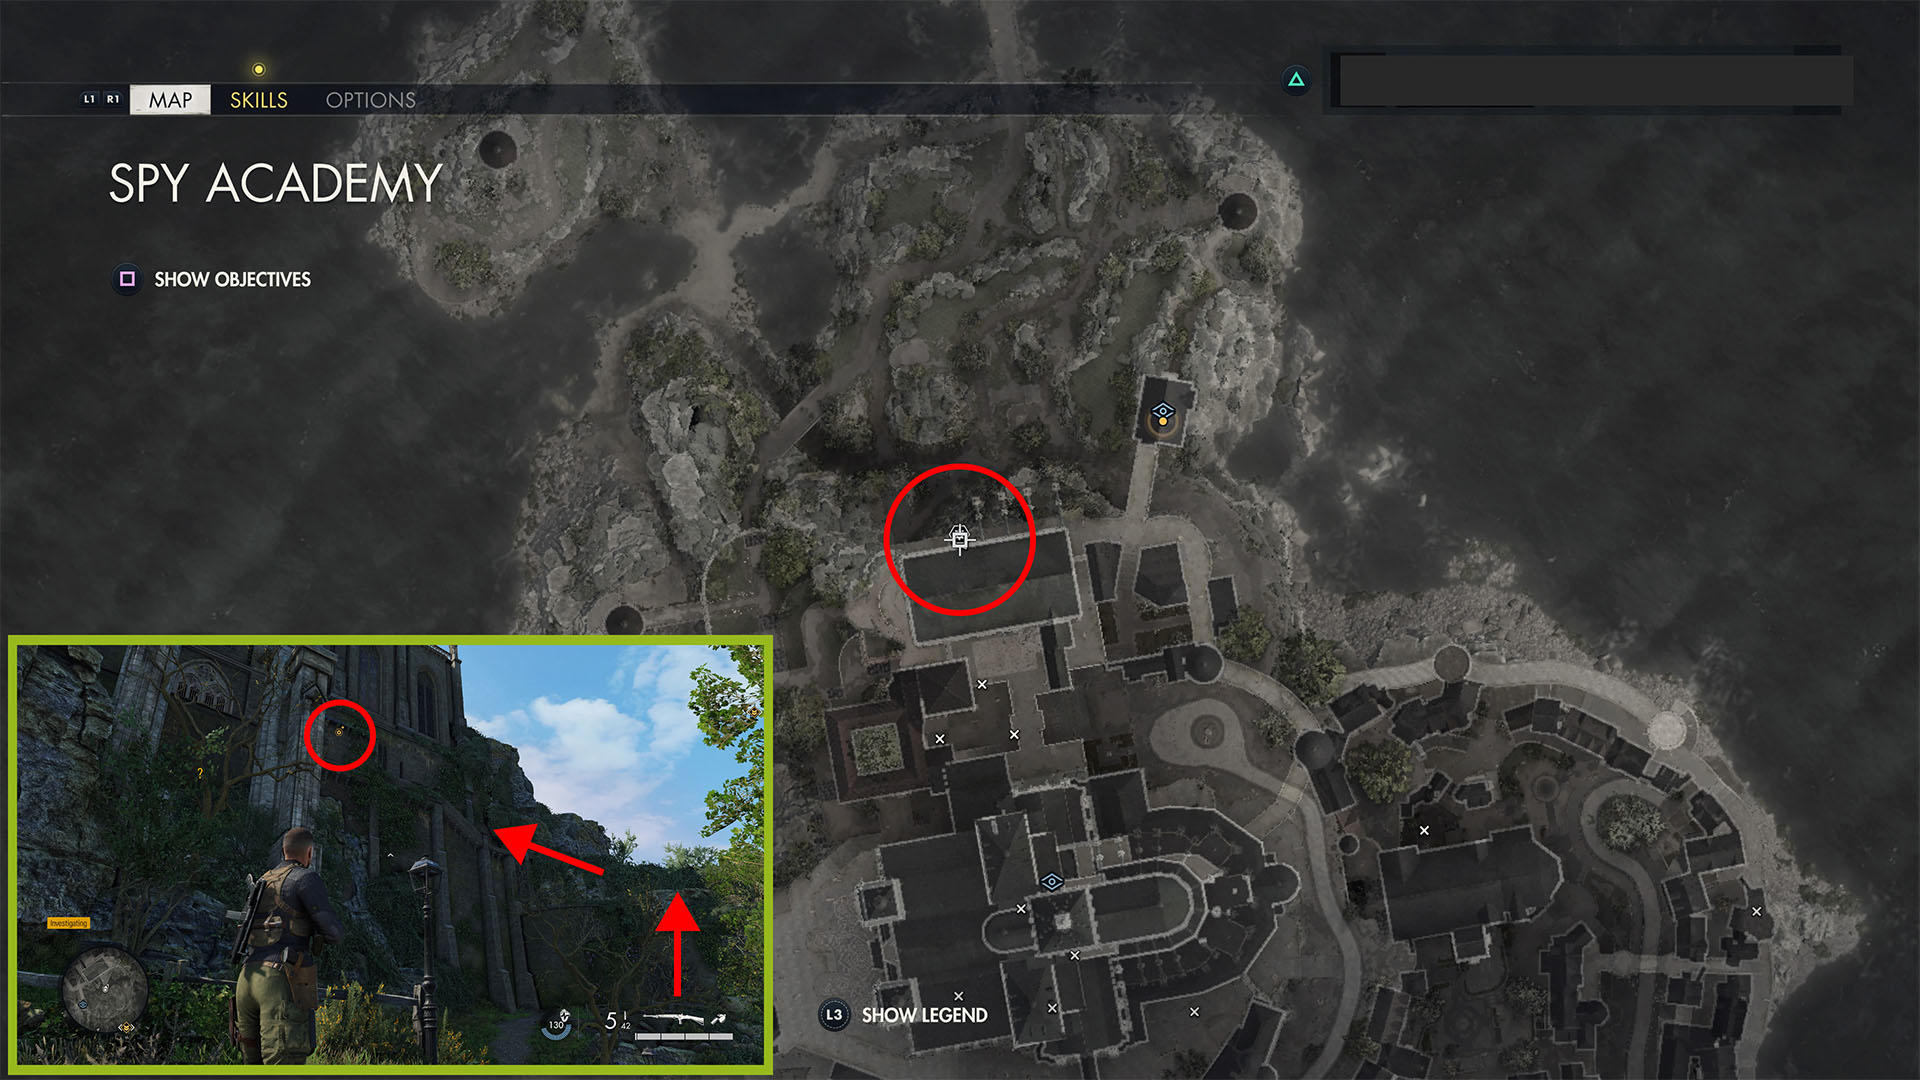
Stone Eagle 3
Continue on with the mission, and you’ll see this stone eagle from the bell tower above the meeting. It’s on the extreme northern side of the island, perched on stone ruins to the left of the extraction point. You can also snag it just before exfiltrating.
Rifle Workbench
This workbench is on the northern side of the building where you found the Covert Ops Manual, but it can only be reached from the outside. On the way to the extraction point, go to the northern side of the building and climb the vines on the western side. Then follow the path at the top left to the workbench.
And that’s where to find all of the collectibles, workbenches, and starting locations in Sniper Elite 5‘s third mission, Spy Academy. For more, click the links at the top of this guide or head over to our dedicated tips page.


Published: May 25, 2022 11:01 am