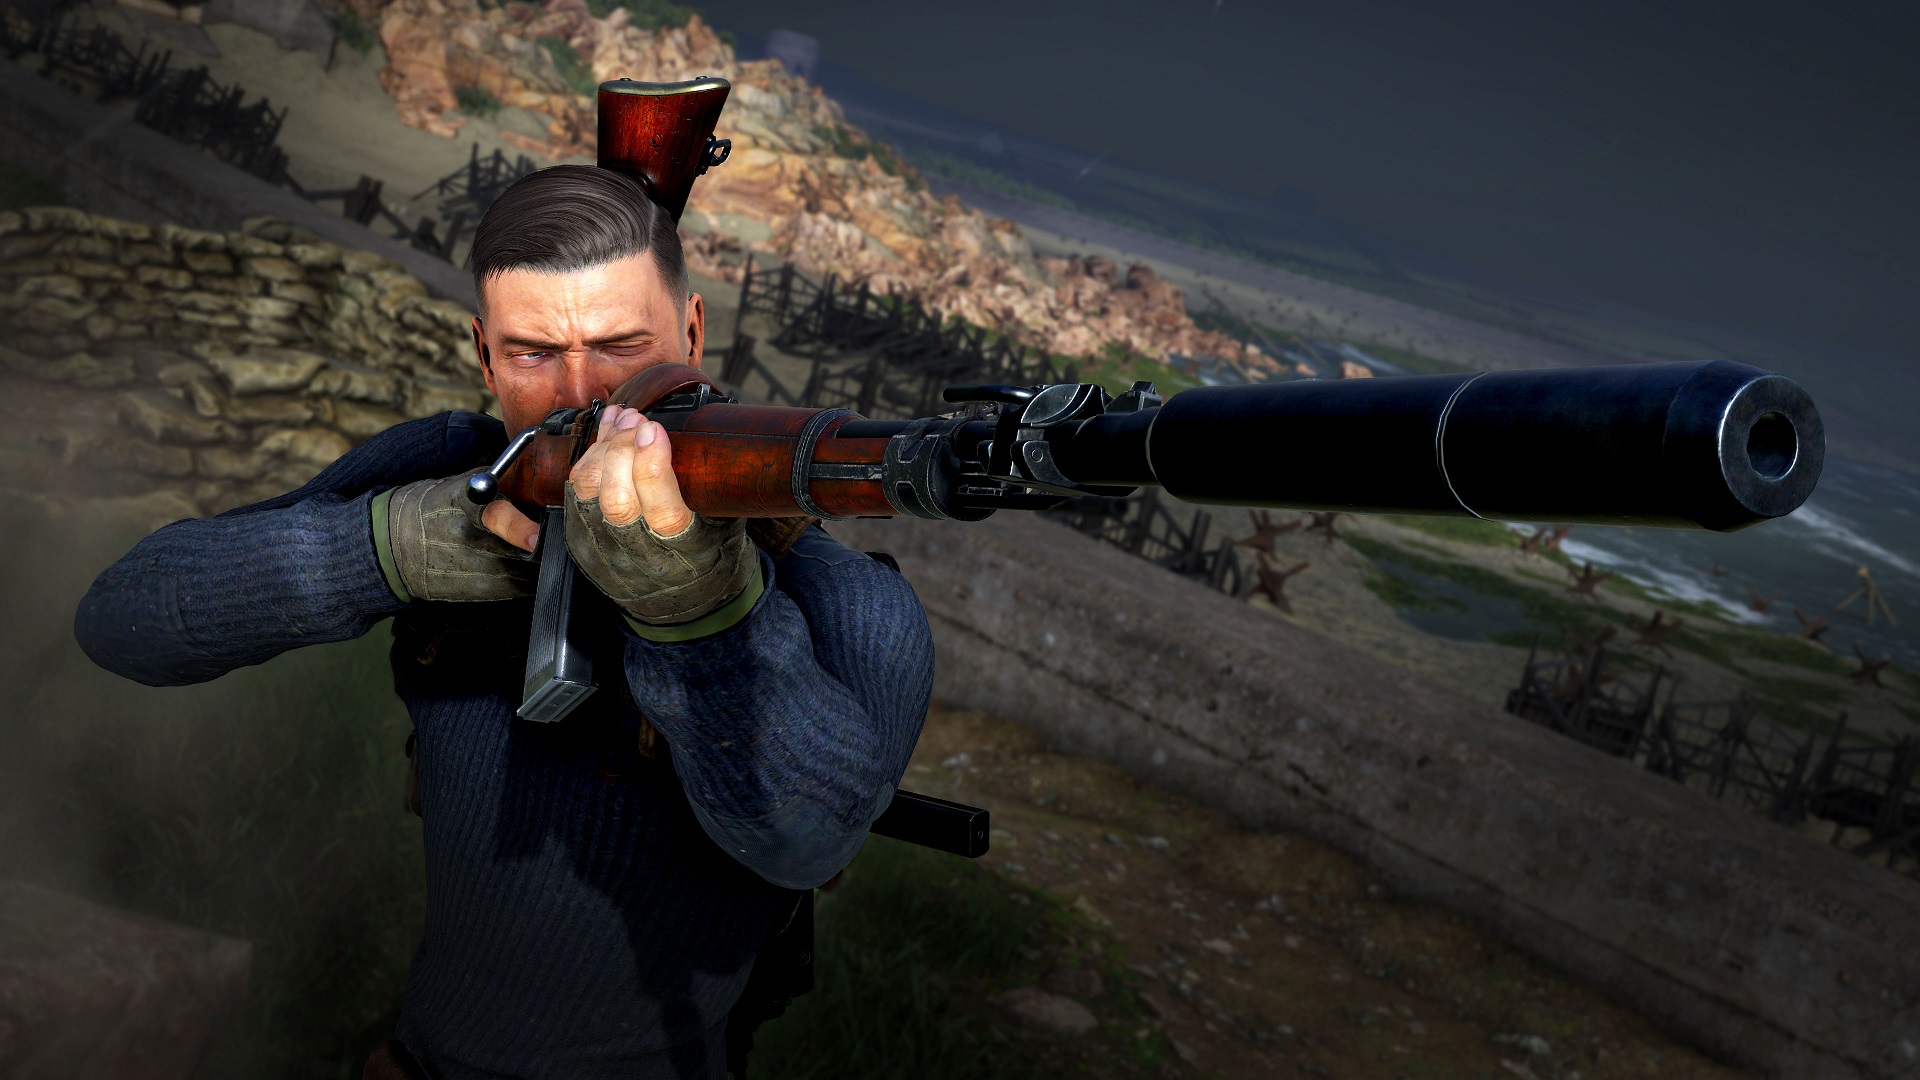
One of the best parts about playing Sniper Elite 5 is finding imaginative ways to eliminate Nazis, and the first eight campaign missions have kill challenges to help you do just that. The final level does not have a kill challenge, though there are several trophies and achievements associated with it that follow similar criteria. However, we won’t cover how to complete those here.
Instead, this guide will lead you through the kill challenges for missions 1-8, telling you how to pull off each assassination successfully. As you play, it may appear that some kill challenges are not working, but all of them can be completed by following these steps. Difficulty does not matter.
How to Find and View Kill Challenges
You can view each kill challenge in two ways:
- From the mission select screen by toggling info and looking at the second field from the right.
- From the in-mission map by toggling “Show Objectives,” then scrolling down to the “Kill List” objective.
Finally, completing each kill challenge unlocks one weapon, which can be seen in the loadout screen or in the kill list objective panel mentioned above. Weapons unlock as soon as a kill challenge has been completed.
Some players have noted that certain weapons, specifically the K98k, can be bugged and don’t unlock when completing their challenge. There’s not much way around this. Attempt the challenge again until an official patch squashes the issue (editor’s note: I did not run into any such bugs while completing these kill challenges).
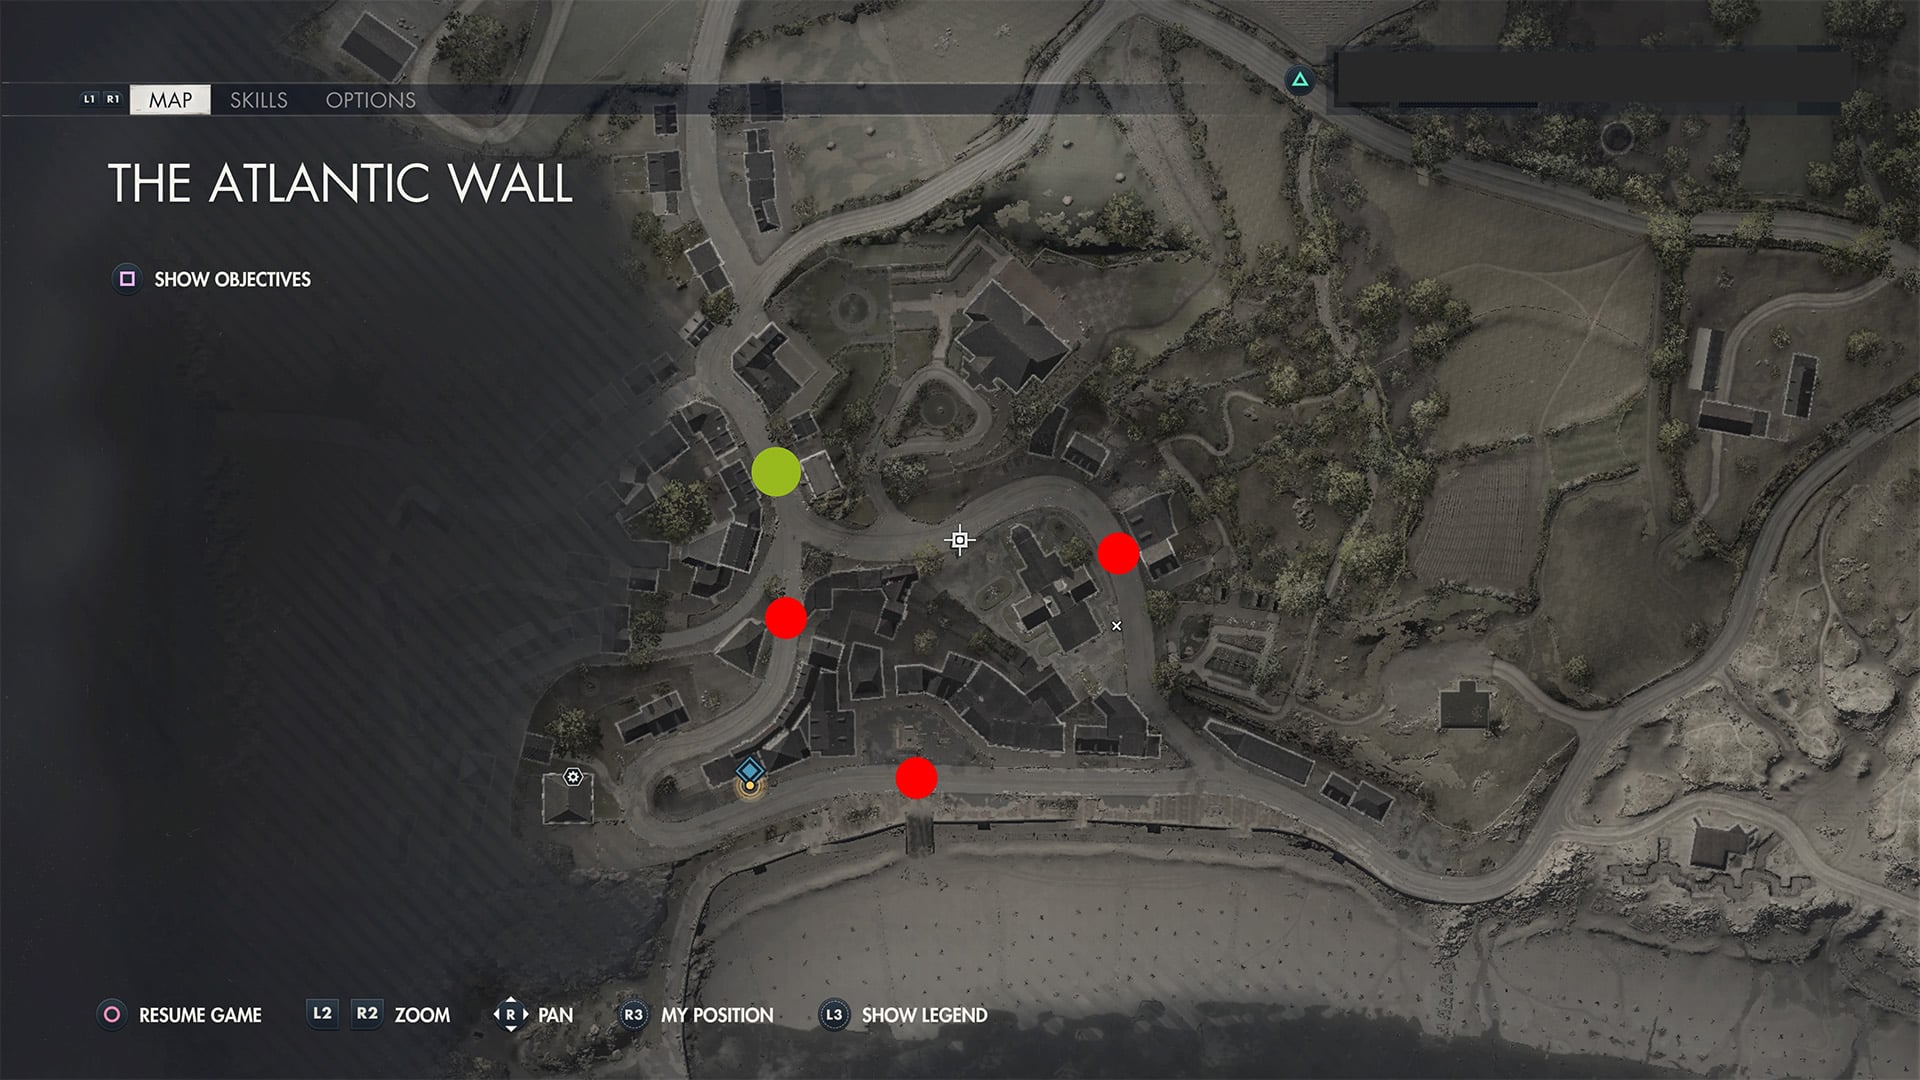
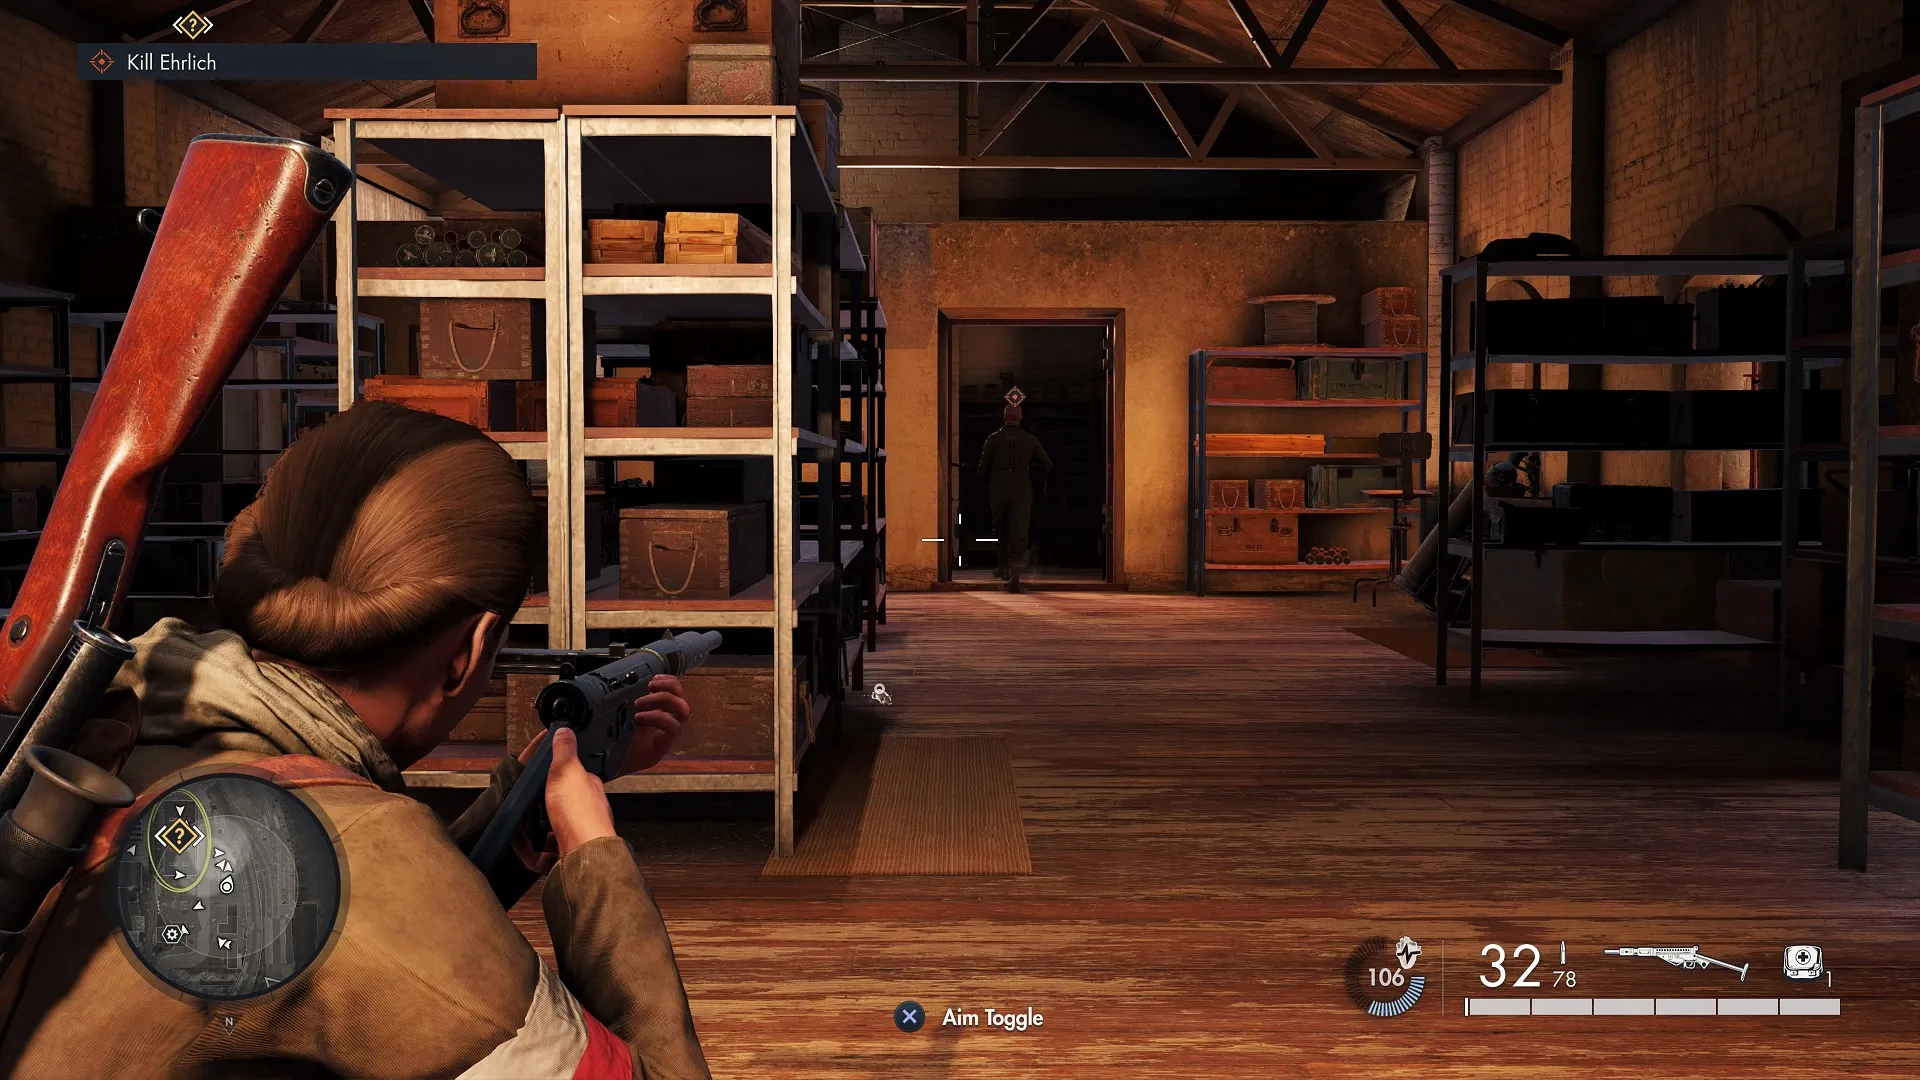
Mission 1: The Atlantic Wall — Kill Steffen Beckendorf with an Explosion
- Reward: M. Pist. 40.
Steffen Beckendorf can be found in the town on the western side of The Atlantic Wall map. He patrols the road circling the town. He stops at three places along his route (marked in red above):
- In front of the market square along the southern coast.
- In front of Moller’s office building to the west of the church. (It is the building with the Nazi banner northeast of the Resistance Safehouse.)
- In front of the church, on the eastern side.
In some instances, you may find Beckendorf missing. This happened once or twice to me, and I reloaded the level. It’s not clear what causes the bug, but it will likely be patched eventually.
When Beckendorff stops in the market square (about 3-4 minutes into the mission), he will patrol near several explosive canisters in the center of the area, on the southwest side. If you start from the Town Promenade, you’ll have a good look at them from about 125 meters away, keeping you far enough away from the patrolling Werhmacht along the road.
Another way to kill Beckendorf with an explosion is to use one of the Panzaerfausts found at the pavilion overlooking the ocean southwest of the town, near the Town Promenade starting location. Its arc will reach the square from the pavilion, but landing the shot is a tad tricky.
Moving quickly enough from Town Promenade, it is possible to catch Beckendorff’s Kubelwagon before it leaves its initial location. That’s just northeast of Moller’s Office (from the road running north/south on the northern edge of town). A simple grenade toss works.
Other options call for laying a proximity Teller Mine in the path of Beckendorf’s Kubelwagon (difficult since you’ll need to get it close to the wheels), sticking a satchel charge on the back of the wagon, or simply wreaking havoc and throwing a grenade at him.
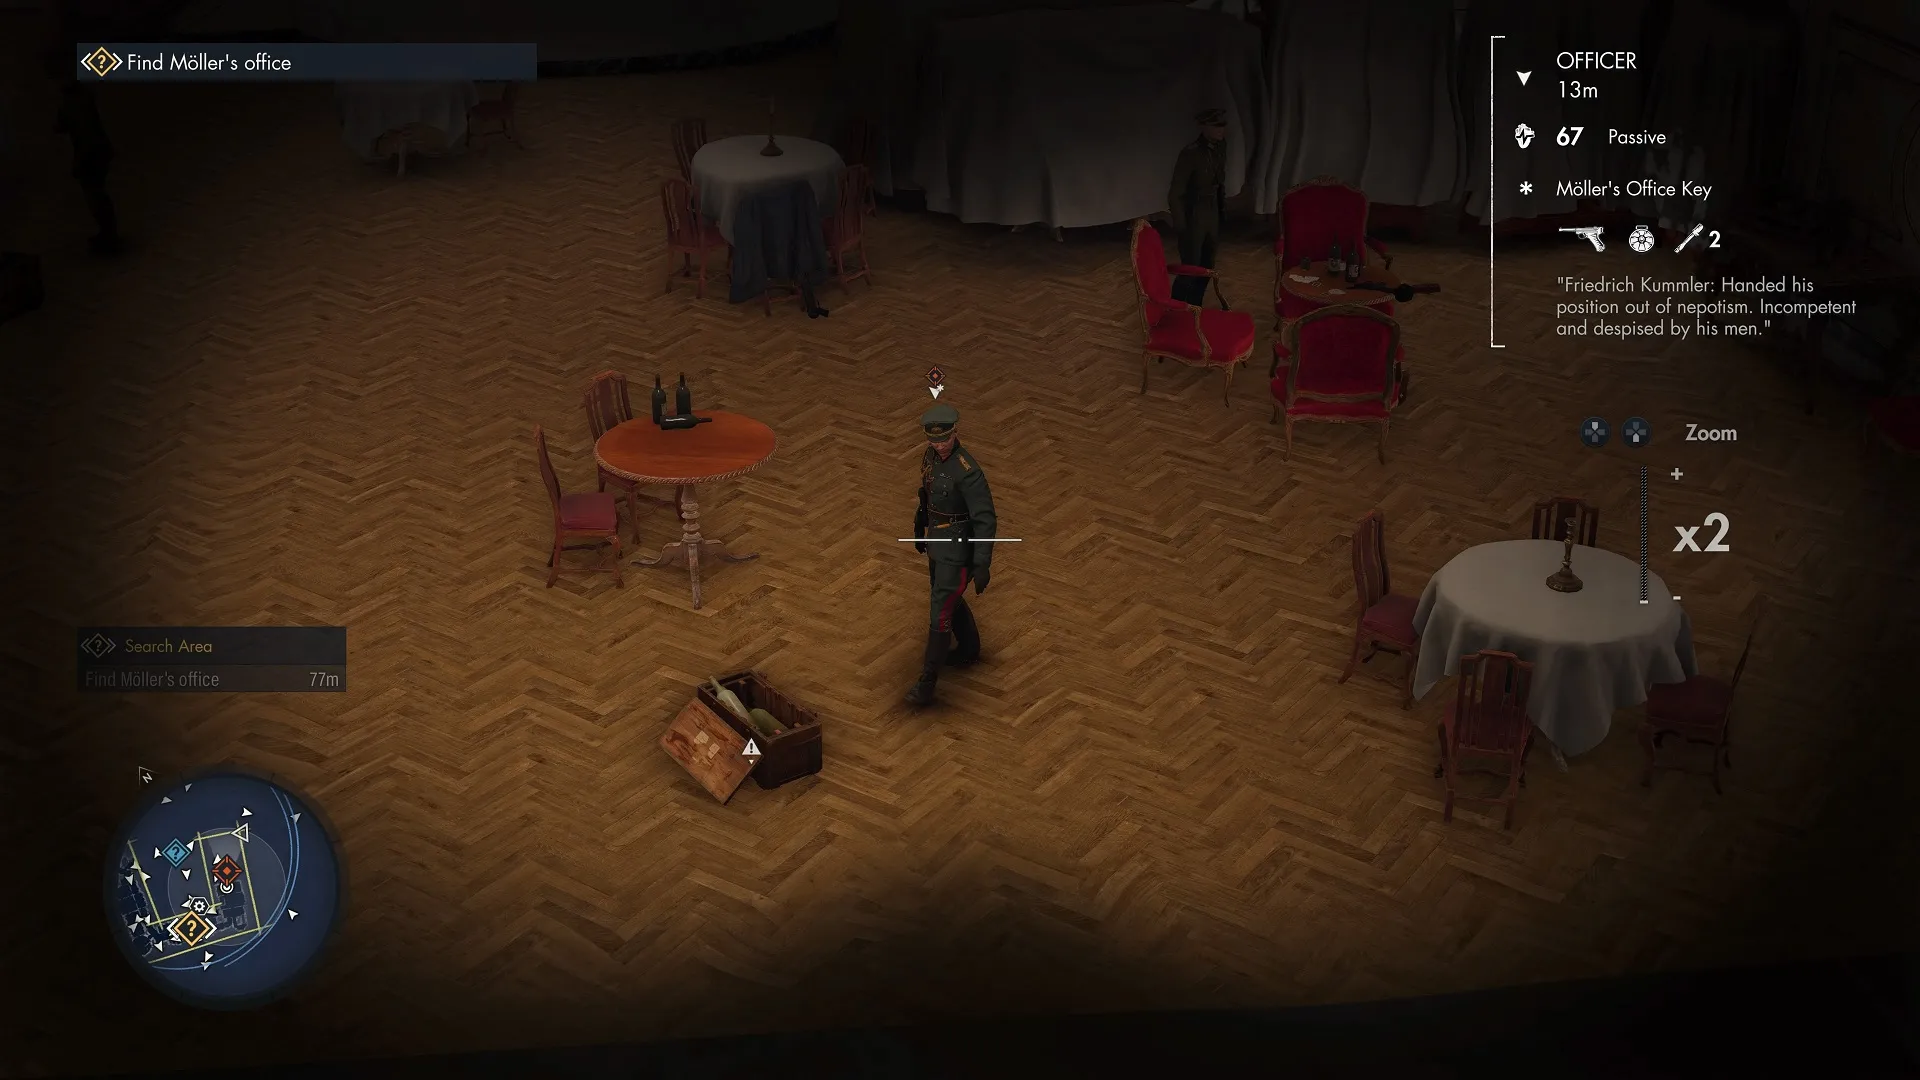
Mission 2: Occupied Residence — Kill Friedrich Kummler with a Chandelier
- Reward: K98k.
Since all of the objectives for Occupied Residence are in the chateau itself, it doesn’t exactly matter which starting location you choose. However, if you’re just after Friedrich Kummler, the best is the Chateau Stables.
Kill the sniper in the northeastern tower so he doesn’t alert the other guards, then go down into the dry moat between the gardens and the mansion. Kill the guard near the first tunnel entrance on the right, and climb up the second set of vines on the right (before the second tunnel entrance). Climb into the window, then go left and upstairs to the balcony overlooking the ballroom. Kill the officer here.
Kummler, wearing the gold sash and red-striped pants, should be below on the right side if you’ve arrived quickly enough. He will then walk to the box of wine bottles under the chandelier. Shoot the chandelier chain; do not sabotage the chandelier or the kill challenge will not count.
Another easy way to get this is to set the difficulty to Civilian, run into the ballroom and knock Kummler out, then place his body underneath the chandelier before shooting the chain.
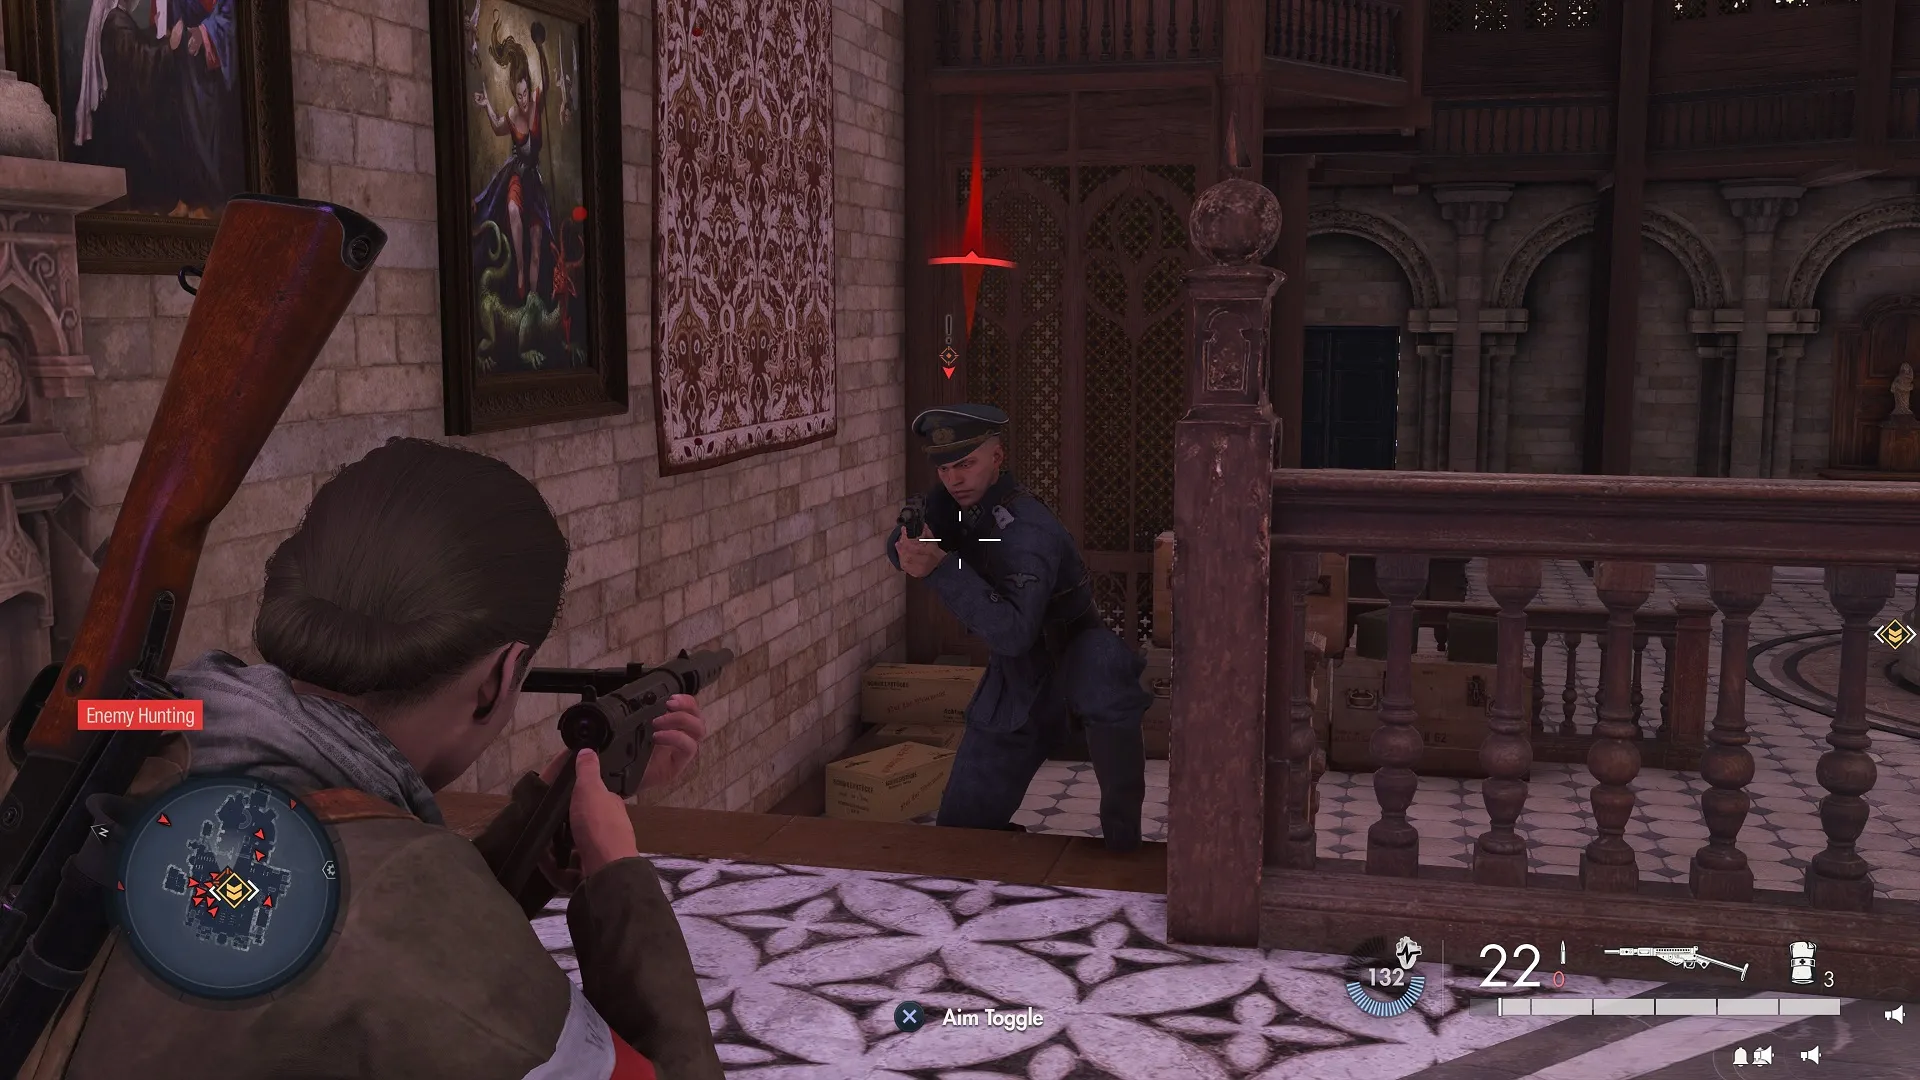
Mission 3: Spy Academy — Kill Fabian Richter Using a Stealth Takedown
- Reward: P08.
Fabian Richter is one of the three Nazi officers attending the Kraken meeting above the church in Spy Academy. Since this is part of your primary objective, finding him is easy. The best way to complete this kill challenge is to put the difficulty on Civilian and start at either the Town Wall or Smugglers Landing locations to avoid the bridge and snipers leading to the island.
Make your way through the church, stealth killing as many guards as you can on the upper levels. Once at the meeting place, kill the officer and take the key to open all three of the doors leading inside. Kill the two officers inside, one in the middle and one on the right. Richter is on the left side, wearing the grey uniform.
Once you’ve done that, only one or two guards will appear to help Richter if you’ve taken care of them on the way up. Now use the open doors to confuse Richter, get behind him, and initiate the melee kill.
Mission 4: War Factory — Kill Matthaus Elrich Using a Rat Bomb
- Reward: M.Pist.44.
Start at the Resistance Safehouse in War Factory, and go upstairs to grab the rat bomb off of the table by the door and the resistance fighter. Take the zipline down, then kill the two soldiers on the catwalk, go down the stairs, then up another set of stairs on the left. Take another zipline across the river.
Make your way south along the train tracks to the kill target location. A set of double doors is open on the northern side and provides the easiest point of entry. Watch out for Elrich as you enter; he’ll likely be standing by the shelves in the middle of the room.
So how do you use the rat bomb? Go to where he was standing, and you’ll see a white silhouette of a rat on the floor by the shelf. Plant the bomb here (or at the location directly to your left when you enter, or on the far-left side of the room). You’ll have to stand almost directly over the rat bomb silhouette for the prompt to appear.
And now simply wait. It will take a few minutes for Erlich to speak to some other soldiers and return to the area to find the (rat) bomb. Once he does, he’ll shoot it and be kaput.
Mission 5: Festung Guernsey — Kill Baumann by Burying Him in Concrete

- Reward: Type 100.
Like the chandelier in Mission 2, the kill challenge in Festung Guernsey requires a very specific set of actions to complete. Just burying Lanzo Baumann in concrete isn’t enough.
The Mirus Construction Site is in the northeastern portion of the map, so it’s best to start at Roadside House or Countryside House if possible. Whichever you choose, go to the southwestern edge of the construction site to find a green building to the right of six concrete mixers. Baumann is in the building arguing with another brownshirt. Once they’re finished, sneak in.
Knock Baumann out and carry his body to the concrete mixer on the east side of the building (between the two mixers with troughs carrying cement down into the construction site). There will be a railing flashing red that you can break, but you don’t have to. Just throw Baumann over to complete the challenge. If you can’t throw him over, press the designated prompt without putting him down, then throw him over.
Mission 6: Liberation — Kill Jaan Trautmaan with Poison
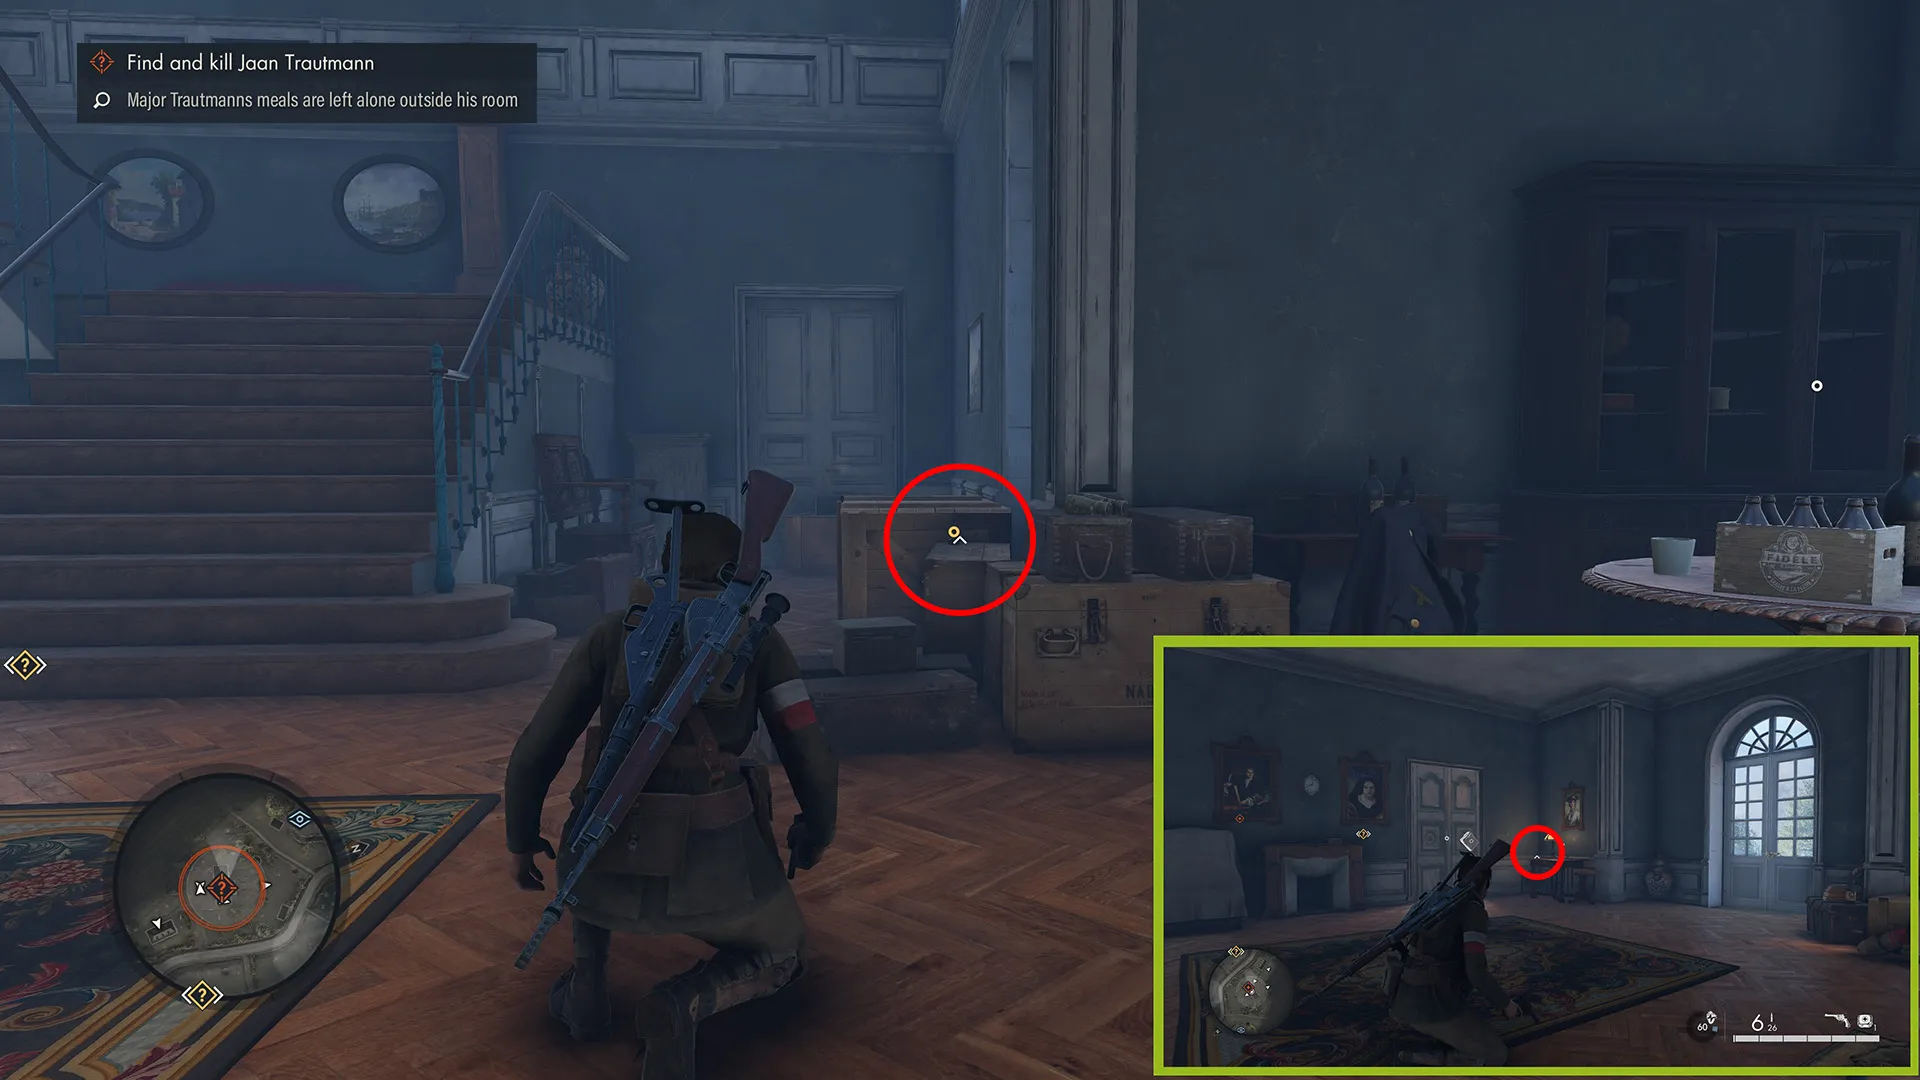
- Reward: Model D.
Except for a small portion at the very top, the Liberation map is essentially split into two halves by a river running from east to west. The target, Jaan Trautmaan, is in the mansion on the far western side of the lower portion. If possible, start from the Riverside House, as it’s just west of the mansion.
Regardless of where you start, enter the mansion from the northern garden; there are too many soldiers on the southern side with the drive. When you enter, look for the yellow icon on the crates to the right indicating the poison.
Go upstairs and put the poison in the cup to the right of the door with the satchel charge silhouette. Ring the bell behind the poison on the same table to alert Trautmaan. Hide so he doesn’t see you.
Just as in War Factory with the rat bomb, you may have to wait a while for Trautmaan to appear and drink the poison. I waited about 3 minutes the first time. But once he does chug it down, his demise is swift.
Mission 7: Secret Weapons — Kill Dr. Christian Jungers with a V2
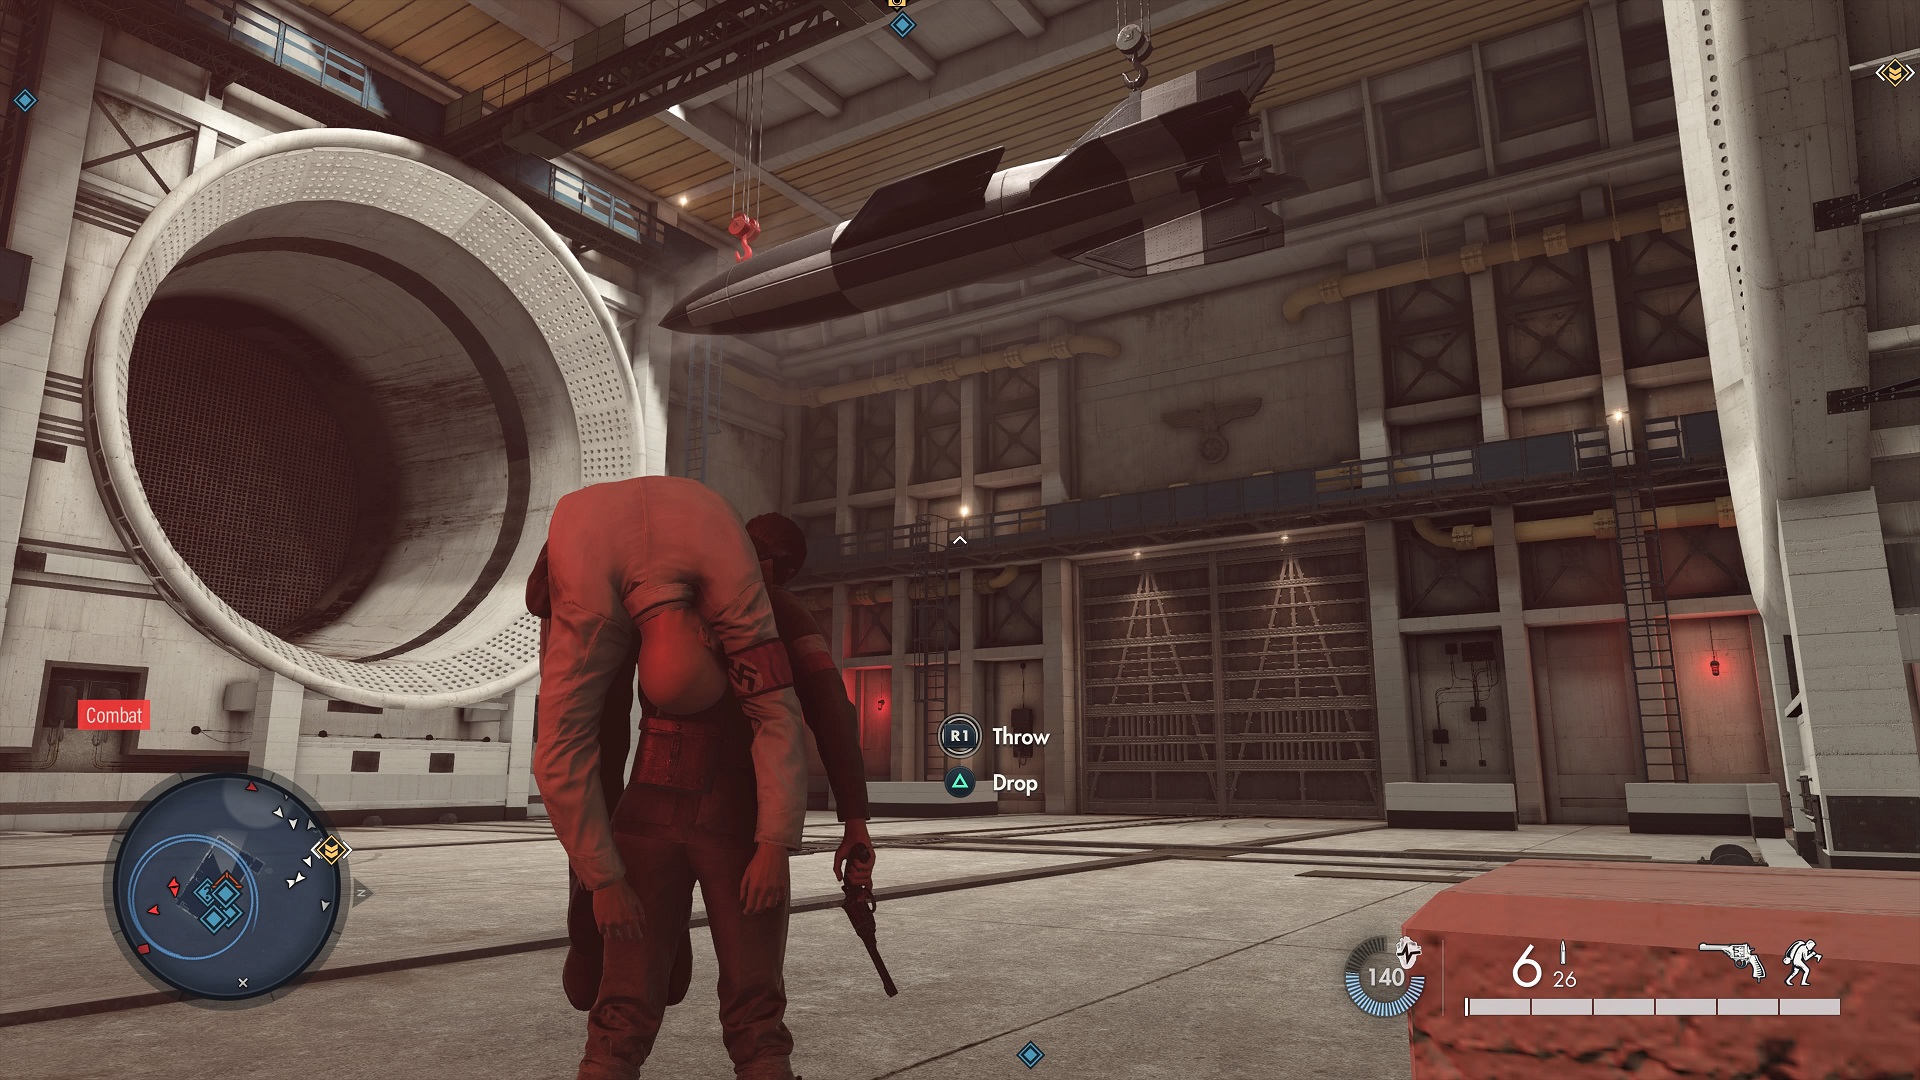
- Reward: RSC 1918.
Dr. Christian Jungers can be found in the weapons lab in the northeastern portion of the Secret Weapons map, just southeast of the dome in the extreme north. If possible, start at the Abandoned House location to fight through or sneak past fewer soldiers.
Once inside the weapons lab, don’t worry about killing any of the other scientists you come across; Jungers is always found in the office of the V2 wind tunnel on the second story. Pacify him by knocking him out, then drop his body beneath the suspended V2 rocket in the wind tunnel. Shoot either of the two hooks holding the rocket up, and it will fall to the ground, crushing Jungers beneath it.
Sometimes it will take 8-10 seconds for the kill to register, with Jungers and the objective marker still under the rocket.
Mission 8: Rubble and Ruin — Kill Shinji Yoshikawa with a Japanese Weapon (Type 100, Type 14 Nambu)
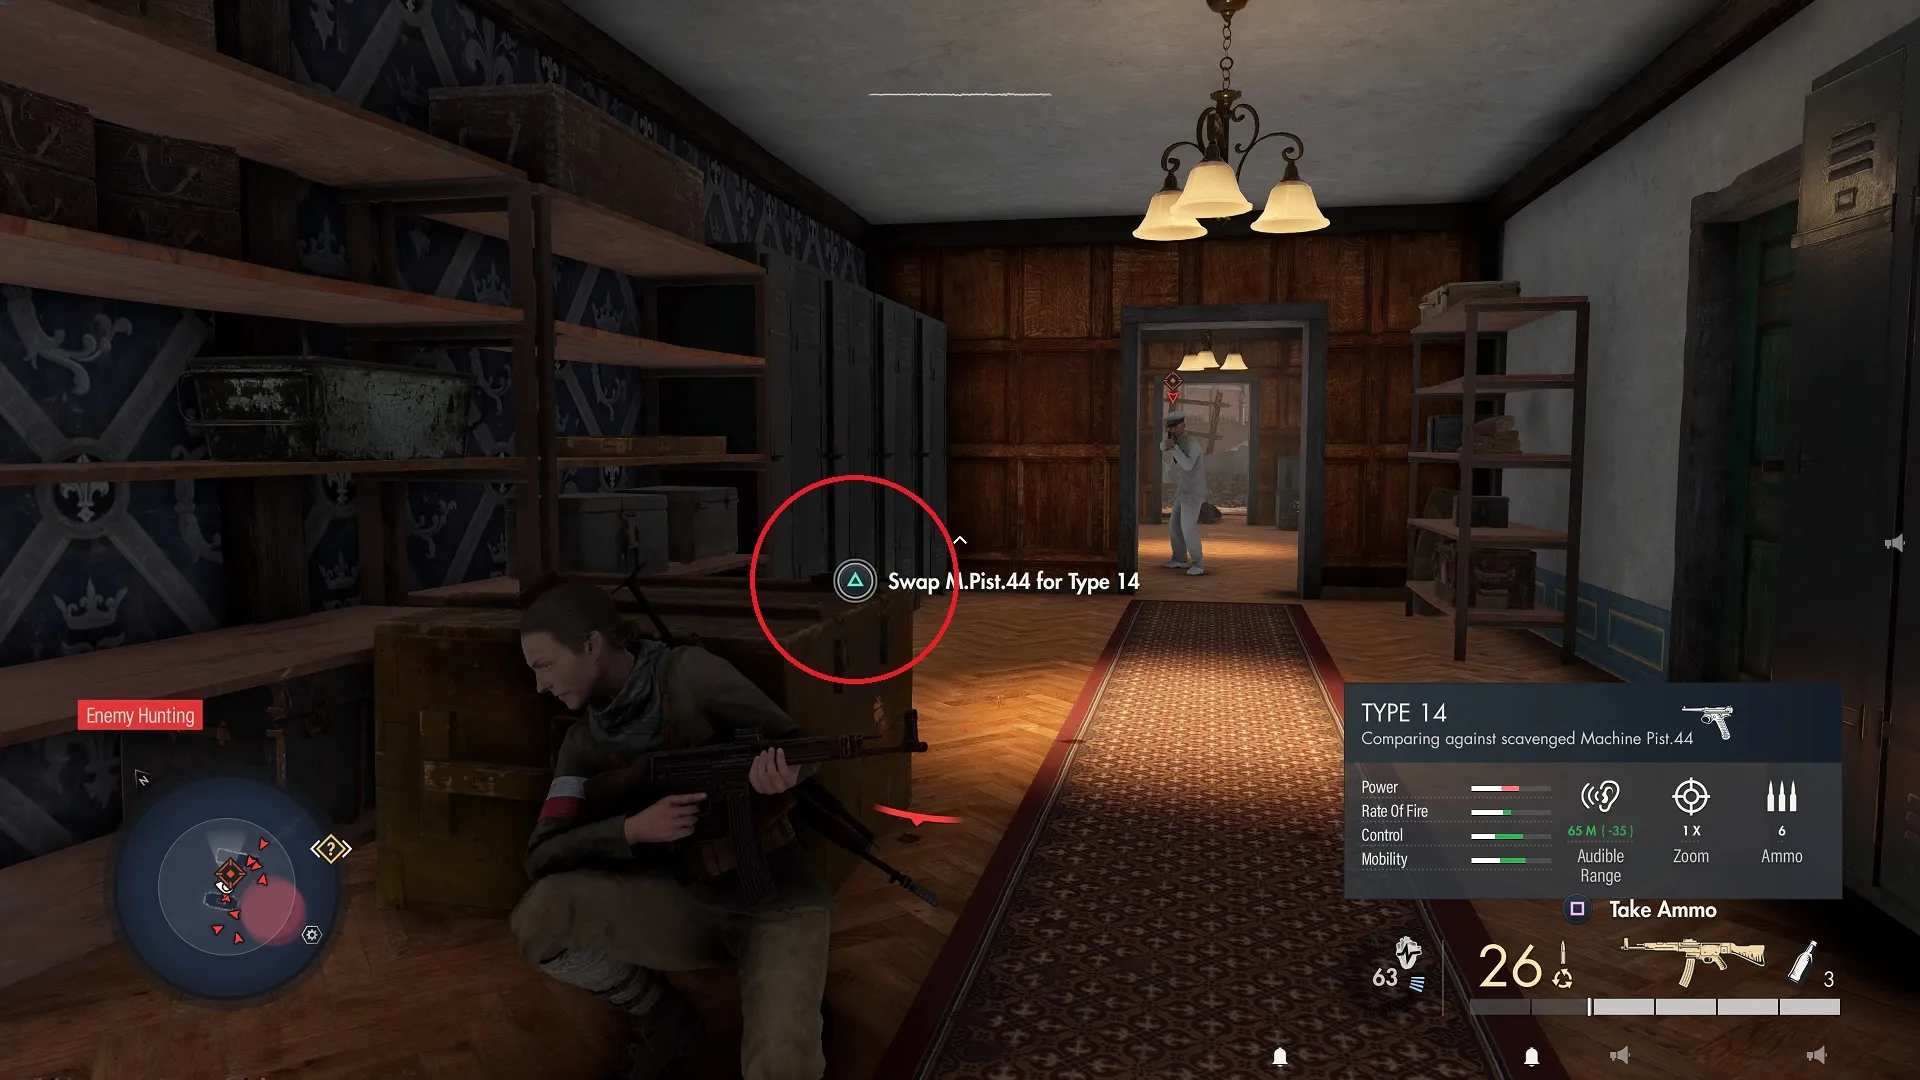
- Reward: Type 14 Nambu
On your way to the U-boat pens in Rubble and Ruin, you can unlock the last gun in the campaign by stopping by the Town Hall in the northwest portion of the map. Your target is Shinji Yoshikawa, and he’s one of the easier marks to assassinate.
There does seem to be a small bug with this mission. If you open your map and click show objectives, it will show the kill challenge as failed from the beginning. Disregard the “failed” message and continue with the steps below.
Start at the Resistance Cafe if possible to avoid the southern ruins. Use the zipline in the attic to cross the street and continue toward the Town Hall. Enter through the hole in the east side of the building (in the gardens) if possible, then go through the library and upstairs.
At the top, kill the Jaeger near the MG42 emplacement to get the Town Hall Office key, then open the door with the satchel charge silhouette. You’ll find Shinji on the other side, as well as a Type 14 Nambu on a crate on the left side of the hall (in case you forgot to bring a Type 100 secondary weapon). Kill him and you’re done.
And that’s how to off every Nazi target and complete their kill challenges in Sniper Elite 5. Now you have access to all of the weapons to either complete your perfect loadout or chase after the weapon masteries. For more on SE5, head to our guides hub, where we have collectible walkthroughs and more.


Published: Jun 1, 2022 07:53 pm