The wilds of Far Cry New Dawn are full of loot and treasure, you just have to know where to look. The best locations, however, are found by completing any of the game’s 10 treasure hunts.
Spread across the lower and middle portions of the map, these hunts lead to stashes full of crafting items, perk magazines, Far Cry credits, and titanium. These items allow you to level up Prosperity, complete New Dawn‘s skill tree, purchase unique skins, and craft certain vehicles and weapons.
This guide shows you exactly where to find those stashes on the map as well as how to solve the puzzles guarding them.
Note: You do not need to speak or interact with NPCs before discovering or opening these stash locations. You can simply go to the areas marked in the screenshots below.
Far Cry New Dawn Stash Locations
Stash #1: For Whom the Bear Tolls
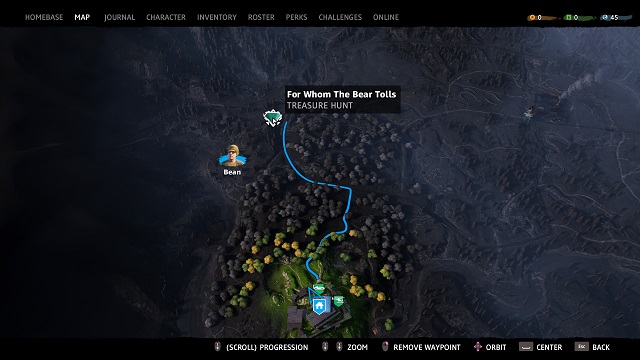
This is one of the easier treasure hunts in Far Cry New Dawn. Travel to the FANG center north east of Bean, which doubles as a run-down church, located at the coordinates above.
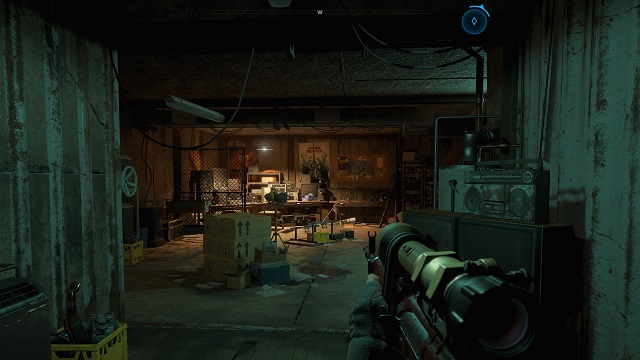
When you arrive, mind the two highwaymen on the roof of the church as well as the highwayman in the caged area to the left of the church. Take them out and then aim at the bell in the bell tower.
Shoot the bell three times to call a Level 3 Grizzly bear to your location; it will come from the back of the church. To make quick work of the bear, shoot it in the head as quickly as possible.
After taking the bear down, take the key from its corpse and head toward the back of the church, keeping left.
Eventually, you’ll see a large hole in the ground. Climb down into the hole to access the bunker there; inside, you’ll find three perk magazines, numerous crafting supplies, Far Cry credits, and titanium in the safe.
Stash #2: Going Haywire
From the last stash, head east. As you enter the fields in this area, look for the two radio towers up on a hill. Directly behind the towers, through a small patch of woods, look for a house. Next to the house will be a large device spewing electricity in all directions. Underneath the device is the entrance to a bunker.
Be wary of the enemies in this location as well as the electricity being emitted from the device; it’s easy to get caught in a perpetual damage loop if you’re struck by it.
To turn the device off, go into the house, turn left, and go all the way into the back. Flip the switch in front of you.
Go back to the device, which should now be off, and go into the bunker to finish the treasure hunt.
Stash #3: High Art
Staying in the same region, the next treasure stash is further east. Coming from the previous location, look for a large barn on the other side of a tributary.
As you approach, look for the highwayman outside doing some graffiti work. Take him out and go around to the back of the barn. There, look for a windmill with a grapple point.
Use the grapple point to climb up the windmill and zipline across to the barn. Break open the loose boards and go inside.
Inside the barn, follow the path to the right and jump down. Turn immediately around and go right; turn the yellow valve behind the chicken wire barrier to your right. This raises the teal car in the center of the room.
Climb back up from where you originally came from and use the lowered car to get to the other side of the barn. Turn left and turn the valve along the left wall. This moves the orange car down below.
Jump back down, enter the new room, and get three more perks points, 45 Far Cry credits, and 15 titanium in the safe.
Stash #4: Riddle Me Fish
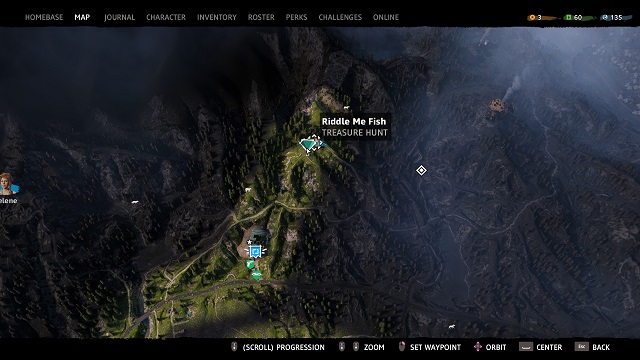
This treasure hunt is one of the harder ones in Far Cry New Dawn, especially if you don’t know what to look for.
When you reach the area indicated above, take out the highwaymen and look for the small tin building next to the left of the main house.
To the right of the tin building, there is an overhang jutting out from the side of the house. Go through the opening underneath the overhang and open the safe if you have the Lockpick perk; inside is 17 titanium.
Grab the titanium and the crafting parts, and then go into the house through the door to your right. Kill the skunks inside so they don’t spray you and look at the back wall, past the generator in the middle of the room.
Activate the generator and watch the fish mounted on the wall. The order in which they move is the code to the bunker underneath the tin building.
If you miss the order, or just want the code without trying to figure it out, it’s 246135.
Now, go to bunker and enter the number by activating the fish on the wall. Open the door; inside the normal loot of three perk mags and 45 credits. There is also 17 more titanium inside.
Stash #5: Target Practice
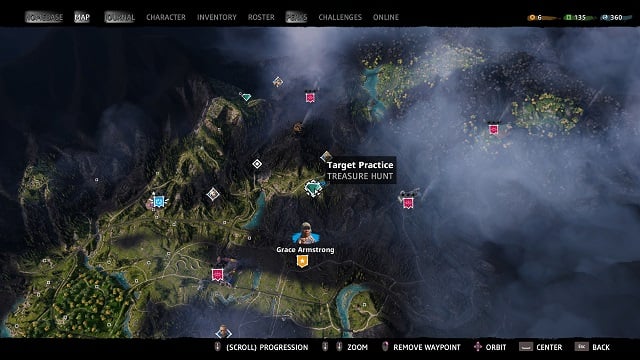
Clear the highwaymen from the area and the face the front of the house. Turn left and go toward the cliff face; climb down or use the small path to the right to walk down to the cave below.
Kill the highwayman there if you haven’t already and enter the cave.
Inside, there is a contraption in the very back of the cave that you need to activate to raise the gate protecting the treasure stash. While looking at the gate, turn left and activate the switch. The gears on the left side of the room will begin to move.
The large gear closest to you (to the left of the switch) has a space in it. Watch the gear. When the target enters the empty space, shoot it. This activates more targets along the left wall. Shoot all of them and the gate will open halfway.
Now, turn your attention to the right side of the room. The targets here are in a straight line and much easier to hit. Shoot them from left to right.
The door will open, and you can grab the treasure stash.
Stash #6: Light ‘Em Up
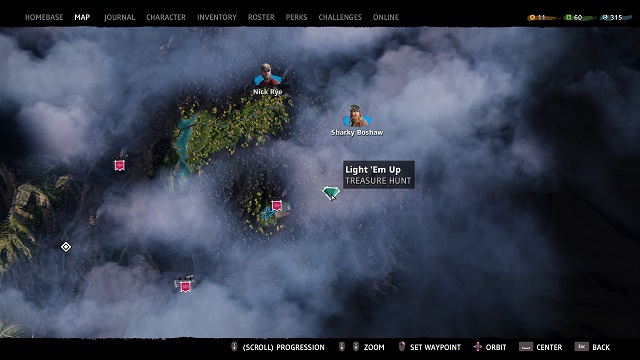
This treasure hunt is southwest of Sharky. Look for an old church in the mountains about 550 meters east of the Sacred Lumber outpost.
Kill the enemies when you arrive and mind the Level 2 wolverine lurking around. The entrance to the stash is in the shed next to the church. However, you need to go inside the church to get a key first.
With the shed to your right, go to the right side of the church and look for the loose boards on the lower wall. Bust through and go inside. Follow the path all the through to the wolverine’s nest.
Grab a molotov cocktail nearby and light the nest on fire. Grab the key from the wolverine’s corpse.
Go back outside and open the shed to get three perk mags, crafting supplies, and Far Cry credits.
Stash #7: The Best Laid Plans
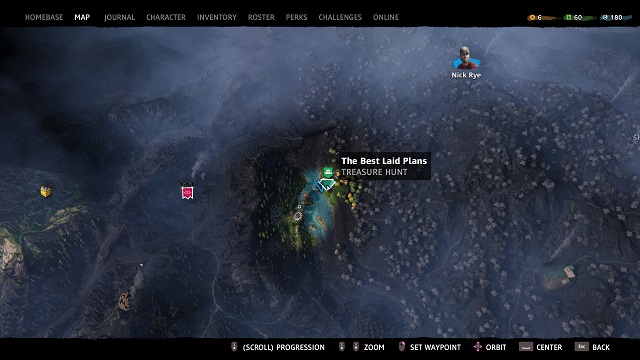
When you reach this area, you’ll see that the bridge is out. Go underneath the bridge and to the far end; look for the area where the box cars are dangling from the bridge.
Climb up to the top of the boxcars using the grappling hook and follow the path to the next broken section.
Grapple across this section, but make sure to have enough momentum and release at the apex of your jump; if not, it’s easy to hit the water, forcing you to start over.
Grapple across the next several gaps and follow the main path. The stash will be at the end.
Stash #8: Burning Souls
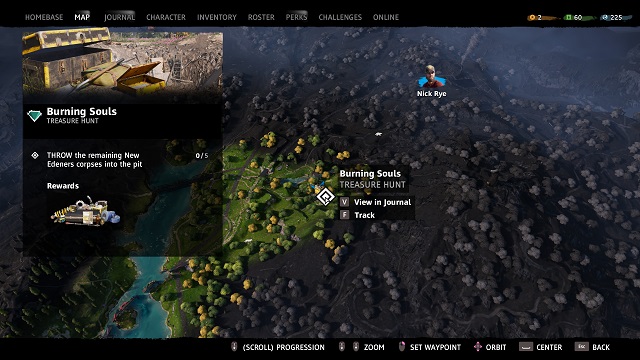
East of Best Laid Plans, you’ll find Eden’s Pyre. Here, you’ll need to throw five New Edeners into a fire pit and light their corpses ablaze.
The first body id on the benches to the left of the pyre. Pick it up and drop it into the pyre pit. With the pyre to your back, go counterclockwise.
The next body is a dozen or so meters from the last, on the right-hand side of the path underneath an overhang. From there, the next body is inside the large shelter near the entrance to the area.
From there, continue counterclockwise, picking up the fourth body up on the fortification near the shelter. Finally, continue up the path to the top of the cliff. Look down and you’ll see the last New Edener lying on a platform above the pyre.
Once all five bodies are in the pyre pit, use a molotov cocktail to light it aflame. The stash will be behind the pyre.
Stash #9: Go With the Flow
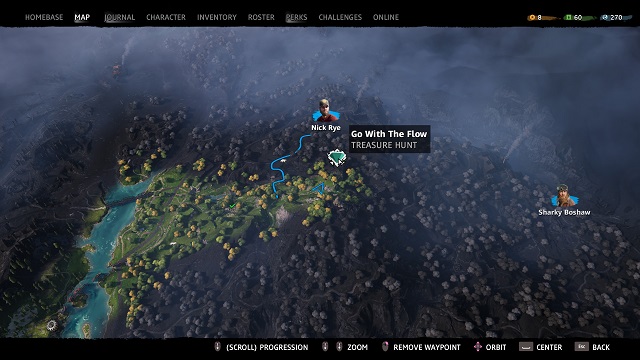
When you get to the location indicated in the screenshot above, you’ll find a cave guarded by four or five wolves. Instead of taking them on, head left and cross the small stream to the other side. Look to the cleft in the rock wall behind the tent to find a key.
Next, go left and cross the small wooden bridge with the white flag next to it. Follow the white flags all the way to the end.
Eventually, you’ll come to a broken bridge. Follow the water and jump down just past it.
Turn left and follow the path up, past the dead white wolf. Use the key to open the gate protecting the stash.
Stash #10: Rescuers Down Under
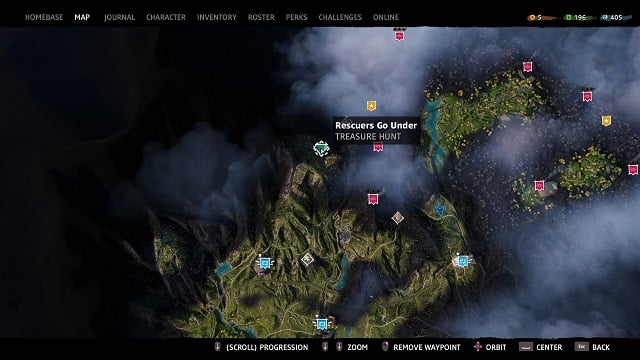
This might be the most head-scratching treasure hunt in Far Cry New Dawn outside of Riddle Me Fish.
The best way to get here is by helicopter not only because it’s high in the mountains, but also because the area is littered with Level 3 mountain lions, wolverines, and black bears.
From the sky, you’ll be looking for a large pit that goes down into the mountain. It will be surrounded by large log piles, and a very ornery Level 3 black bear will be close by. Land, kill the black bear (and harvest its pelt for titanium), and jump down into the hole.
Dive down and follow the path through cavern until you reach the derelict cars inside. There will be a note that says you need to “release the brakes” of the car on the precipice above the water. To do so, jump over and look at the back passenger-side wheel, which will prompt you to release the brakes.
With the car in the water, use the car to hop over to the ledge across from it and grab the stash. If you hit the water, try getting a running start and jumping from the very edge of the car hood.
—
That’s all you need for finding all of the treasure hunt stashes in Far Cry New Dawn. If you’re looking more of the game’s safes, be sure to head over to our complete locations guide, and if you want to find even more strategies on getting more titanium, we’ve got something for that, too.
For more tips and tricks for Ubisoft’s latest first-person shooter, be sure to visit our Far Cry New Dawn guides page. To see why we said “it doesn’t get much better than Far Cry New Dawn,” here’s our review.


Published: Feb 13, 2019 03:13 pm