Every Chapter in Dragon Quest Builders has 5 challenges that unlock extra building recipes for Terra Incognita. Your success with most of these challenges come right down to good old fashioned exploration. If you’re absolutely stumped, however, then you’ve come to the right place.
We’ve completed every challenge in Dragon Quest Builders, taking screenshots along the way — all for your benefit! Following this guide, you’ll have every challenge behind your belt before you can say ‘Alefgard’.
Table of Contents
- Chapter 1 Challenges
- Chapter 2 Challenges
- Chapter 3 Challenges
- Defeat all the boss trolls and gigantes.
- Complete the spectacular spa blueprint.
- Discover the recipe for the lyre of slime immemorial.
- Chapter 4 Challenges
Dragon Quest Builders Challenges Guide
Each chapter in Dragon Quest Builders has 5 challenges. The first 2 challenges in every chapter actually share a pattern:
- Complete the Chapter within ‘x’ days.
- This is essentially a speed run challenge. I’d advise you to save this challenge for last. You don’t want to be rushing your first playthrough. That’s almost as bad trying to complete this challenge simultaneously with the 4 others.
- Build your Base to level ‘x’.
- For this challenge, you need to earn enough points to reach max Base level. You earn Base points by building and furnishing rooms. Check the item description on blocks and furnishings for info on how many points they provide.
The last 3 challenges of each chapter are detailed extensively below.
Cantlin – Chapter 1 Challenges
- Complete the Chapter in 20 days.
- Build your Base to level 5.
The dragons themselves are easy enough to defeat. They only use two attacks, both of which are heavily telegraphed. Just swing your sword 3 to 5 times whenever you have an opening and back off. Actually finding the three dragons is the tricky part.

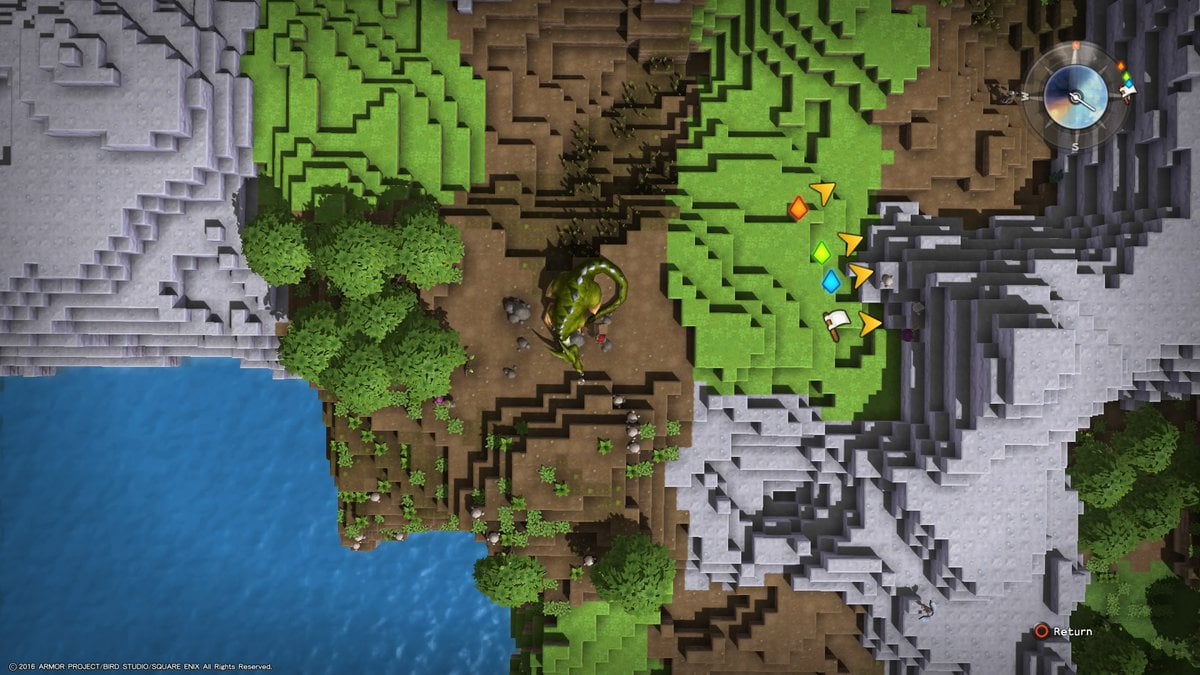
The first dragon is found on the same island as your Base, Cantlin. From your base, head South-West and climb the mountain range near the spire.
You should be able to see the dragon to the West. It’s just South of a bonfire burning atop a steep hill. Killing it nets you a Comfy Couch.
The second dragon is found beyond the Blue Teleportal. From the Teleportal, head West, taking the Southern path. At the “dead end”, climb the mountain and continue West.
You’ll eventually come across a ruined castle. Run around it and climb the hills, working your way towards the North-Western corner of the island. The dragon here drops a Fireplace.
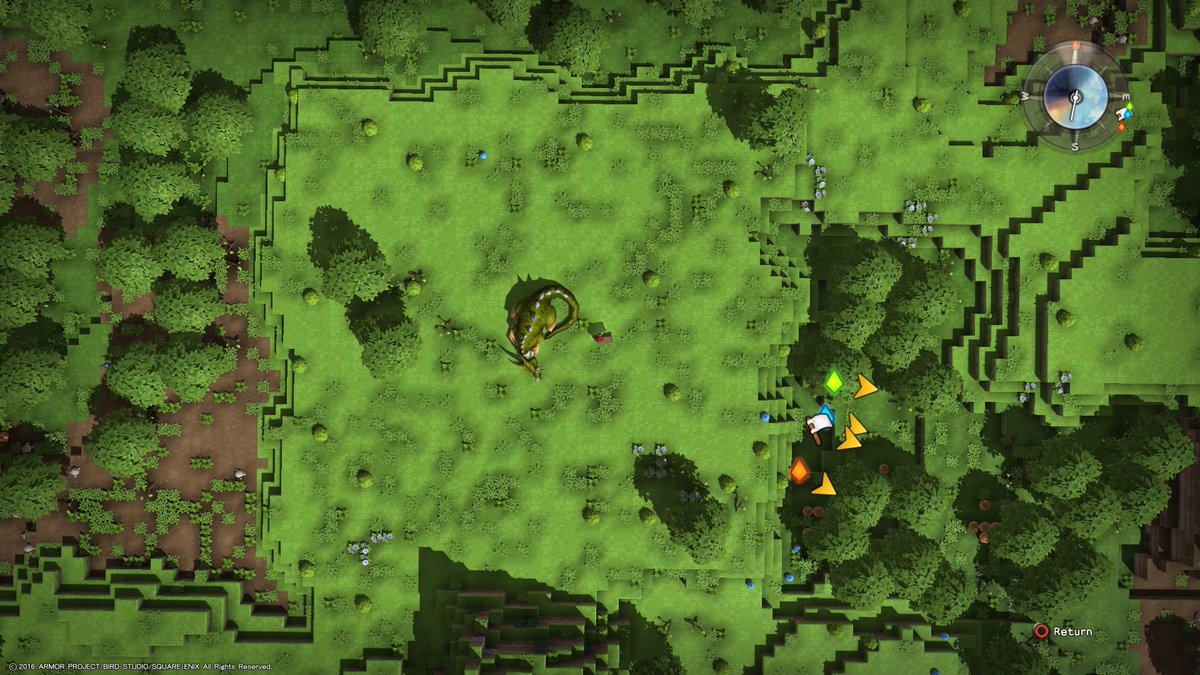
The third dragon is found beyond the Red Teleportal. From the Teleportal, follow the shoreline North through the desert and climb the mountain range. On the other side you’ll find a lightly wooded area.
Continue West through the forest until you encounter the final dragon. It drops a Dragon Scale, which is an Accessory that increases your Defense by 5.
Easily the trickiest part of building the Cantlin Garden is having 8 blocks of water. Cantlin is on high ground, and since water only exists below ground level, you would have to spend hours building a basement garden if you hoped to fit it in your Base.
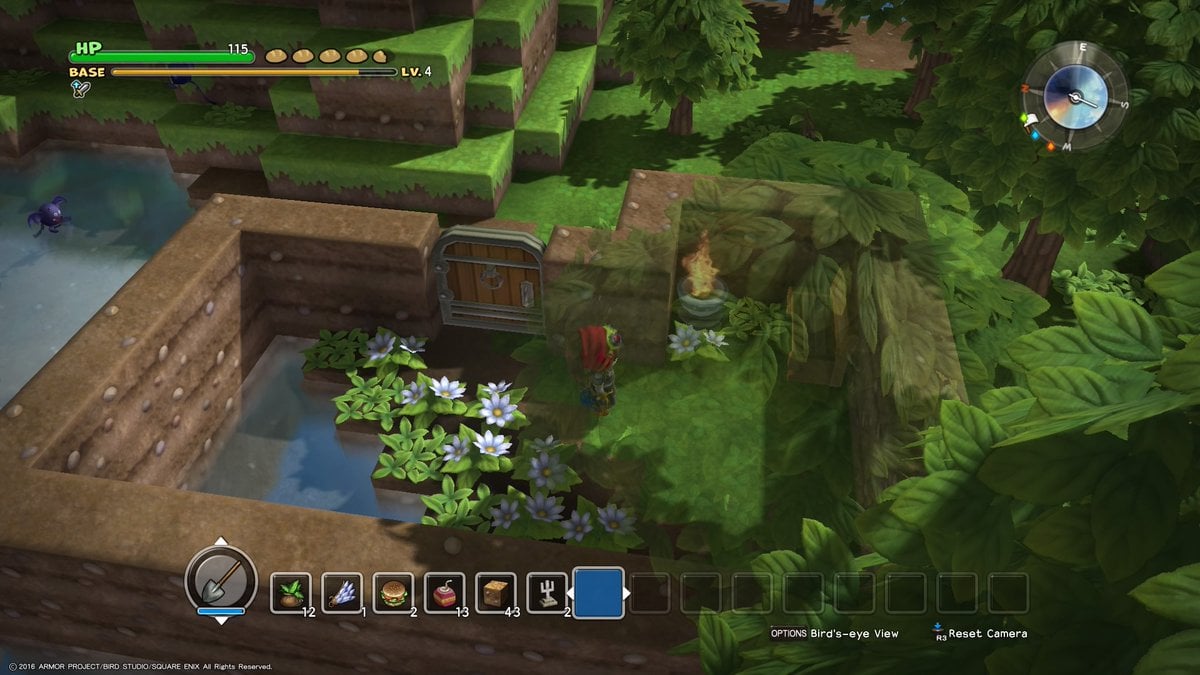
It’s easiest to build one at a lake just down the hill from your Base. Build a room around a Plumberry Tree and some water. To create a Cantlin Garden, you’ll need:
- x1 Door
- x1 Brazier
- x1 Bench
- x1 Plumberry Tree
- x8 Water
- x5 Grass
- x10 Flowers
To pick the flowers and clumps of grass, you’ll need to craft a shovel. It takes up a Weapon Slot in your Equipment inventory. With your shovel in hand, just run up to flowers and grass clumps then press the attack button to collect them.
Repair the hammerhood’s graveyard.
There’s a hammerhood in a ditch beyond the Blue Teleportal that wishes to see a couple of his graves repaired. To accomplish this, you first need to learn a recipe for Gravestones.

You can learn the Gravestone recipe from a brownie on an island past the Red Teleportal. From the Teleportal, follow the shoreline North and climb the mountain range. Drop down on the other side and search the North-Eastern corner for a shallow sand bank that you can walk across to reach the island.
Speak with the brownie and he’ll teach you the Gravestone recipe. Return to Base and craft 2 Gravestones for the hammerhood.

From the Blue Teleportal, head South-West until you come across a ditch with a graveyard at the bottom. Smash the pebbles where the old Gravestones used to be and replace them with your own. Afterwards, speak with the hammerhood to report a job well done.
Rimuldar – Chapter 2 Challenges
- Complete the Chapter within 30 days.
- Build your Base to level 5.
If you ever hope to craft roofing tiles, this challenge is essential. It involves using roofing tiles to repair a roof. After the task is complete, a note teaches you how to make all four variations so you can use them on your houses in Rimuldar. The tricky part is finding the ruined house.
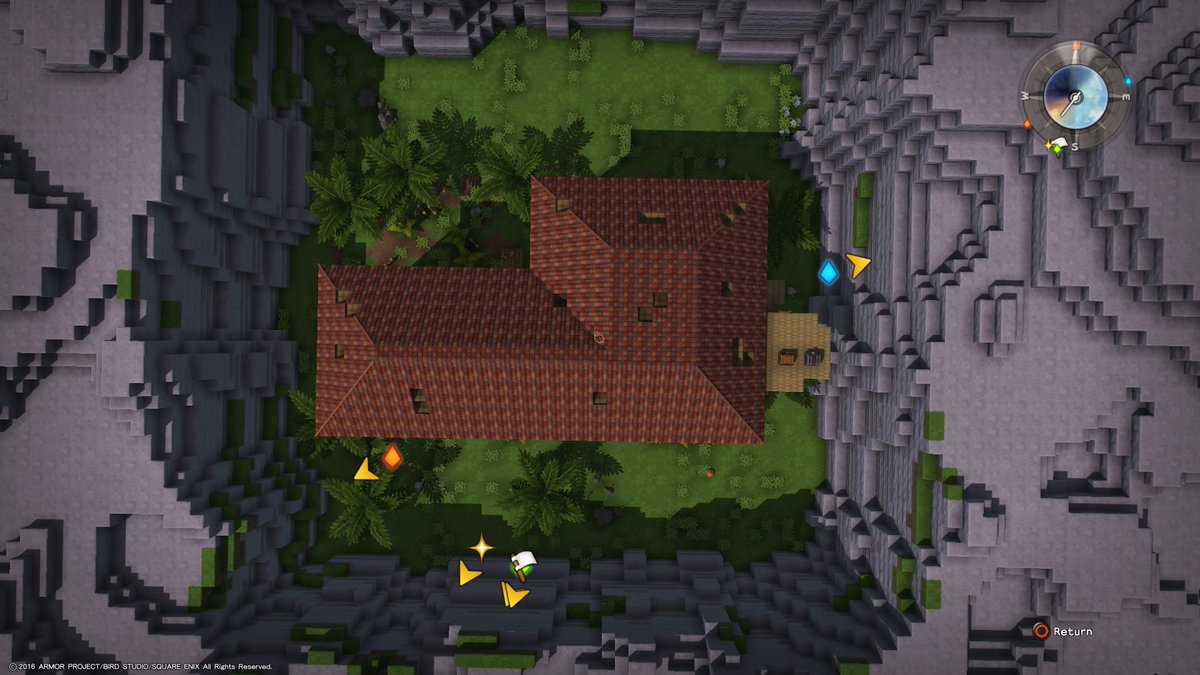
From the Blue Teleportal, head South up the cliffside. At the top, climb the mountain to the West and follow it until you come to this rather large house nestled in a valley. There are two chests on the Eastern side of the roof. The first one contains the tiles needed to repair the roof. The second one teaches you how to craft the tiles from scratch after you finish up.
The Crown Goowels are a drop from the elusive King Slime. It’s listed as a material in the item description, yet I was unable to discover a use for it. In order to find the King Slime, you’re going to have to take a fishing trip.
See this lake? It’s shaped like a slime. That means you will only fish up slime materials and slime monsters. While you can catch the King Slime elsewhere, this spot is like to give the best chances.
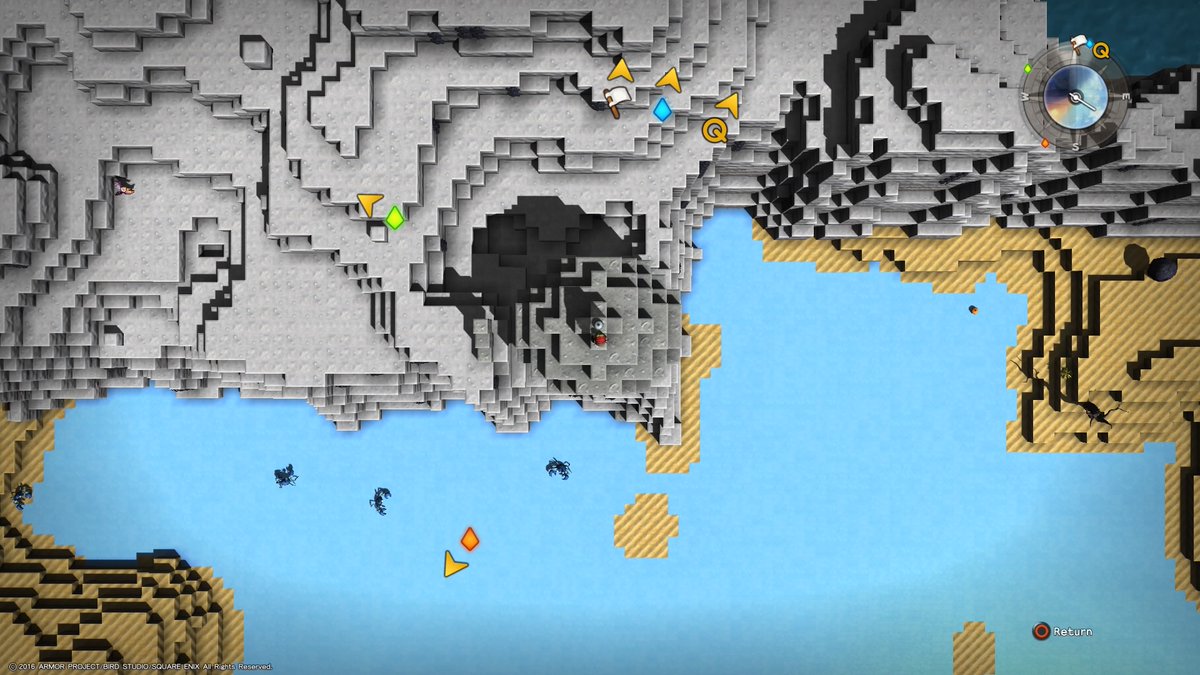
Head through the Red Teleportal and wind your way North through the swamp. Once the swamp opens up, veer to the East and you should stumble upon this charming little pond. Cast out your rod and hope for the best. It may take some time before the King Slime shows up. Be prepared for a fight when he does.
Thalamus has 4 puzzles hidden about in remote areas of each island. Completing the puzzles on the first 3 islands rewards you with special blocks needed to complete the 4th puzzle. Do not lose these blocks.
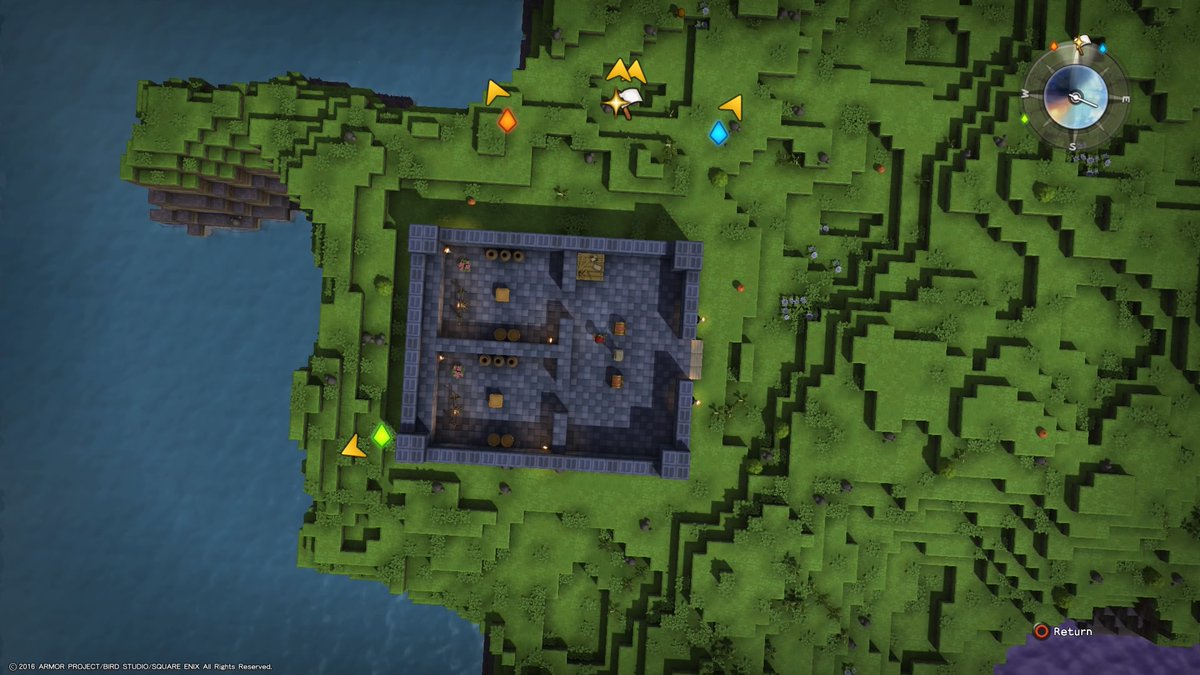
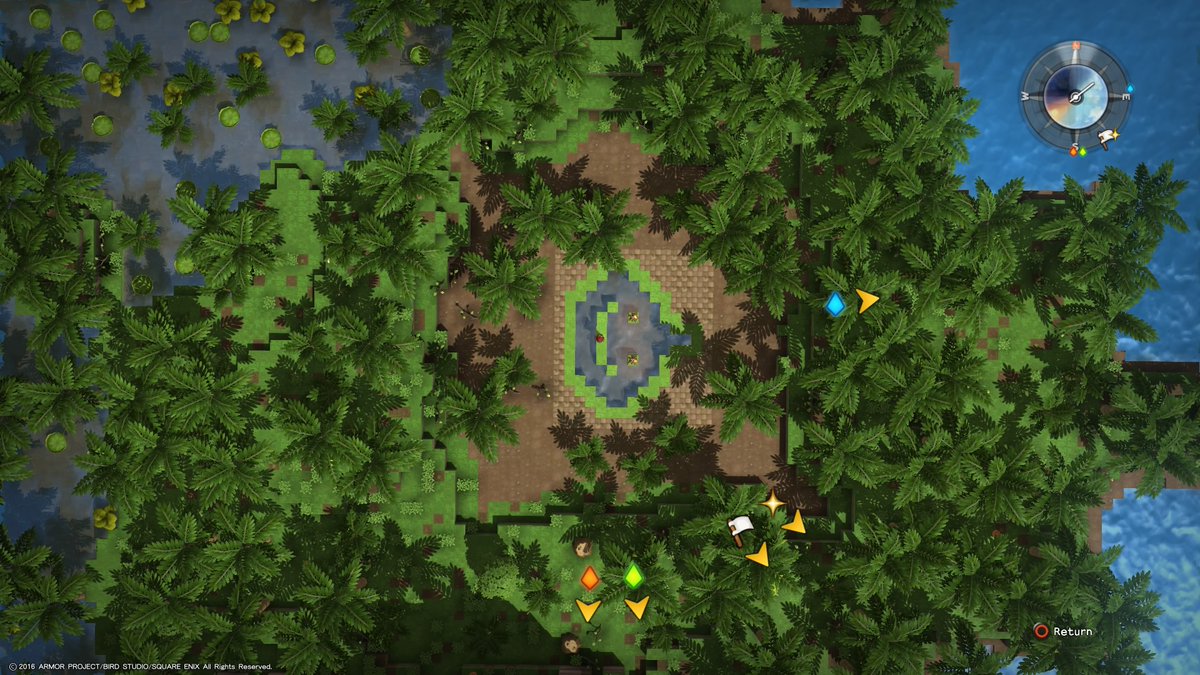
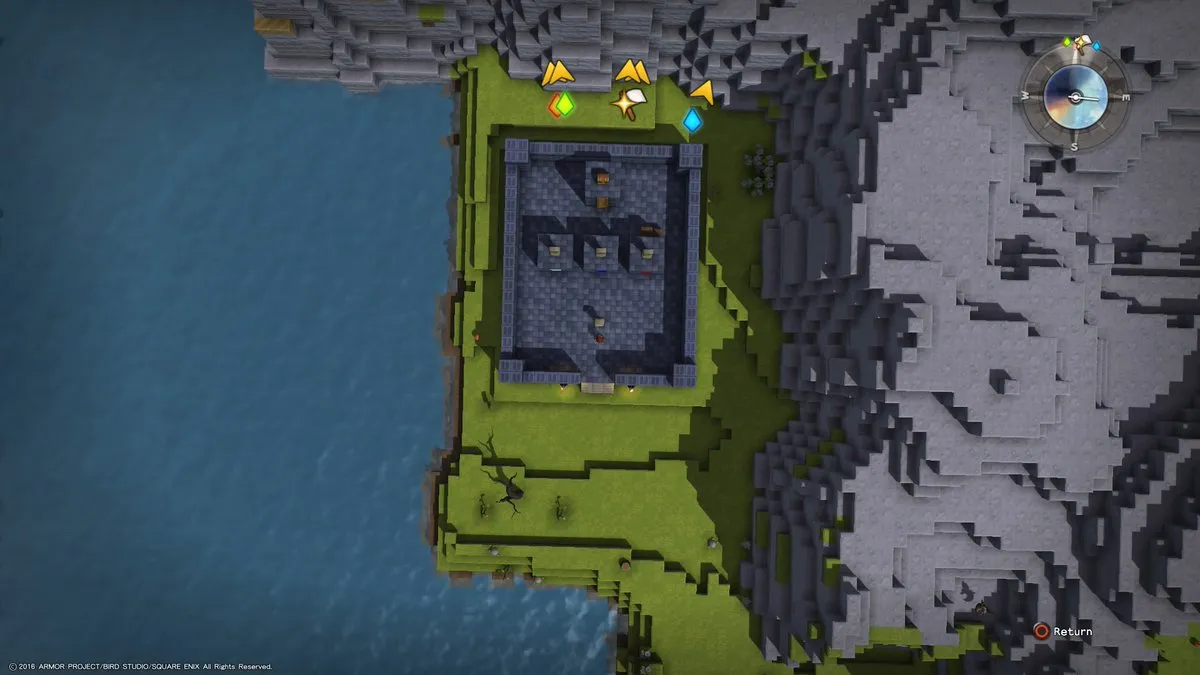
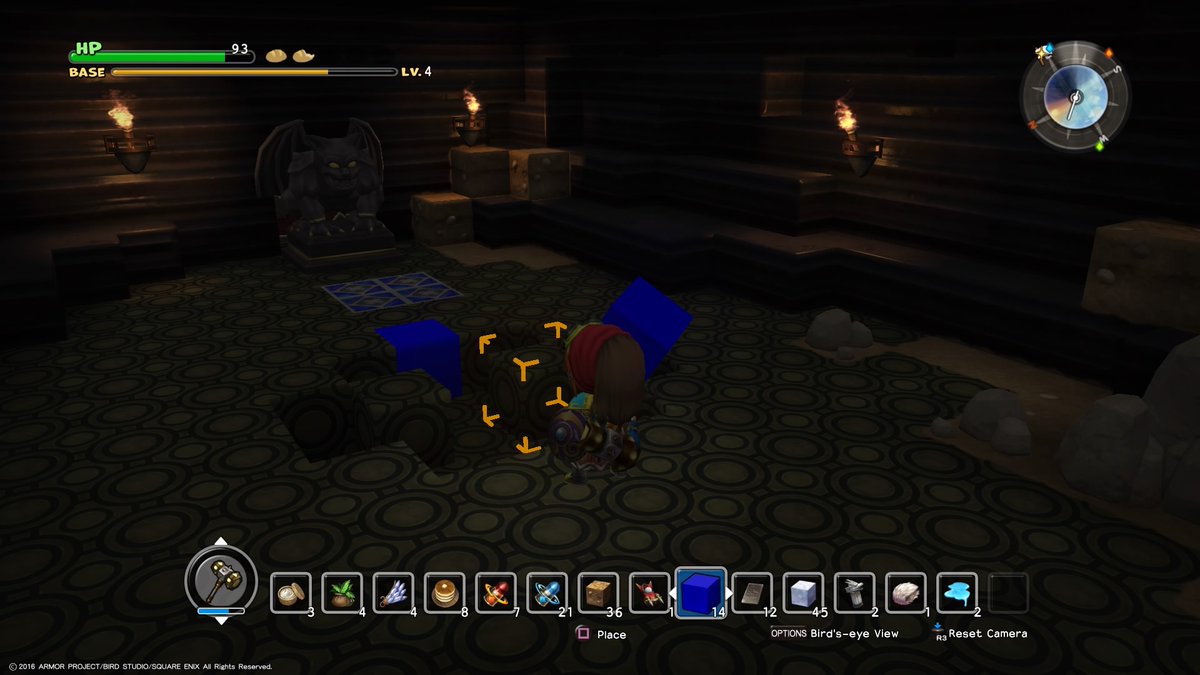
The first puzzle is found on the same island as Rimuldar, your home Base. Head East out of town and take the Southern route up the cliff-side. Continue South-West until you come across a fortress like the one pictured above.
The goal for this puzzle is to mirror the first room in the second room. You’ll need to craft some furniture to finish the room. Once you have, open the chests and store the White Block you pick up in a safe place.
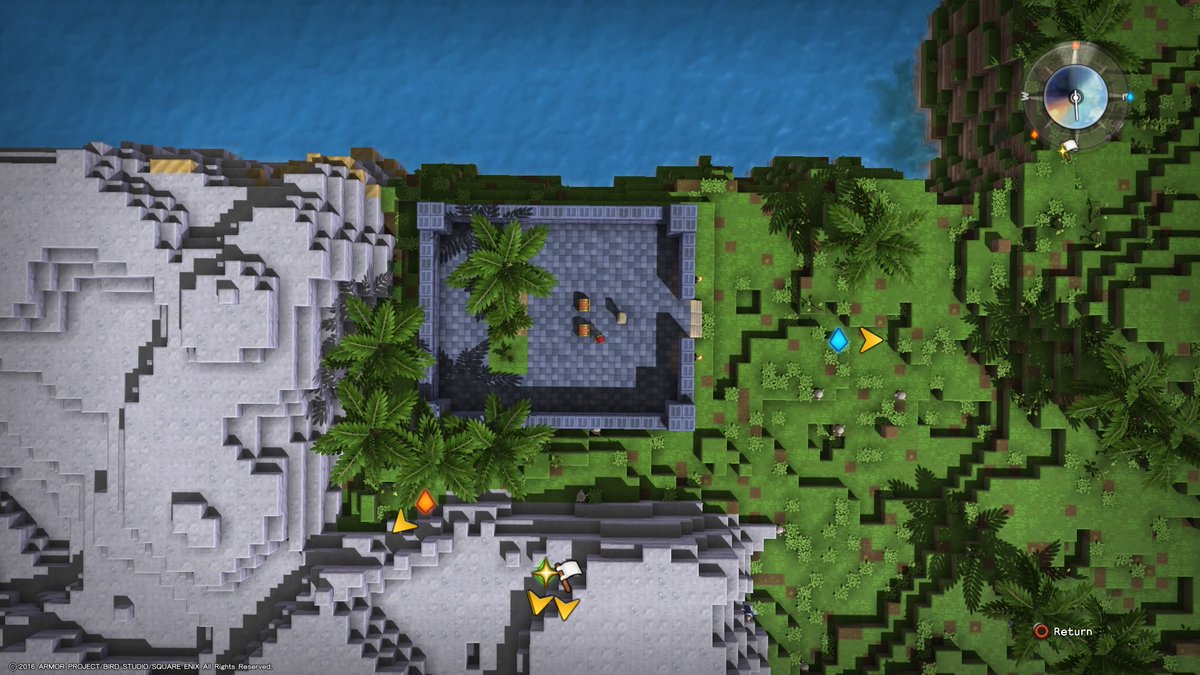
The second puzzle is just beyond the Blue Teleportal. From the Teleportal, head due West, climbing up the cliff. Along the way, take the time to chop down a Palm Tree and its Stump. At the end of the line you’ll come across Thalamus’s second fortress.
This puzzle wants you to complete the line of maturity for Palm Trees. There’s already a day-old and a 2-day-old Palm Tree here — all it lacks is a sapling. Plant down the Palm Sapling in its rightful place to unlock your reward. Pick up the Blue Block and stash it somewhere safe.
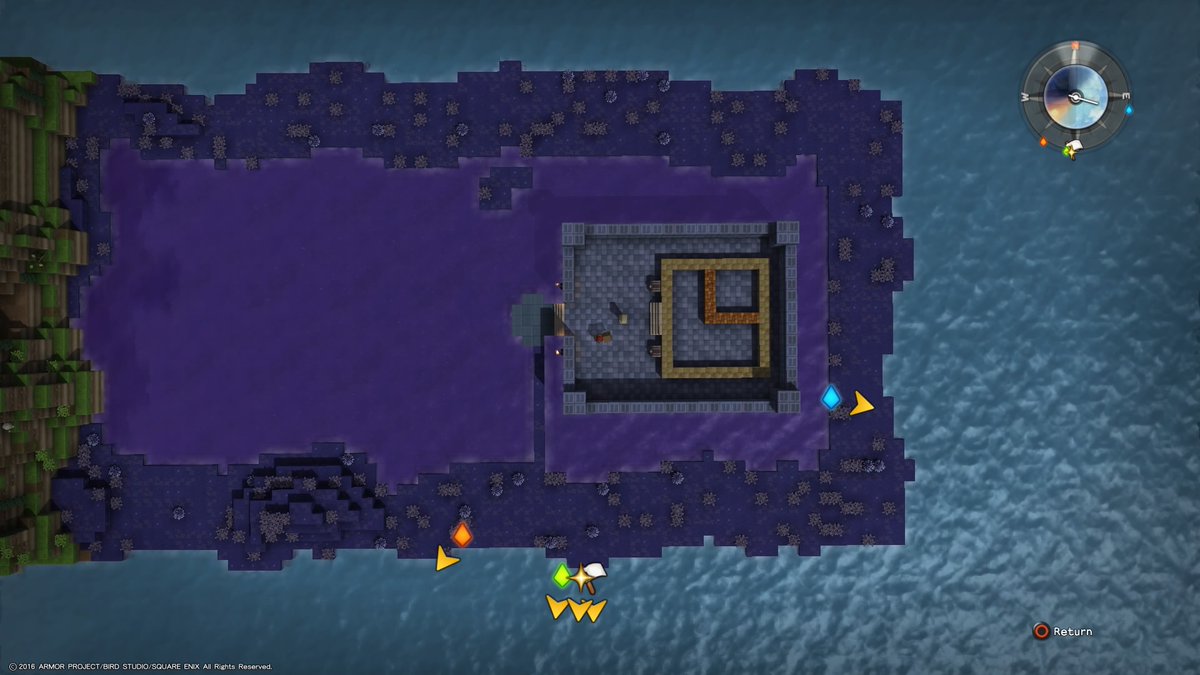
The third puzzle is found at the edge of the island beyond the Red Teleportal. From the Teleportal, head North through the swamp and into the brick area where Skeletons and Legerdemen roam. Make your way East past the ancient palace and climb the mountain. At the Eastern edge of the mountain nestles a small, poisonous bog with a fortress in the middle.
This is a clock puzzle. When you arrive, the time reads “9PM” (orient yourself facing East). The puzzle wishes you to change the clock to read “3AM”. To do this, simply mine out all the blocks on the Northern side of center and place them on the Southern side. Collect the Red Block as your reward and stash it with the others.
The final puzzle is nestled in a far corner beyond the Green Teleportal. Before you head out, make sure you have the White, Blue, and Red Blocks on you. From the Teleportal, work your way South-East and pass through the gateway into a grassy area. Run West past the Golden Golem and round the corner to find yourself in front of Thalamus’s last castle.
This puzzle simply bids you to place the block from each challenge in their display stands like trophies. Place the White Block in the far-left slot, the Blue Block in the center, and the Red Block on the right. Climb the ladder and open the treasure chest to learn how to craft a special Accessory that protects you from poison, paralysis, and confusion.
Kol & Galenholm – Chapter 3 Challenges
- Complete the Chapter within 30 days.
- Build your Base to level 5.
There are 2 trolls and 2 gigantes in Chapter 3 of Dragon Quest Builders — one for each island. Defeating each of them unlocks sinister furniture options in Terra Incognita. These monsters are rather difficult to kill so I recommend either bringing a party or using the ultimate weapon you craft near the end of the chapter.

The first troll is located just south of Kol, your home Base. Simply head through the gate and continue south until you see this towering monstrosity. I don’t recommend fighting him early on, although if you insist, his attacks are rather easy to avoid. Just keep kiting around him to the left and he shouldn’t be able to hit you.
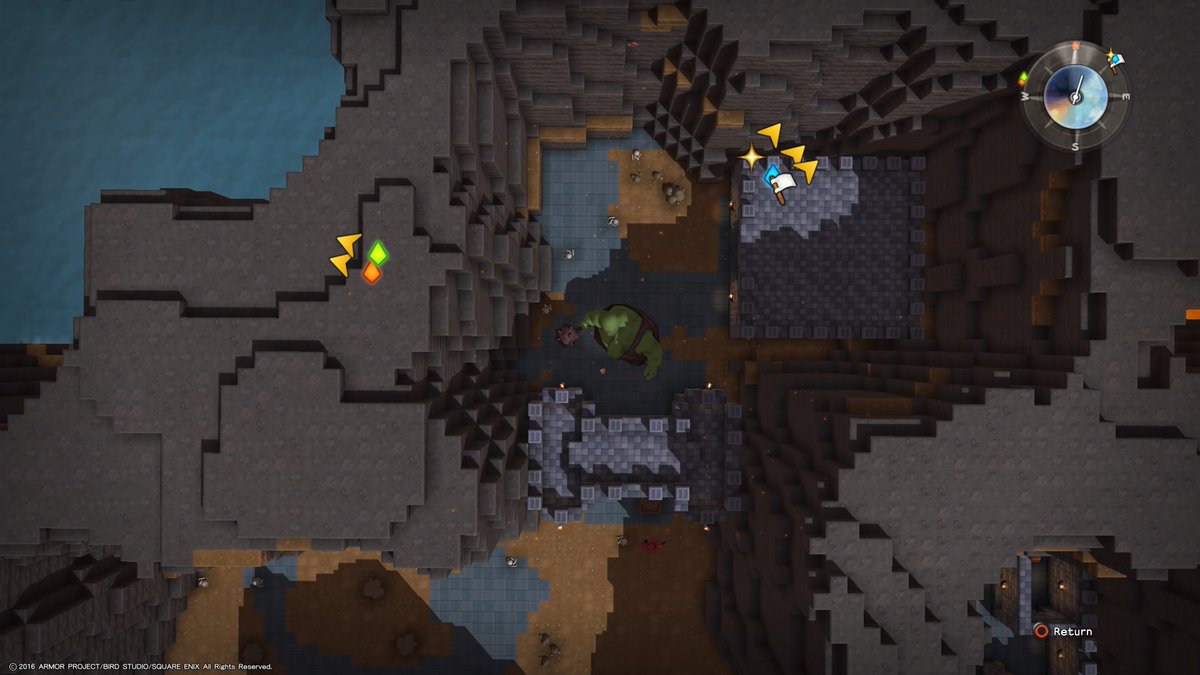
The second troll is holed up in the monster fortress beyond the Blue Teleportal. From the Teleportal, begin by heading South-West. Pass South through the gated checkpoint and into the fortress before turning West again. Head through the first room filled with Knights and Legerdemen, then turn North past the gate.
You should come across a troll locked away behind bars. Smash down the bars to get at him and prepare for a fight. Once defeated, you may waltz into the Eastern treasure room and grab some fabulous loot.
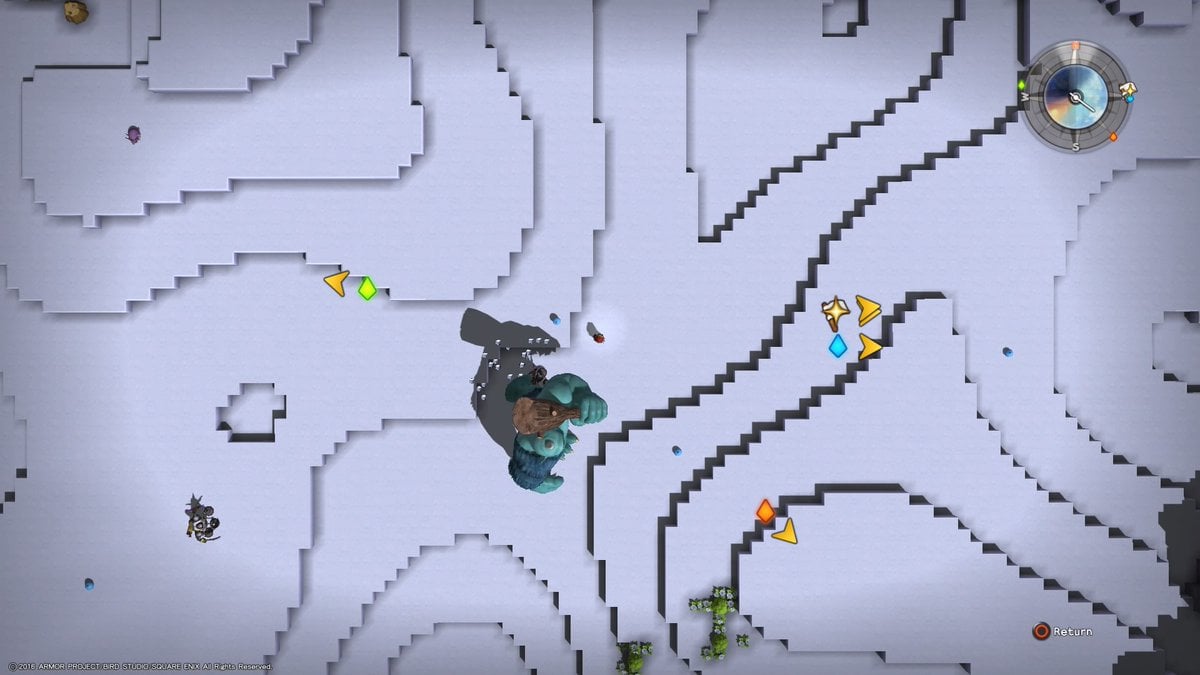
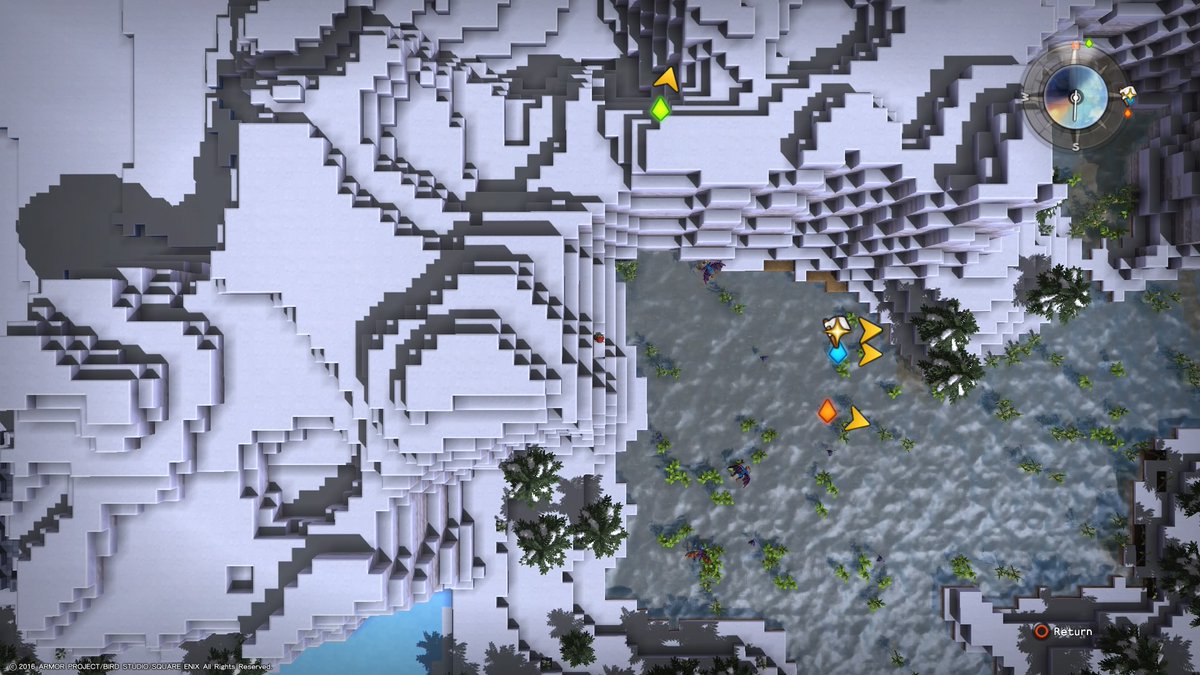
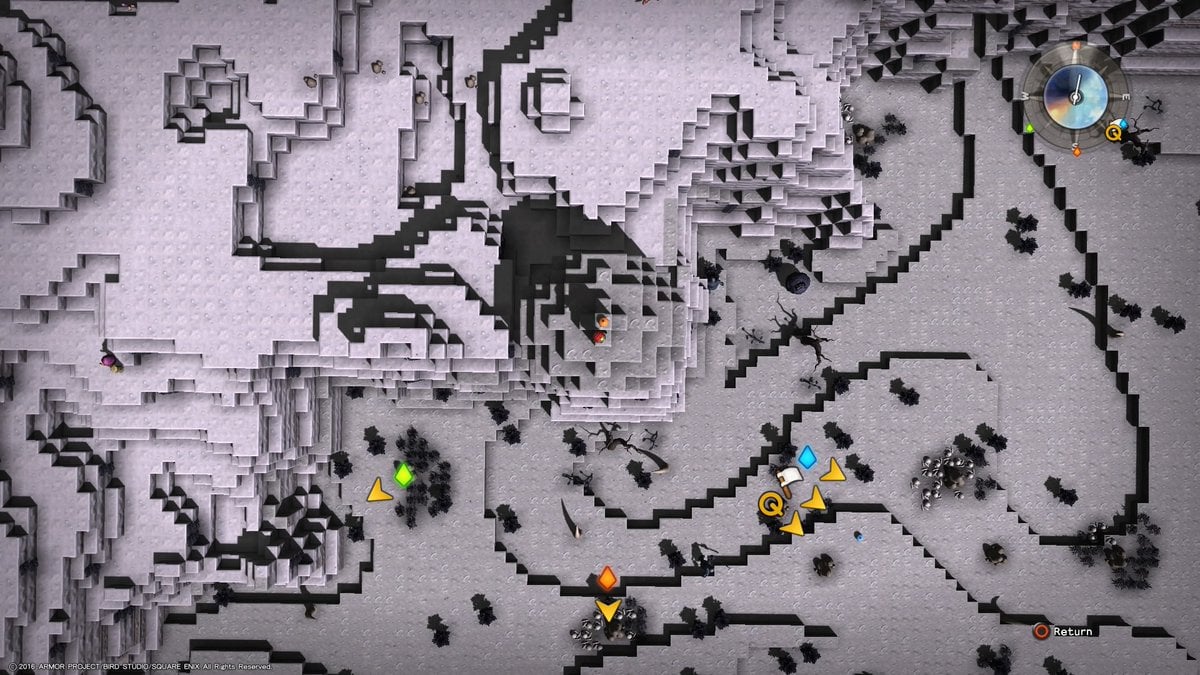
The first gigante is found just beyond the Red Teleportal. From the Teleportal, head North-West until you stumble upon a Snowman-like structure. From there, head due North. You will see the mighty green giant well before it sees you. It likes to smash puny humans with its feet. Gigantes are not nearly as safe to battle as the trolls are. Be on your toes.
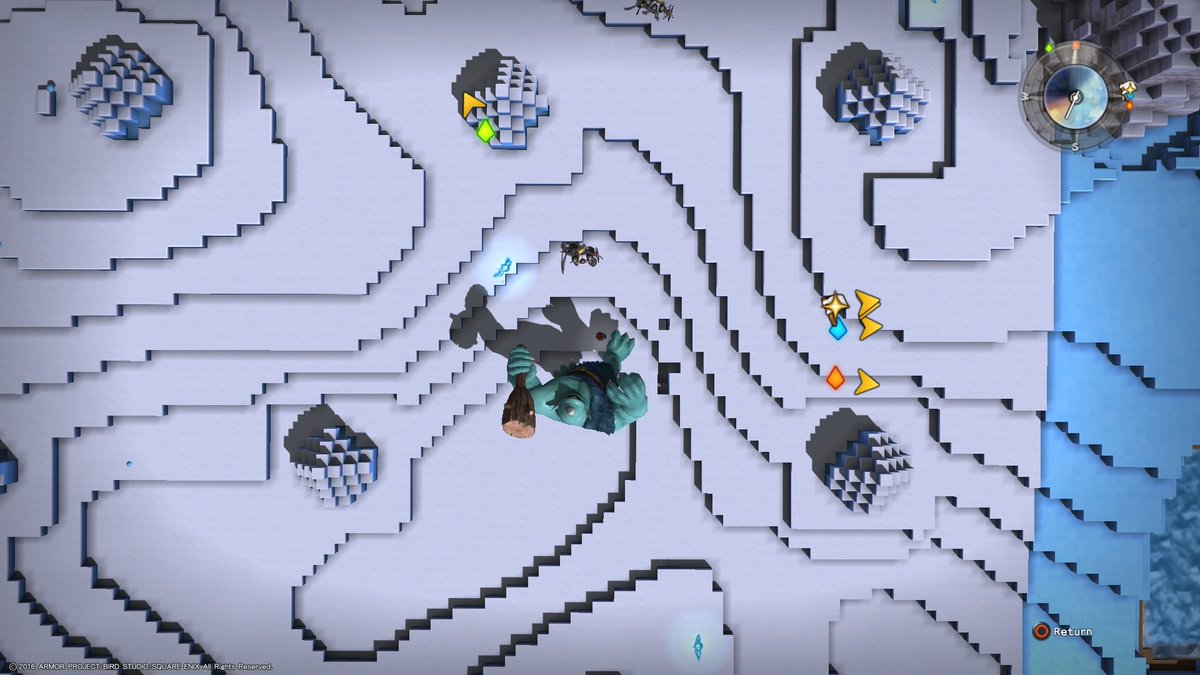
The second gigante and final giant boss monster is found beyond the Green Teleportal. From the Teleportal, simply head South over the mountain. Cross the icy terrain traveling South-East until you find the last of the towering green monstrosities found in Chapter 3.
The spectacular spa is essentially a fancy version of the Hela Hot Baths. If you’ve been looking for a reason to move the baths in Kol, here it is. The first matter of business involves actually finding the spectacular spa blueprint.
The spectacular spa blueprint is hidden in a cave beyond the Green Teleportal. The cave it’s found in is randomized in every playthrough, so you’ll have to keep exploring them until you find a chest with the blueprint in it. It shouldn’t be too far from the Teleportal. I found mine to the South in the cave on the side of the swampy area.
Once you pick up the blueprint, head back to base and find a spot to plop it down in. I recommend digging out a spot out and placing it one block below Base level so you can take advantage of the water that spawns by placing the Hot-Water Crystal there.
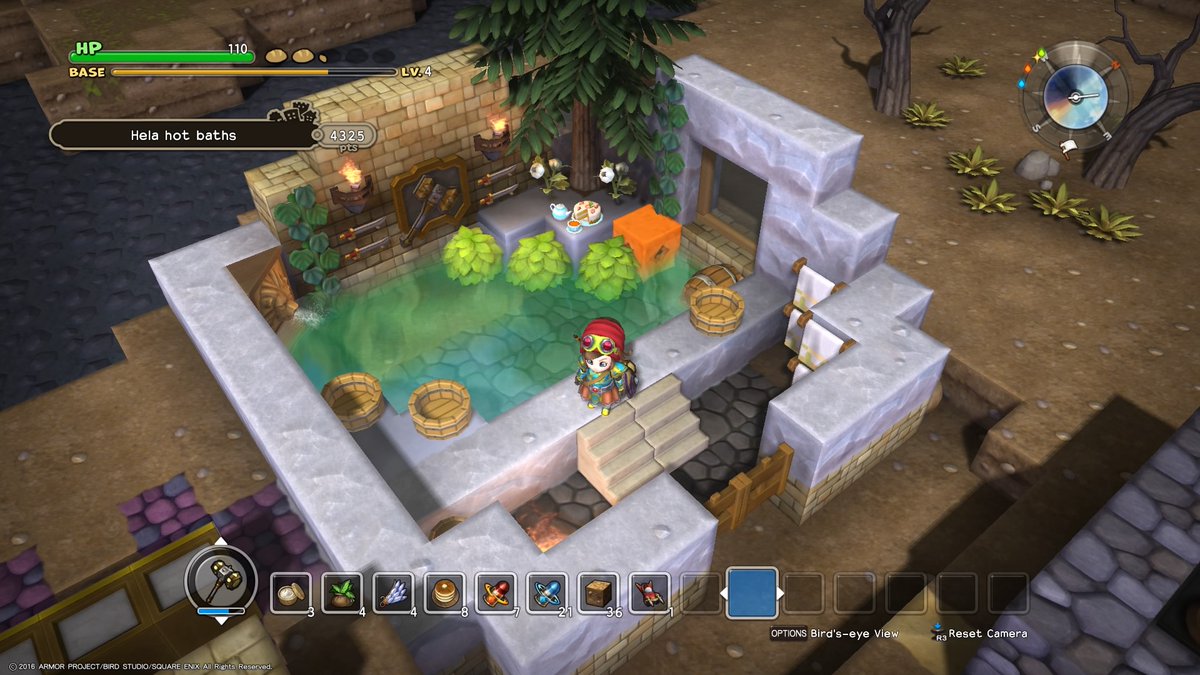
This is what the spa should look like when it’s finished. It should be noted that you don’t actually need the water blocks in there to complete the blueprint, but it completes a room recipe and makes it look splendid.
As stated in our beginner’s guide, saplings only grow within your Base. Because of this, it’s impossible to complete this blueprint outside of your base since you can’t place blueprints down under existing structures.

By now you’ve probably noticed the Fierce Fountain is required to build the spectacular spa. Chances are, you don’t know the recipe, and you’re going to have to search for it.
From the Blue Portal, head West, climbing the chalk mountain. Hop onto the dirt mountain and make your way North, collecting Wheat along the way for the Hearty Cream Cake you need to craft Tea Service. (You’ll also need Dracky Butter, Heartfruit, and Sugarcane for the cake.)
Carefully drop down the mountain side and follow the shallow waters East. You’ll eventually come across a room with a Troll standing outside of it. Upon entering the room, you’ll find that the troll is peeking through a hole in the wall at a scantily clad human woman inside.
Rain on the Peeping Tom’s parade by plugging up the hole and speaking with the woman afterwards. She rewards you with the Fierce Fountain recipe.
The Lyre of Slime Immemorial is a delightful lyre that transforms Dragon Quest Builders‘ soundtrack into nostalgic, 8-bit tunes. Completing this challenge unlocks the ability to craft it in every chapter.
To find it, prepare 15 Blue Blocks and head through the Red Teleportal. Return to where you found the first gigante just North of the Snowman-like structure. Look along the East cliff-side for a cave entrance. There will be an unbreakable Evil Idol guarding a door here.
Place the 15 Blue Blocks in the slime-shaped hole and the Evil Idol will disappear. Continue through the door and wind your way around to the end of the cave. Open up the treasure chest to learn how to craft the Lyre of Slime Immemorial.
Tantegel – Chapter 4 Challenges
- Complete the Chapter within 30 days.
- Build your Base to level 4.
This challenge is pretty self explanatory. You cannot be wearing the Auroral Armor or the Hero’s Shield when you start the battle with the Dragonlord. Don’t even touch them during either phase. The Sword of Kings is entirely OK to use, however.
There is some misleading information spreading about on the internet that implies you can use the Auroral Armor and Hero’s Shield during the first phase of the fight without penalty. This is false. I personally tested this, switching out the Auroral Armor and Hero’s Shield before finishing off the first phase and I did not complete the challenge, despite starting and going through the entirety of the second phase in my skivvies.
Just stash the Auroral Armor and Hero’s Shield in the Colossal Coffer before the fight even starts to be on the safe side.
This is a long quest chain that involves showing flowers to slimes. Before we even begin, you’ll need to craft yourself a shovel. Got it equipped? Perfect.

Each slime can be found on top of a giant slime statue that sits atop a mountain. The slime found on the starter island — just south of base — wants to see a Milkblossom. You can find Milkblossoms by purifying skulls with Holy Water. Dig one up and bring it back to receive a Clouded Memory.
The she-slime found to the North-West of Tantegel Castle desires to see Daffodaisy. To find a Daffodaisy, you’ll need to kill she-slimes South of Tantegel Castle until they drop a blossom. Plant the blossom and dig it up with your shovel. Showing the Daffodaisy to the she-slime rewards you with another Clouded Memory.
The metal slime is found beyond the Red Teleportal on top of a peak to the North-East. It desires to see a Coralily. You can find the blossoms by killing the purple Drackies to the West of Tantegel Castle. Plant the blossom and dig it back up with your shovel. Return to the metal slime with your Coralily to receive the third and final Clouded Memory.

Prepare to meet the certain someone (a.k.a. the King Slime) by gathering the materials and crafting station needed to build the verdant vision. You’ll need:
- 3x Clouded Memory
- 1x Milkblossom
- 1x Daffodaisy
- 1x Coralily
- 1x Diviner’s Altar
To reach the King Slime, use the Rainbow Drop to teleport to the Dragonlord’s island and follow the path South until you reach the gated checkpoint. Climb up the Southern mountain here to find the a statue of the King Slime with yours truly sitting atop the crown.
Talk to the King Slime to learn the recipe for the Verdant Vision. Place down your Diviner’s Altar and craft the Verdant Vision. Show it to him, then speak with him again afterwards to complete the challenge.
The Sword of Ruin is a cursed sword that rivals even the Sword of Kings in power. Equipping it renders you unable to switch weapons until the Sword of Ruins finally breaks. However, only finding it is required for the challenge, so the Builder must press on.

Return to the first island you landed on in Chapter 4 and head South-East, climbing the mountain range here. You will come to a sign that reads ‘Tantegel Sanctuary’. Break the blocks and head inside. Kill Skeletons to receive keys and make your way down through the Sanctuary.
Eventually you’ll walk through a door that seems to lead no where. Break the mossy earth blocks here and continue down the staircase. At the end of this floor waits a chest containing the Sword of Ruin. Pick it up and place it in your Colossal Coffer for safe-keeping.
Now you know exactly how to complete every challenge in Dragon Quest Builders. Please submit any questions you may be left with regarding challenges in the comment section below. I’ll help walk you through them as best I can!


Published: Oct 15, 2016 06:24 am