
The Ridorana Lighthouse is the latest 24-man alliance raid in Final Fantasy XIV, which is a part of Patch 4.3, Under the Moonlight. It requires level 70 and has a time limit of 120 minutes. It can be unlocked by progressing through the Return to Ivalice storyline after clearing the Royal City of Rabanastre.
The entire raid consists of four bosses of various difficulty, and if you manage to beat all four of them, you will get rewards after each boss. Follow our guide below for all the essential tips on how to beat all the bosses in the Ridorana Lighthouse raid.
Boss 1: Famfrit, the Darkening Cloud
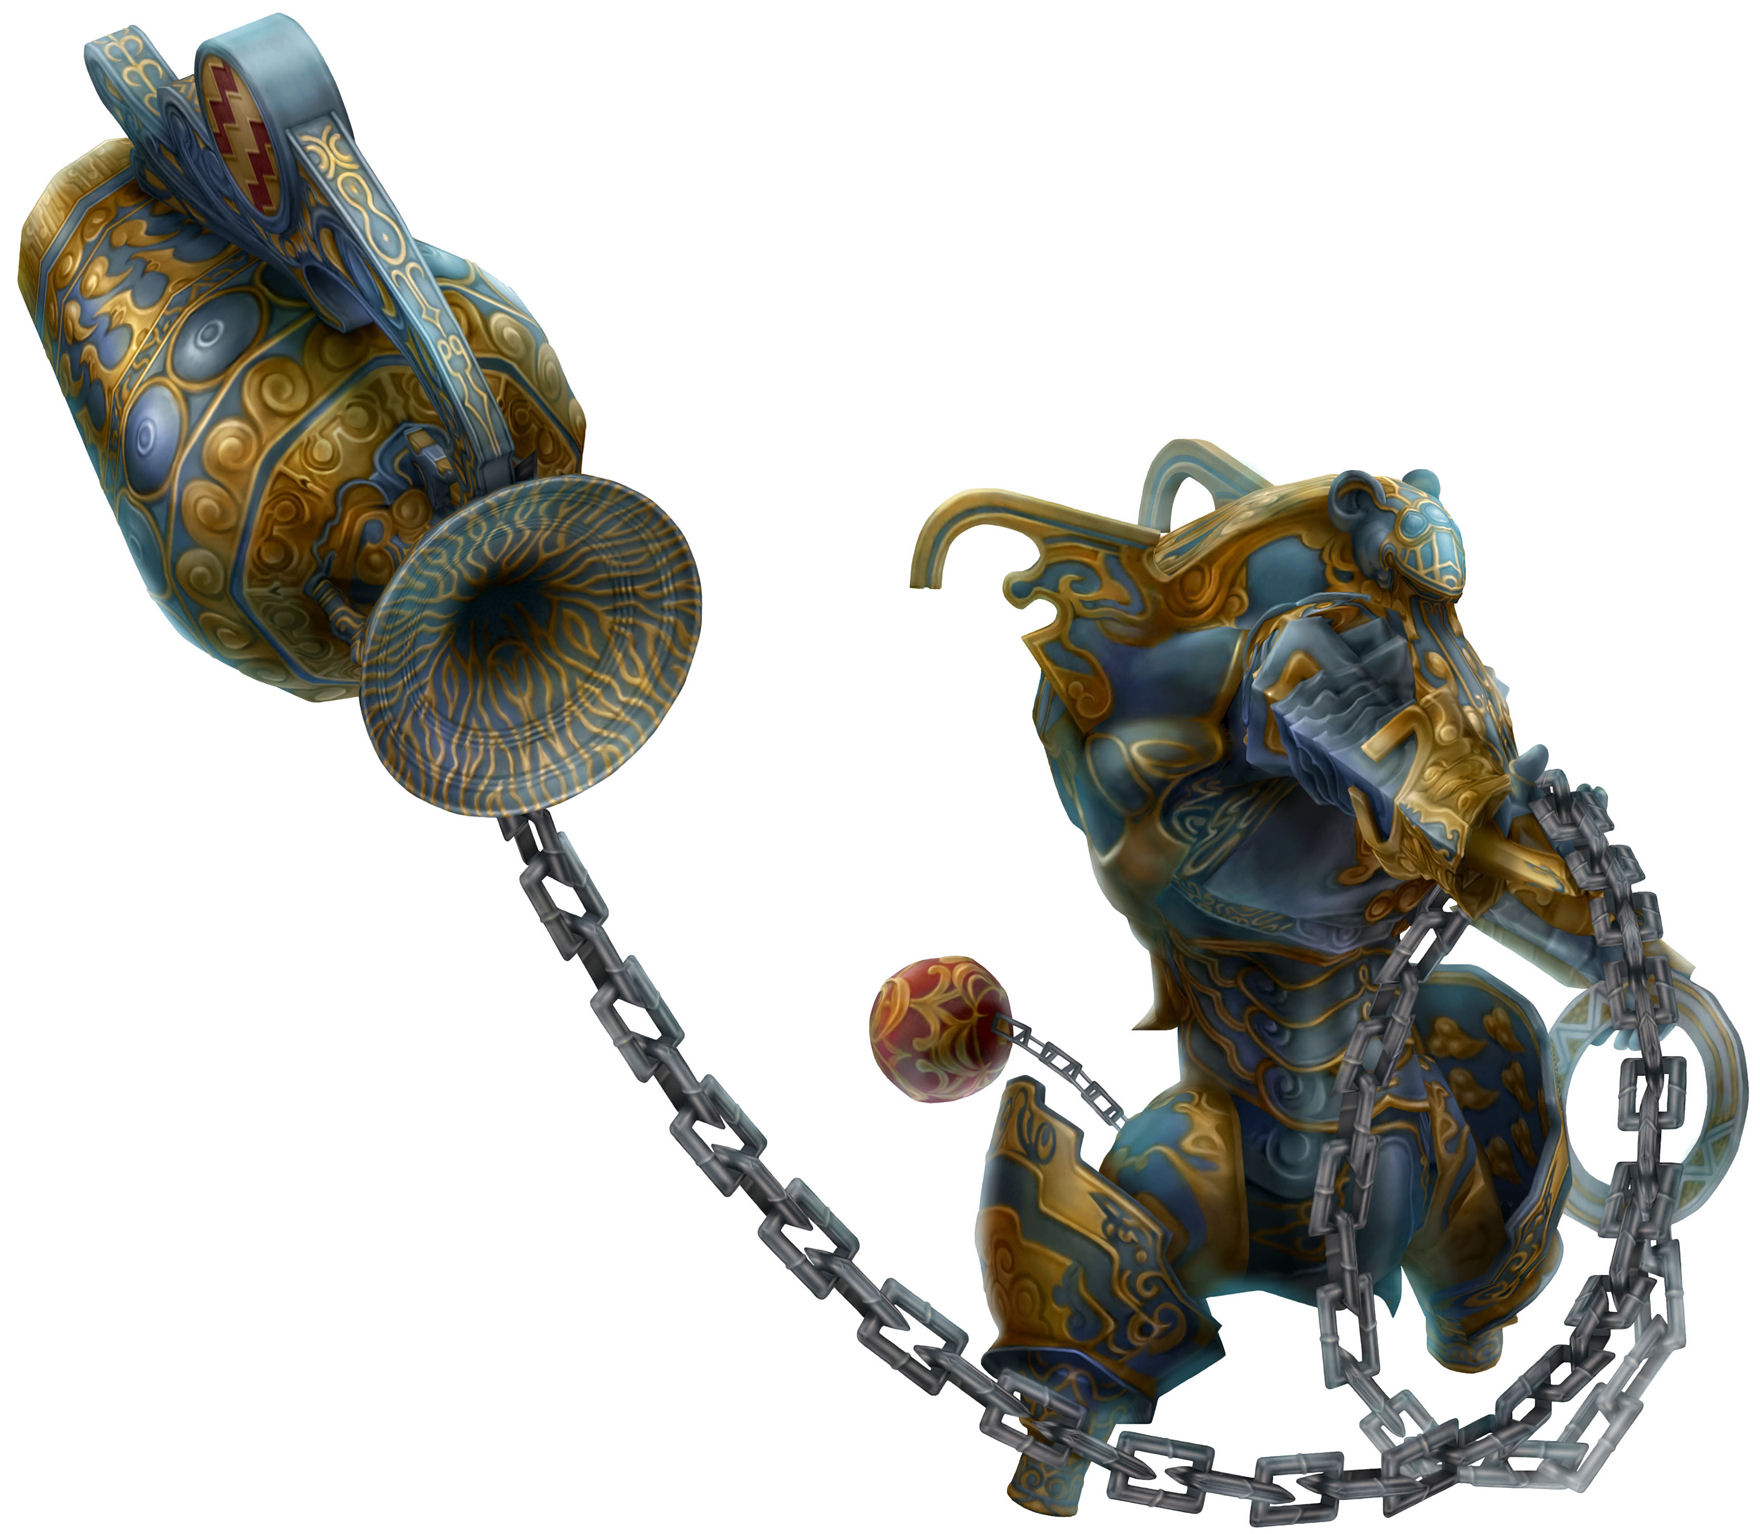
The first boss of the raid is Famfrit, the Darkening Cloud, who represents the zodiac sign of Aquarius, the Water Carrier, and desires to “flood” the world with darkness.
Famfrit mostly uses AOEs and stacks them up as the battle progresses. The biggest threat he will pose is Tsunami. He will fill up his vase with water and turn it around above his head. When he stops, he will spill out the water from the vase in the direction the water came from.
Keep an eye on the direction of the vase at all times. When he’s done casting Tsunamis, he will switch to Dark Ewer, which will make whirlpools of water fall through an entire arena, from one side to another in a straight line, so stay away from this as much as you can.
Dark Rain is his ADD trick. You can split the alliance into groups and let each fight one of the Rains. The longer it takes, the more AOEs Famfrit will cast, to the point that it will get really hectic. But if you have enough heals and shields, you should be able to survive this.
Famfrit, the Darkening Cloud rewards:
- 10x Allagan Tomestone of Creation
- 1x Treasure Coffer
Boss 2: Belias, the Gigas
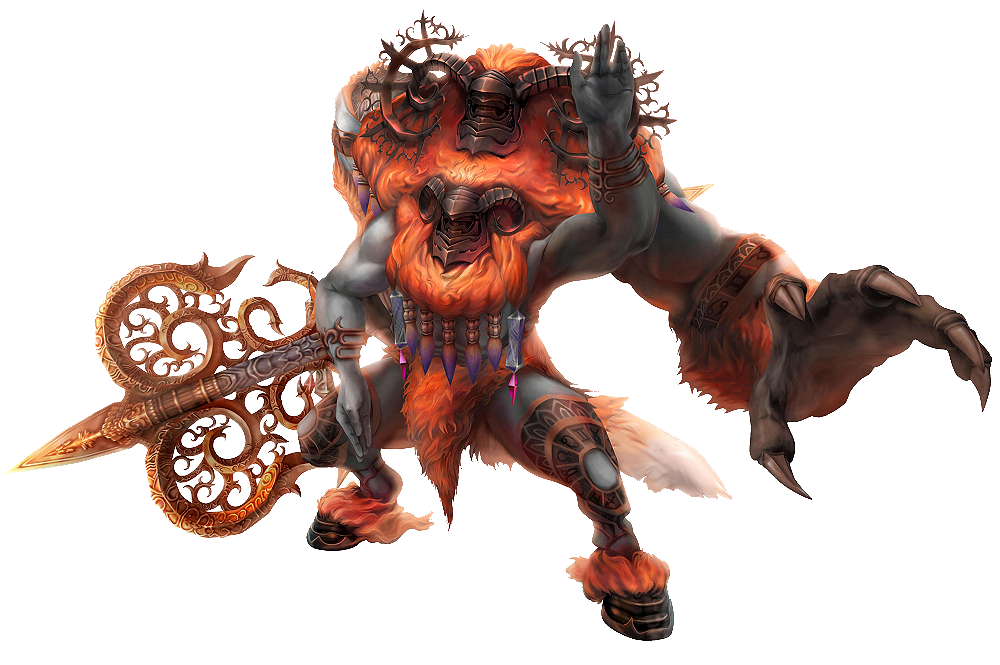
Belias mostly uses Fire and Time AOEs to disrupt your company. The Fire IV spell sends a whirlwind of fire all around the arena, so it’s pretty hard to evade. However, his second skill, Time Eruption, divides the floor into squares and sets up time bombs that tick on each of them. All you need to do here is to stick to the bombs that tick slower, and when the faster ones explode, then jump to the safe spots.
Later on, Belias will split into two clones and charge across the battlefield in a straight line. Again, just follow his marker and move to the opposite side. This way, you will be able to avoid his charges.
In the second phase of the battle, the boss will activate Hand of Time, which will slow down all players affected by its tethers. This means that the safest zone is on the edge of the arena, where the AOE can’t reach you.
Lastly, he will summon three Gigas that can be easily defeated if you split your alliance and take care of each of them. After Gigas, you may also find yourself against several Time Bombs, but those shouldn’t be a problem either.
Belias, The Gigas rewards:
- 20x Allagan Tomestone of Creation
- 1x Treasure Coffer
Boss 3: Construct 7
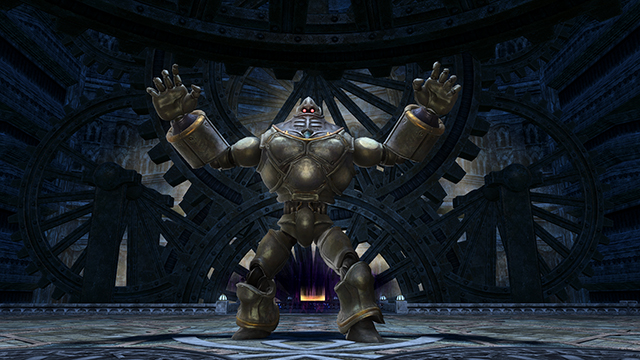
The beginning of the fight against Construct 7 involves a lot of running around, as he will use Accelerate and Pulverize AOEs to try to burn you down. So just move along the edges of the arena and avoid his markers.
Then, Dismissal and Dispose will follow when Construct 7 starts jumping across the room and wrecking everything in his path. At one point, he will land and charge a cone-shaped AOE in front of him while rotating in all directions. In this case, you simply need to always find yourself behind the boss.
If you manage to survive all this, then Construct 7 will start a mini-game — Computation. This will set the HP of all players to single-digit numbers. Pretty fun, huh? But don’t worry, the boss will summon four AOEs that will have numbers from 1 to 4 above them. He will then provide you with a computation task.
For example, you might be required to step into one of the circles so that the value of your current health plus the value of the circle can be divided by four. This means that if your health is 1, then you need to step into the circle with 3. This will bring your life total to 4, which will complete the computation.
There will be several such computation tasks, and in-between, your party will be sucked into portals to fight three other constructs. When you’re done with the constructs and all the computations, you will finish off this boss.
Construct 7 rewards:
- 30x Allagan Tomestone of Creation
- 1x Treasure Coffer
Boss 4: Yiazmat
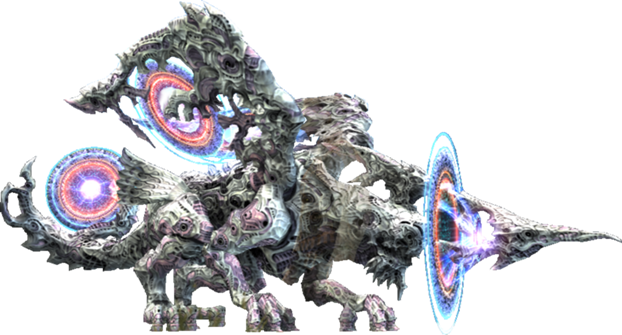
The final boss is hard! He will start with a few circle- and cone-shaped AOEs, which you can avoid by going behind him. But then he will throw White Breath, which basically covers the entire arena, so the only escape route is under his belly.
One of the most exciting mechanics used by Yiazmat is the Magnetic Lysis. This AOE separates the room into two polarities: positive and negative. If you get hit by either a positive or negative charge, just try to stay on the side of the room with the opposite charge to yours.
The problem is that during this phase, the boss will cast other AOEs, so it’ll be harder and harder to avoid those and stay on the right side of the room. When this phase is over, he will initiate a Cyclone that will pick up all players and turn them around in a whirlwind.
As if this wasn’t enough, Yiazmat will summon demons that have to be separated before you can kill them; if they’re stacked together, they’ll be invulnerable. But if you manage to kill them, the boss will reveal his heart and lose tons of HP. Now you can kill him easily!
Yiazmat rewards:
- 40x Allagan Tomestone of Creation
- 20x Allagan Tomestone of Mendacity
- 1x Gougan Coin
- 1x Cracked Cluster
- 2x Treasure Coffer
—
That covers how to beat all the bosses in the Ridorana Lighthouse raid, and for other Final Fantasy XIV guides at GameSkinny, please visit the links below:
- Eureka Anemos Weapon Guide
- Eureka Complete Gear Guide
- The Rising Password for Cheap Dungeon
- Stormblood Aether Currents Guide: How to Find and Use the Compass
- Titan Fight Guide


Published: Jun 5, 2018 07:42 am