Starstone Barrows in New World is one of the six main expeditions that offer an intriguing set of rewards, but also a number of puzzles that are hard to crack. if you’ve never done them before. This guide will provide you with tips and tricks on how to complete Starstone Barrows expedition in New World.
Starstone Barrows becomes available once you reach Level 35 at the Everfall region, and it is one of the hardest expeditions to complete due to its confusing layout. It is also connected with the quests Starstone of Shattering, Reaper’s Locus, and More Bones for Barkimedes, which can be obtained prior to entering the dungeon.
How to Complete Starstone Barrows in New World
Unlock Starstone Barrows
The Starstone Barrows expedition can be unlocked after completing the following series of side quests:
- Researcher’s Request (by Balian Clark at Everfall Magistrate)
- An Anonymous Gift (by Tekla Petrowski at Everfall Forge)
- Ancient Contemplations (by Tekla Petrowski at Everfall Forge)
- Foreman’s Ledger (by William Heron at Everfall Tavern)
- Starstone of Shattering (by William Heron at Everfall Tavern)
Once these are done you will be tasked to enter the Starstone Barrows expedition.
Prepare for the Expedition
Starstone Barrows requires the participation of three to five players just like any other expedition. This means that you will need at least one tank, one healer, and one DPS character to successfully complete the dungeon.
You will also need the following items to be able to enter and complete the expedition:
- 1x Starstone Tuning Orb
- 1x Azoth Staff
You will acquire the orb while doing the aforementioned quests, while the Azoth Staff can be obtained by completing the side quests given by Yonas the Hermit, who can be found at Fisherman’s Bend in Windsward, west of Grenville.
Starstone Barrows Area 1: Ancient Hall
Follow these steps to complete this first area:
- Go down the hallway
- Turn right and cross the bridge
- Take out the ranged enemies first, then warriors and shieldmen last
- Follow the linear path defeating enemies
- Cross another bridge
- Defeat Centimas mini-boss and his mobs
- Use the Azoth Staff to unlock the door to the next area
Area 2: Sealed Chamber
This area will introduce the first instance of lasers, which are going to become a predominant issue as you progress.
- Go up the stairs and defeat the first group of enemies
- Loot the room to your right
- Enter the room with laser beams to your left
- Crawl under the beams to be able to reach the end
- Activate the first checkpoint and loot the vicinity
- Continue onward and defeat the second group of enemies
- Enter the next room and roll or dash in order to avoid moving laser beams
- Defeat the third group of enemies and turn right
Area 3: Forbidden Passage
The third area has even more laser beam obstacles that need to avoided at all cost.
- Turn right and go down the ramp
- Ignore the beams in front and turn left instead
- Reach the pillar, using a ledge
- Drop down to the next ledge to your right
- Walk under the beams, using the ledges across the room
- Reach the main door and turn left
- Defeat the first group of enemies and continue on
- Enter the room with the monolith
- Interact with it to gain Arcane Protection that protects from laser beams
- Cross the room through the beams and approach the main door
- Enter the door through the beams and activate the checkpoint
- Continue on and defeat the second group of enemies
- Follow the hallway to the next area
Area 4: The Amphitheater
In this portion of Starstone Barrows, you will be dealing with a lot more enemies, so come in prepared.
- Defeat Ioane mini-boss and the mobs in the big hall
- Continue upwards, defeating more enemies as you go
- When you reach the main door, use the Azoth Staff to unlock it
- Interact with the checkpoint and enter the next area
Area 5: Shattered Obelisk
This is another area with lots of enemies, but this time much tougher.
- Approach the central staircase
- Defeat all the enemies to your left
- Focus on defeating a powerful mage to the right, using DPS units
- Proceed upwards and turn left
- Defeat another group of enemies
- Unlock the door using the Azoth Staff
- Continue to the checkpoint and defeat some more mobs
- Turn right in the big room and unlock the door with the Azoth Staff
- Remember the closed door to your left for future
Area 6: Halls of the Crypt
This will be the final area before the two major boss battles of Starstone Barrows.
- Follow the downward path, defeating the enemies
- Reach the monolith with Arcane Protection
- Defeat Limas and Erebas mini-bosses and their mobs
- Interact with the monolith
- Cross the hall with the laser beams and reach the next checkpoint
- Defeat the rest of the mobs before the first boss battle
Boss 1: Alectos the Relentless
Alectos will summon a lot of mobs and buff them, so you need to counter his buffs.
- Once the mobs spawn and get buffed, use your mage to apply debuffs
- Dodge Alectos’ Arcane Orb projectiles by moving backwards
- Use stagger attacks on Alectos, to which he is most vulnerable
- Avoid his spinning staff AoE attack Arcane Nova
- Try to knock him down for extra damage
Once Alectos is defeated, you will be rewarded with the following items:
- 99x Coin
- 270 Weapon Mastery
- 1350 XP
Continue on the downward path and follow these steps:
- Approach another monolith with Arcane Protection
- Defeat a group of enemies and interact with the monolith
- Cross the next area with laser beams
- Reach another monolith and renew your protection
- Defeat the Sangarion mini-boss and all the mobs
- Open the ornate chest and pick up the Obelisk Key
- Return back to the area of the Alectos boss fight
- On your way, inspect the area to the left of the monolith
- Use Arcane Protection to unlock the Inert Ancient Shrine
- Approach the shrine once you reach the area with Alectos
- Bless the Obelisk Key in the shrine to get the Blessed Obelisk Key
- Return to the end of the Shattered Obelisk area
- Approach the closed door to your left in the big room
- Use the key to unlock the final boss battle
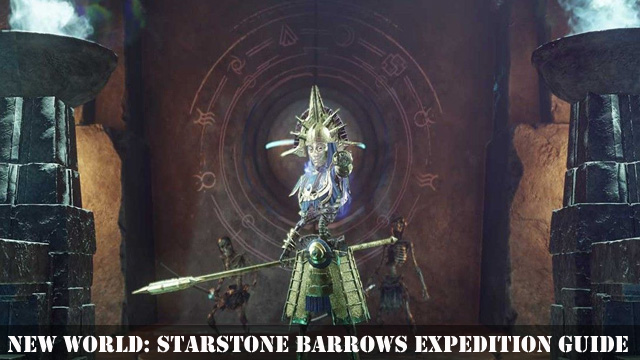
Boss 2: Greundgul the Regent
The final boss of Starstone Barrows wields a heavy greatsword, which sends damage waves all around, so don’t attempt to hide behind her back.
- When she swings her sword, put your tank character in front
- Once she throws the Greundgul’s Bone, destroy it immediately
- If you didn’t manage to destroy it, prepare for mobs spawning
- Once defeated, she will be resurrected for another round
- Avoid her Leaping Smash attacks in the second phase
Besides the addition of the leaping Smash, the fight will go on as usual in both phases. Once Greundgul is defeated the second time, you will be able to collect the following rewards:
- 99x Coin
- 540 Weapon Mastery
- 1350 XP
In addition to the rewards obtained from the two bosses, you will be able to collect the following rewards at the end of the Starstone Barrows expedition:
- Graveguard’s Seal (Tier 3 Rare Amulet)
- Staff of the Immolated Veil (Tier 3 Rare Fire Staff)
- Obsidian Rapier (Tier 3 Rare Rapier)
- Creeping Cold (Tier 3 Rare Ice Gauntlet)
- Fleeting Reality (Tier 3 Rare Hatchet)
Finally, you will also receive the Starstone Diadem, which is required for the completion of the Startstone of Shattering quest given by William Heron.
Related Guides:
That’s all you need to know on how to successfully complete the Starstone Barrows expedition in New World. Check out more New World guides on our dedicated hub page.


Published: Oct 18, 2021 10:22 am