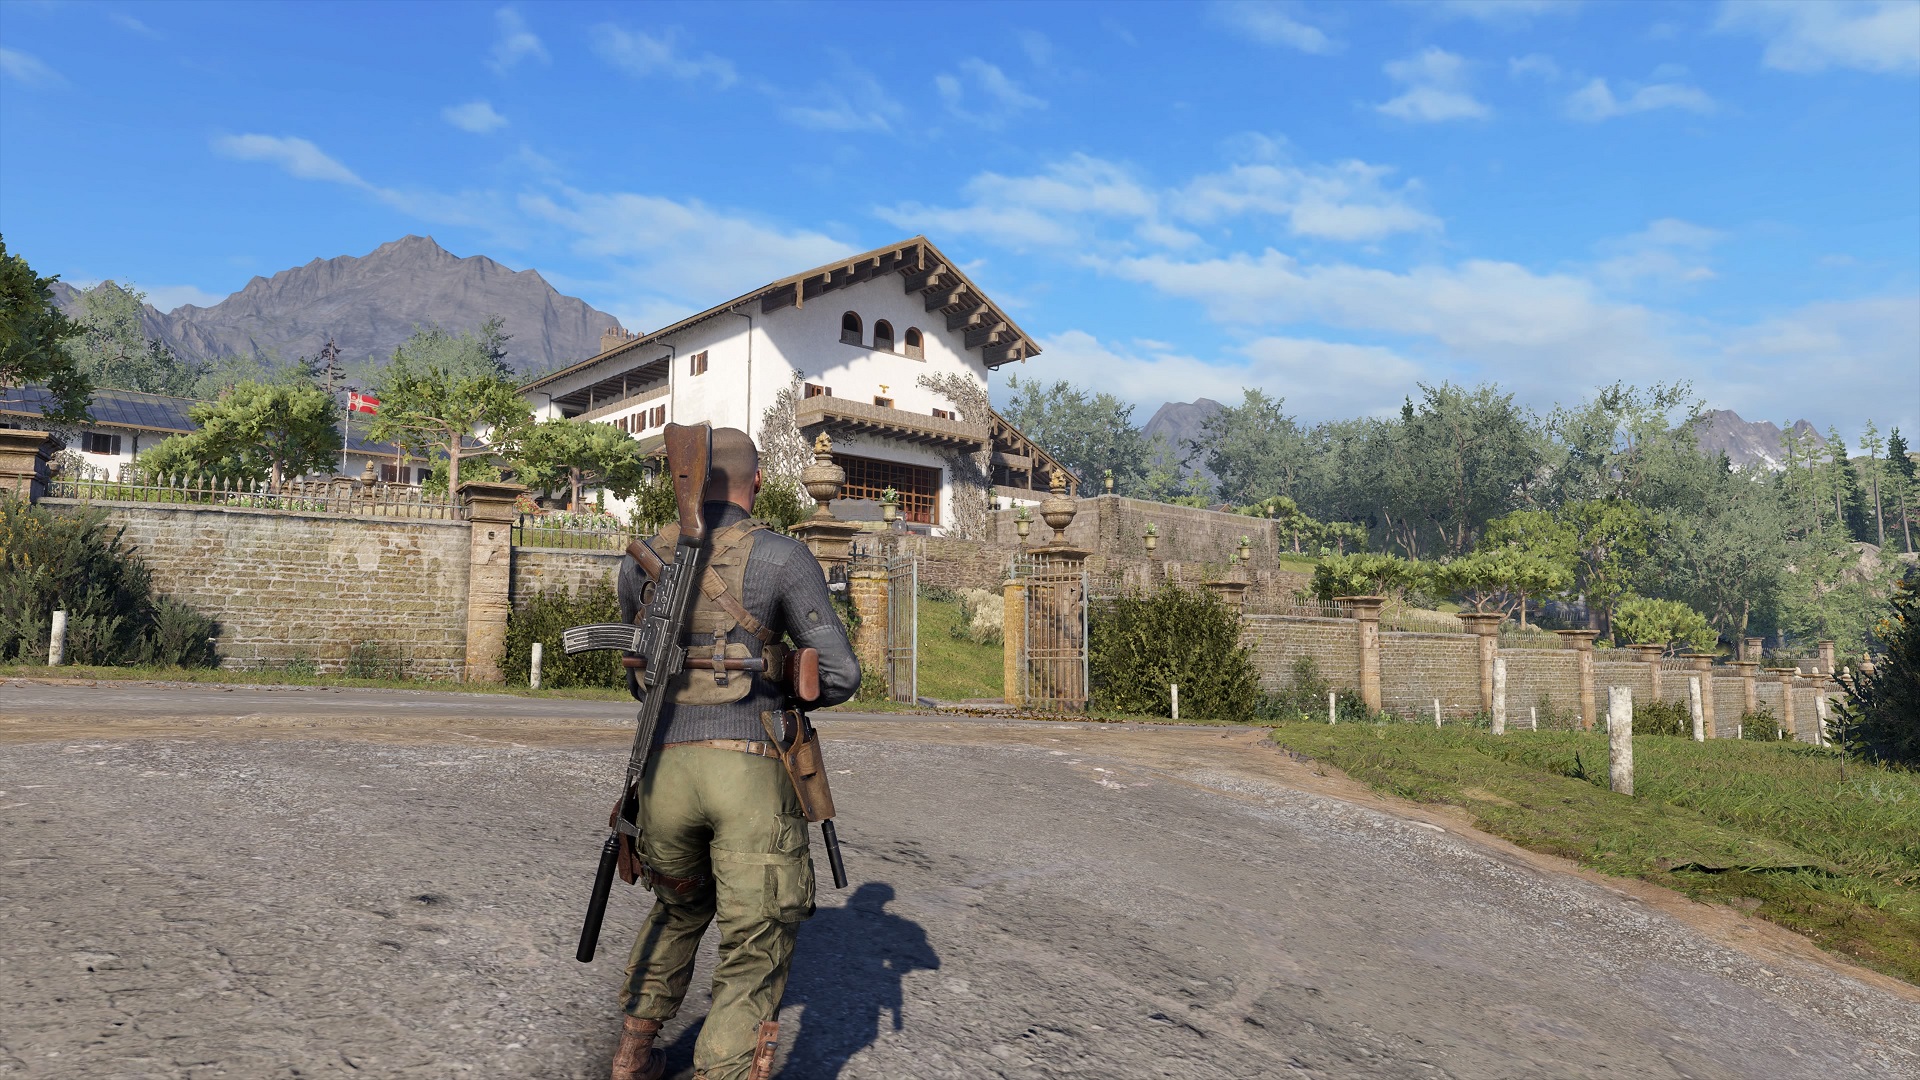
As with eight of the nine missions in the main campaign, Sniper Elite 5‘s Kill Hitler DLC, Wolf Mountain, has 19 collectibles to find across stone eagles, classified documents, hidden items, personal letters, and workbenches. Of course, there are additional starting locations, as well. This time there are two to secure.
This guide will show you their location starting from left to right, then back left again, as we’ve tried to minimize backtracking based on the map’s design. Of course, you can find these collectibles in any order you wish using the overview map below.
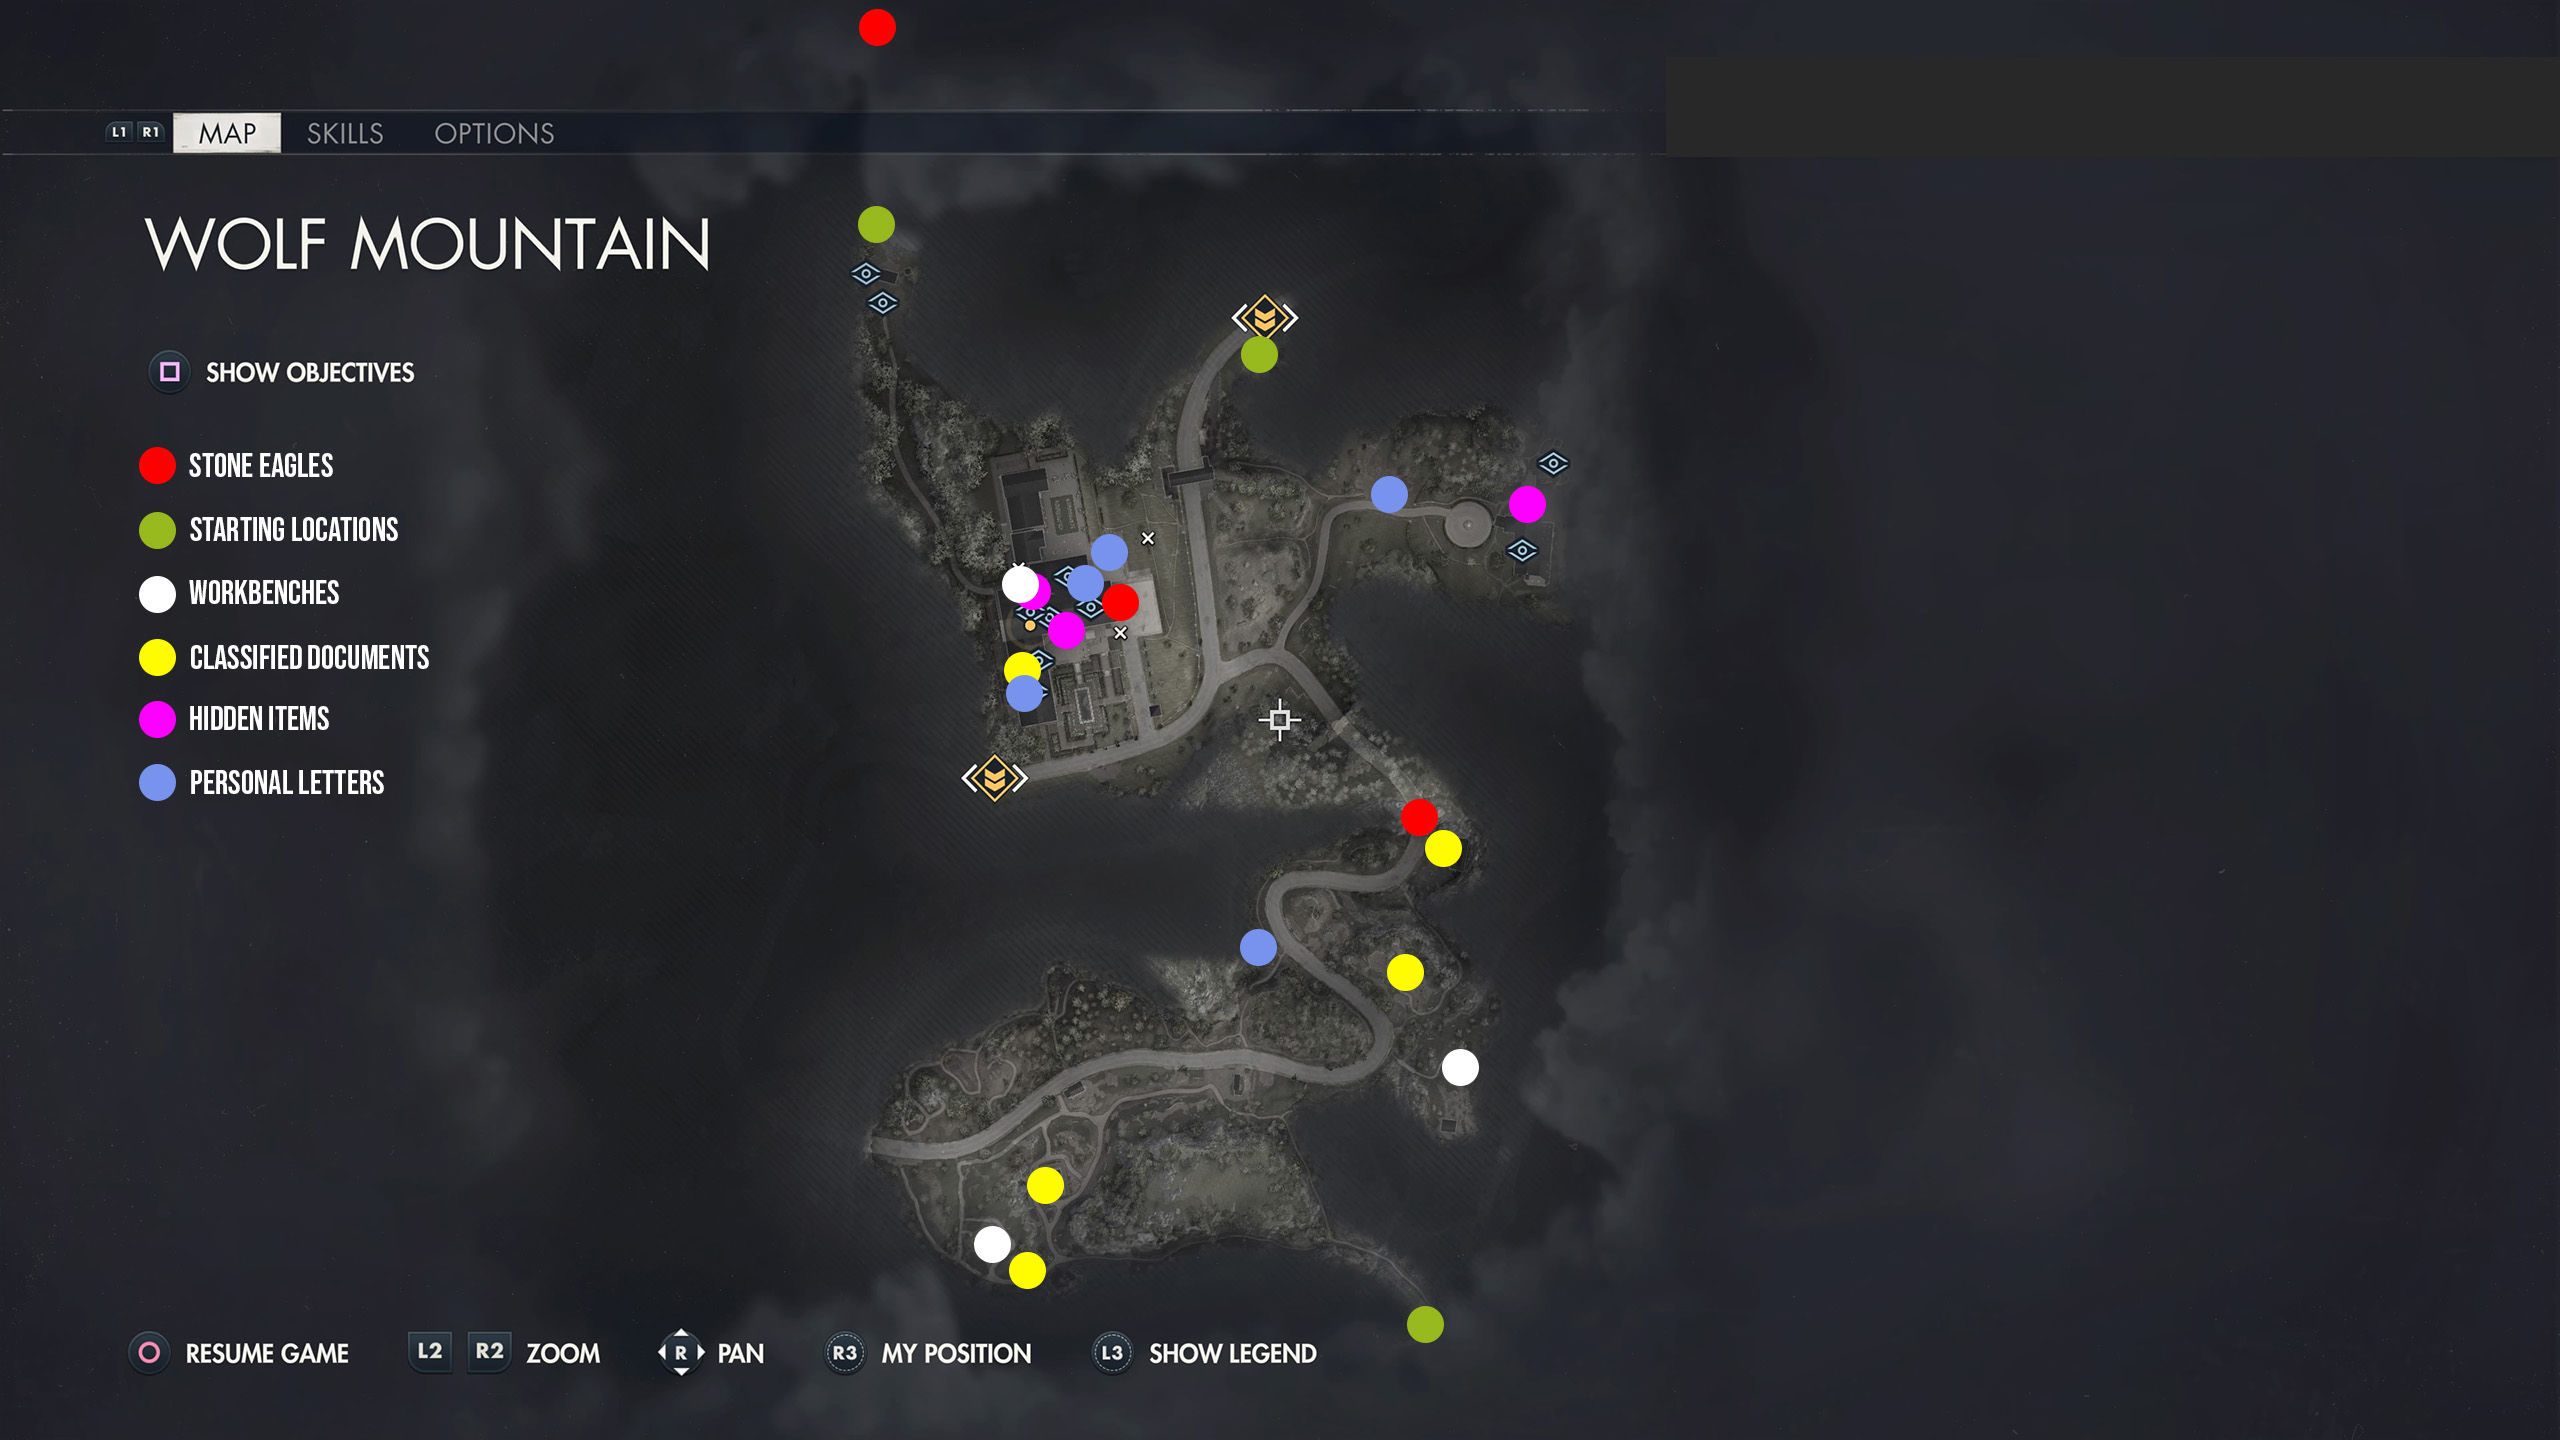
Wolf Mountain Collectibles and Starting Locations
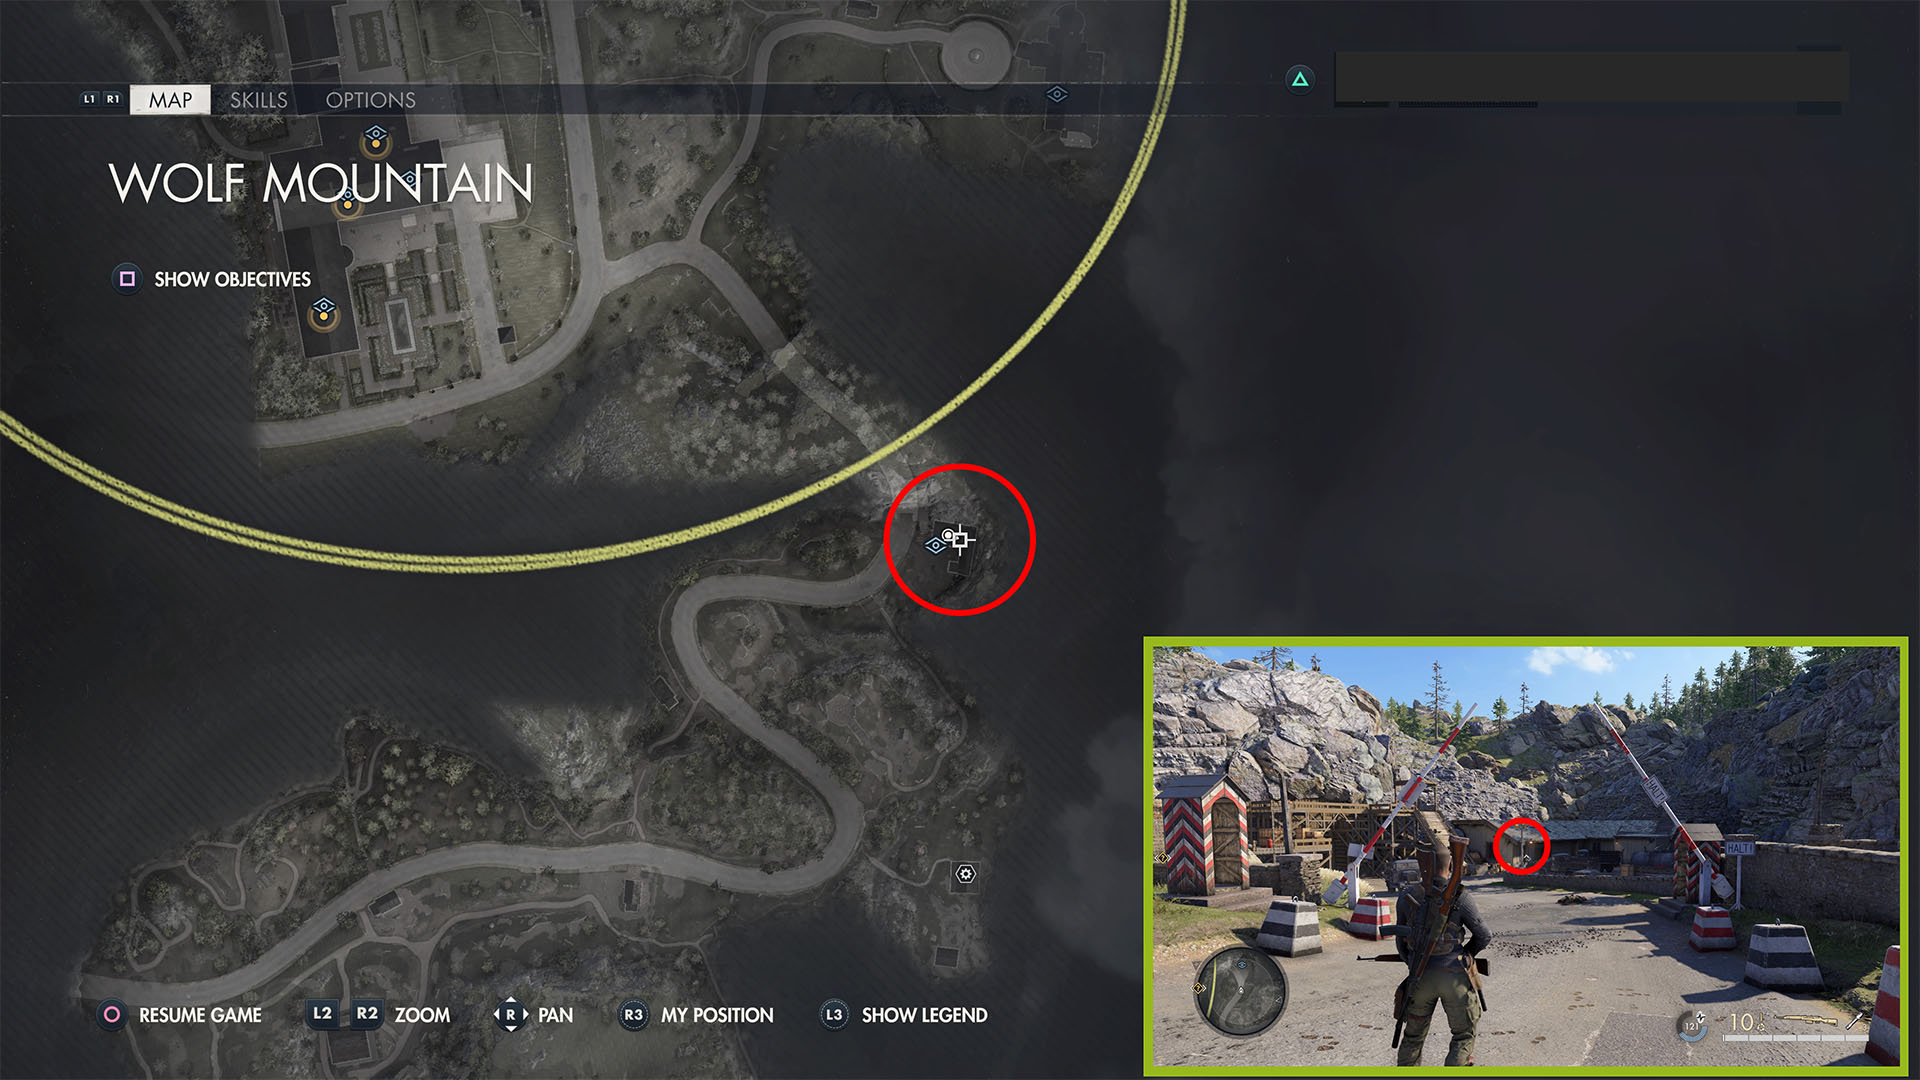
Communications Operations (Classified Document 1)
Begin the mission from the Mountain Overlook starting location and take the path left when it splits left and right. You’ll eventually crawl under a fence and see a guard tower in front of you. This classified document is in the guard tower, to the right when you reach the top of the stairs.
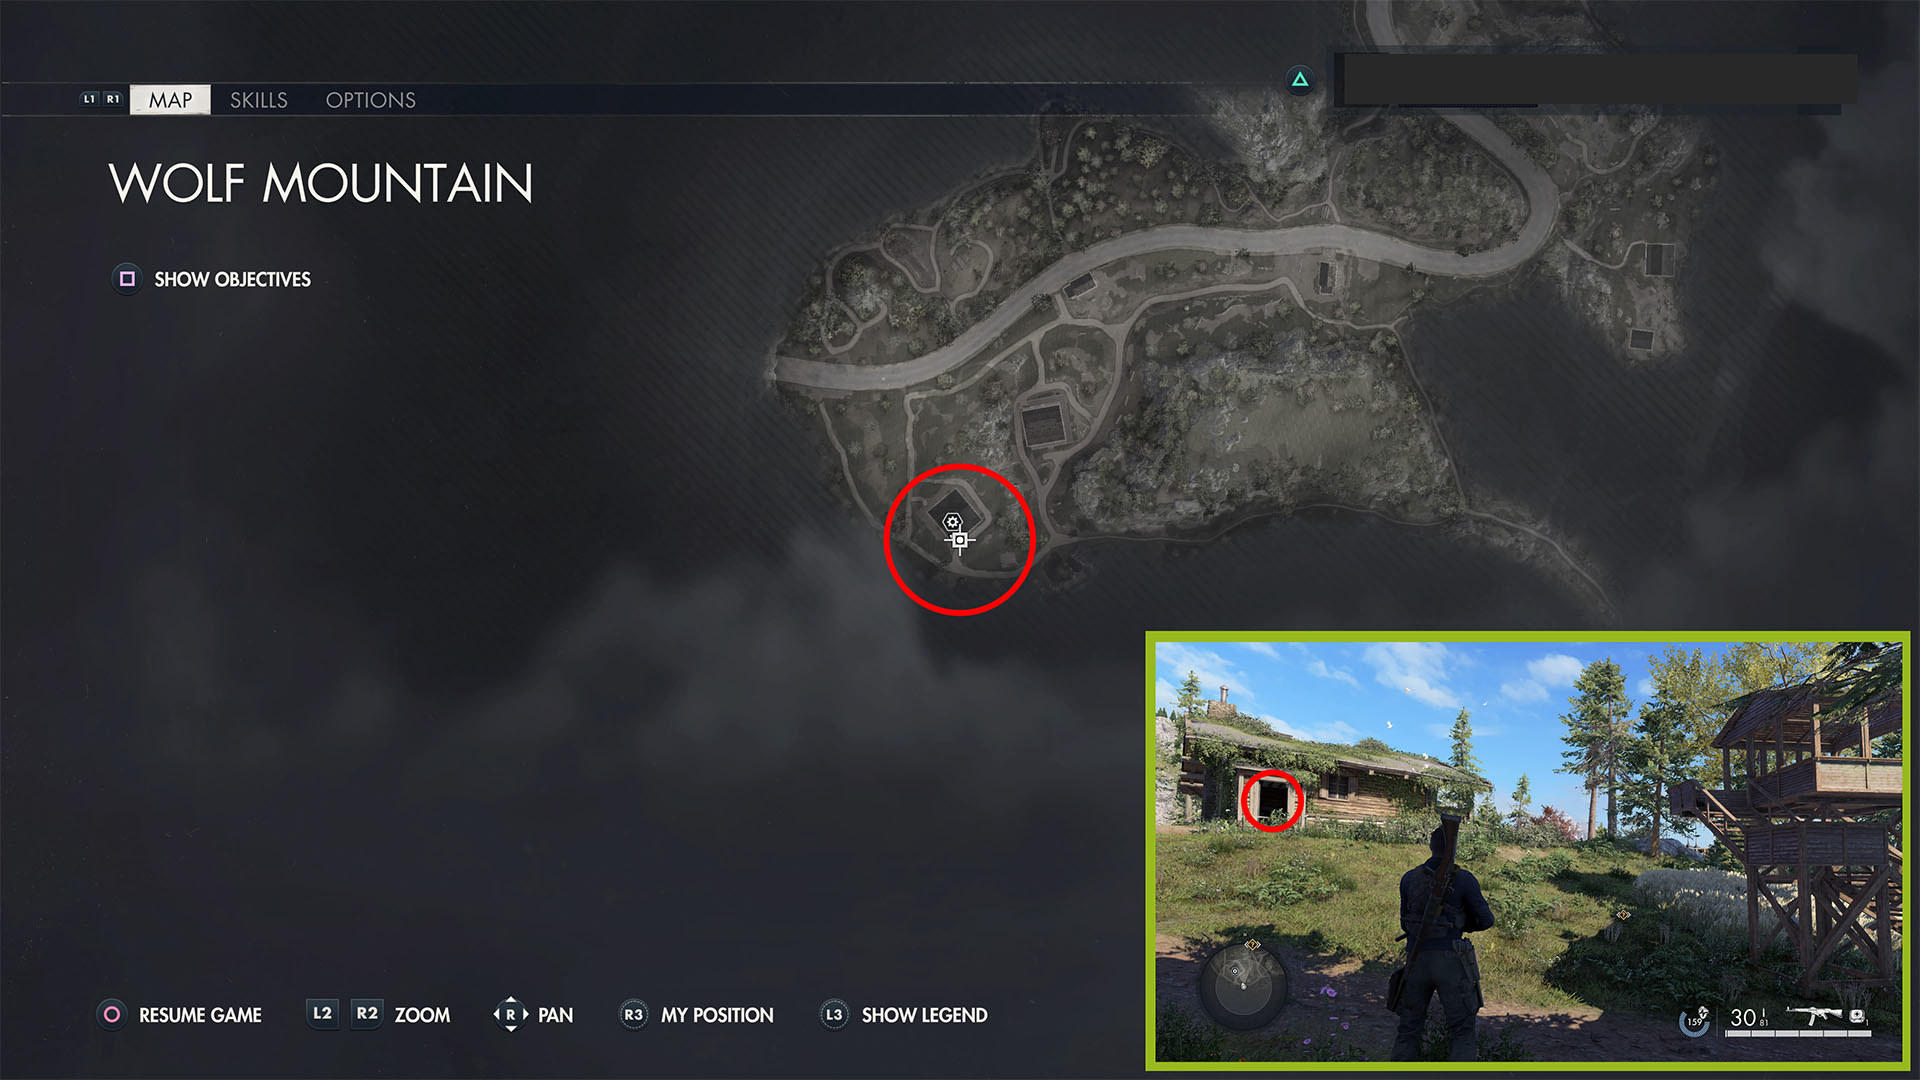
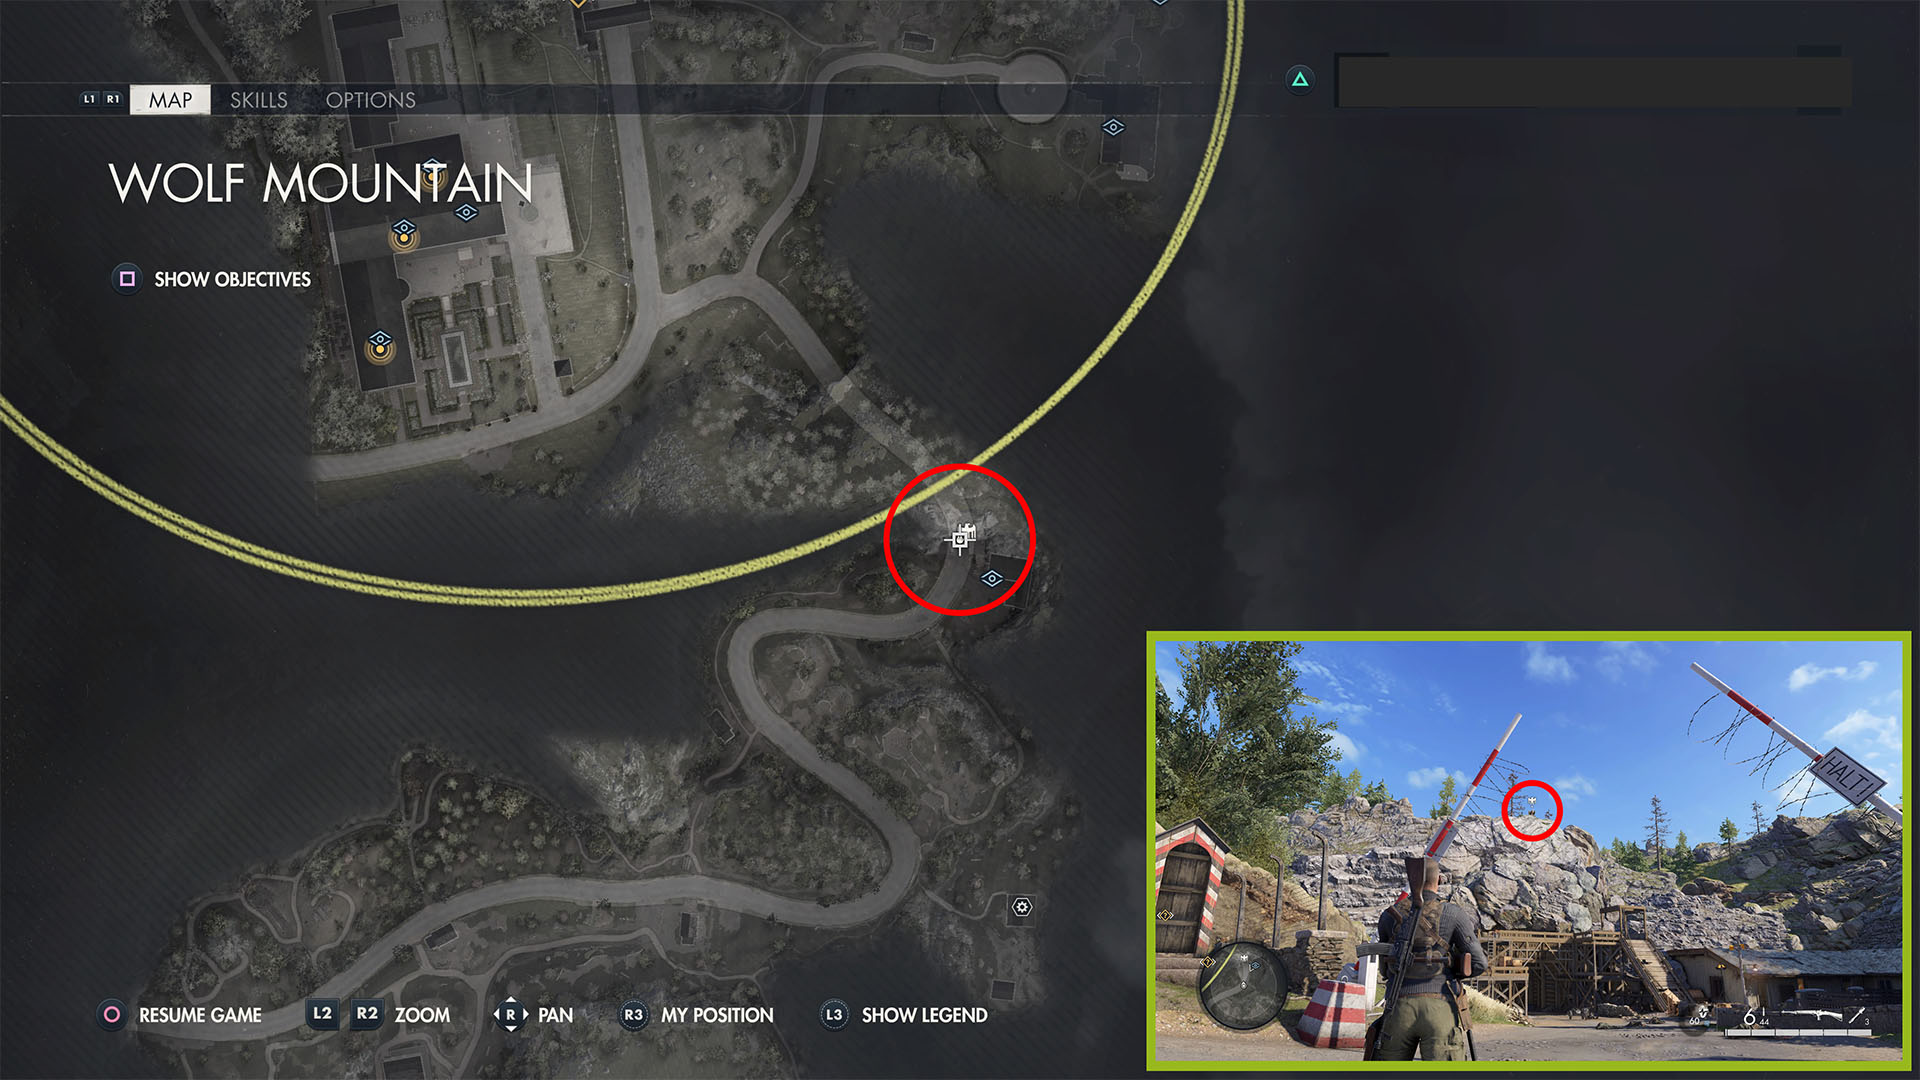
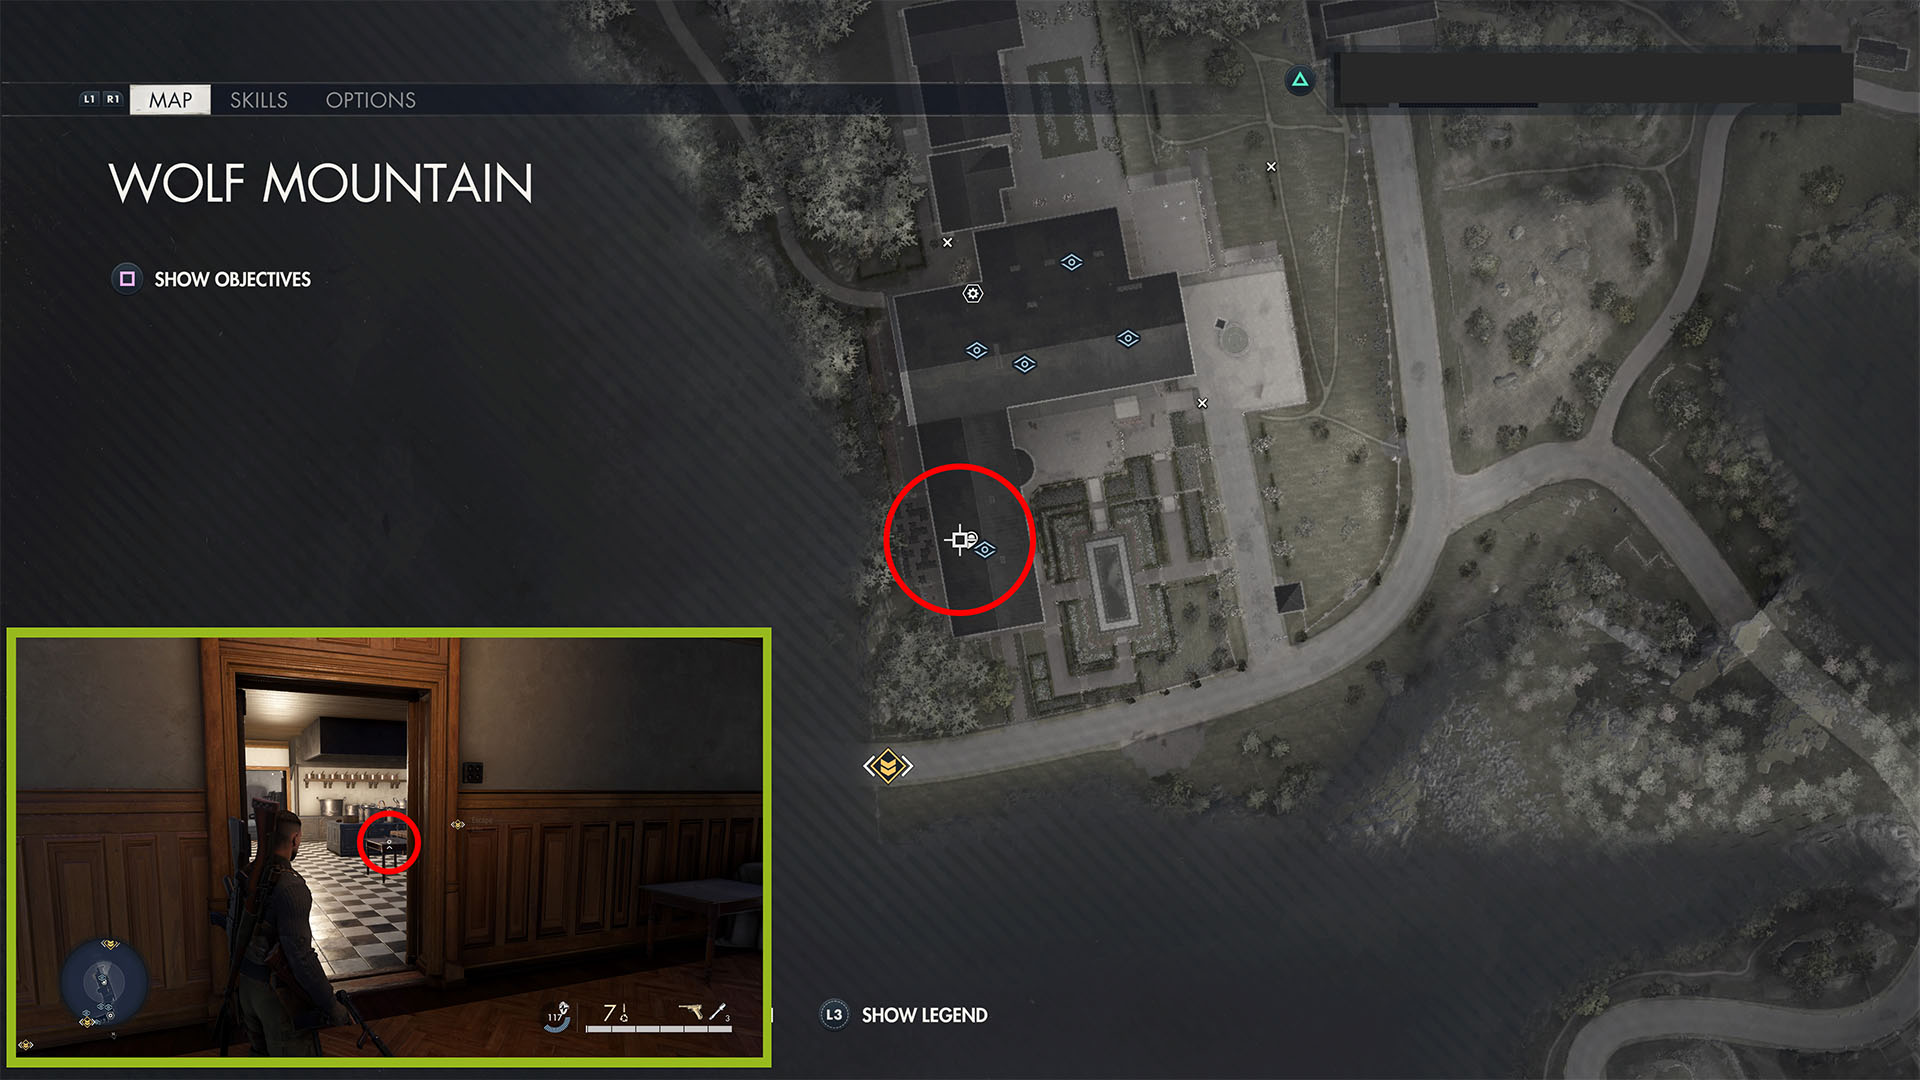
Additional Flak Positions (Classified Document 2)
Go to the building just northeast of the guard tower. Enter the first-floor door on the south side, and go into the first door on the left (the room in the southwestern corner of the building). This collectible is on a desk in the back of the room by a satchel charge. Pick up the satchel charge or kill and loot the officer on the second floor for a key.
Rifle Workbench
Once you’ve picked up the satchel charge or key from the officer, head back to the ivy-covered building west of the guard tower (on your right going back up the hill). Open the door on the southern side, and go down to the basement to find the rifle workbench.
SMG Workbench
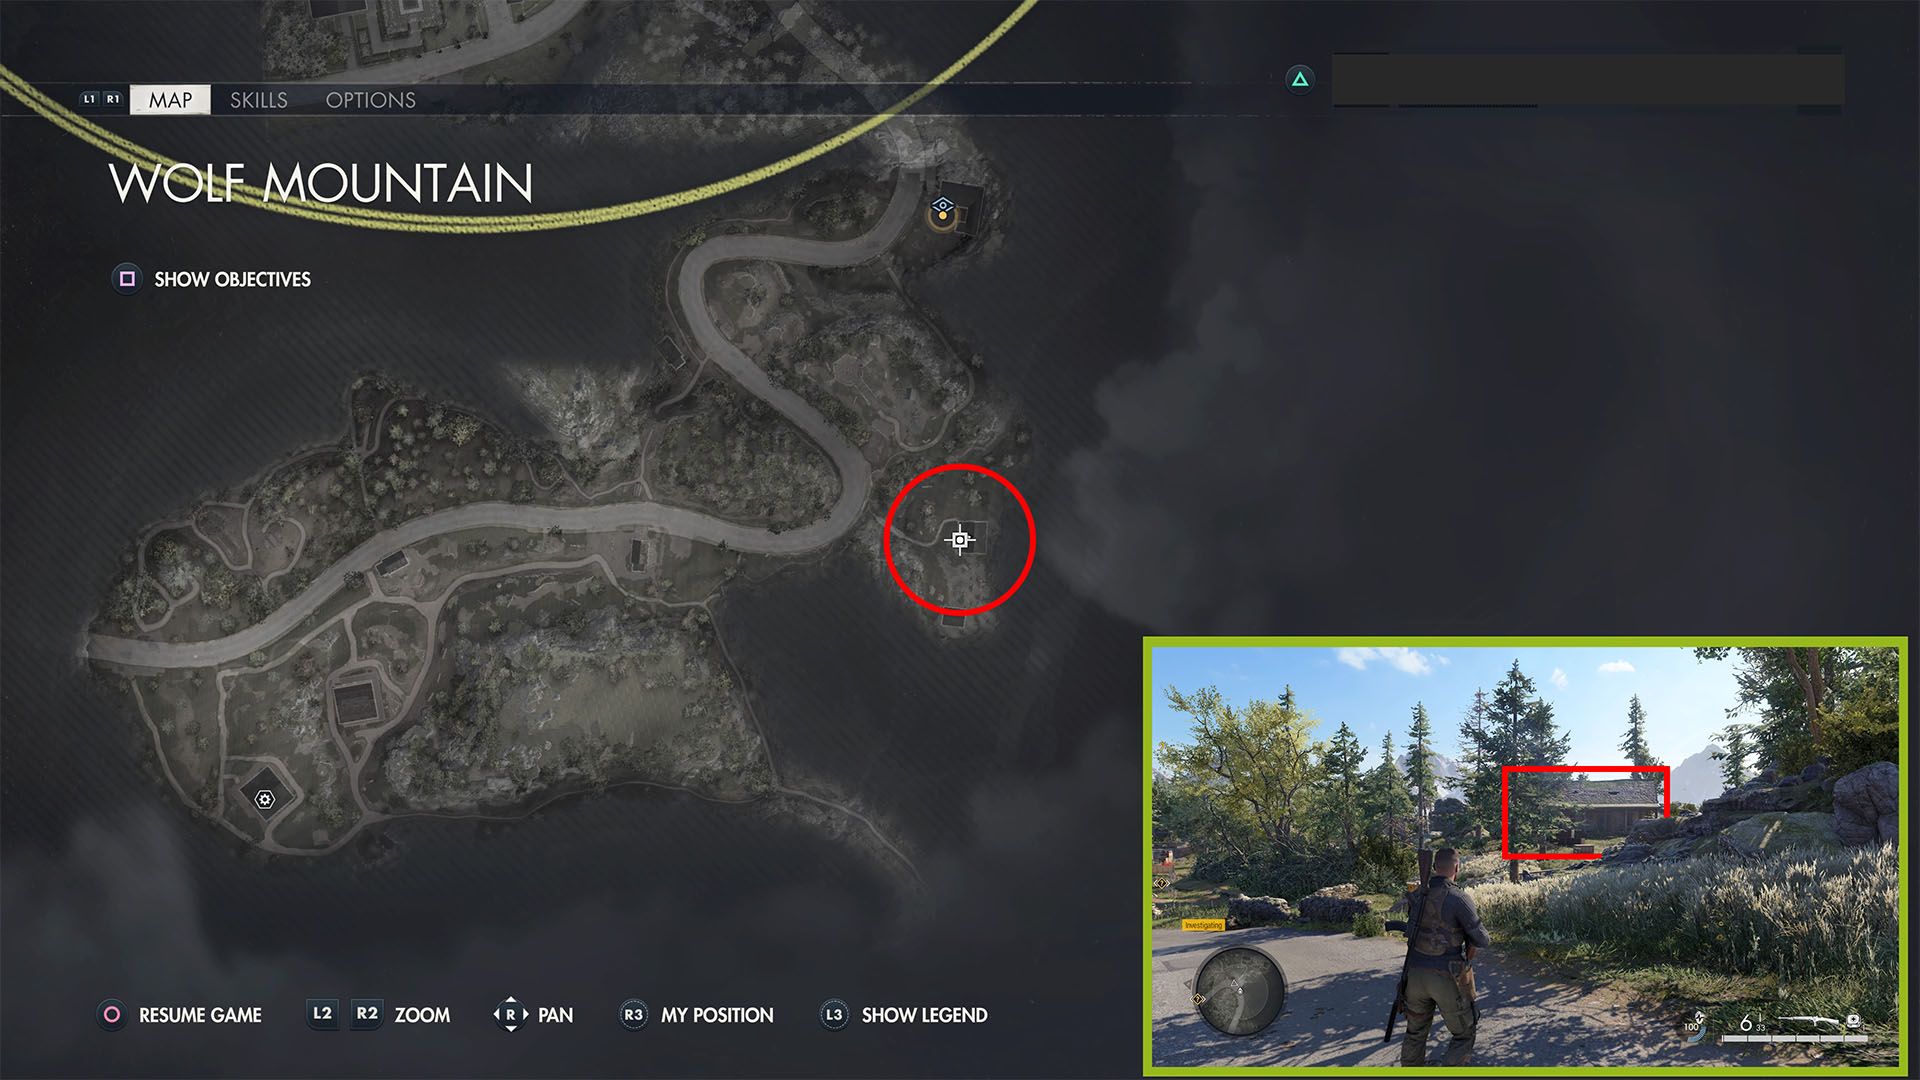
Follow the main road to the eastern-most side of the map, where it begins to turn left (north), forming the bottom of an “S”. You’ll see a small wooden bridge on the right side of the road leading toward a medium-sized stone building. You can enter stealthily through the hole in the foundation on the northern side.
Alternatively, you can use a satchel charge on the door or loot the door key from a soldier in the camp with the AA gun just north (left if facing the front of the house).
Missing Inventory (Classified Document 3)
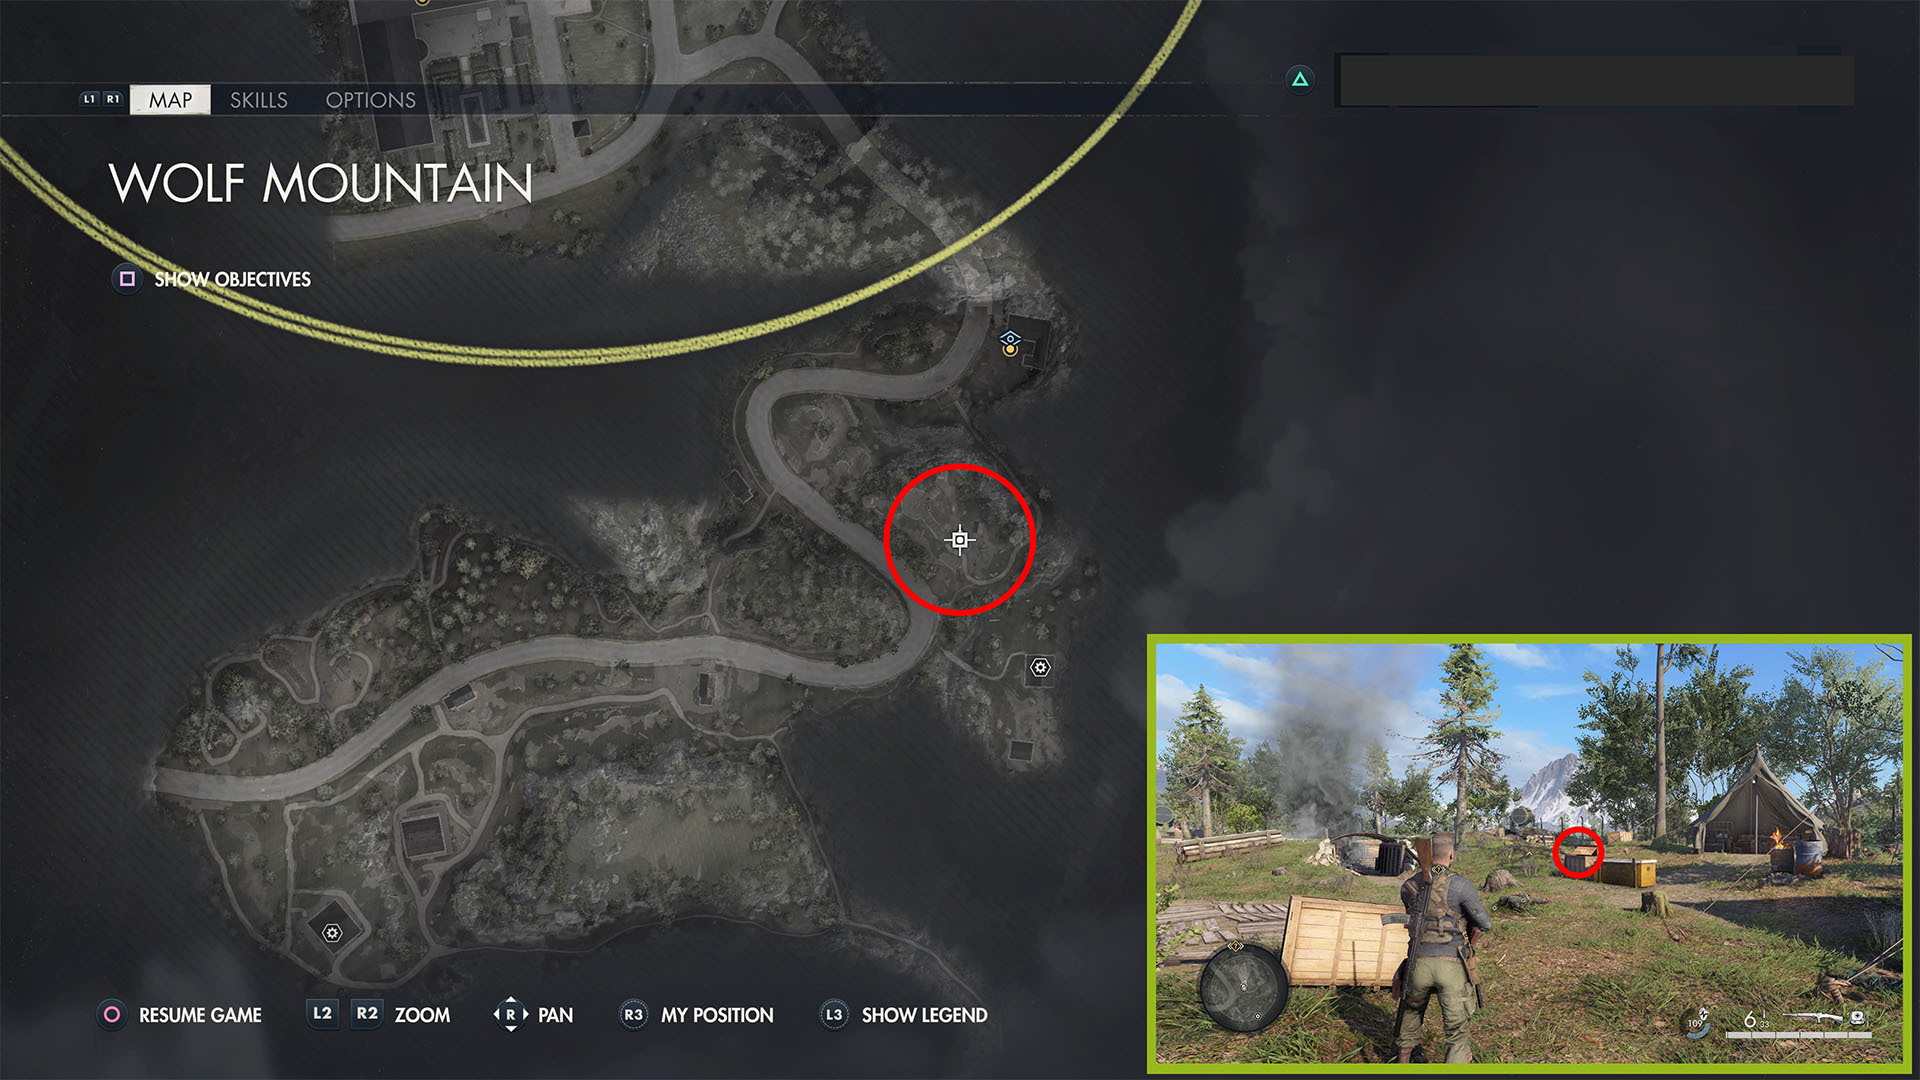
From the SMG Workbench, go to the camp with the AA gun barely north of the stone house. This classified document is on a box in the middle of the camp, near a yellow crate where you can hide bodies.
Perimeter Problems (Personal Letter 1)
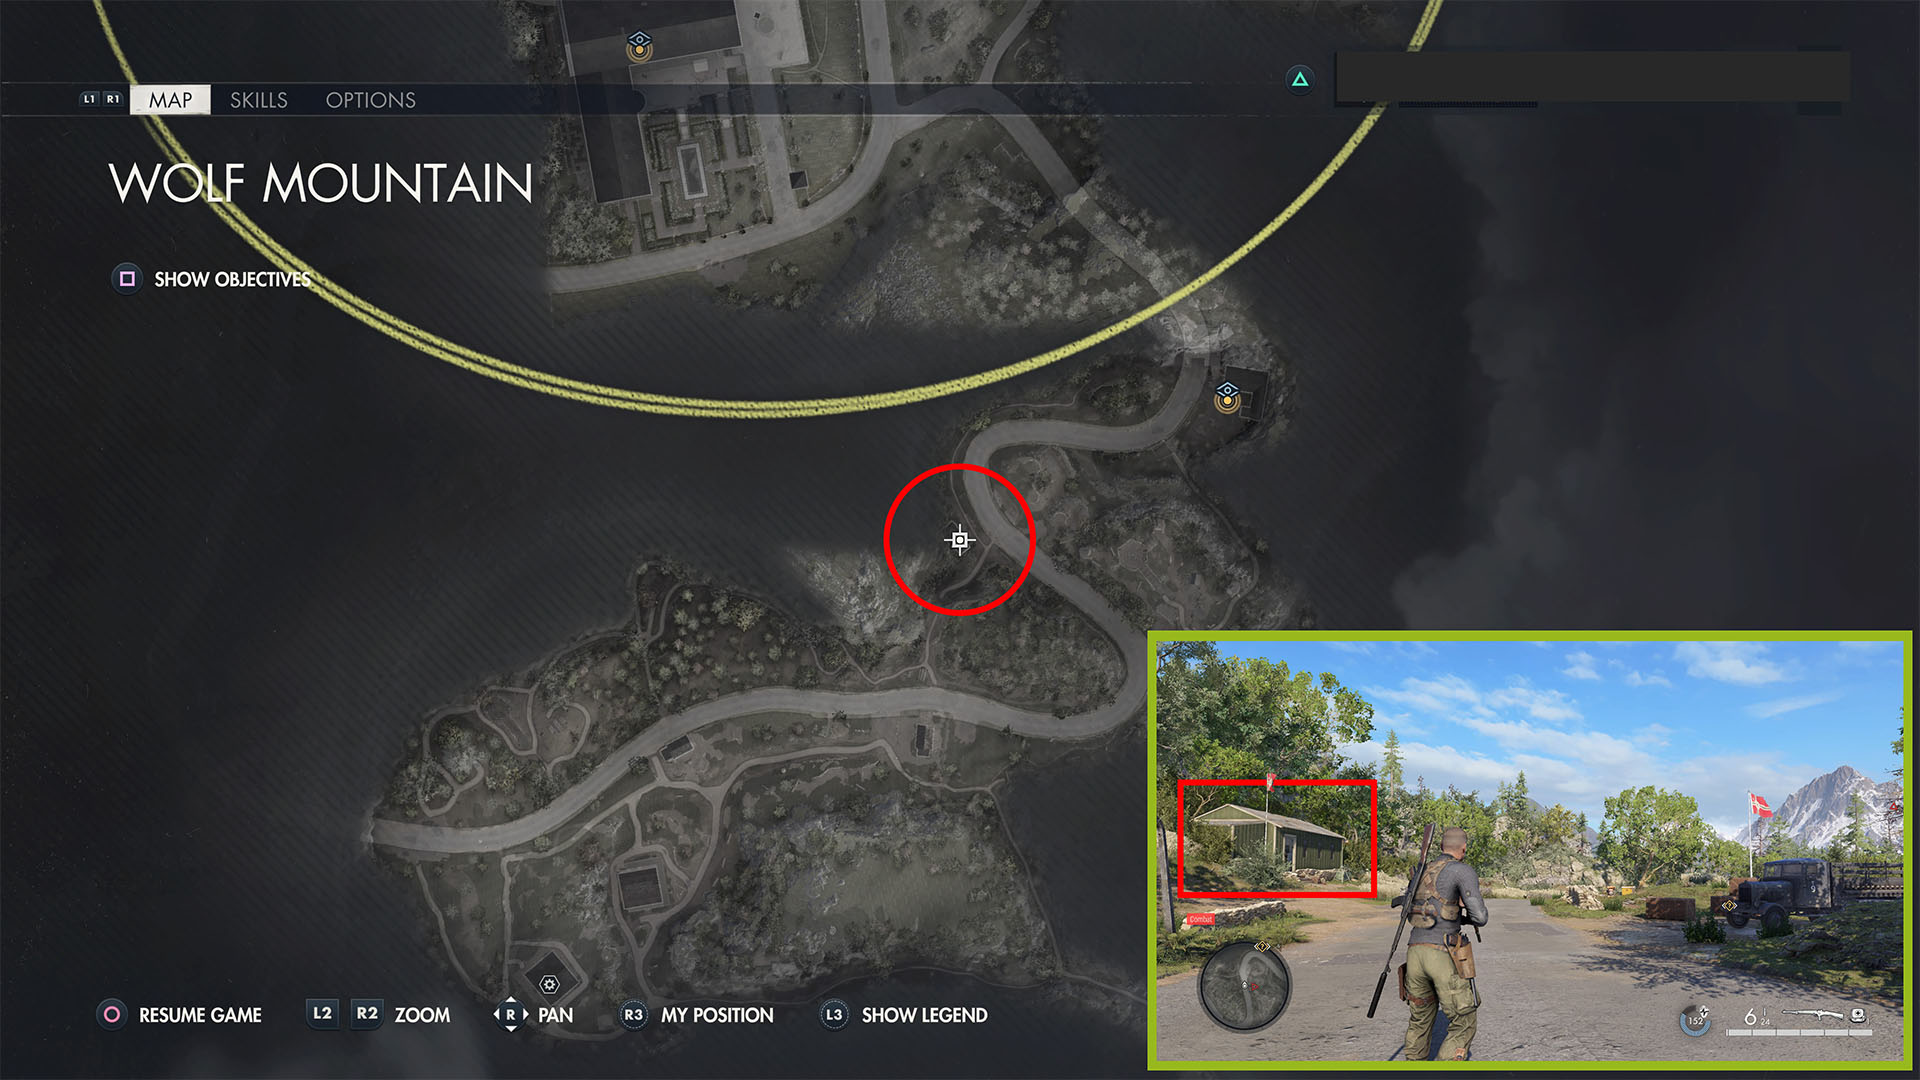
Follow the road a short distance to the northwestern edge of the map, near the top of the “S” shape in the road, before it descends to the right (east/northeast).
You’ll see a green cabin on the left with a Nazi Flag, across from a clearing with sandbag walls, a parked truck, and another Nazi flag. Two Jaeger patrol on the left side, and an officer and soldier patrol on the right. This collectible is inside the cabin on a desk to the right.
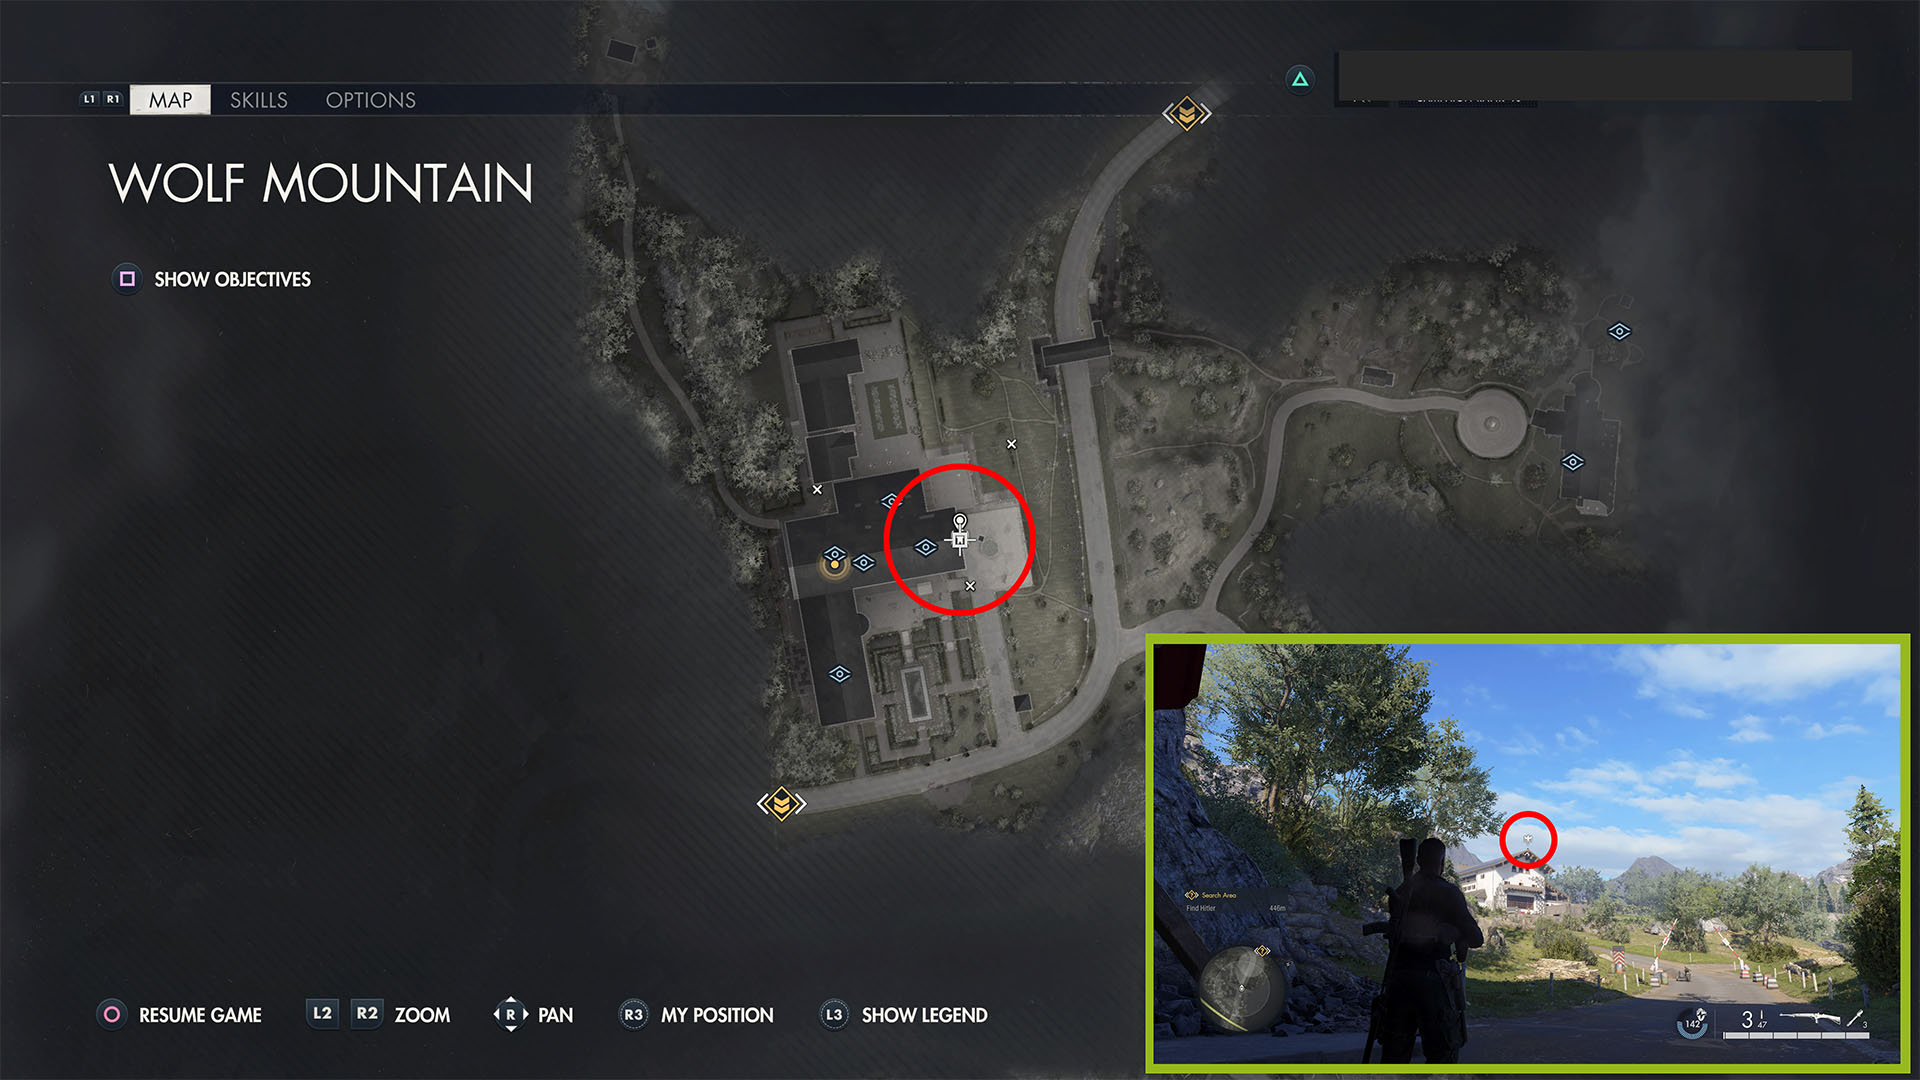
Routine Reminder (Classified Document 4)
From the personal letter location, continue along the road northeast, and you’ll quickly come to a heavily-guarded checkpoint near a tunnel. This classified document is inside the building to the tunnel’s right, in a safe through the door closest to the tunnel.
Stone Eagle 1
This stone eagle is in the center of the cliff above the tunnel.
Stone Eagle 2
Go through the tunnel and look to the peak of the Berghof roof on the other side for the second stone eagle.
Construction Halted (Personal Letter 2)

Continue down the road a short distance and stay right, away from the Berghof, heading toward the teahouse. There will be a green cabin on the left side of the road just before the teahouse. This personal letter is inside on a table with three chairs.
Possible Hitler Disguises (Hidden Item 1)
Go to the northern end of the teahouse to find a small, round dining room off of the main dining hall. This hidden item is on a table overlooking the front teahouse gardens.
Berghof Guardhouse Starting Location
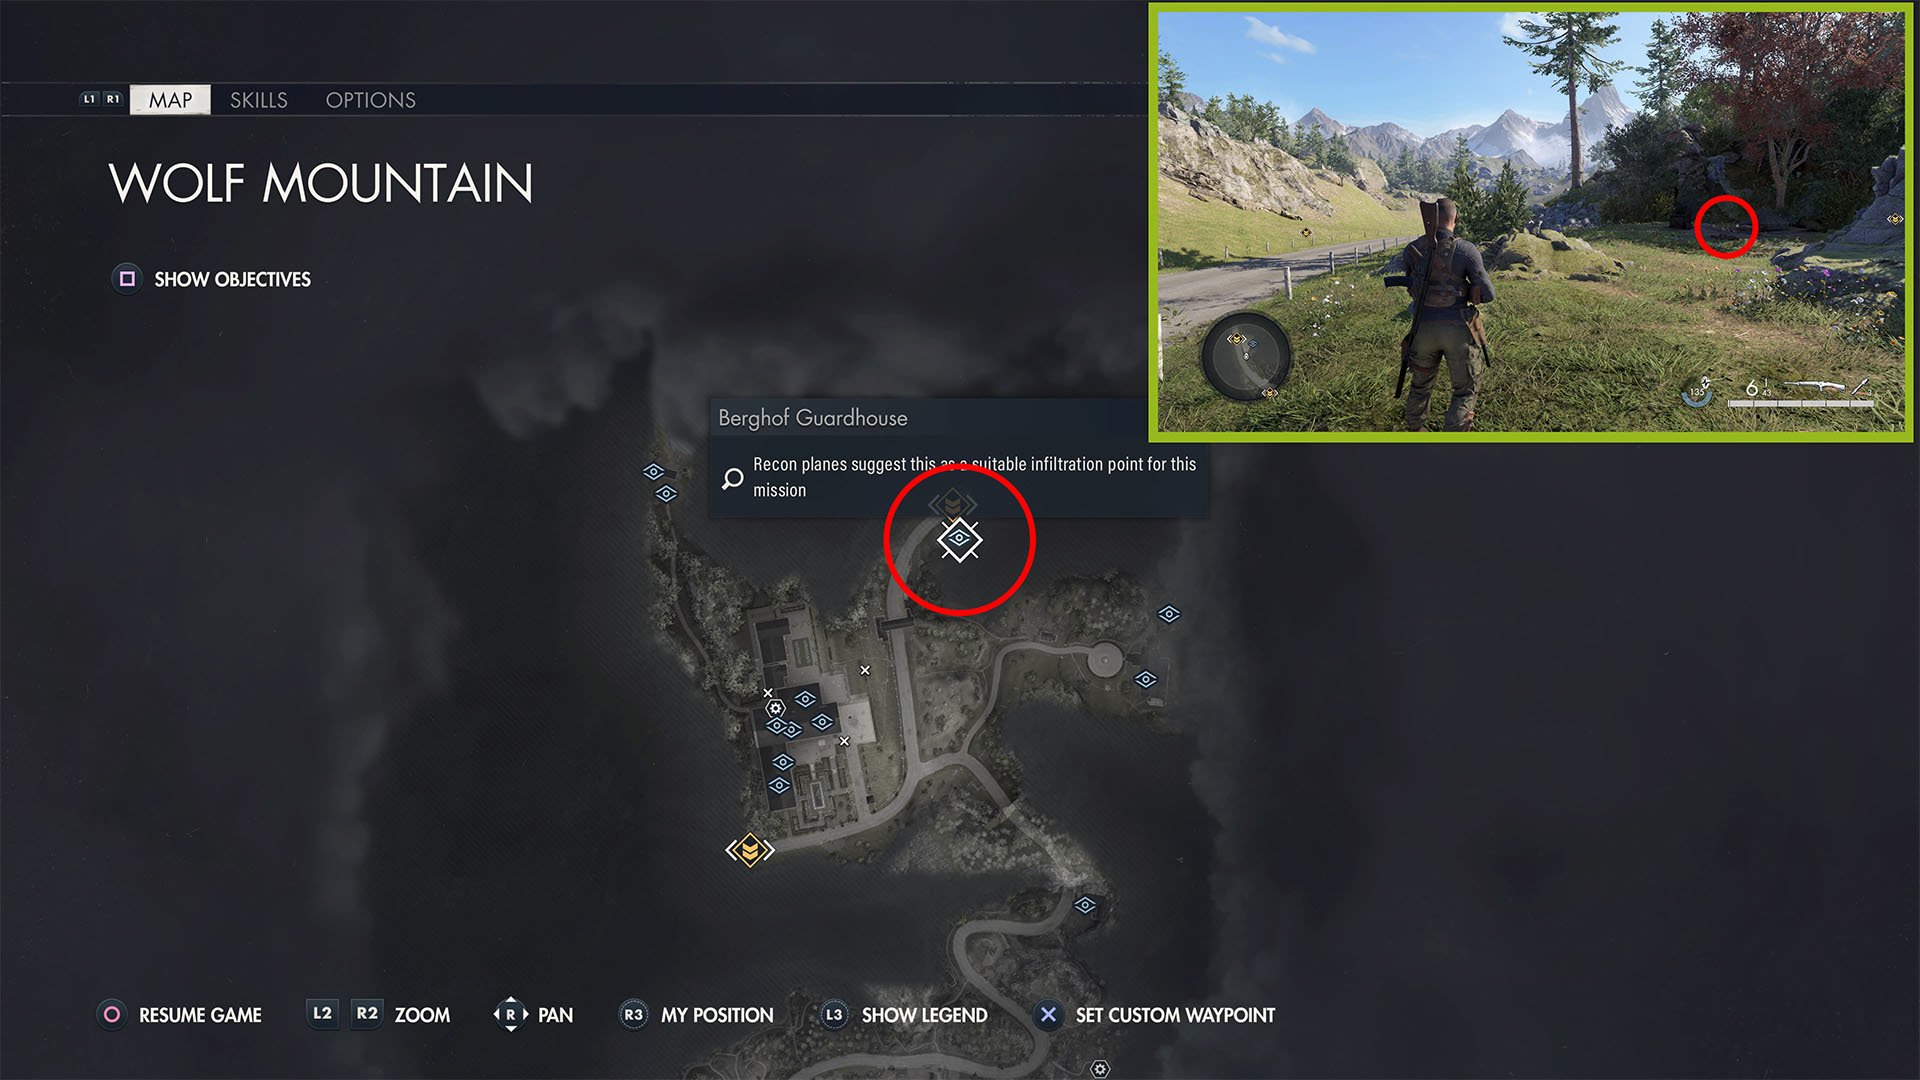
Go toward the Berghof, staying on the right (northern) side. You’ll go down a small path leading through cliffs on either side and ending at a guardhouse checkpoint along the main road. Turn right and follow the main road beyond the checkpoint. Just before the mission boundary, you’ll see a small camp in a small open area on the right. Interact with the bonfire.
Vermin Infestation (Personal Letter 3)
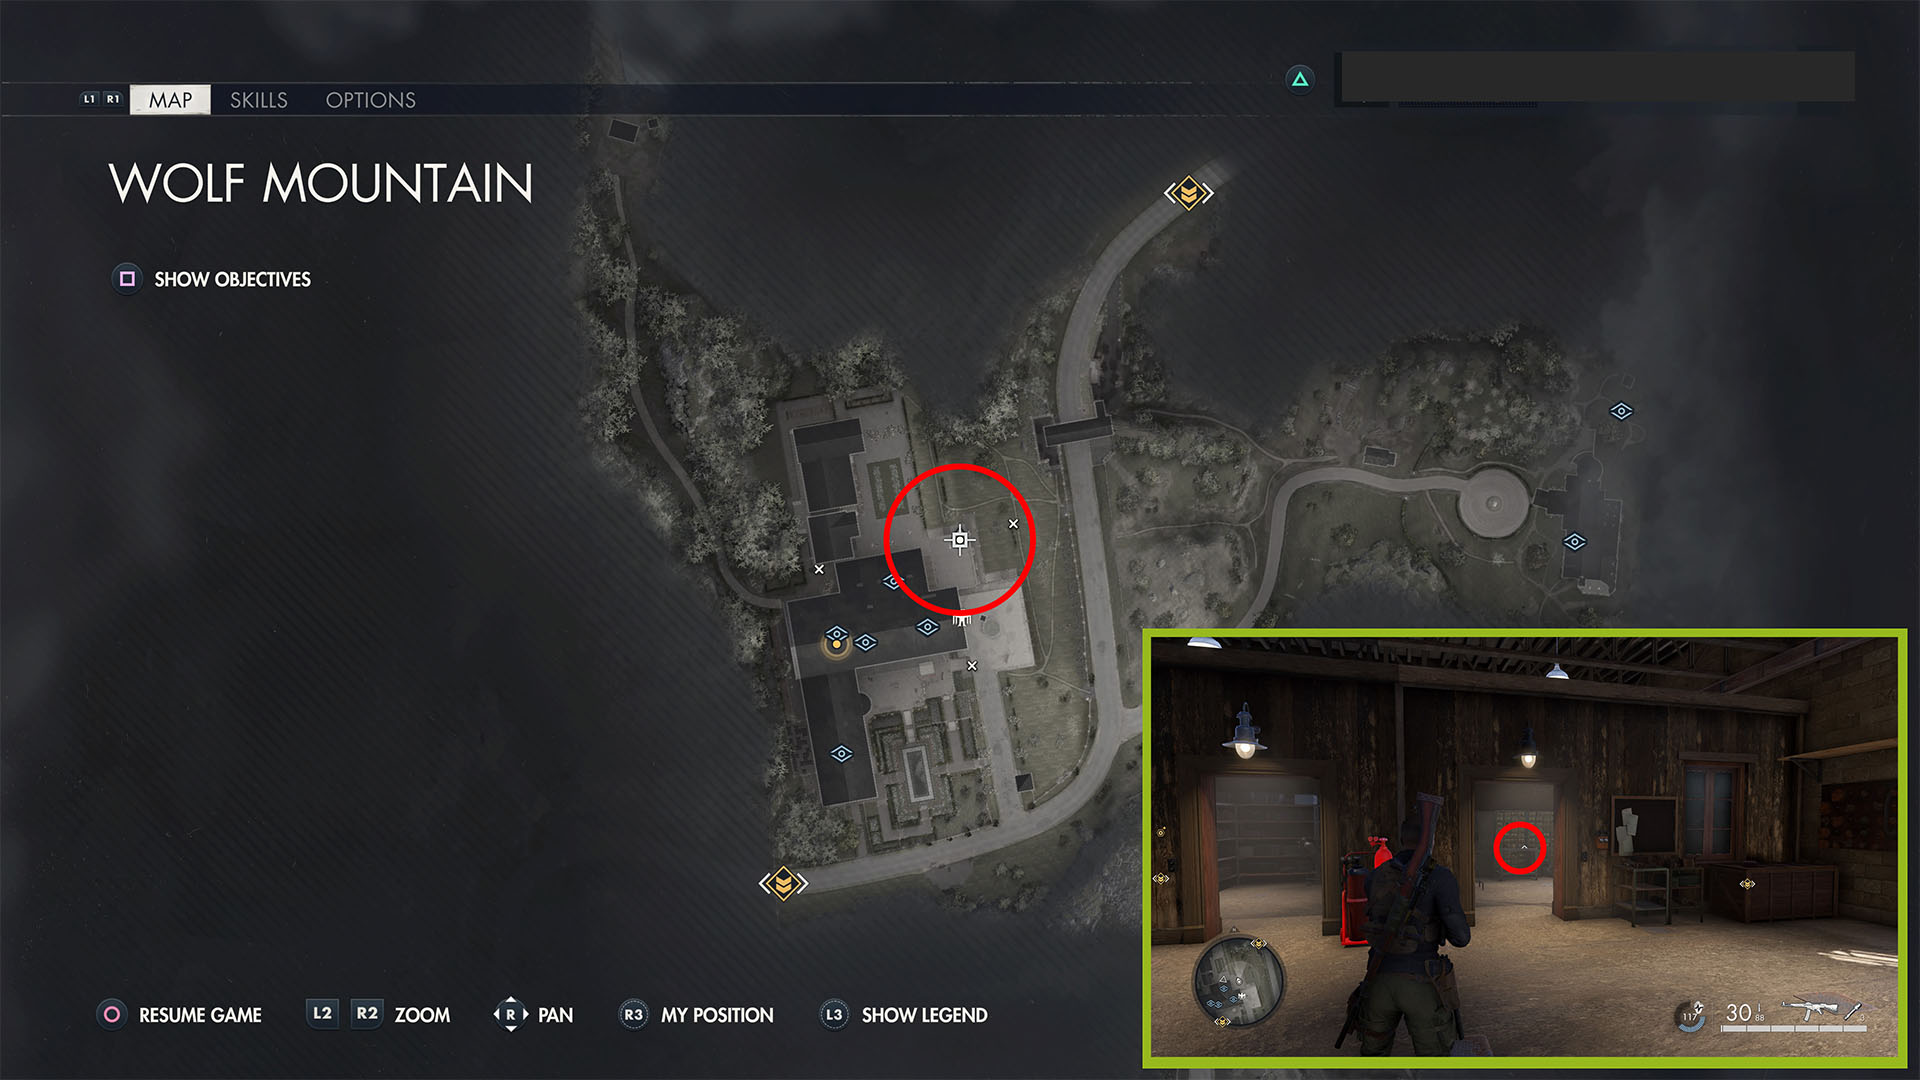
Go to the Berghof and enter the garage across from the fountain in the main, front parking area. Go to the back and into the room on the right. Pick this collectible up from a small cart in the back of the room.
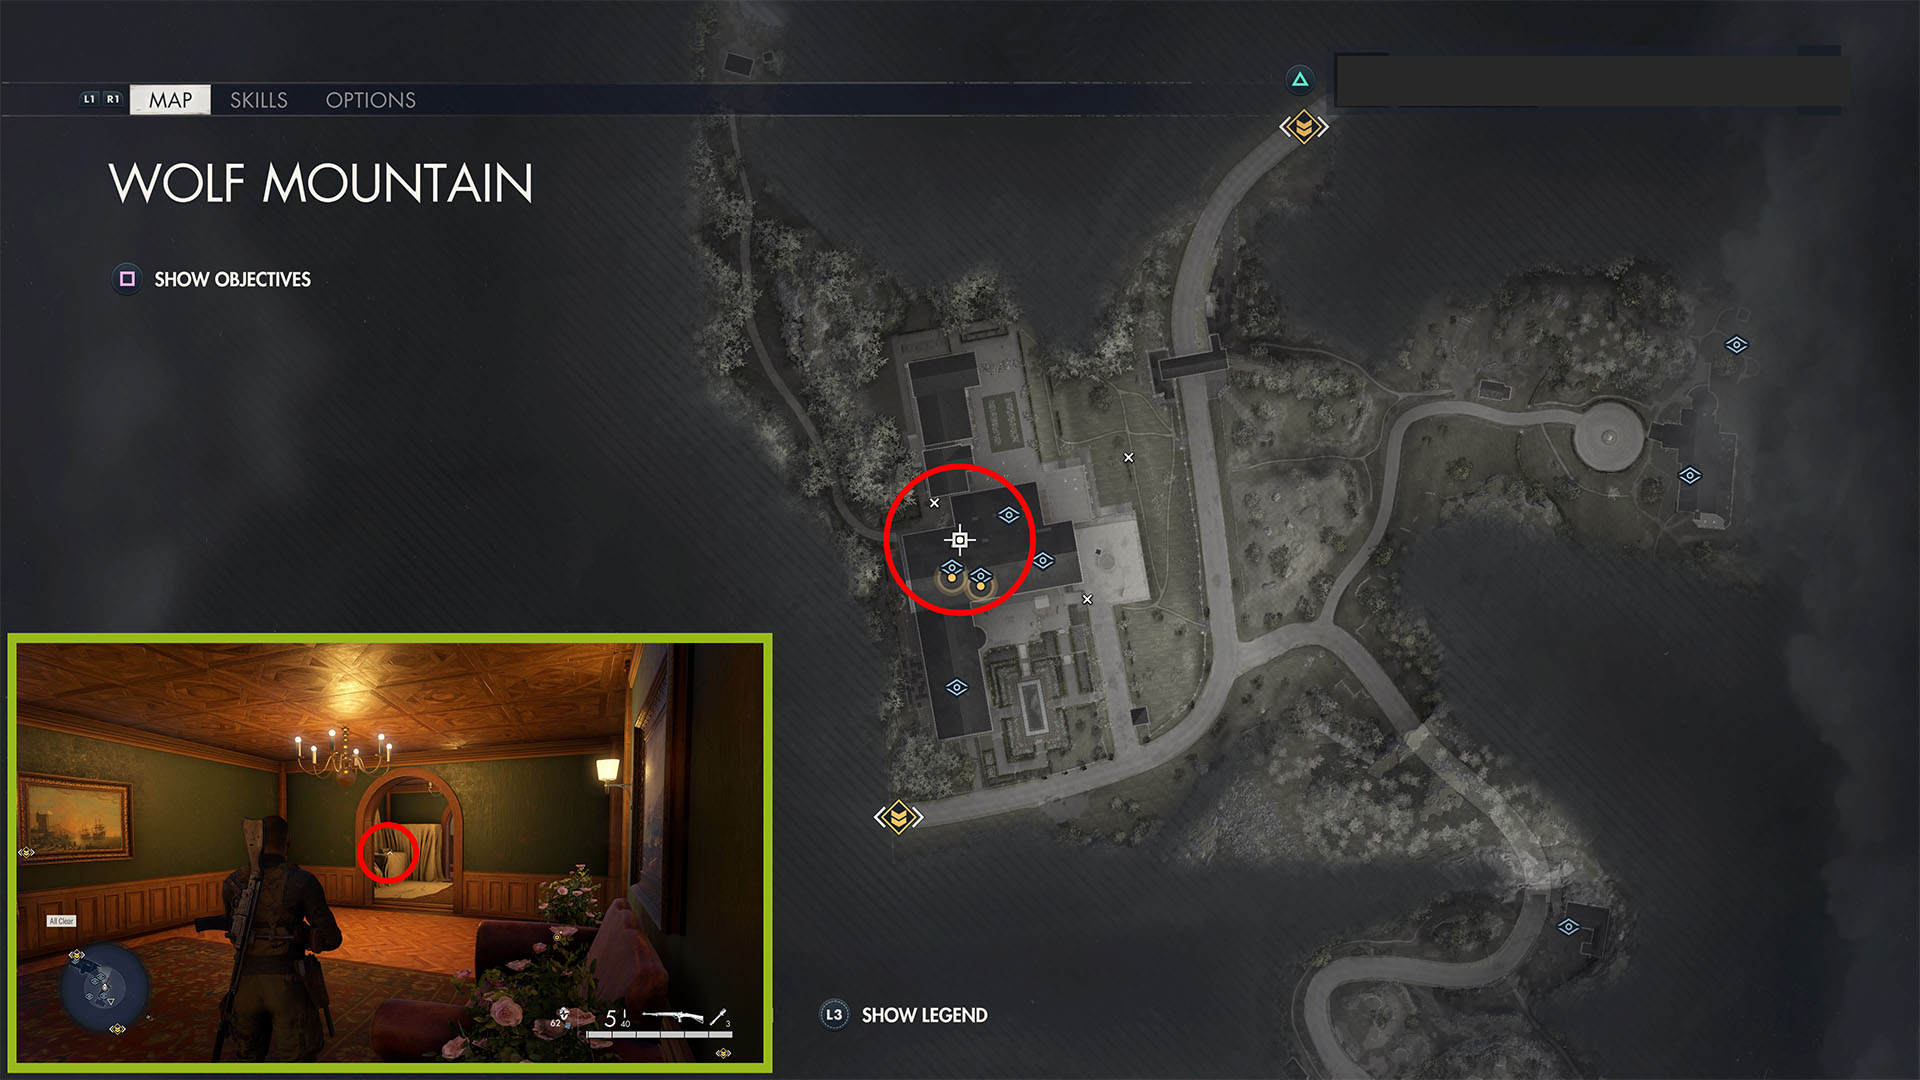
Fuhrer’s Personal Space (Personal Letter 4)

Climb to the roof of the garage using the vines just outside. At the top, go into the door on the left, flanked by two potted plants. This is one is on a chest of drawers on the left side of the room with the two benches.
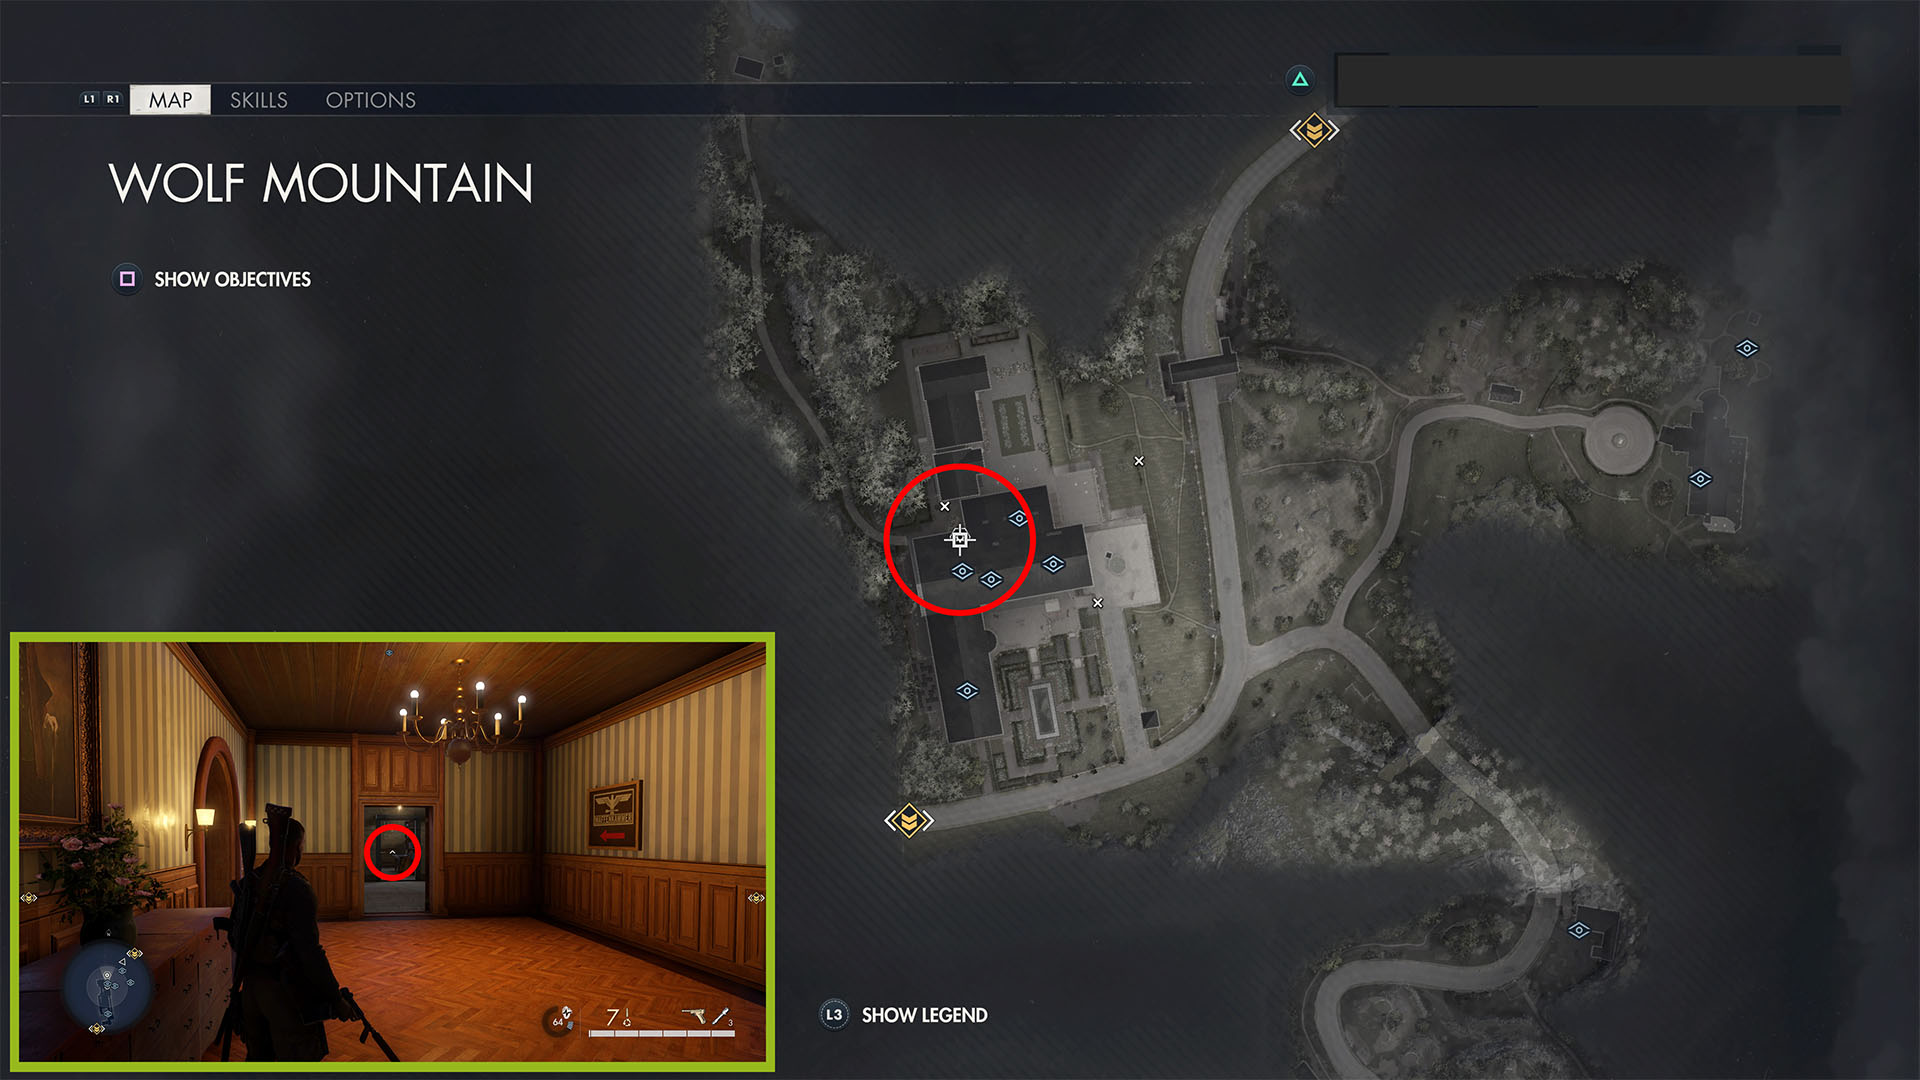
Fuheremuseum Concept Model (Hidden Item 2)
From there, go through the doorway into the library. Go left, then quickly right through a doorway flanked by two busts. Go through a sitting room with paintings, pink flowers on the left and right, and a stairwell leading up on the right. Continue into the next small room with covered furniture; this hidden item is on the left.
Pistol Workbench
Exit that room, and turn left into the main hall. Follow it down ⅔ of the way, then turn right to see stairs going up and down in the foyer (there are three red banners on the wall). Go downstairs and turn left at the Waffenkammer sign. Blast the door open or use the key to gain access to the workbench.
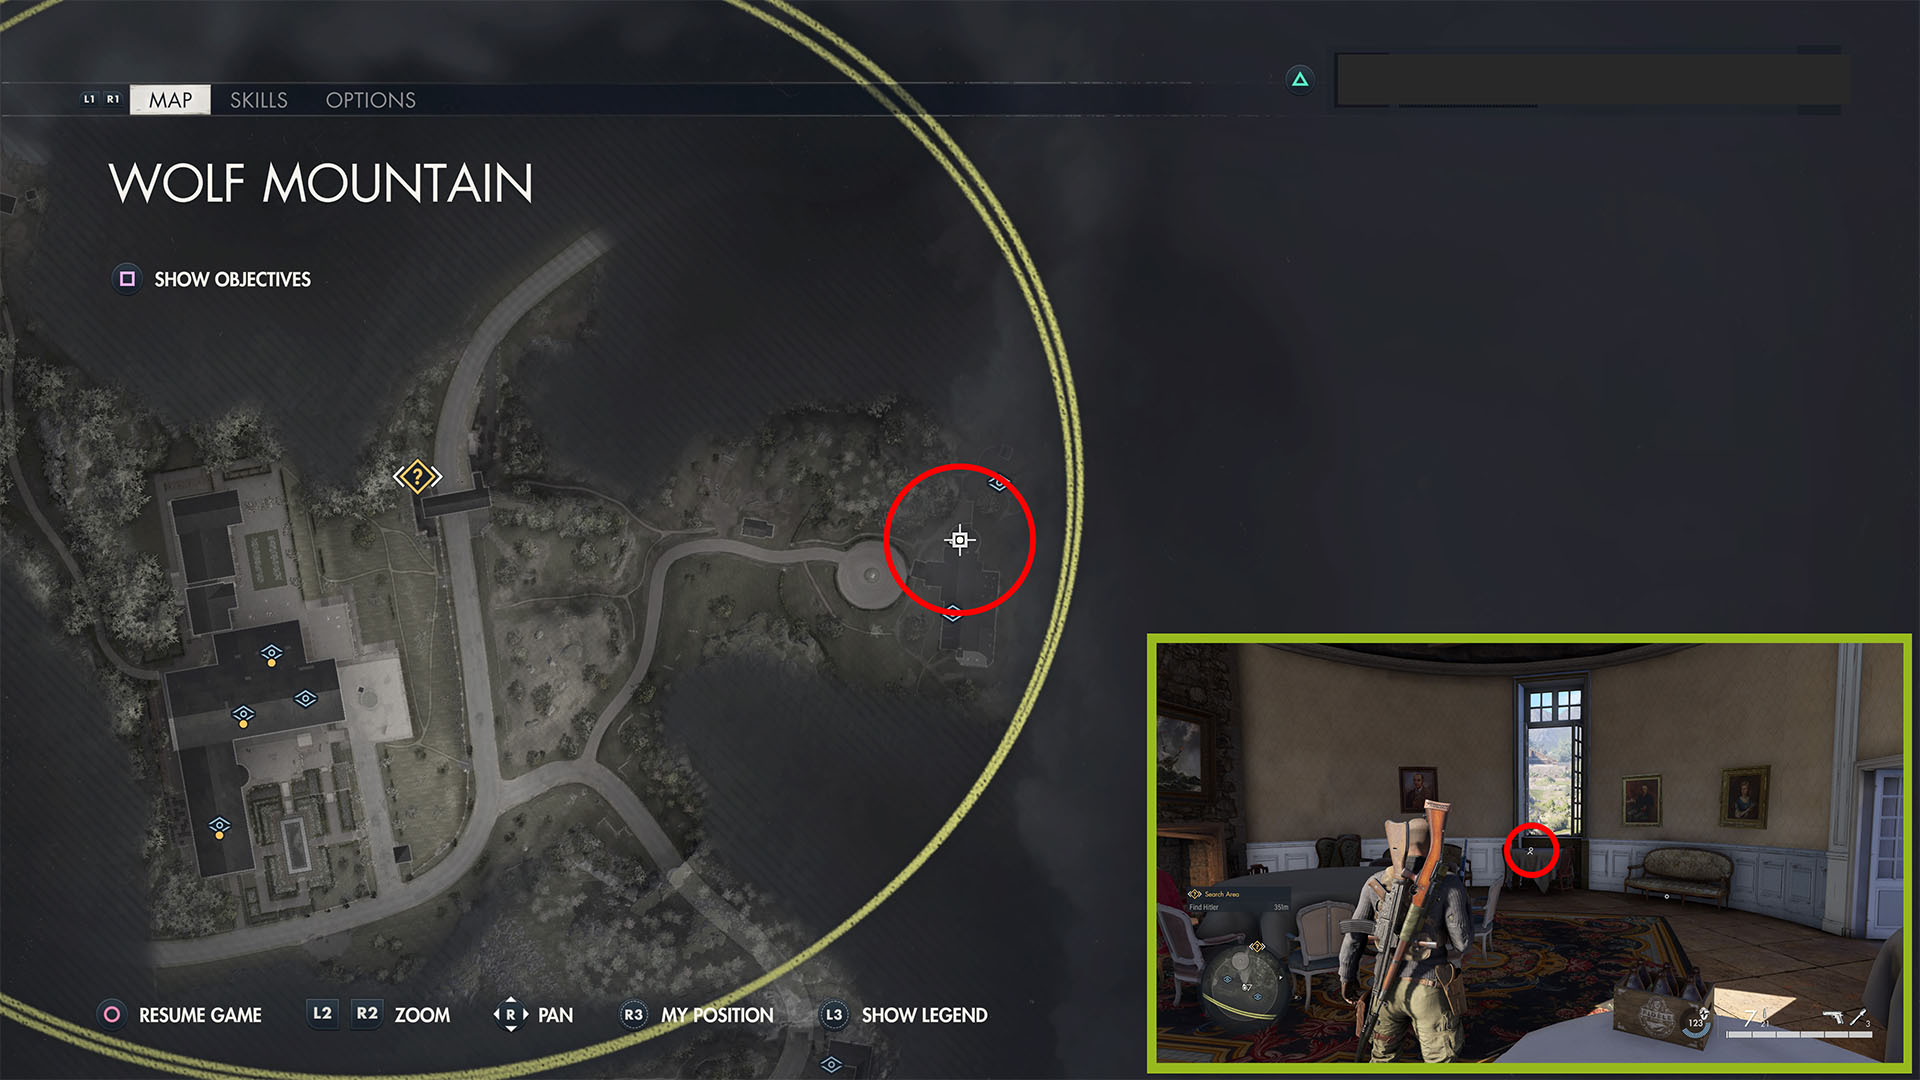
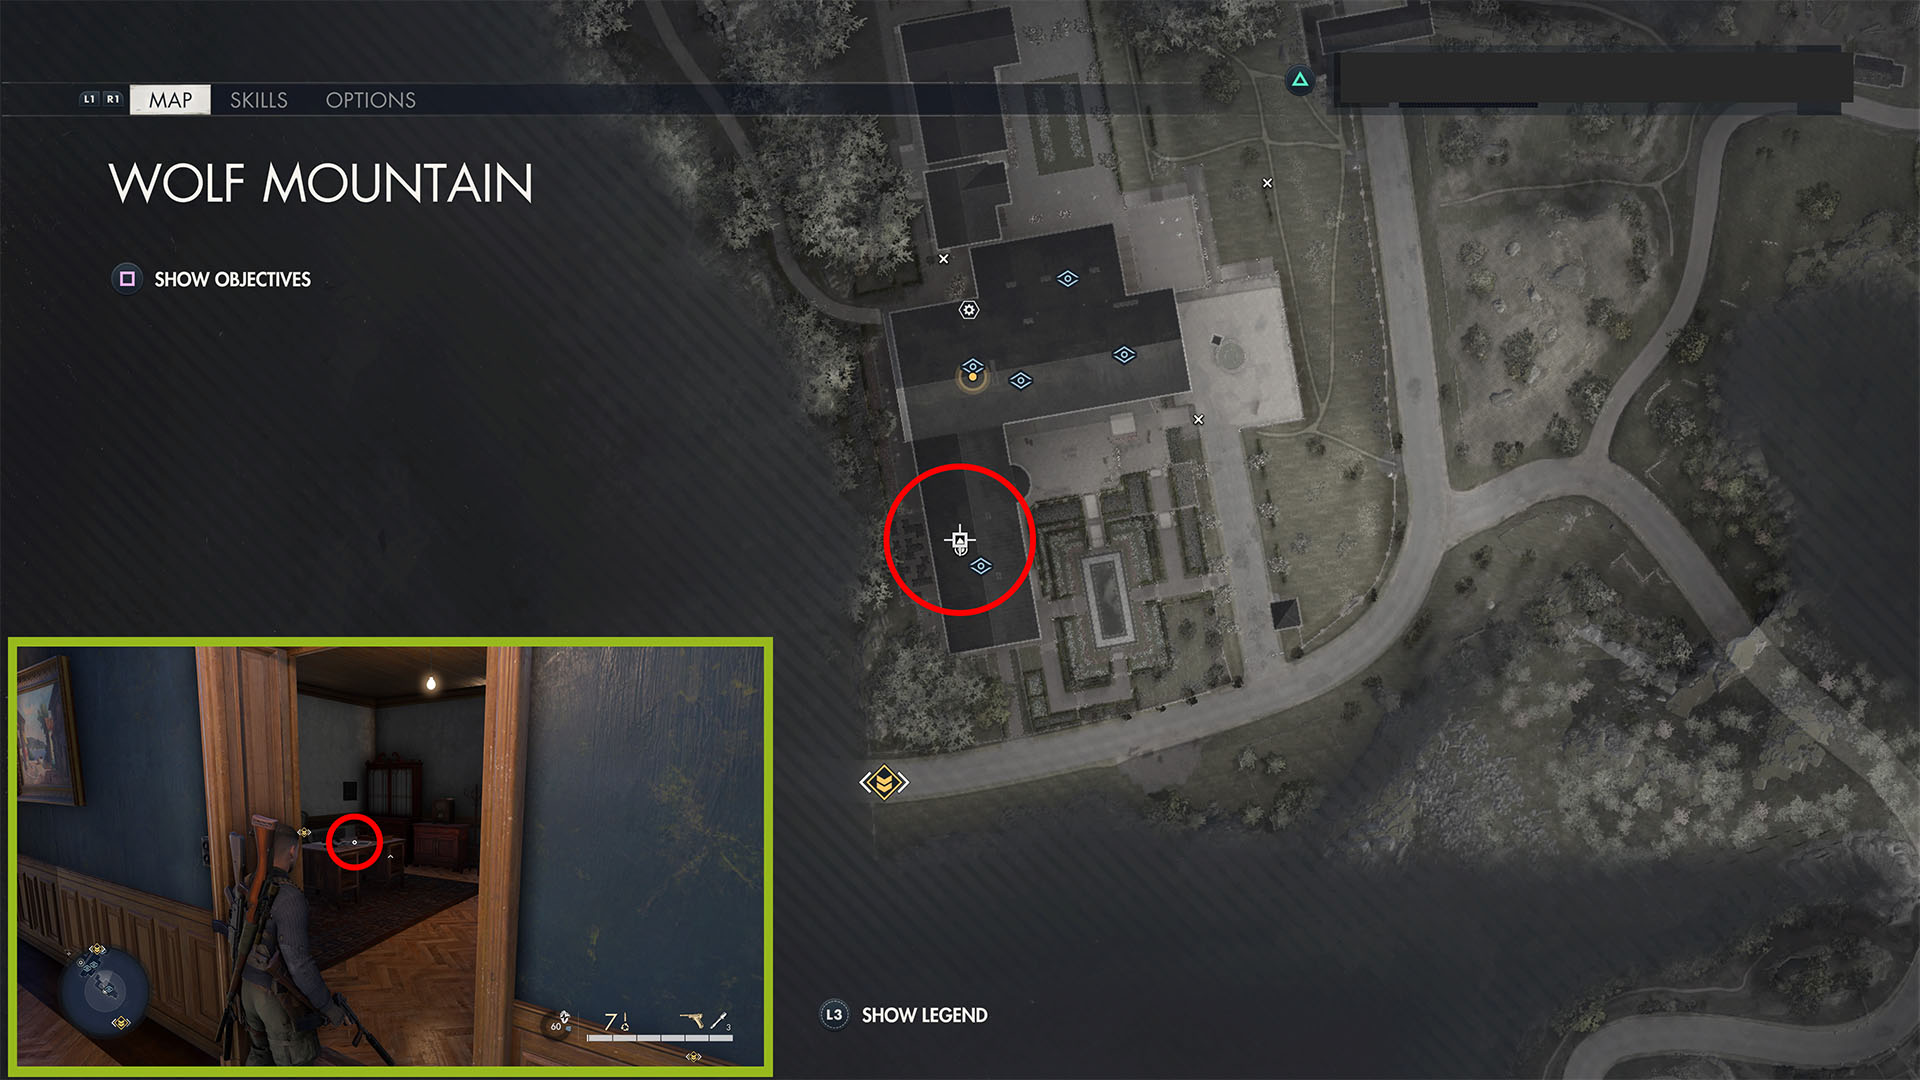
Fuhrer’s Plans (Personal Letter 5)
Go back upstairs and stay right, following the path into the kitchen. This personal letter is on a table on the right side, just inside the door.
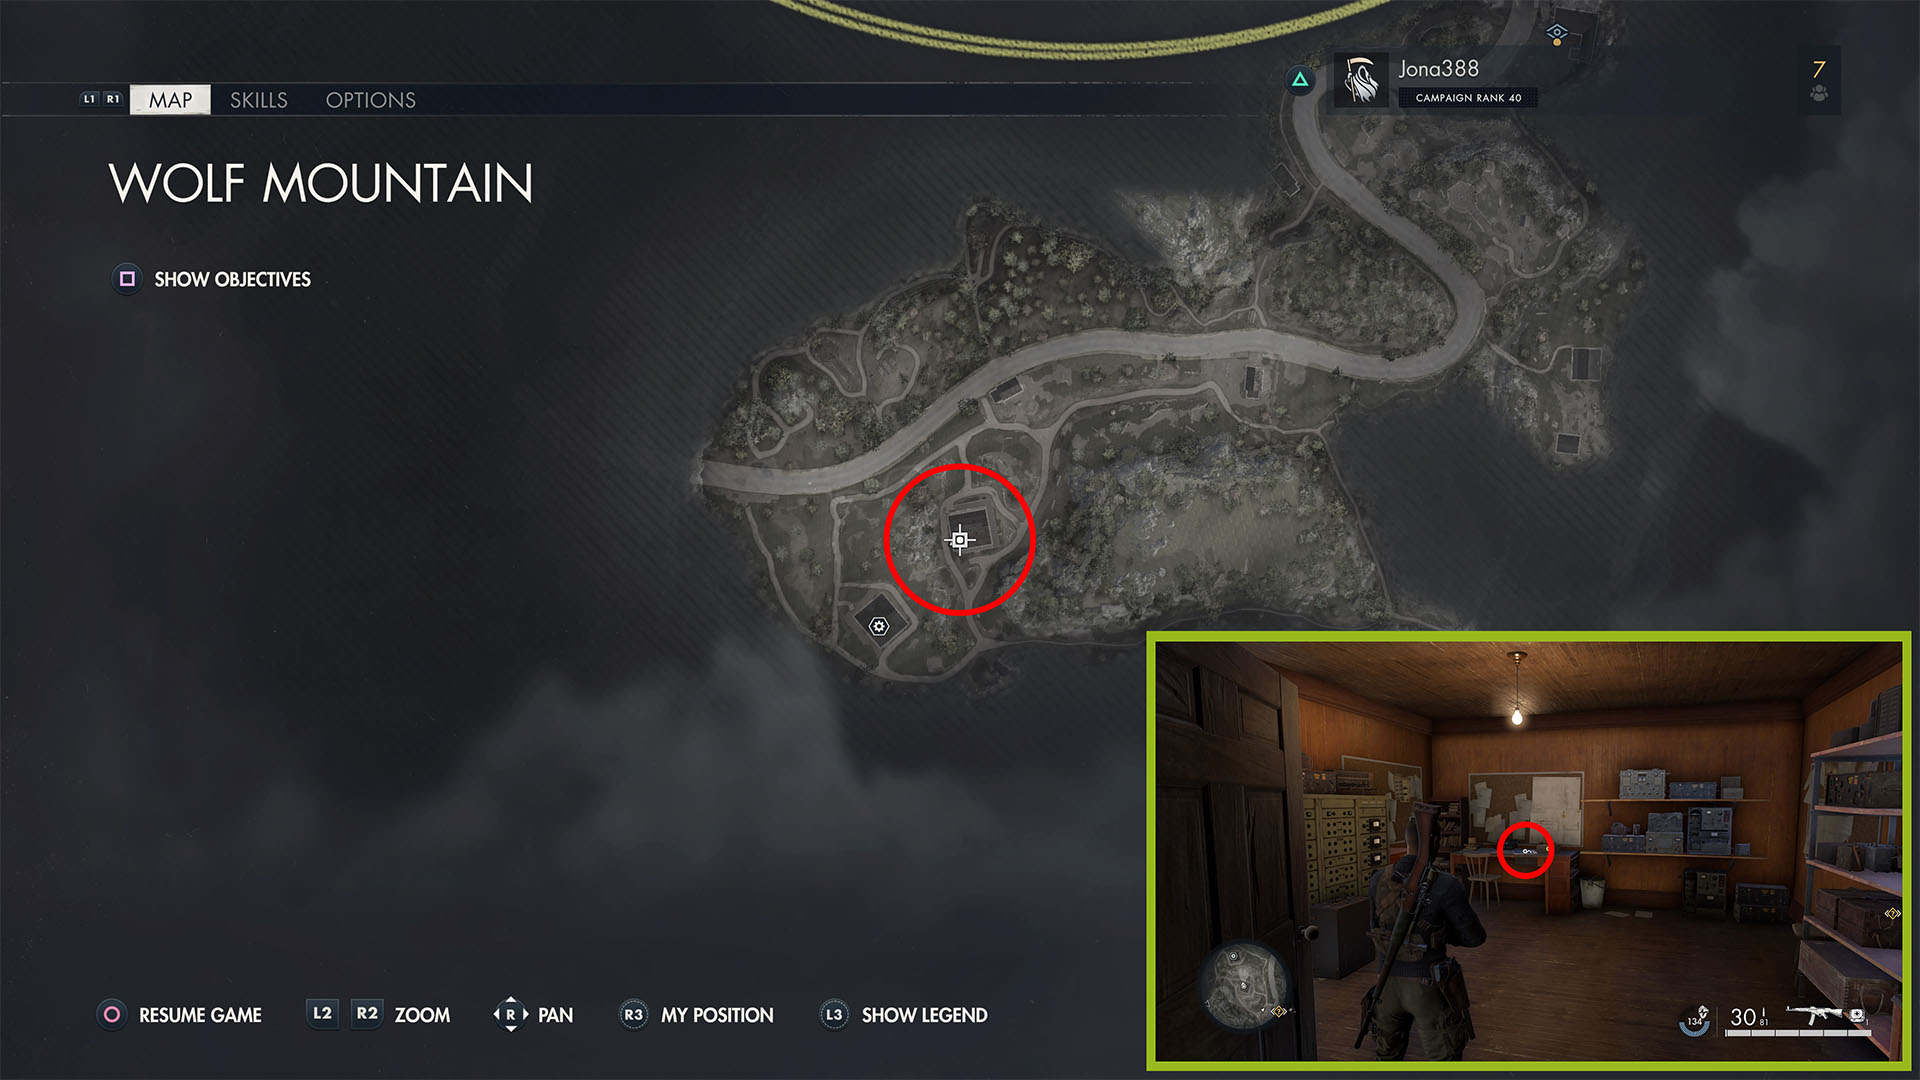
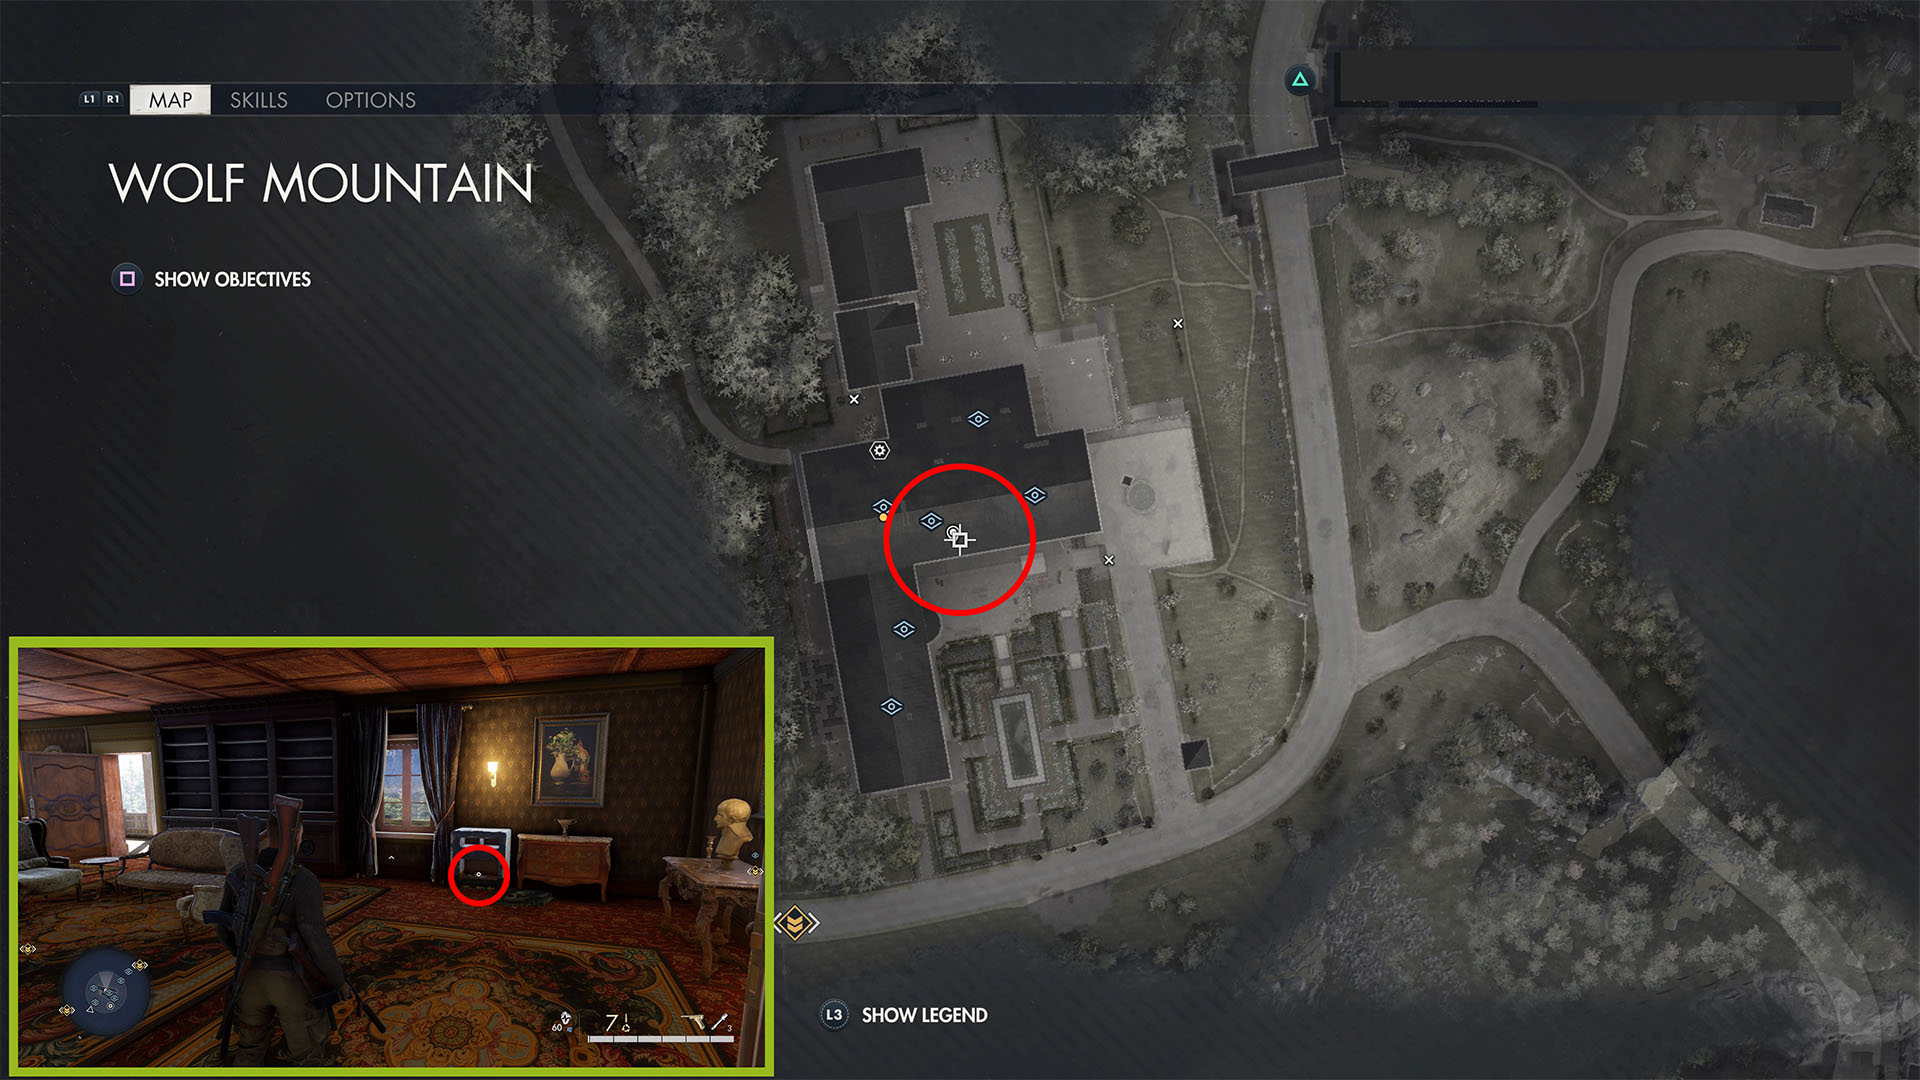
Guest of the Fuhrer (Classified Document 5)
Continue straight into the next room off of the kitchen (the one with barrels and chairs stacked on cloth-covered tables, then turn right and up the stairs by the door. Go into the second room on the right (an office) to find this piece of intel on a desk by a telephone.
Practice Pose Photography (Hidden Item 3)
Go back to the foyer (where you went downstairs for the pistol workbench) and go upstairs. At the top, go right and up another set of stairs. Go left at the top, the right to find a safe on the right side of the room with this collectible inside.
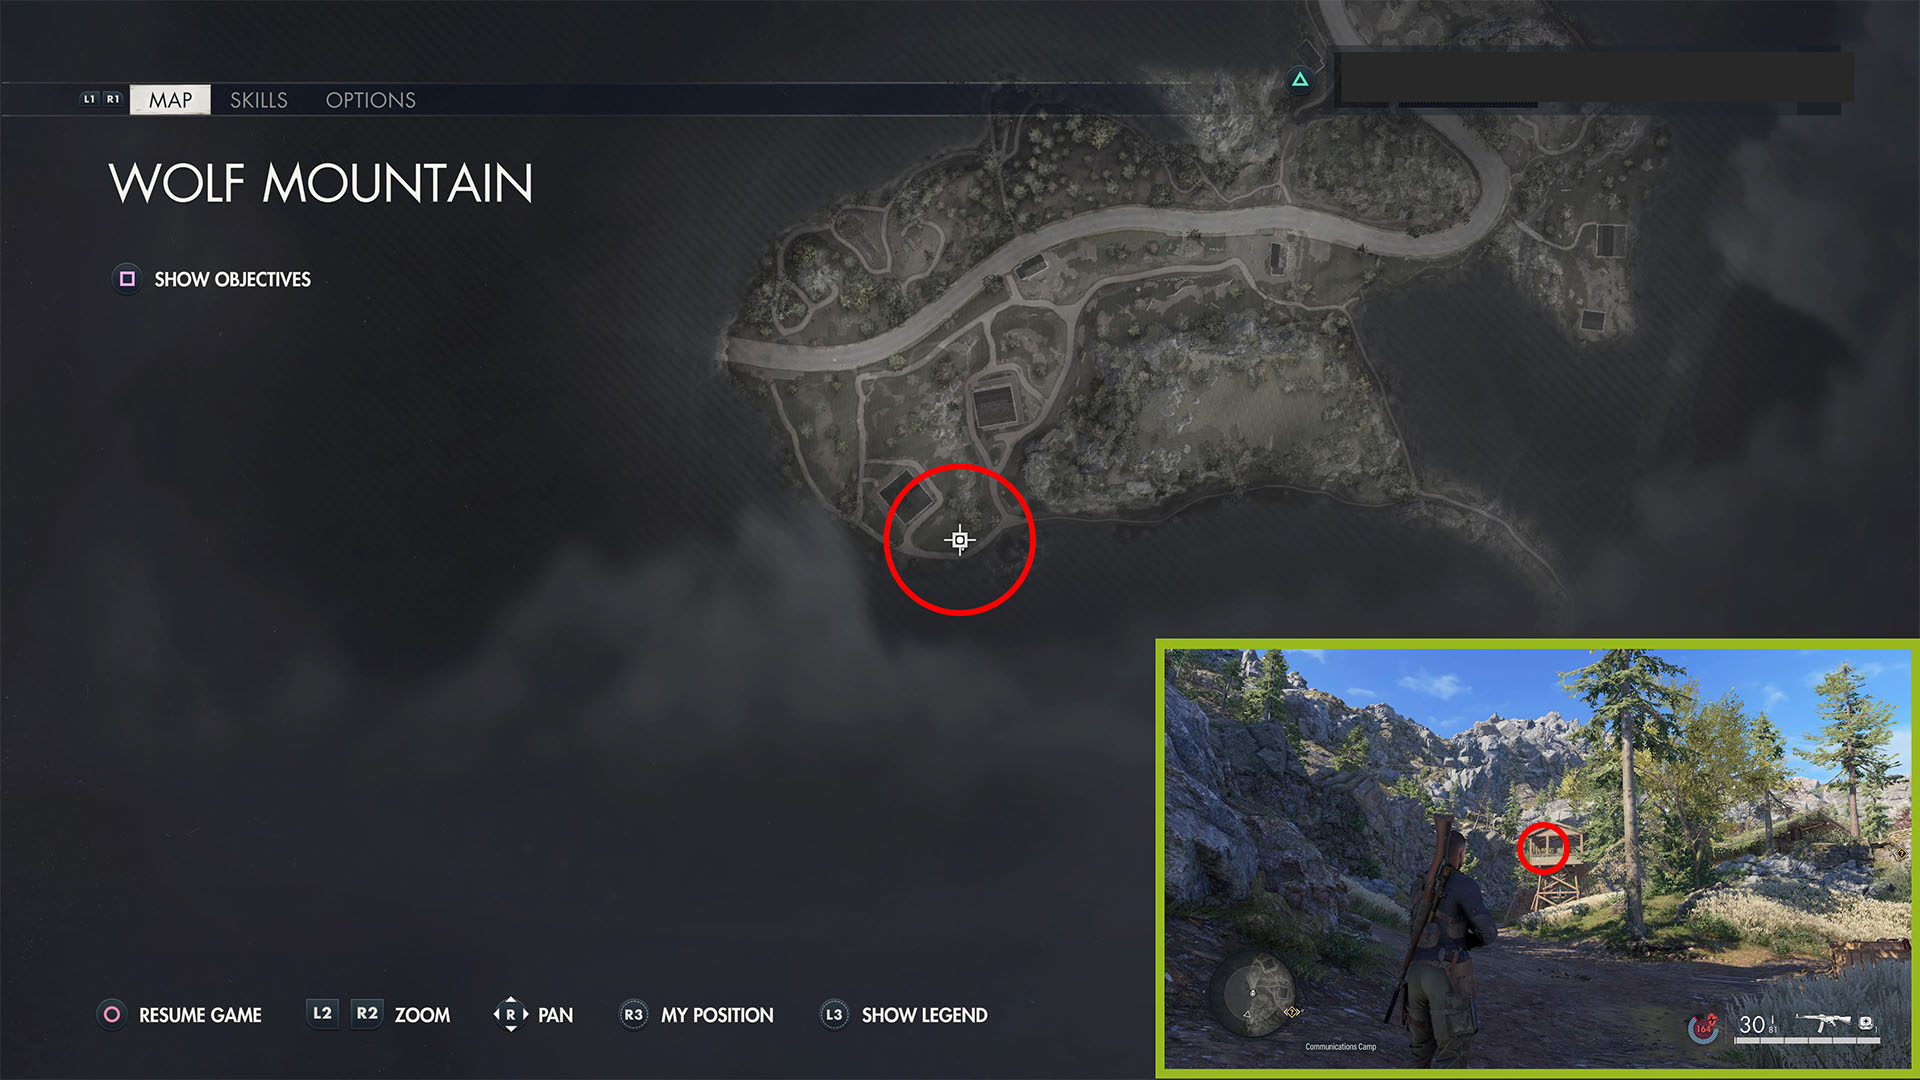
Stone Eagle 3 and Lakeside Path Starting Location
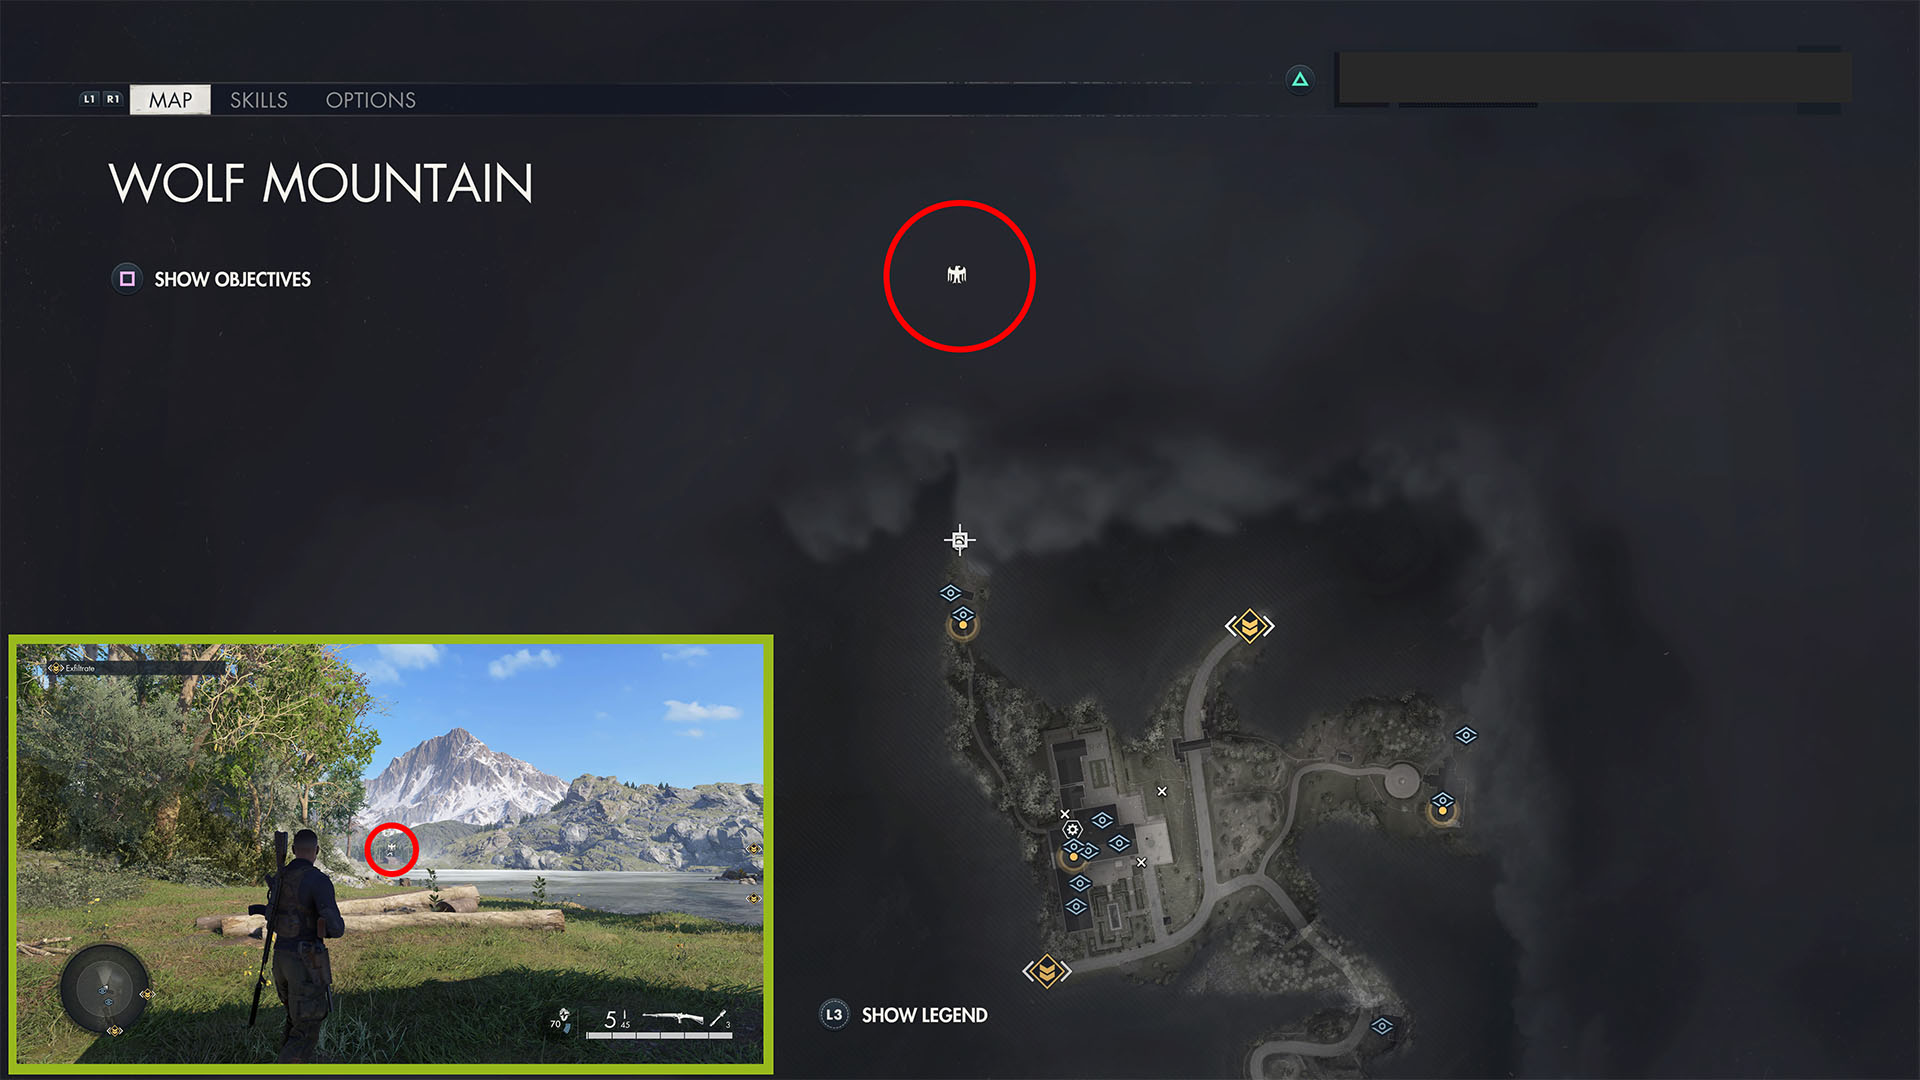
Follow the small road behind the Berghof leading north/northwest through the forest. At the end, you’ll find a cabin with a campfire to the left of it. Interact with that to activate the Lakeside Path starting location. Then look far across the lake to see another cabin and the third stone eagle on the roof.
And there you have it: all of the collectibles and starting locations in Sniper Elite 5‘s Kill Hitler DLC, Wolf Mountain. For more guides leading to the game’s intel, personal letters, hidden items, and workbenches, like those for Mission 8: Rubble and Ruin and Mission 7: Secret Weapons, head on over to our SE5 guides mission command.


Published: Jun 7, 2022 12:15 pm