Now that Resident Evil 2 is finally out, you’ll need all the help you can get to make it out of Raccoon City alive. To make things a bit easier, you’ll want to find all of the codes and combos to the game’s various safes and lockers, which are stuffed with valuable items and ammo.
Below is a quick guide to every safe and locker combination you’ll need in Resident Evil 2, including those for Leon’s desk and the portable safe.
Resident Evil 2 Codes, Combos, and Keycards
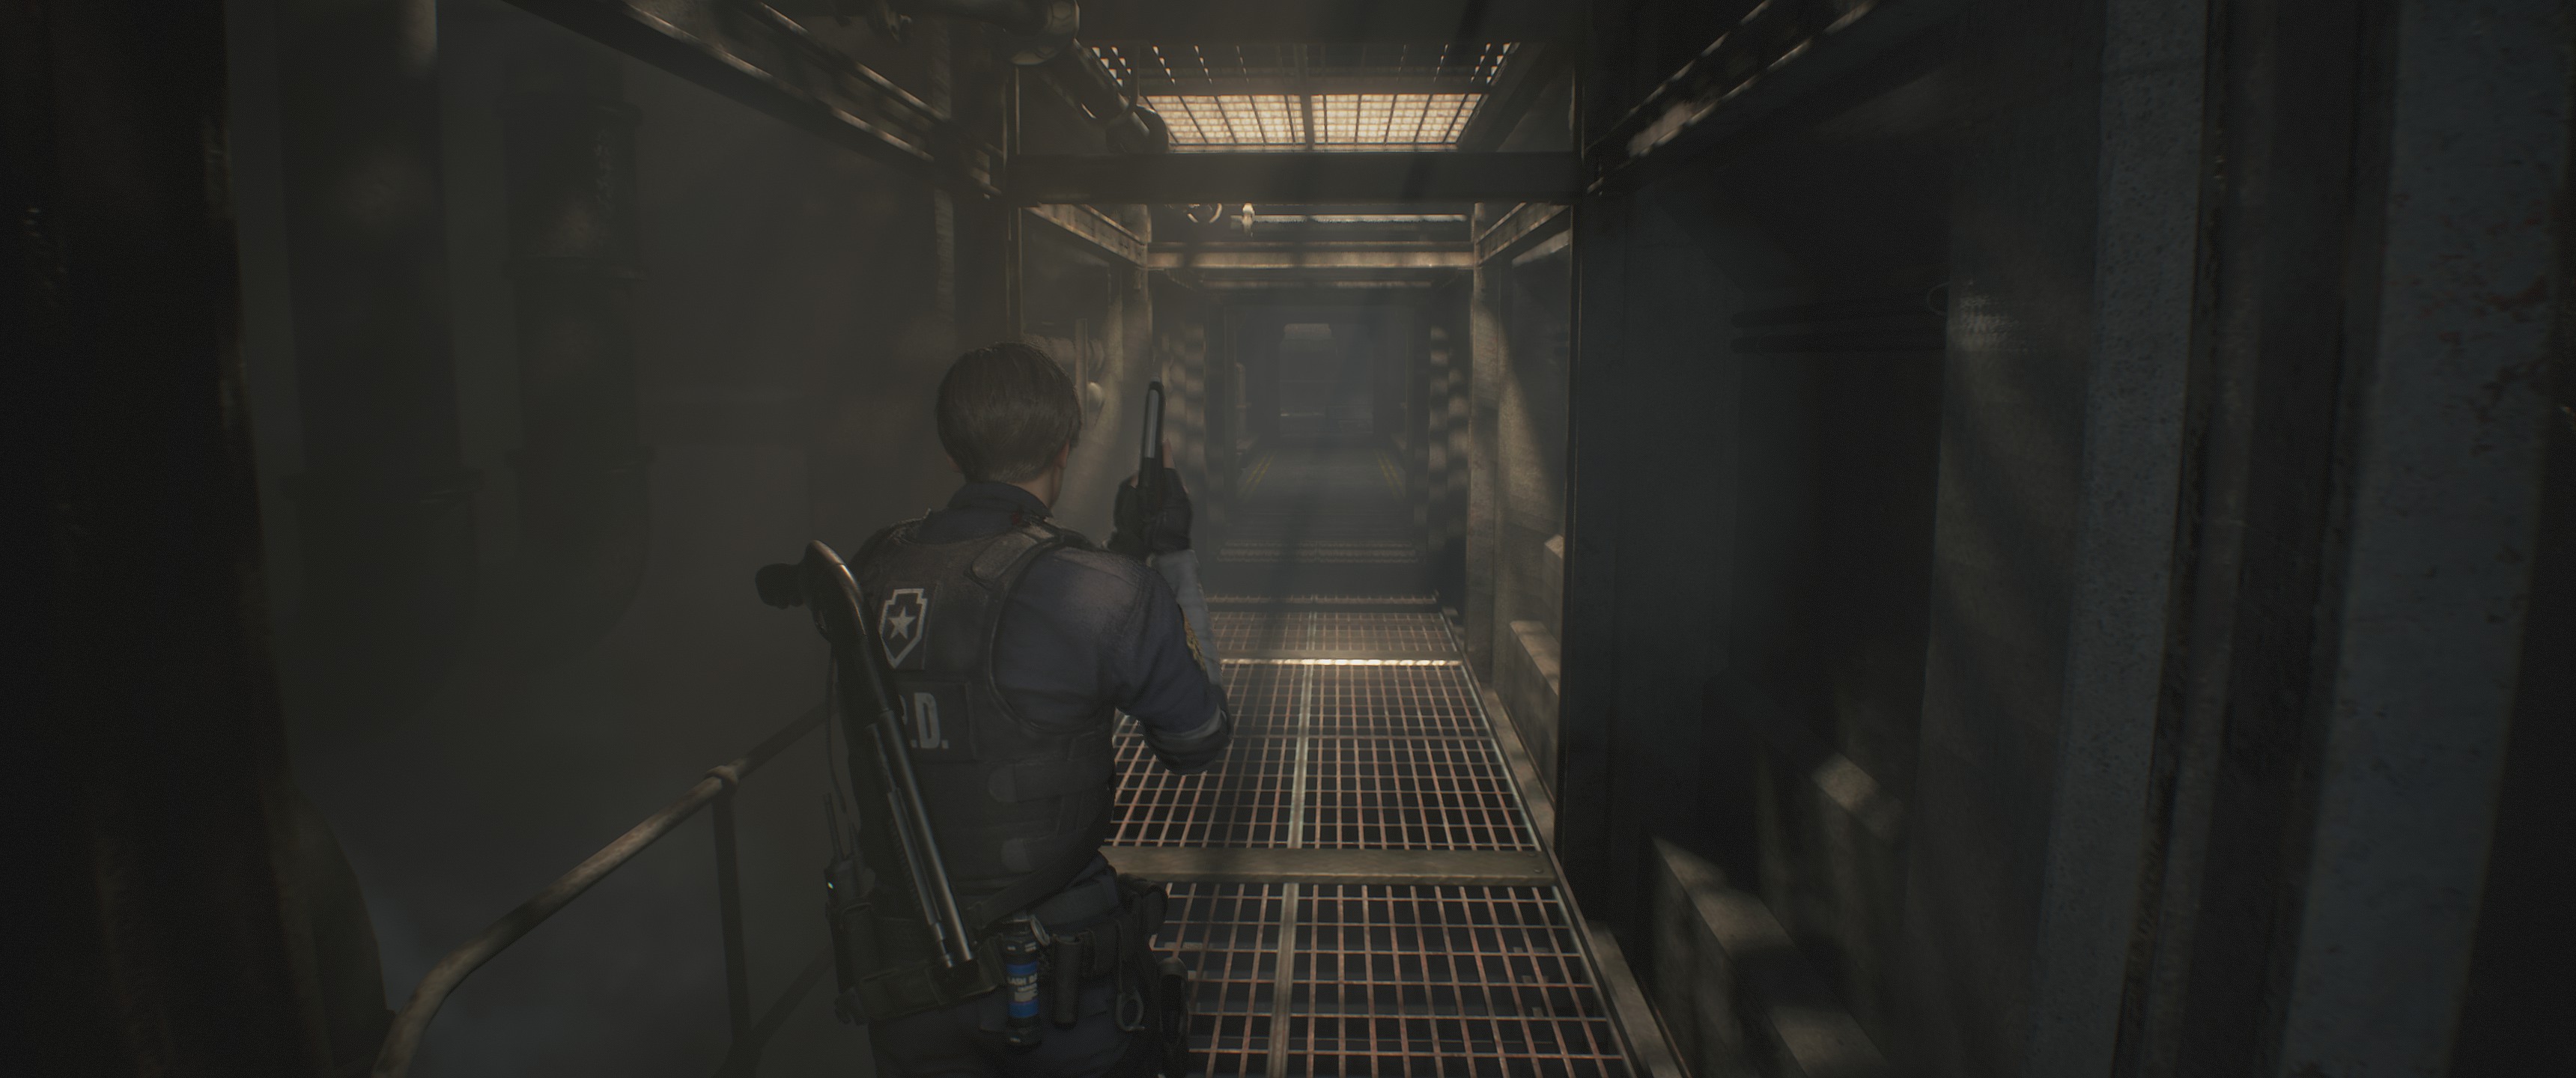
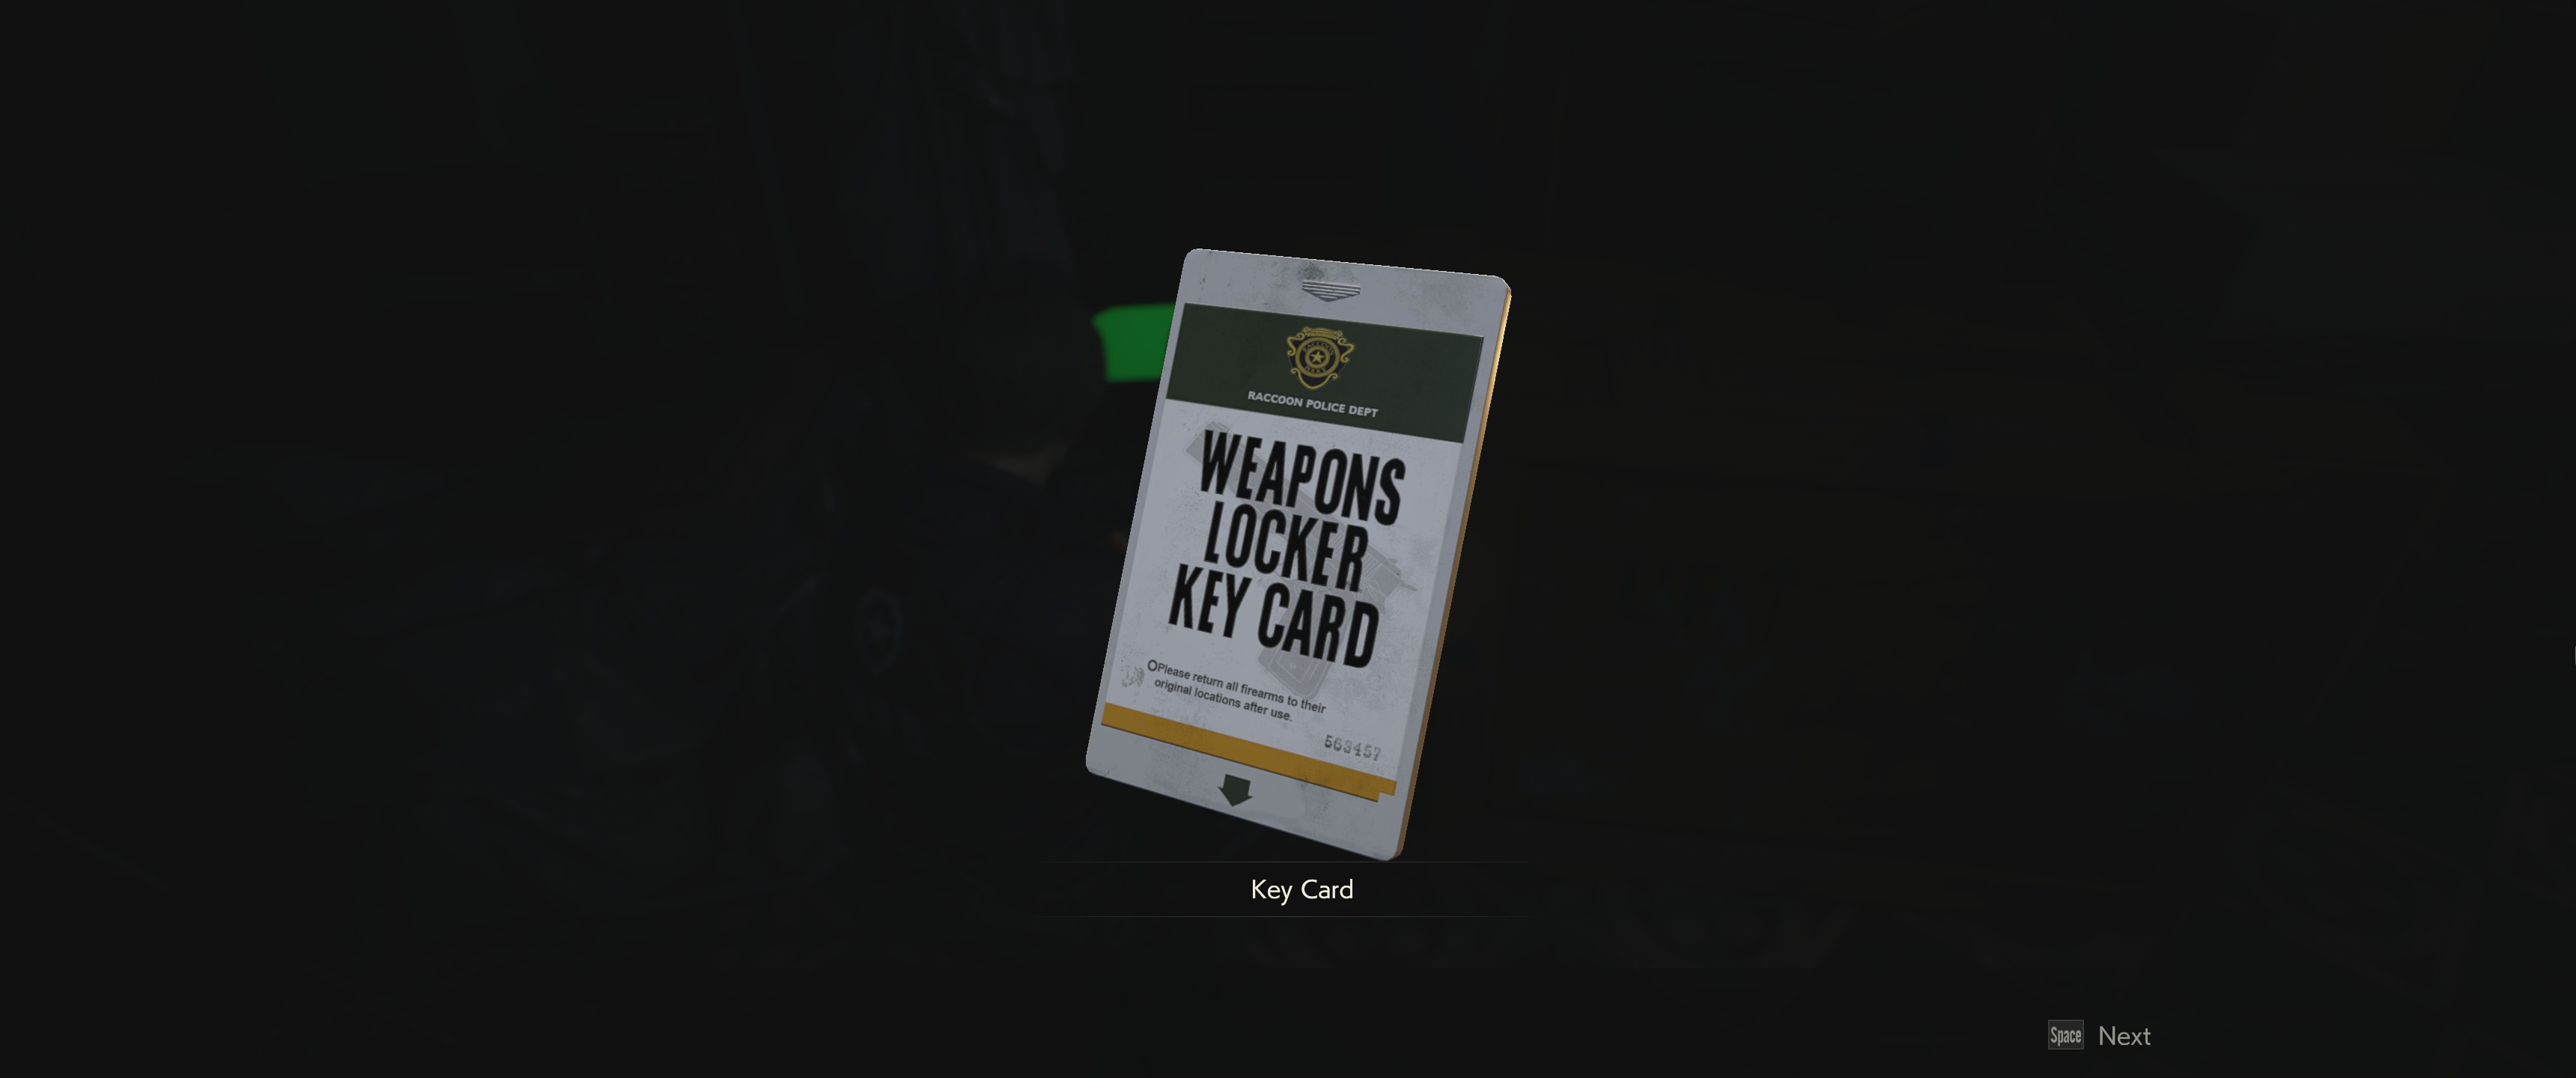
1F Weapons Locker Keycard
The weapons locker keycard isn’t a story item, so it’s easily missable. The safety deposit room weapons locker that it unlocks has a shotgun for Leon and a grenade launcher for Claire, so it’ll be worth your effort.
First, you’ll need the spade key, which can be found on a desk next to a mannequin on the third floor of the police station. Use it on the spade door in the 2F waiting room, then hang an immediate left and pop into the art room.
Ahead and slightly to the right, the weapons locker keycard will be under an old-school banker’s lamp. Nab it, then jog back to the safety deposit room and claim your desperately needed reward.
Leon’s Desk in the West Office
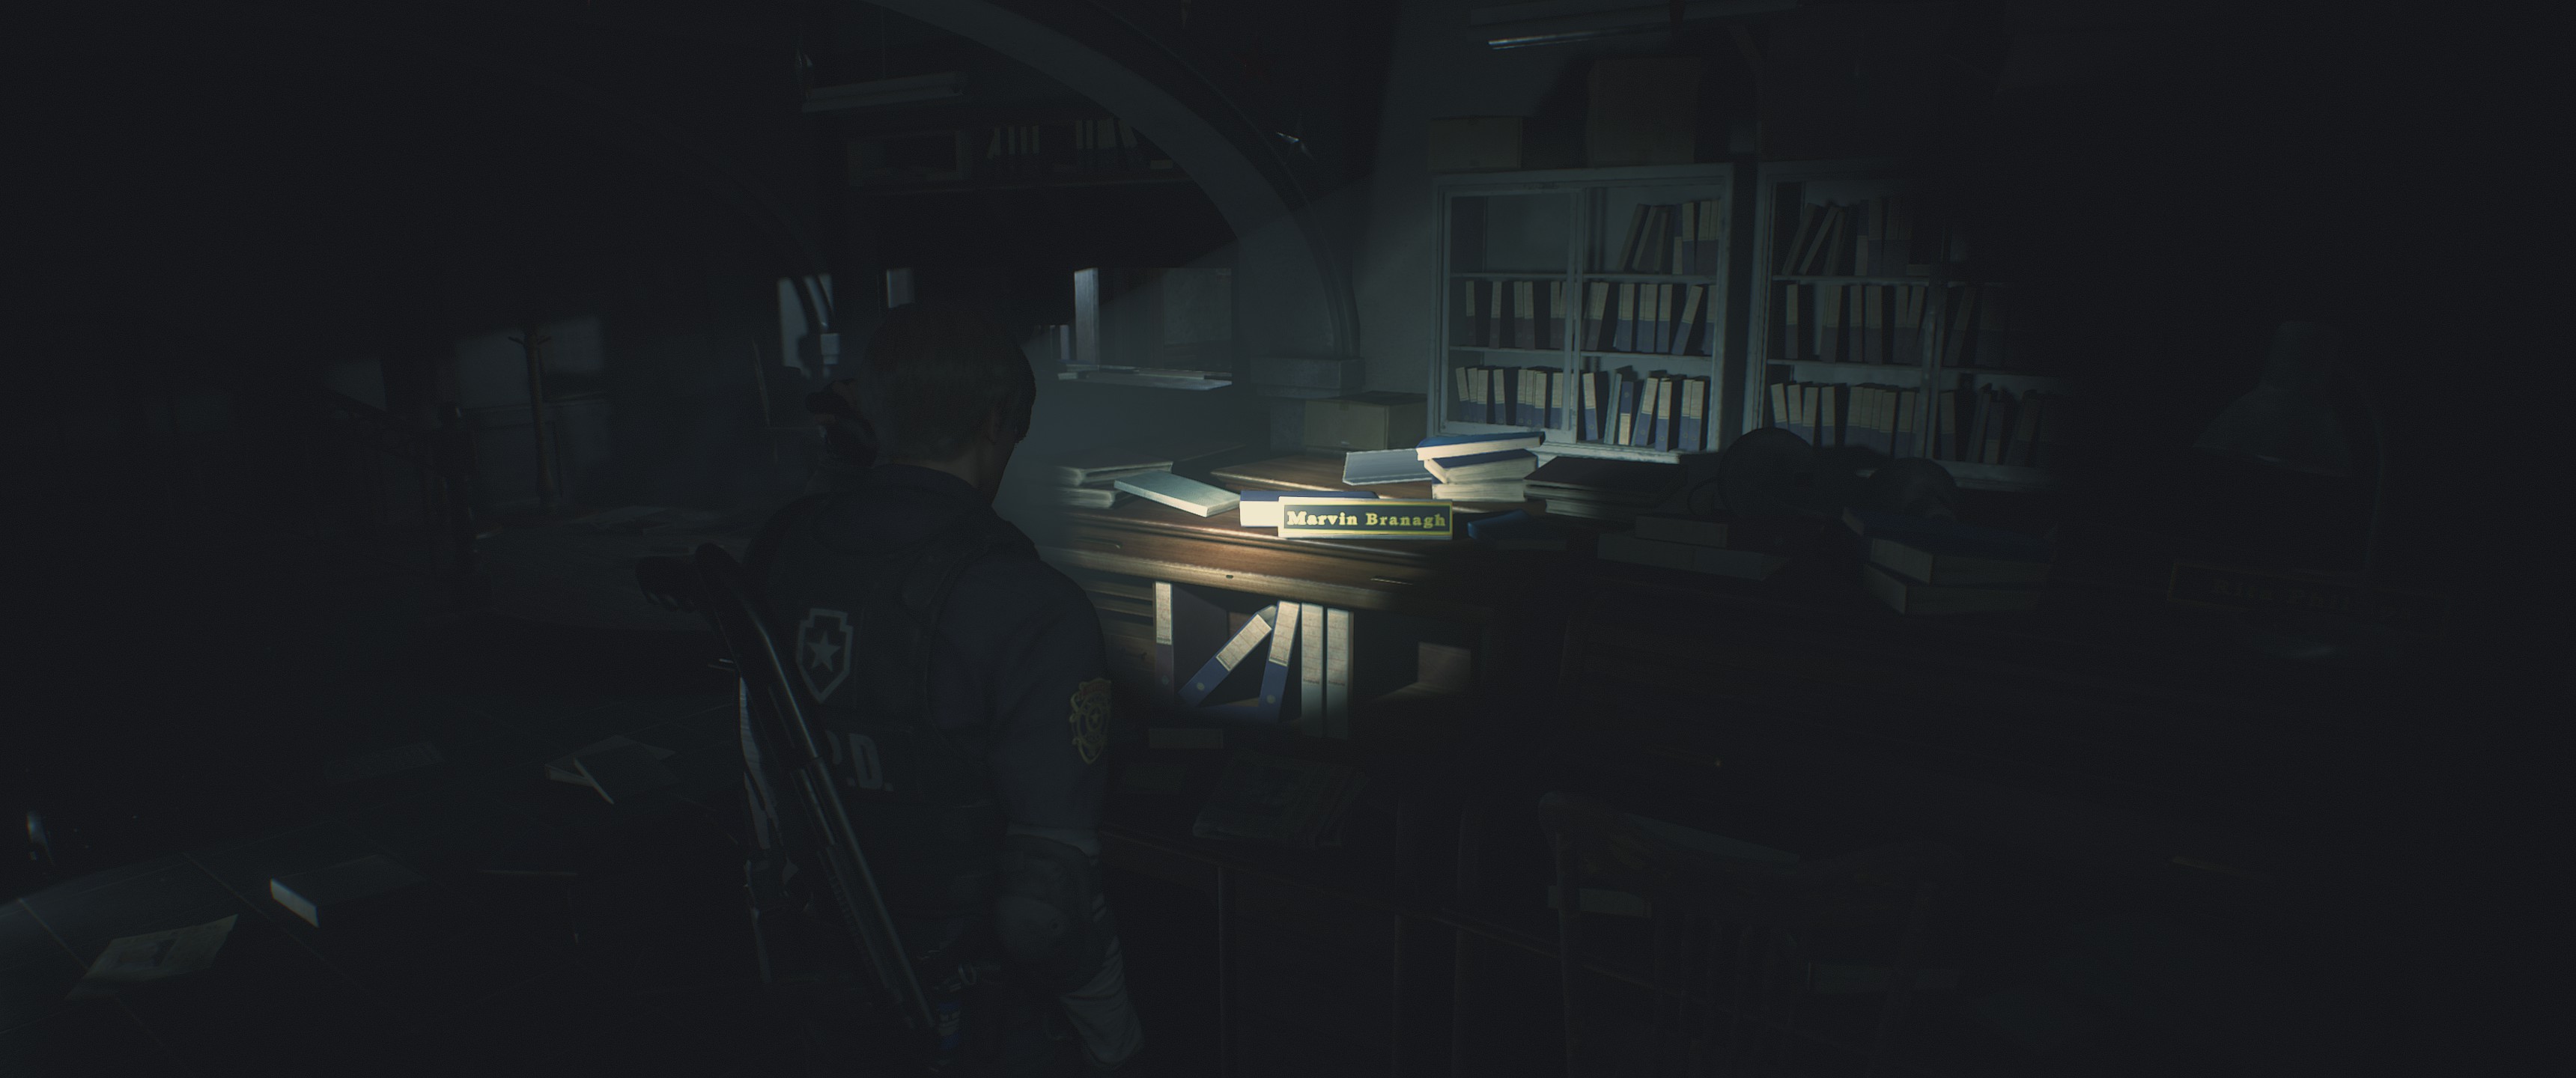
The desk in the 1F west office is locked by two locks, each with a three-letter combination. The note on the desk says that Leon needs to learn his coworkers’ names — specifically, the initials of their first names.
Take a look at the nameplates on the desks to either side of Leon’s desk. Marvin and Rita are on the right and David and Edward are on the left. That’s four names, but you need six.
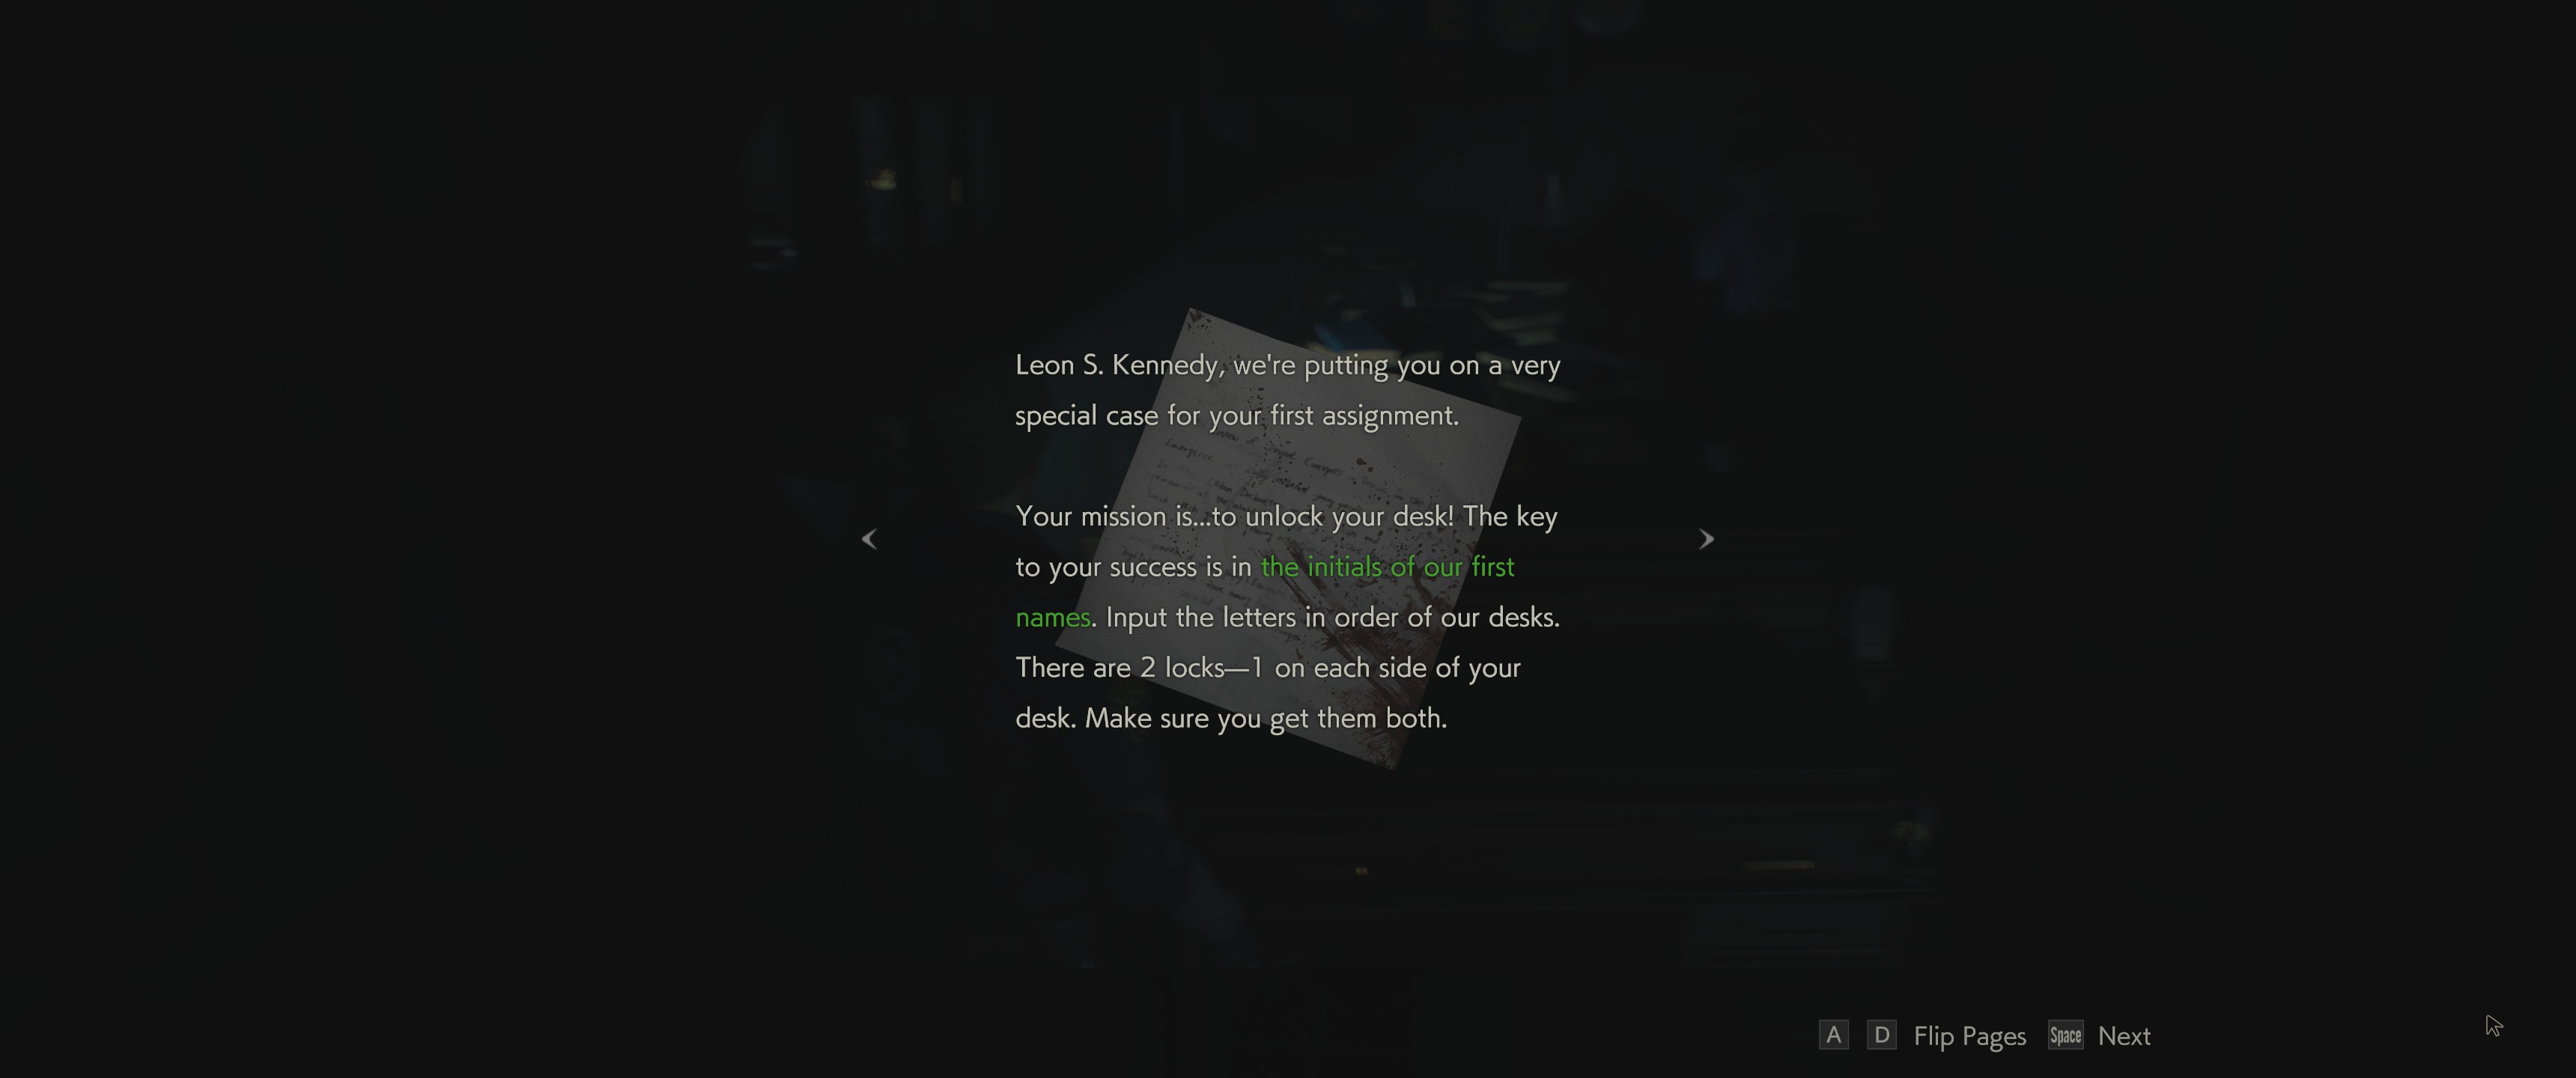
Although the other two desks are missing nameplates, the missing initials are easy to guess. Enter NED on the left lock and MRG on the right. Inside the desk, you’ll find an extended magazine for Leon’s handgun or a speed loader for Claire’s.
Accessing the Portable Safe
The portable safe can be found on a shelf in the 2F men’s locker room, and it contains a spare key that you’ll need to open some of the lockers in the 1F safety deposit room.
Instructions for the safe can be found right next to it. Unfortunately, there’s no set combo — the safe is semi-randomized for each save file. The gimmick is a simple one, though. I recommend visualizing a number next to each key; this will help you mentally track the pattern.
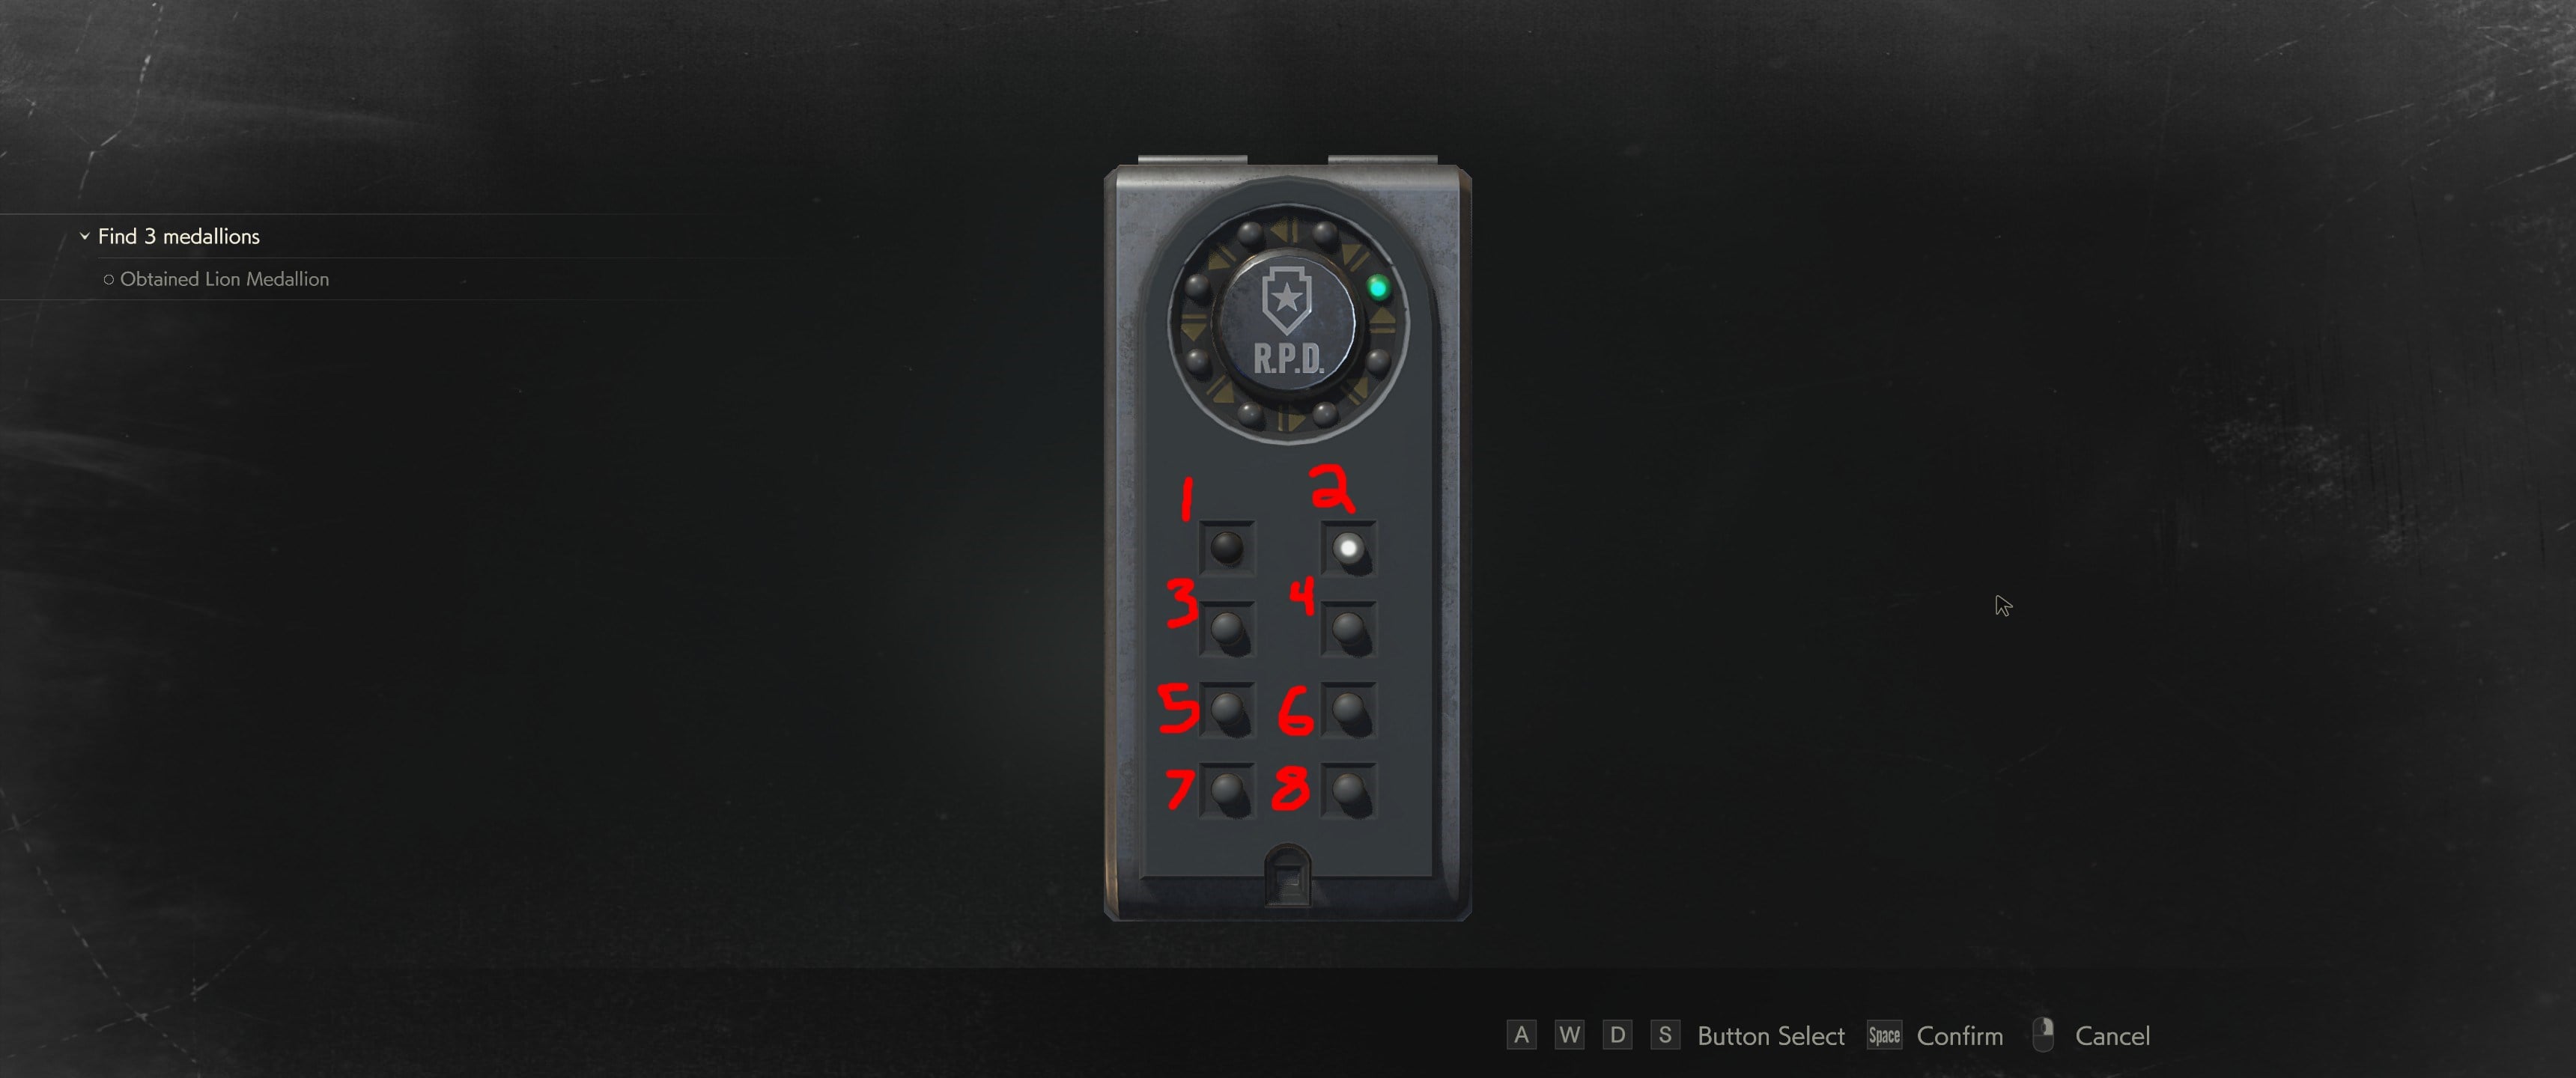
Just press a button and see if you get a green light or a red one. If green, write down the number you just pressed and try a different one. Anytime you press a wrong button (red light), the pattern resets. Simply start over and keep eliminating possibilities until you get all green lights.
There’s another portable safe in the clock tower that contains the other missing key for the safety deposit room. It functions identically to this one.
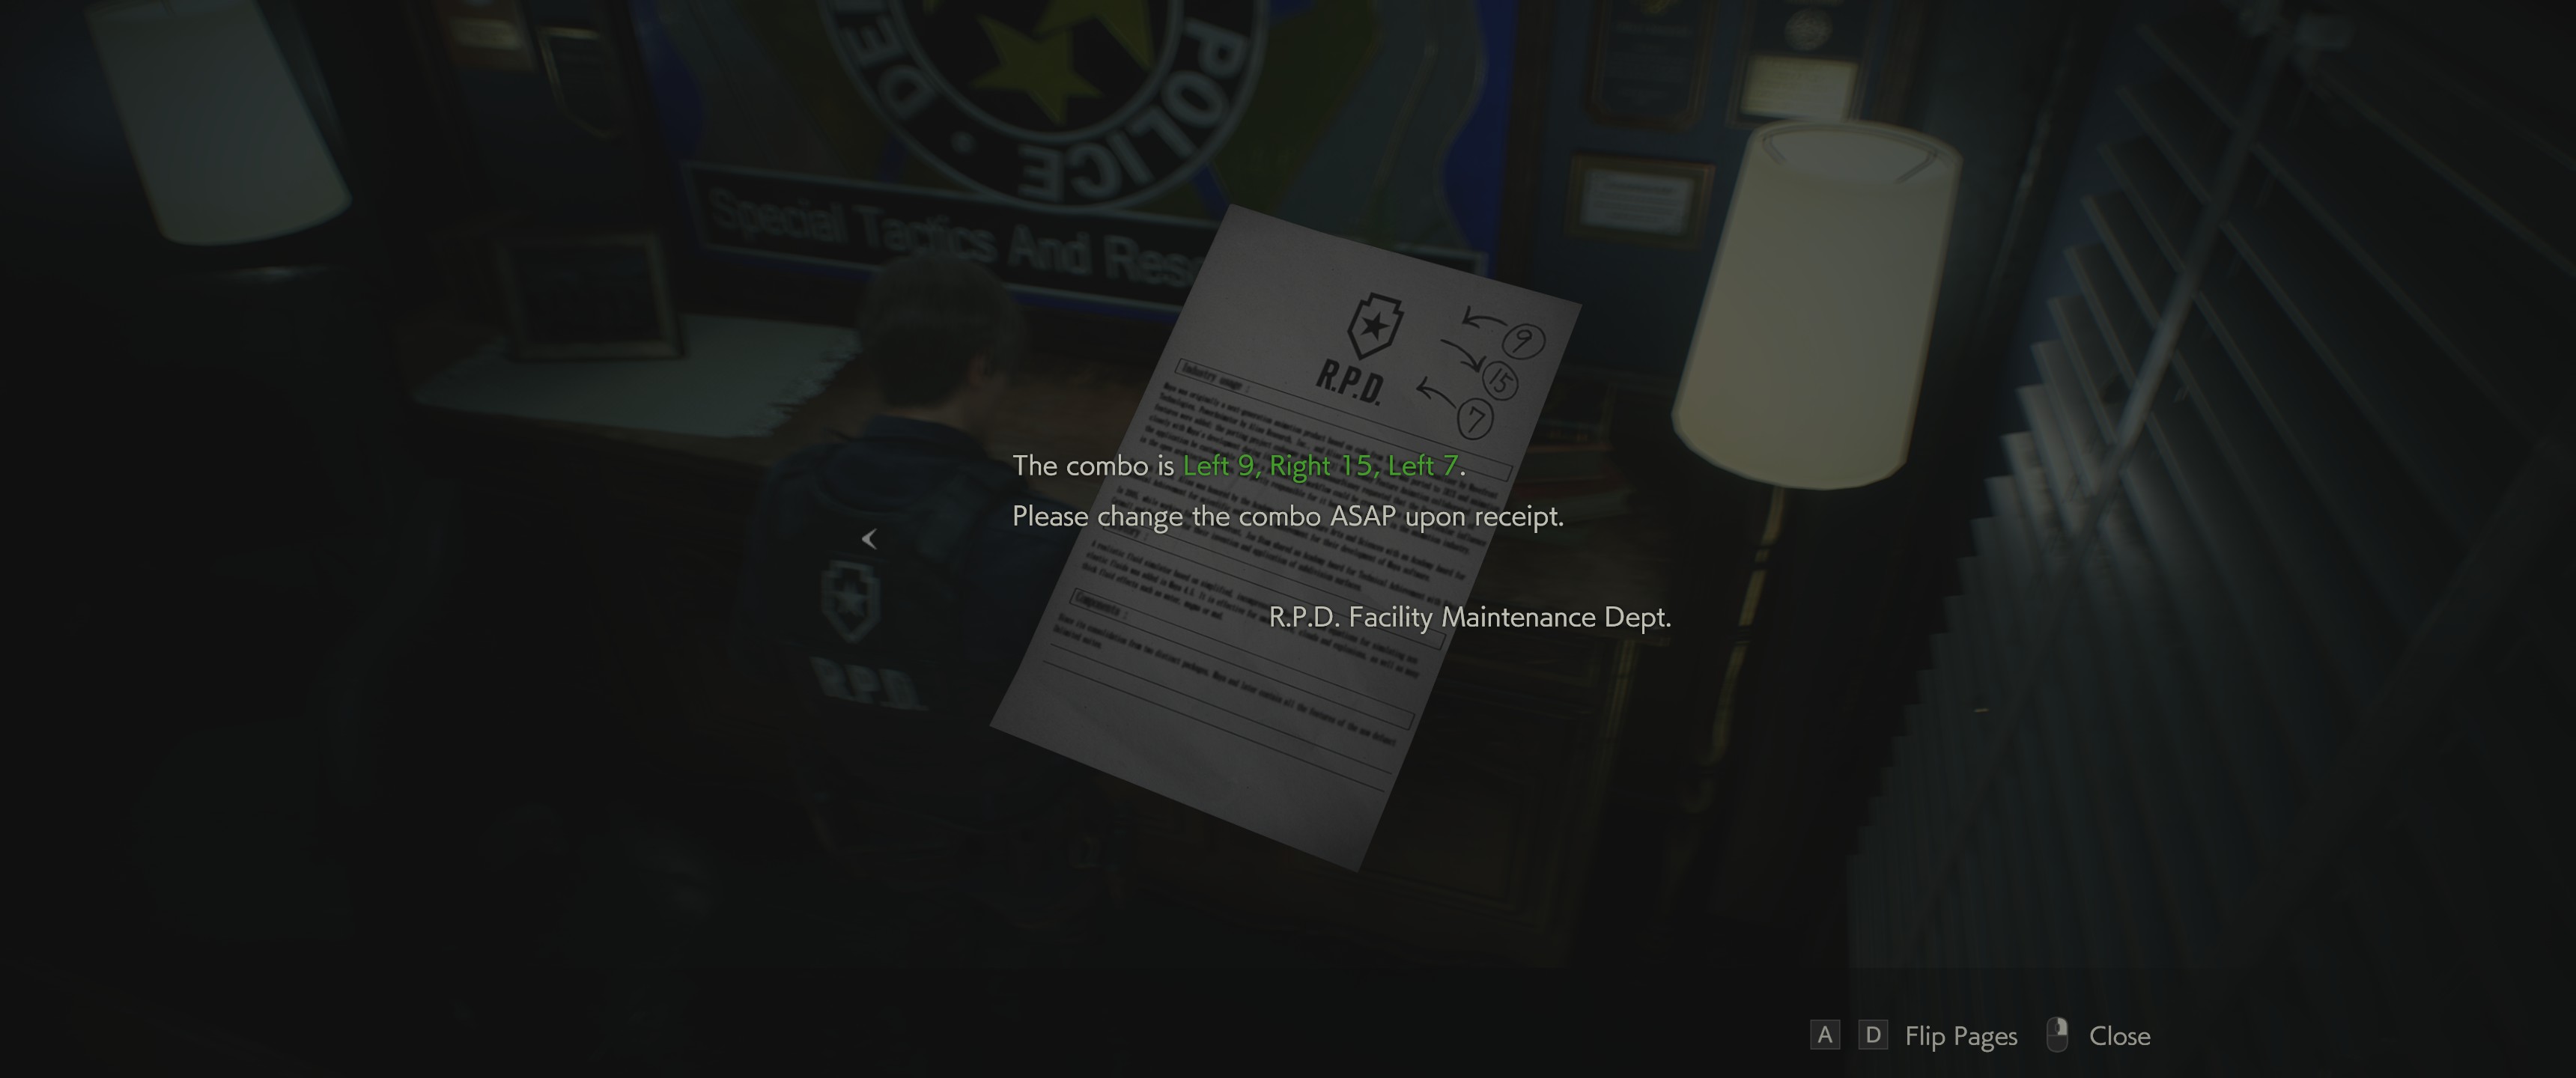
Cracking the 1F West Office Safe
This safe holds a hip pouch, which will expand your measly inventory by two slots.
The combo is scrawled on a memo in the 2F S.T.A.R.S. office. It’s L9, R15, L7. Enjoy your newfound ability to carry slightly more stuff.
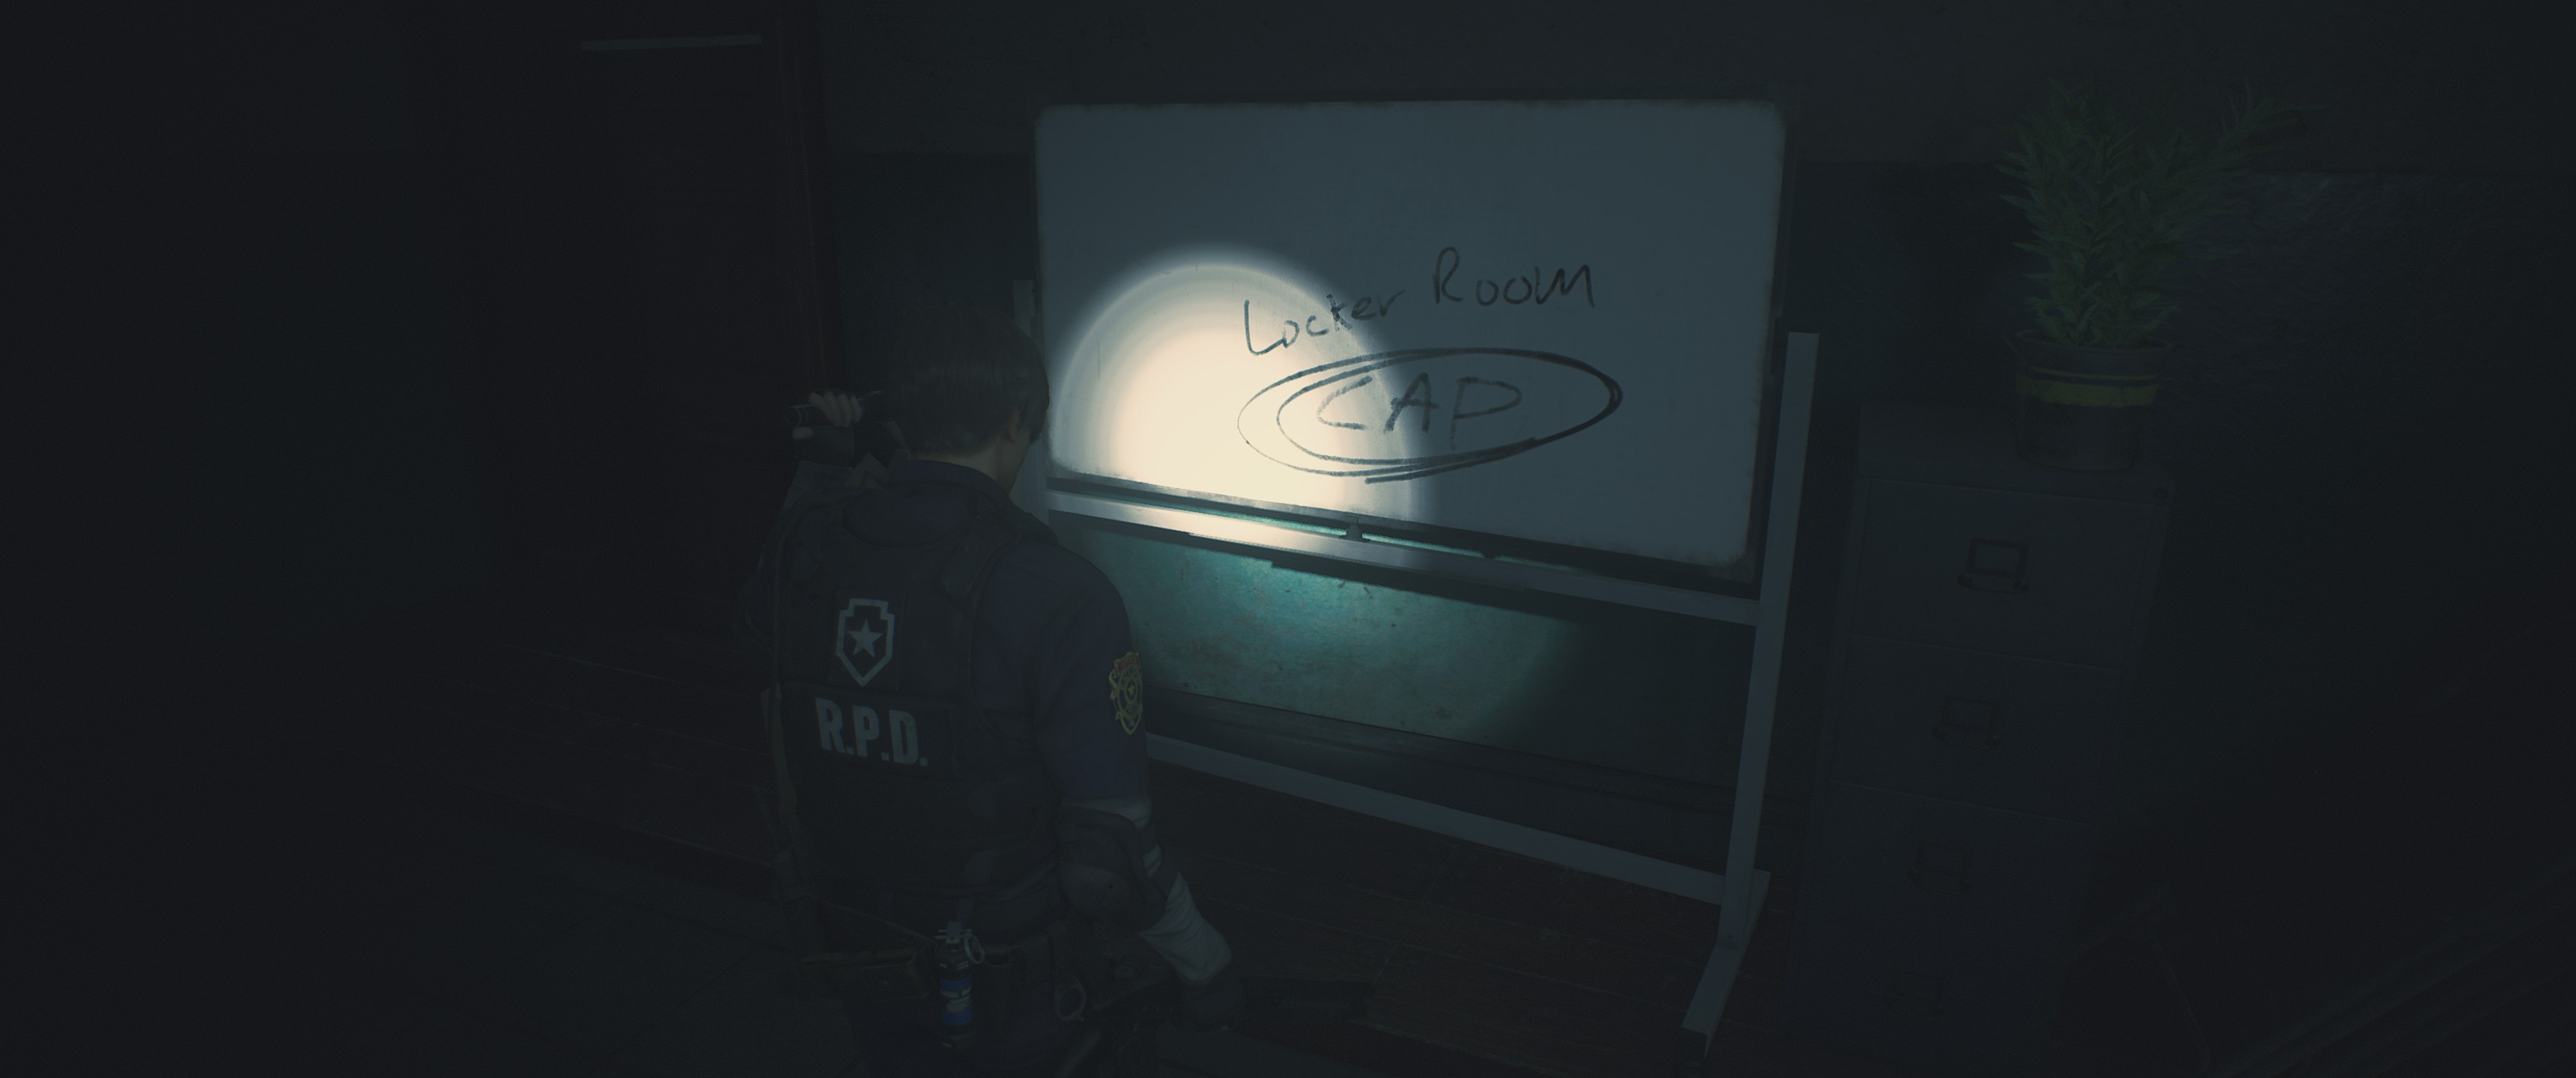
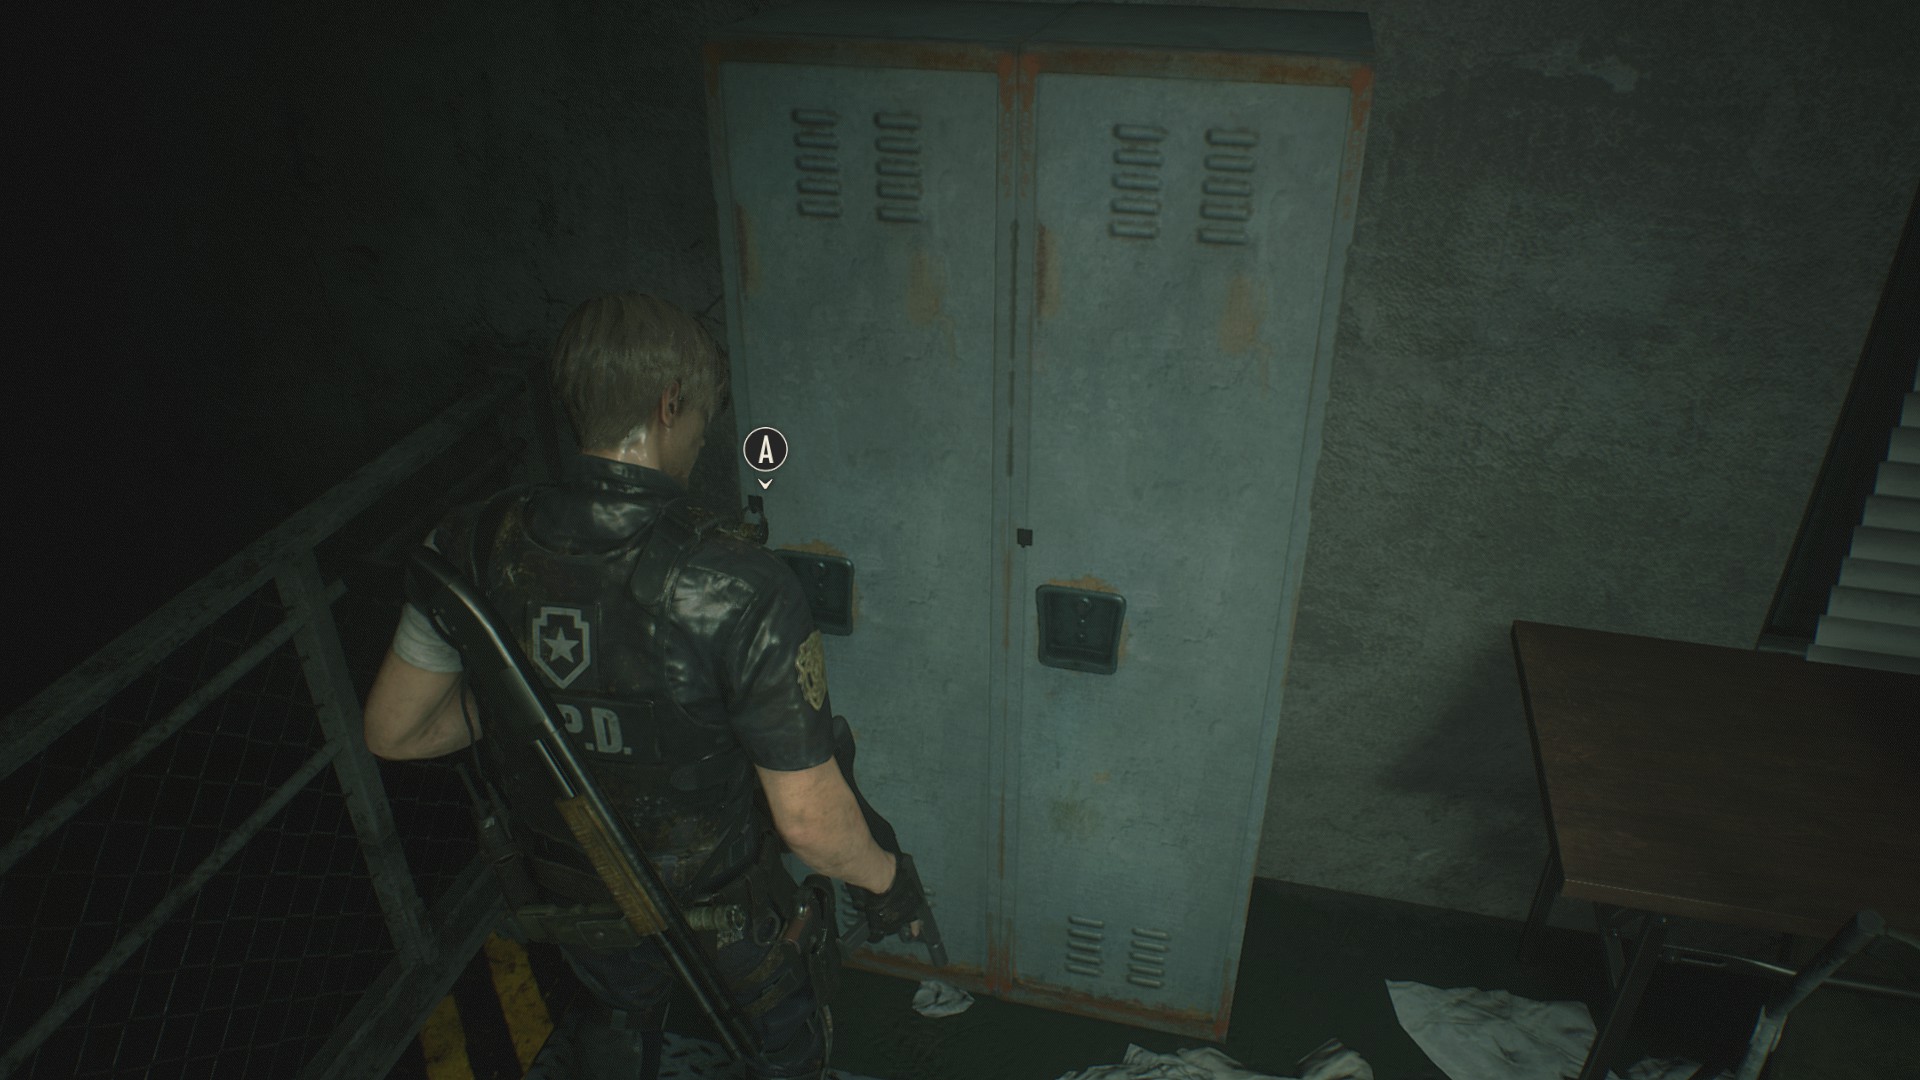
2F Men’s Locker Room Code
Right next to the shelf with the portable safe in the 2F men’s locker room, there’s another locker secured with a 3-digit letter code. That code can be found on a whiteboard behind the locked door in the 1F operations room. Bring the bolt cutters to gain access.
Enter CAP to open the locker. You’ll score some shotgun shells or submachine gun ammo for your trouble.
2F Waiting Room Safe
The code for this one is L6, R2, L11 and can be found attached to the Confiscation Report, which is on a table in the 1F interrogation room. Your reward for popping the safe is a muzzle brake for Leon’s handgun or a high-capacity mag for Claire’s second handgun (which is found a bit later, in the trunk of a police car in the B1 garage).
3F Locker Combo
The locker on the 3F landing just outside the room where the spade key can be found is jealously guarding magnum ammo or submachine gun ammo, so yeah, you’ll want to get in there.
To find the combo, snag the film roll from the firing range in the police station B1 area. (It’s behind a door locked with the diamond key, so click over to our key location guide if you need help finding it.)
Develop the film in the darkroom and you’ll learn that the 3F locker code is DCM.

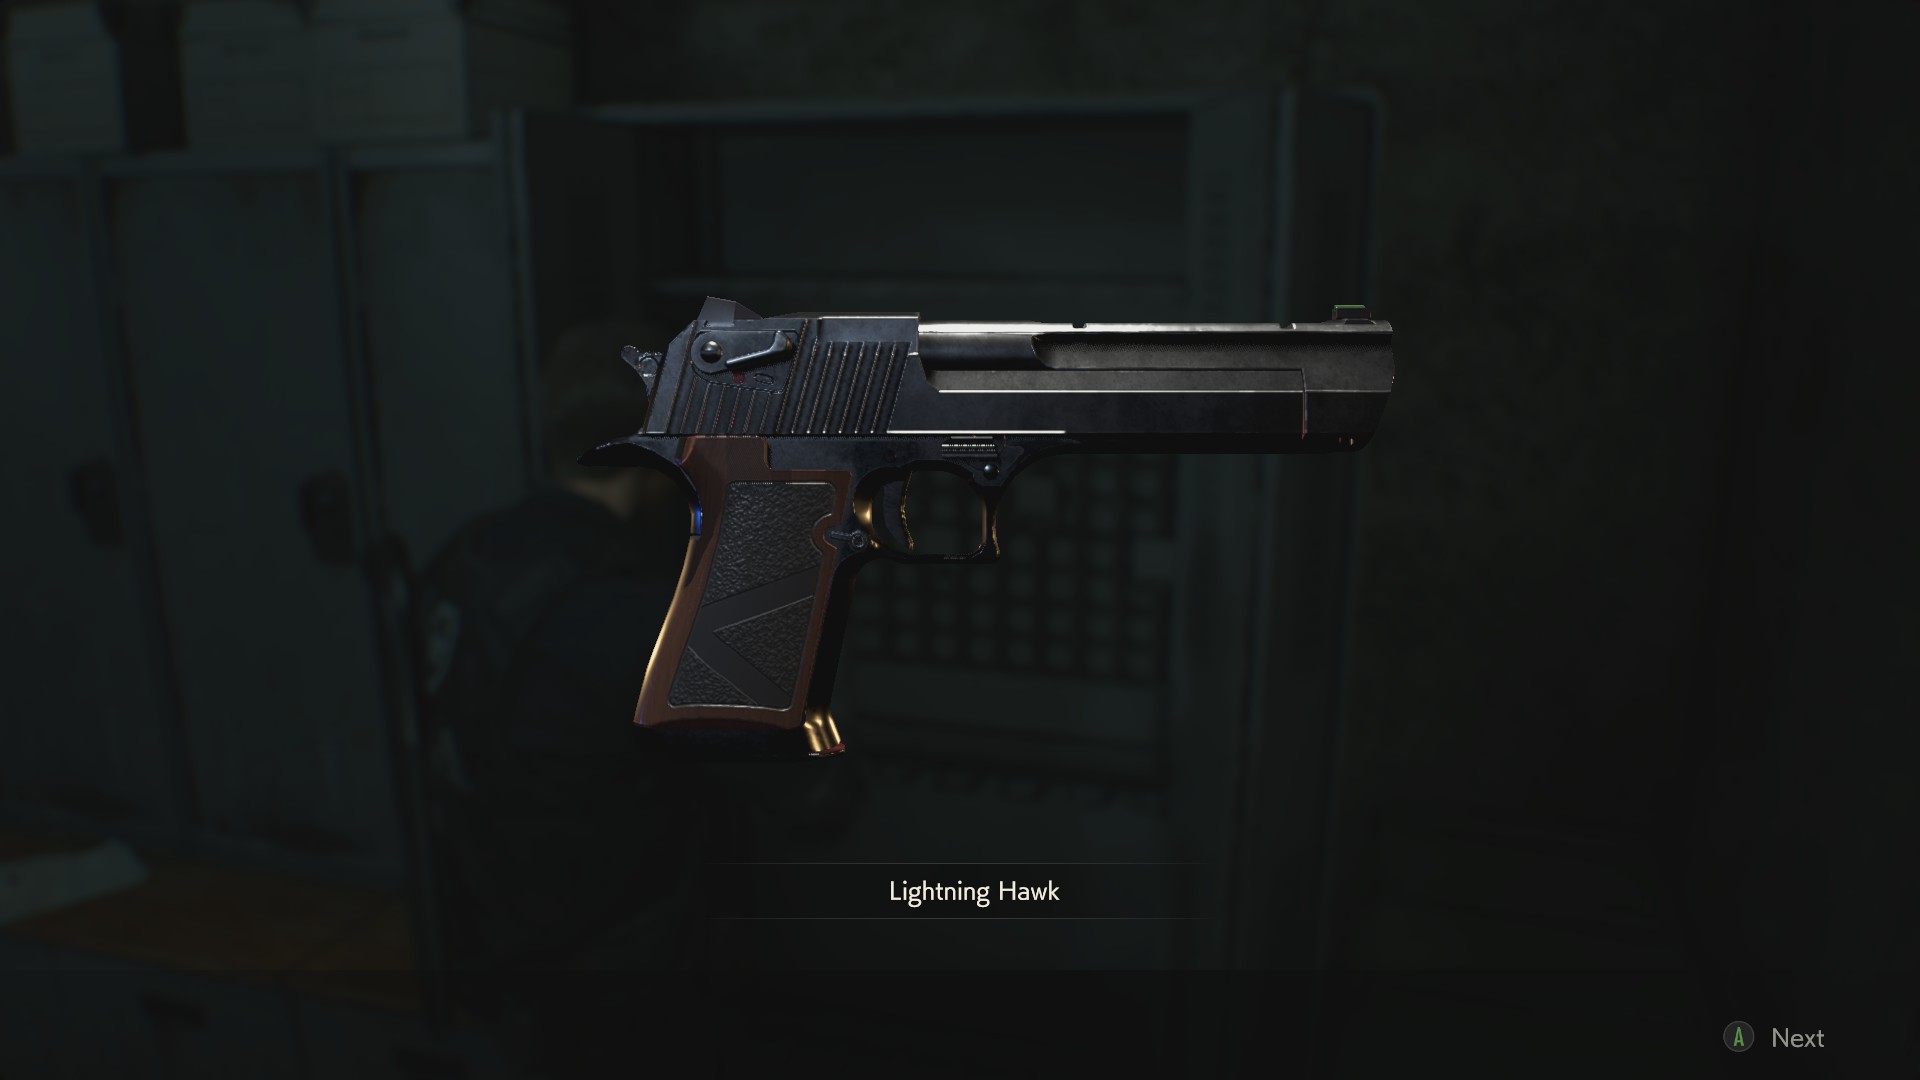
Tracking Down the Magnum/Submachine Gun (and Their Upgrade Parts)
When you reach the 2F S.T.A.R.S. office, you’ll see a tantalizing prize locked away in the armory (the Magnum for Leon or the submachine gun for Claire). It takes a bit of work to get in there.
First, track down the bejeweled box, which is in the 1F observation room (A scenario) or the 2F men’s locker room (B scenario).
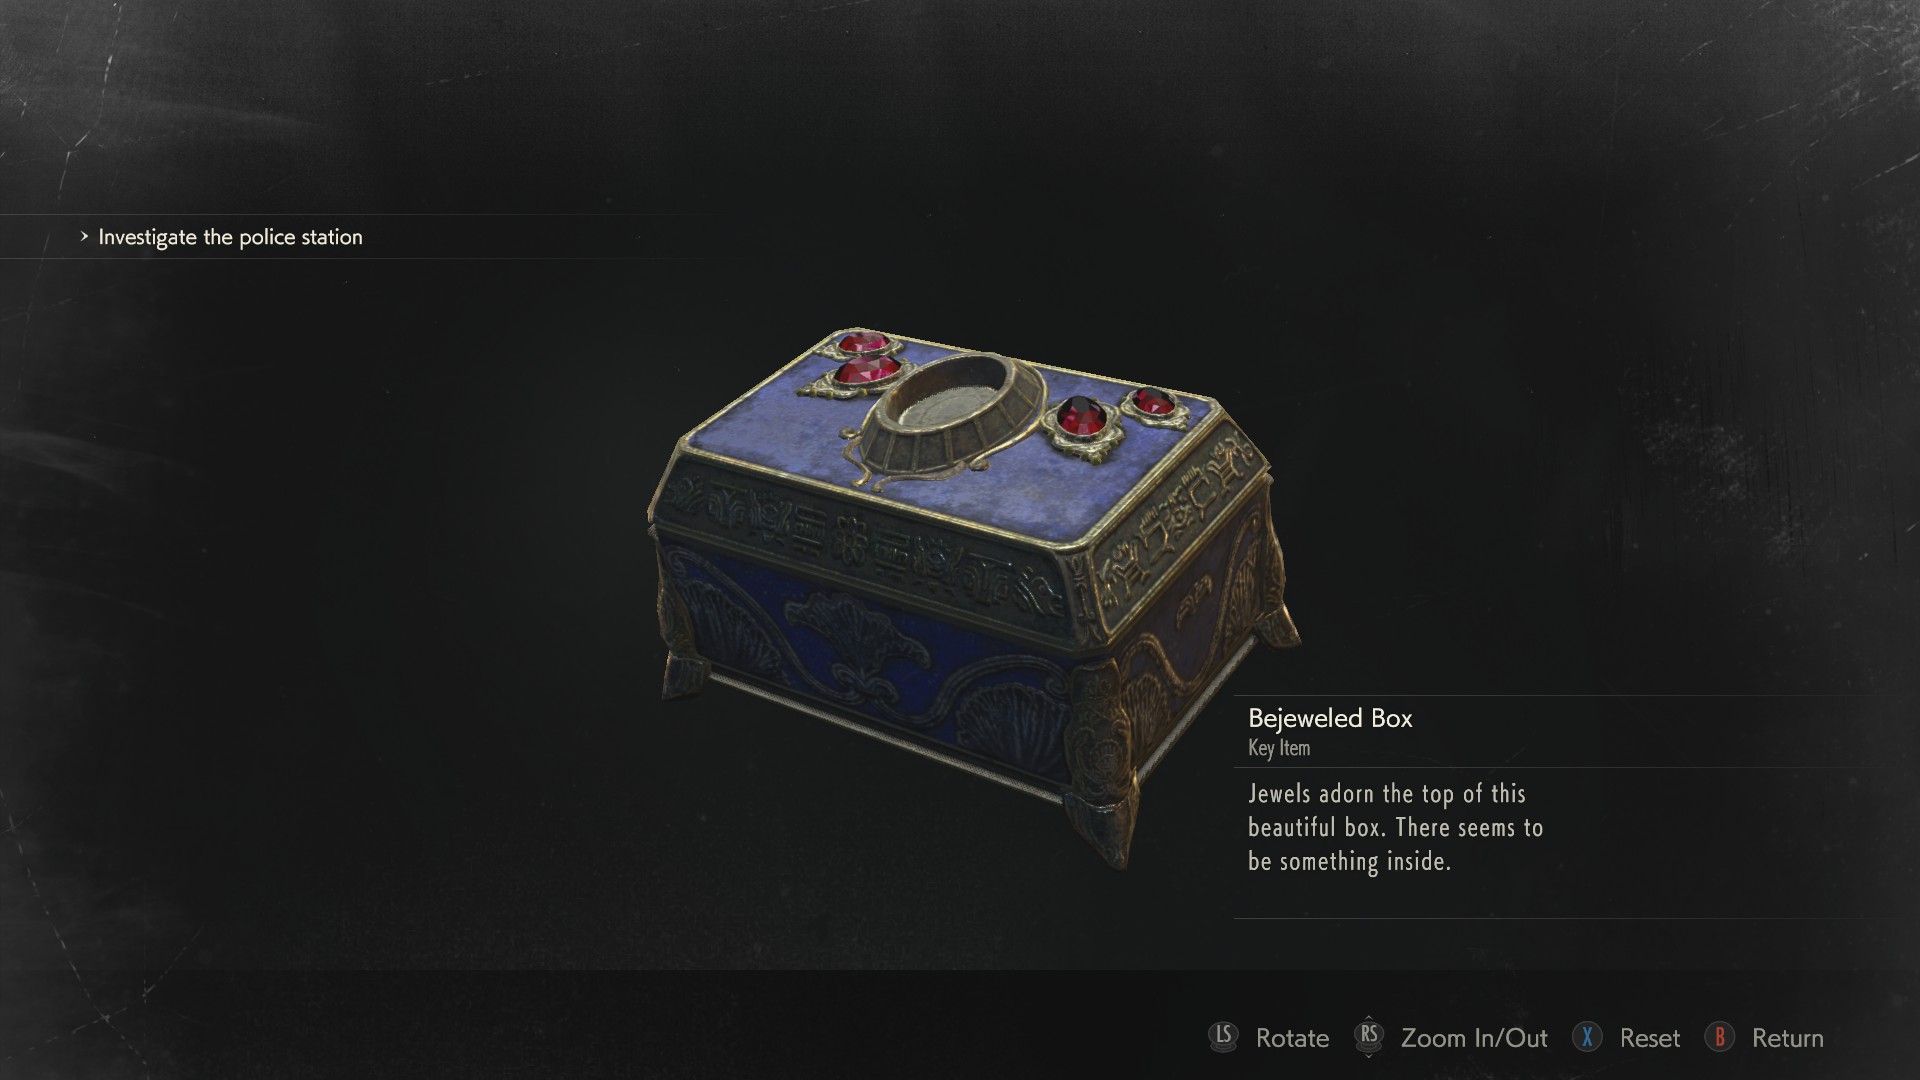
Then you’ll need to snag the red book from the library, combine it with the statue arm in the 2F art room, and then reaffix the arm to the statue. In return, you’ll get the scepter.
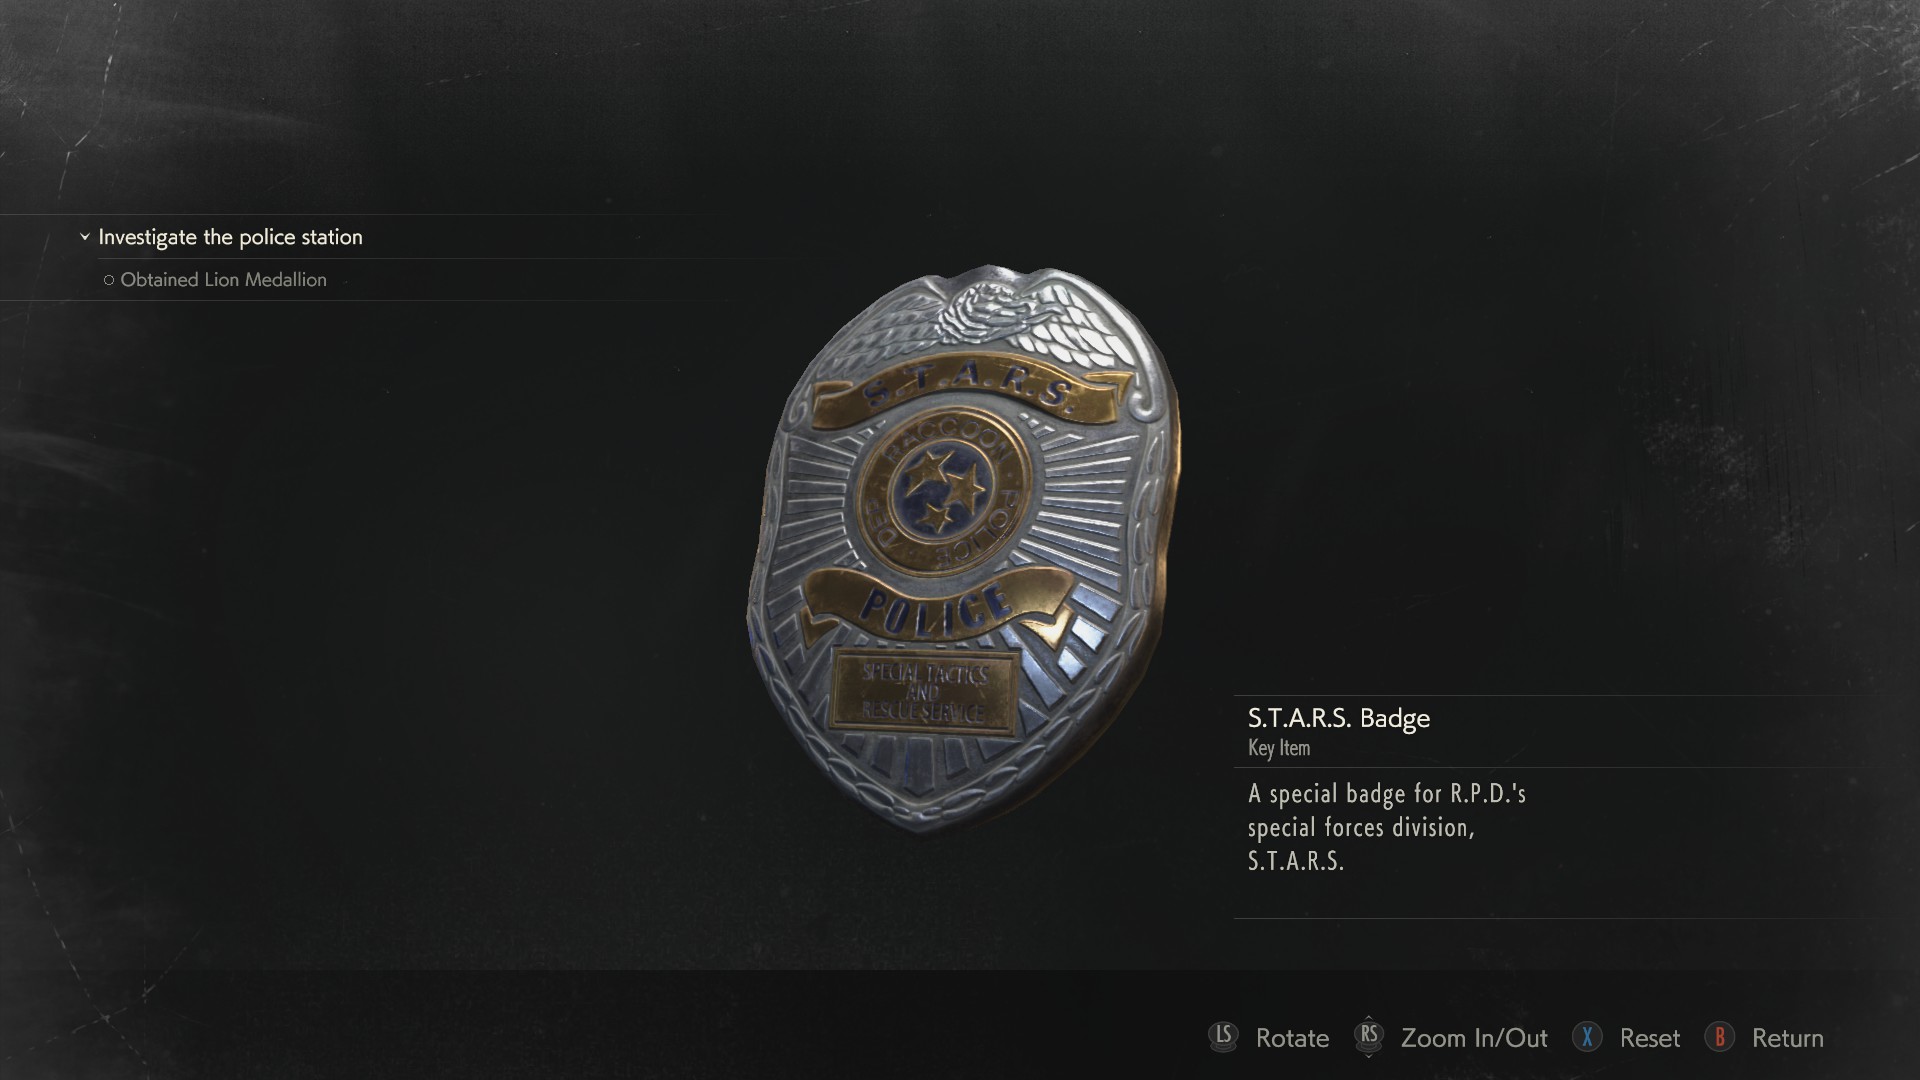
Examine the scepter from your inventory to get the red jewel. Combine the jewel with the bejeweled box and voila—S.T.A.R.S. badge. Once again, examine it in your inventory to discover that it’s a USB stick.
Use the USB stick on the armory computer back in the 2F S.T.A.R.S. office and claim your new best friend.
Hang on—don’t toss the S.T.A.R.S. badge just yet. Examine it once more to retract the USB dongle and run down to the basement access hallway just outside the elevator that you take down before the first fight with Birkin. You’ll find a locked glass case at the base of the stairs.

Use the de-dongled S.T.A.R.S. badge here to score a long barrel for Leon’s Magnum or a suppressor for Claire’s submachine gun.
Sewer Control Room Locker
By the time you reach the sewers, you’ll want some extra magnum ammo or submachine gun ammo for the big baddies that live down there.
To get into this locker the legit way, you’ll need to track down the sewer access key in the garbage collection room. Use the T-bar valve to open the door and head across the bridge toward the lower waterway, but don’t go down there.
Snag the key and use it to open the workers’ break room across from the first movable bridge you ran into after entering the sewers.
In the break room, you’ll notice a poster with some letters circled.

Enter code SZF to pop the control room locker.
Sewer Safe
This is the easiest safe of them all to open. The combo is written right on the side, but don’t feel bad if you missed it; because of the way the safe is positioned, it’s easy to miss. The combo is L2, R12, L8.

—
Check out the guide page if you need help with other parts of the Resident Evil 2 remake, such as how to escape the police station, where to find all the Mr. Racoon statues, where to find the square crank, how to get the scepter (red jewel), where to find all of the suit keys, how to snag every file, and where to locate every film roll.
Be sure to check out our review of the Resident Evil 2 remake and see why we said it was good, just not to die for.


Published: Jan 25, 2019 04:00 am