Stamina upgrades are the most common and crucial ones to pick up throughout Trek to Yomi. There are several in each level and many are easy to miss. Once you hit a Shrine (checkpoint), you won’t be able to reload past the last save, and some areas may get cut off. This guide will save you a big headache.
Stamina pickups, of course, increase your stamina bar, which allows you to attack, block, and sprint more before entering a tired state. Exhaustion means waiting for your meter to refill, which leaves you vulnerable and unable to defend yourself. Early in Trek to Yomi, making sure you don’t miss a Stamina pick-up could be the difference between a decent challenge and a frustrating time.
All Stamina Upgrade Locations in Trek to Yomi
Chapter 1 (2 Upgrades)
Stamina Upgrade 1 — You will enter a house where a tooltip about Secrets work will pop up. From here, go left to the next area. You will find your first Stamina upgrade in this small room.
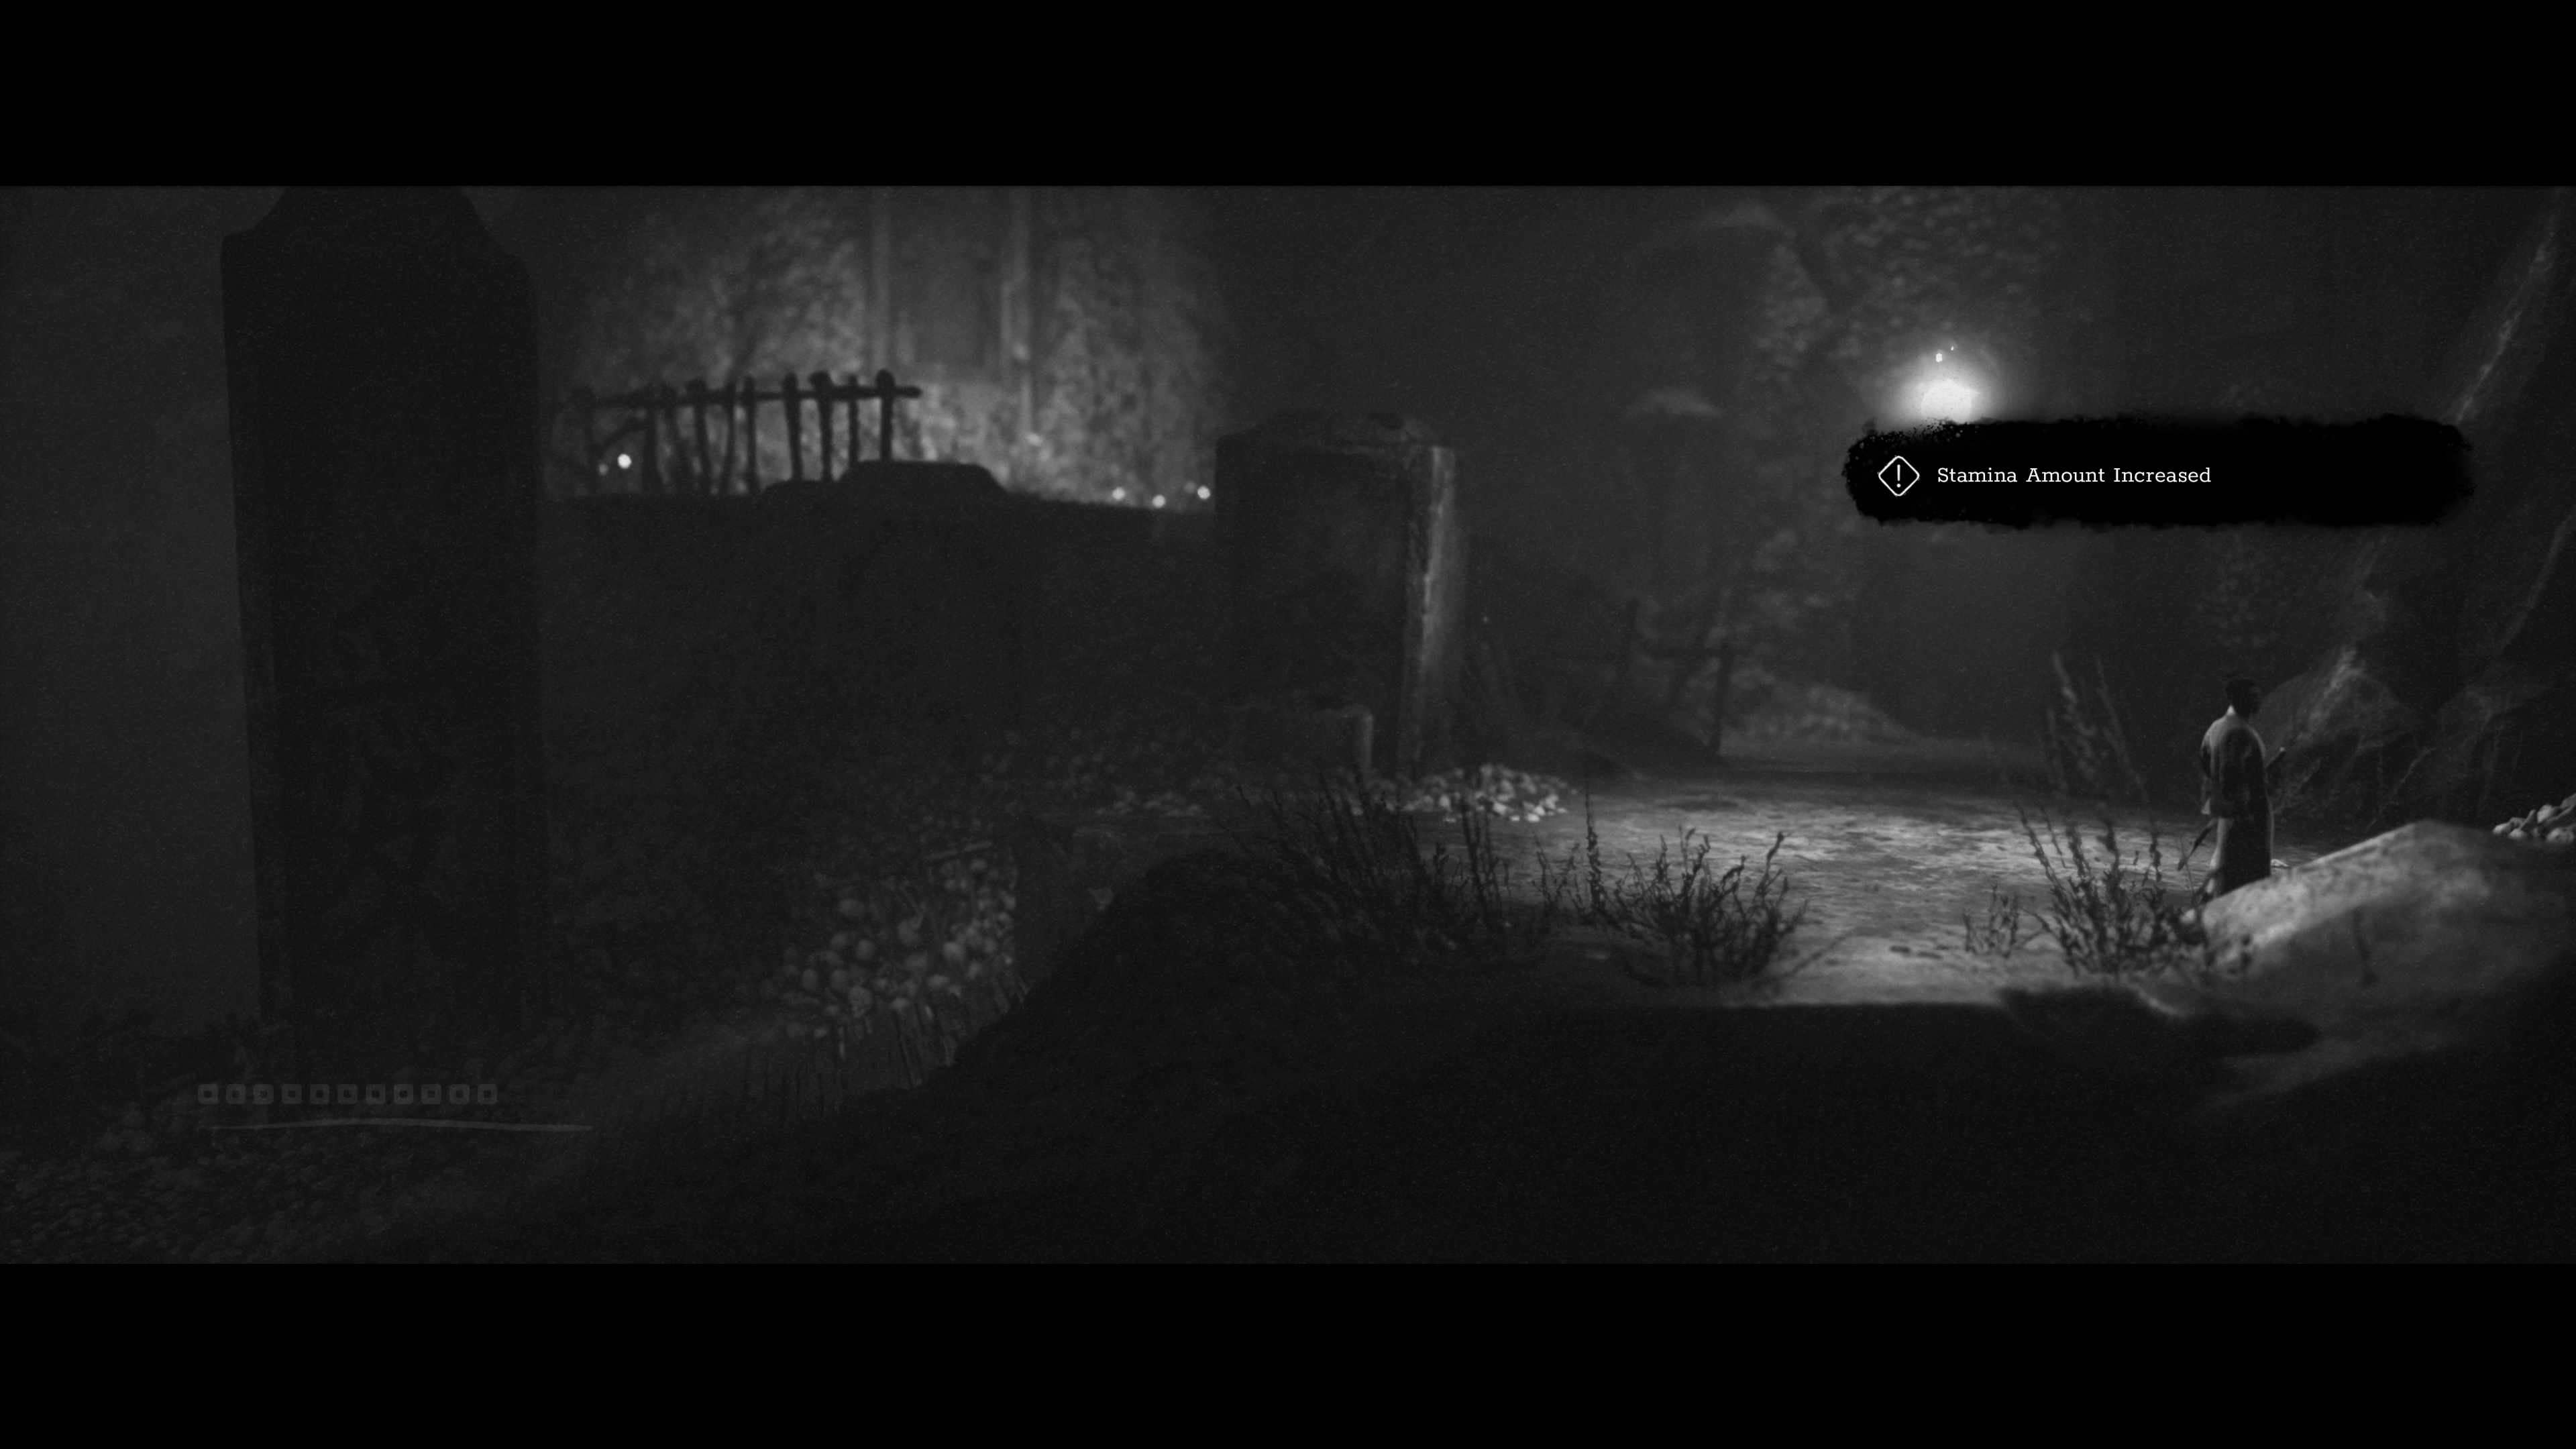
Stamina Upgrade 2 — When you first exit the village, you will come to a crossroads with a wooden bridge to your right. Instead of crossing it, head left to find a hidden Shrine. Keep heading in the same direction (you will be heading to the right side after that first turn), and you will encounter bandits in a graveyard. Defeat them, and move to the next screen (as far right as you can go). You’ll find a collectible on a gravestone and your second stamina pickup to the left of it.
Chapter 2 (3 Upgrades)
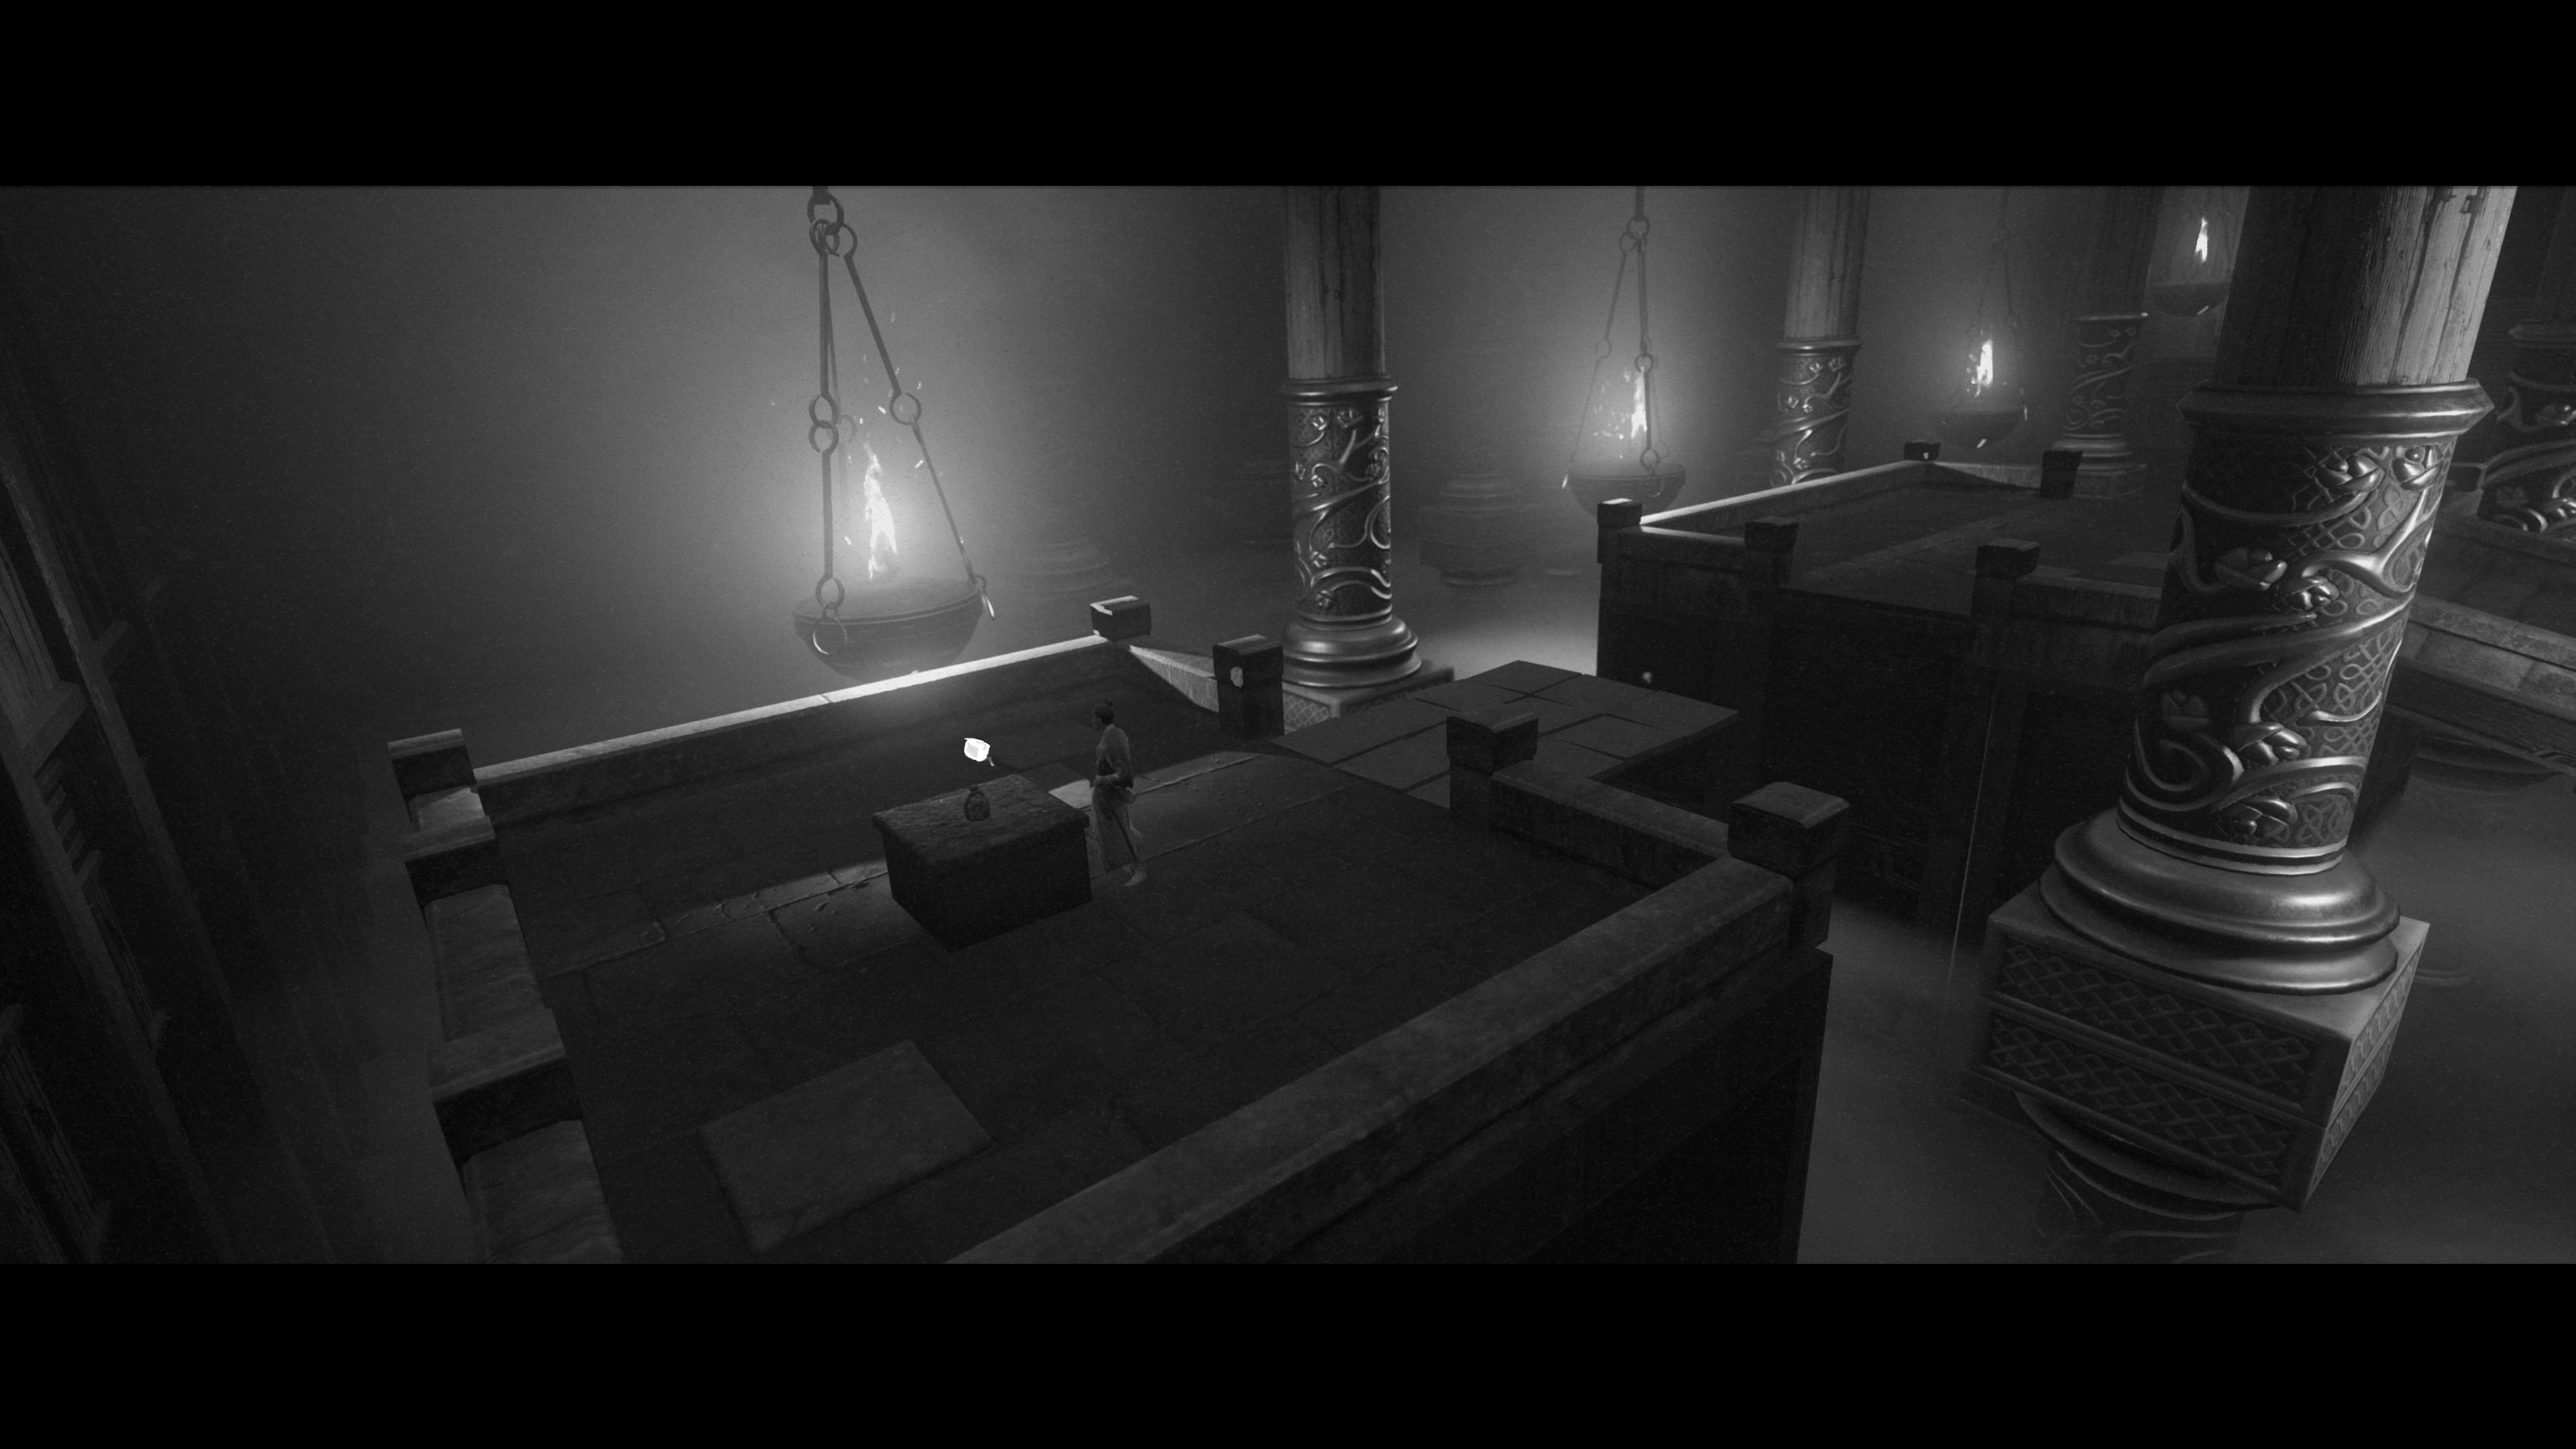
Stamina Upgrade 3 — After the first fight of Chapter 2, head one screen to the left. There is a clearing of trees that leads to this one in a dead end.
Stamina Upgrade 4 — You will come to a Shrine after the section in the mine. The second one in this level sits directly next to it.
Stamina Upgrade 5 — After you push open the big door to return to Hiroki’s village, you will see a path leading to a house in the background. Outside the house is a distraught man holding his head in his hands. Go inside to find some Bo Shuriken ammo and the next Stamina upgrade.
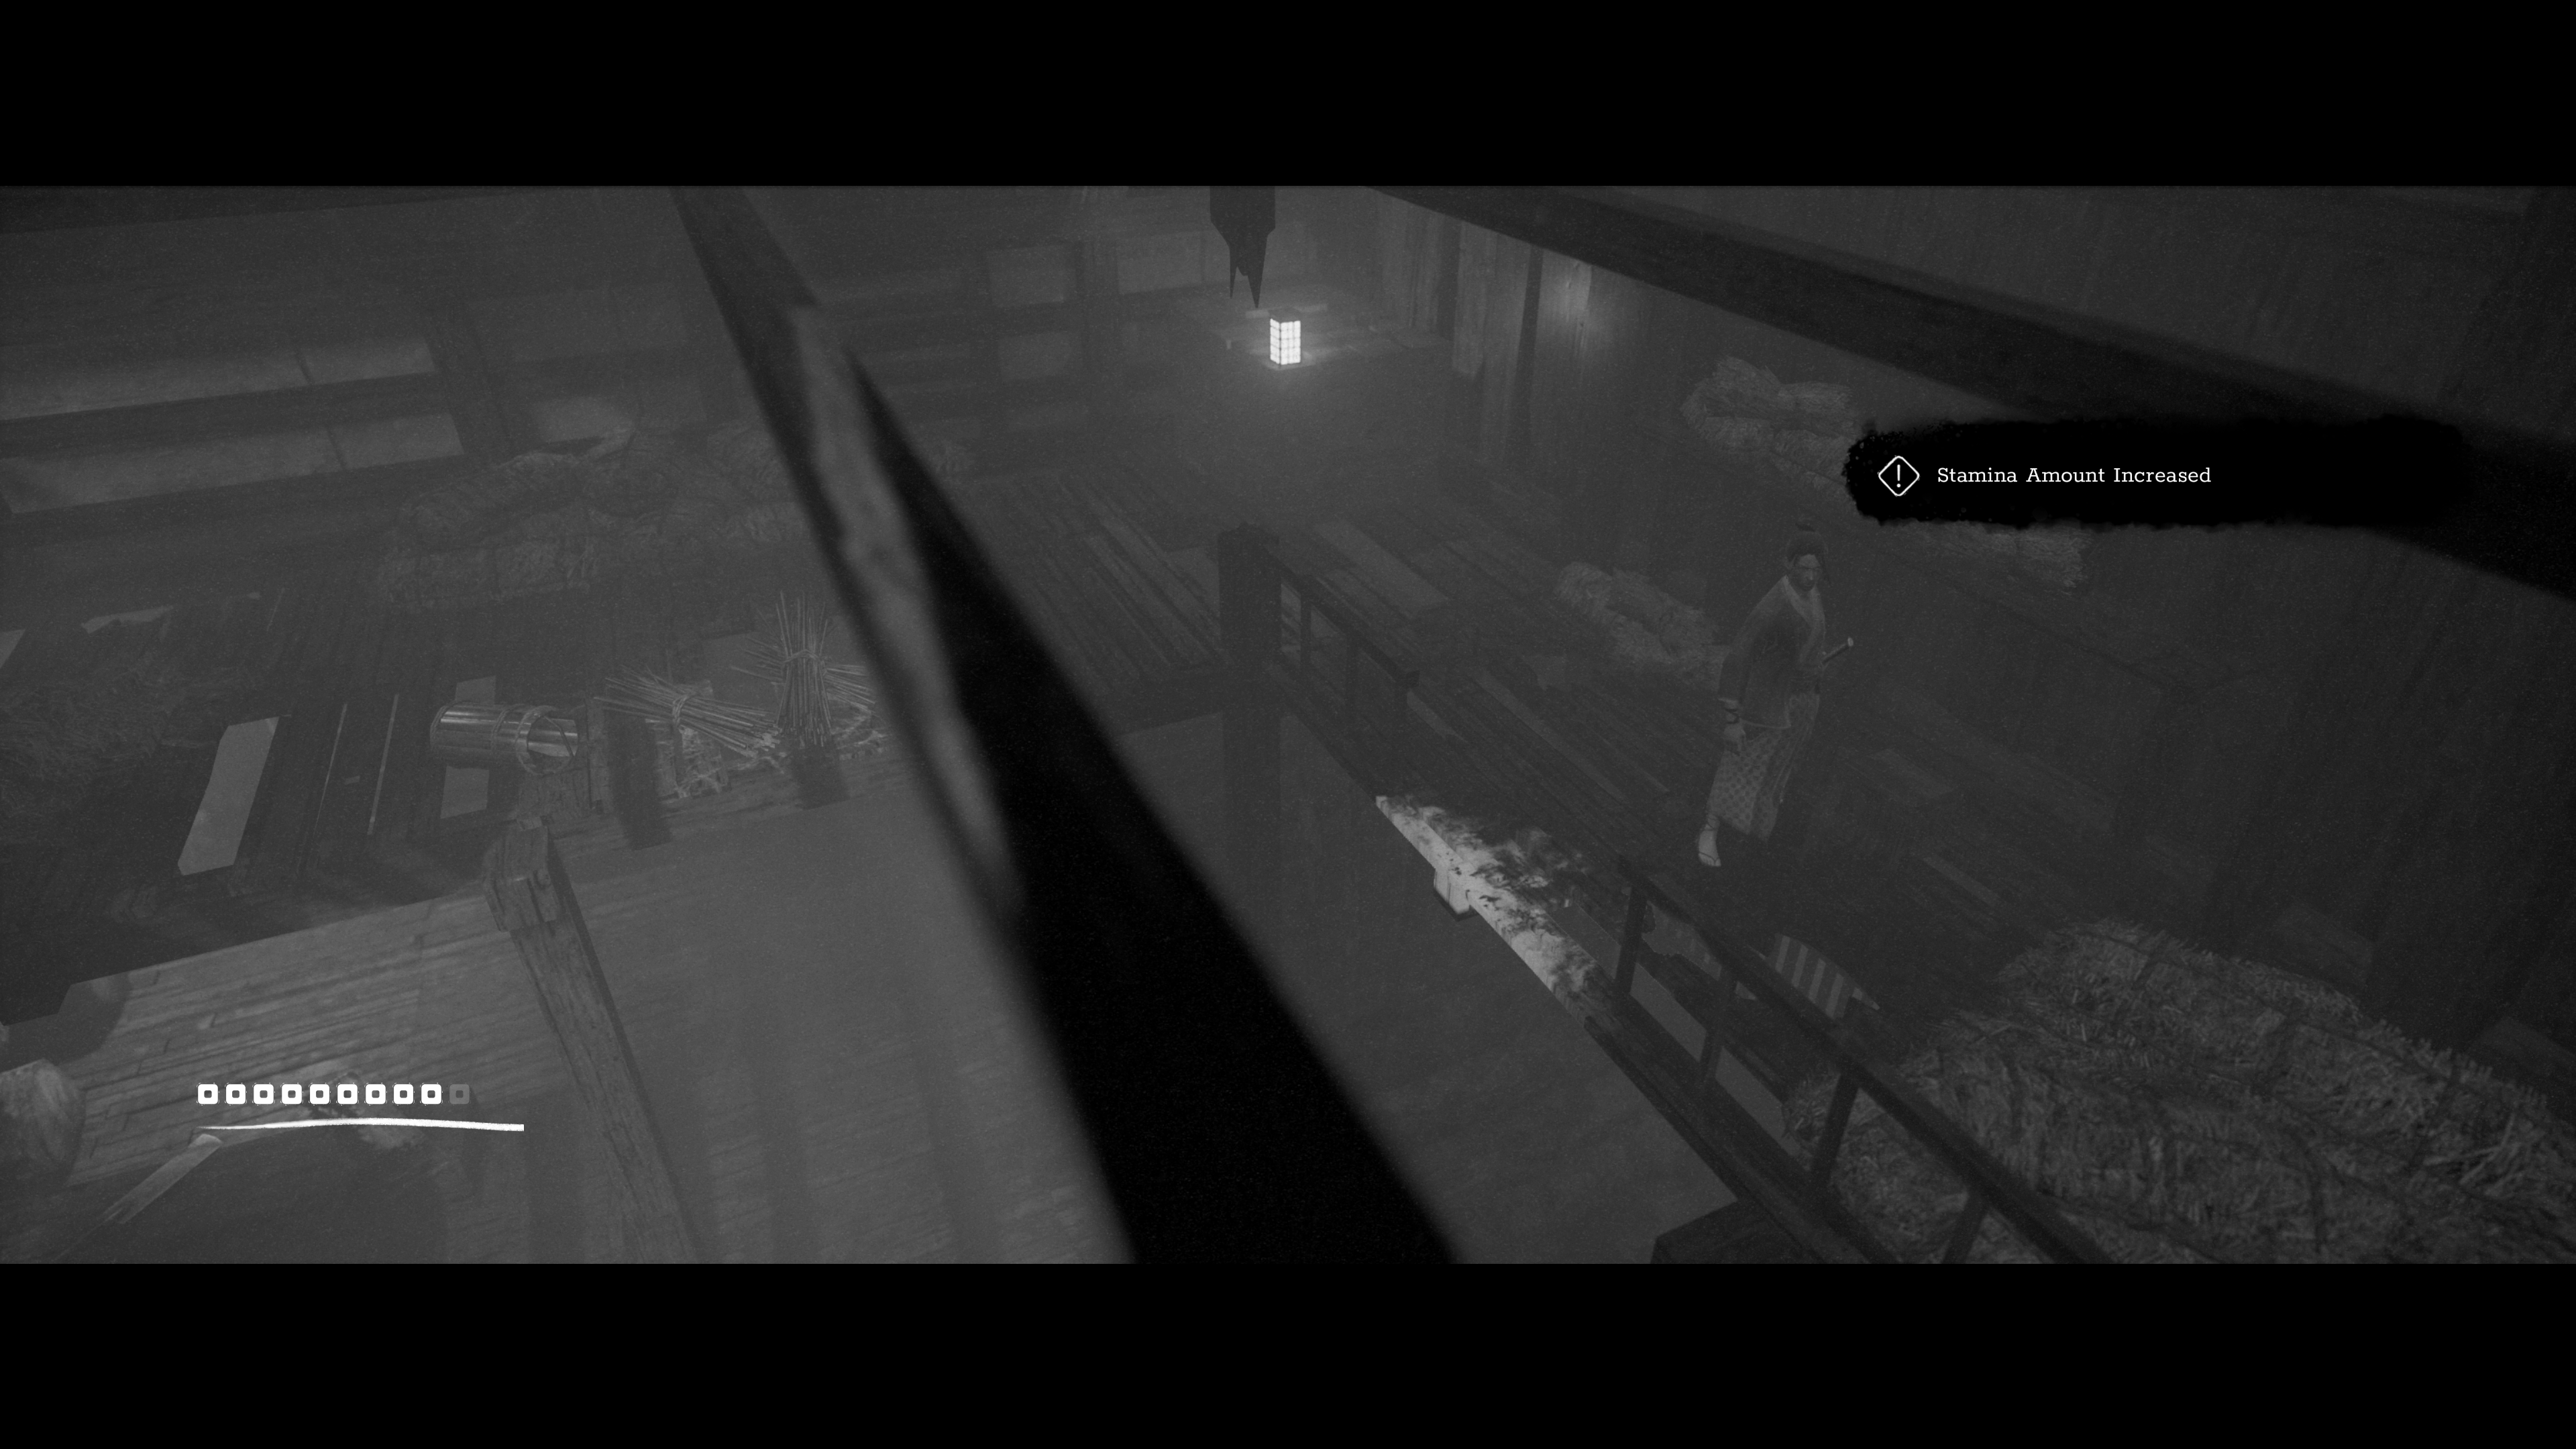
Stamina Upgrade 6 — Late in Chapter 2, you will encounter a villager on a dock who says, “I’m dying. Save yourself!” If you cross the dock to the right, you will continue the level. Instead, head in the opposite direction, and you will discover a hidden area with a Shrine and two buildings. Head to the building up the hill, furthest from the Shrine, and you will get a Stamina upgrade and a collectible. Don’t forget to check the other house for a useful skill before you leave the area.
Chapter 3 (4 Upgrades)
Stamina Upgrade 7 — After the first section where you are being attacked by bandits on horseback, you will come to the same crossroads where you picked up the second Stamina upgrade in Chapter 1. Pass the Shrine again into the graveyard. This time there will only be one screen (and thankfully no enemies), where you will find this one.
Stamina Upgrade 8 — Late in Chapter 3, you will enter a house with a ladder in the background of the first room. Before climbing, go right. The entrance to this room is slightly obscured but just make sure you are as far in the foreground as you can be before going to the right. You will see a glowing lamp and find this alongside a collectible.
Stamina Upgrade 9 — Not long after getting the one, you will reach a fork. If you take the upper path, you will be able to knock down a tree and flood the enemies waiting in your path. Climb down the ladder and finish off the last one before continuing across the now broken bridge. Find this one at the top of the stairs on the next screen.
Stamina Upgrade 10 — The final one of Chapter 3 is near a dead body before the final encounter. If you hit the cutscene for the “boss fight,” you’ve gone too far.
Chapter 4 (5 Upgrades)
Stamina Upgrade 11 — Early on in this chapter, you will fall from a tree branch bridge. The next Shrine is up a ledge in a clearing. From this Shrine, head inside the structure to the left. There will be a collectible here, so pick it up, but keep going to the left. Climb the hill to reach another fallen tree branch where this one awaits.
Stamina Upgrade 12 — Not long after the first upgrade, you will enter a barn-style house. Once inside, climb the ladder to find yourself face to face with a Blighted. Kill them, and make your way around the corner of the upper level to find another Stamina pickup. There is an opening in the railing you can use to return to ground level and continue.
Stamina Upgrade 13 — After the section that introduces the spider monsters hatching out of the tree eggs, you will climb a ledge and if you look closely, you can see a path heading into the foreground. Take the path up until you reach a Shrine. Proceed to the next screen, and you will see a gap with shiny goodies on the other side. Knock down the tree nearby to make a bridge.
Stamina Upgrade 14 — This one you can see from the critical path. Near the end of the chapter, you will head down a wooden slope that leads to a dock. Hiroki will call out for Aiko. From here, navigate to the object in the foreground at the front of the dock.
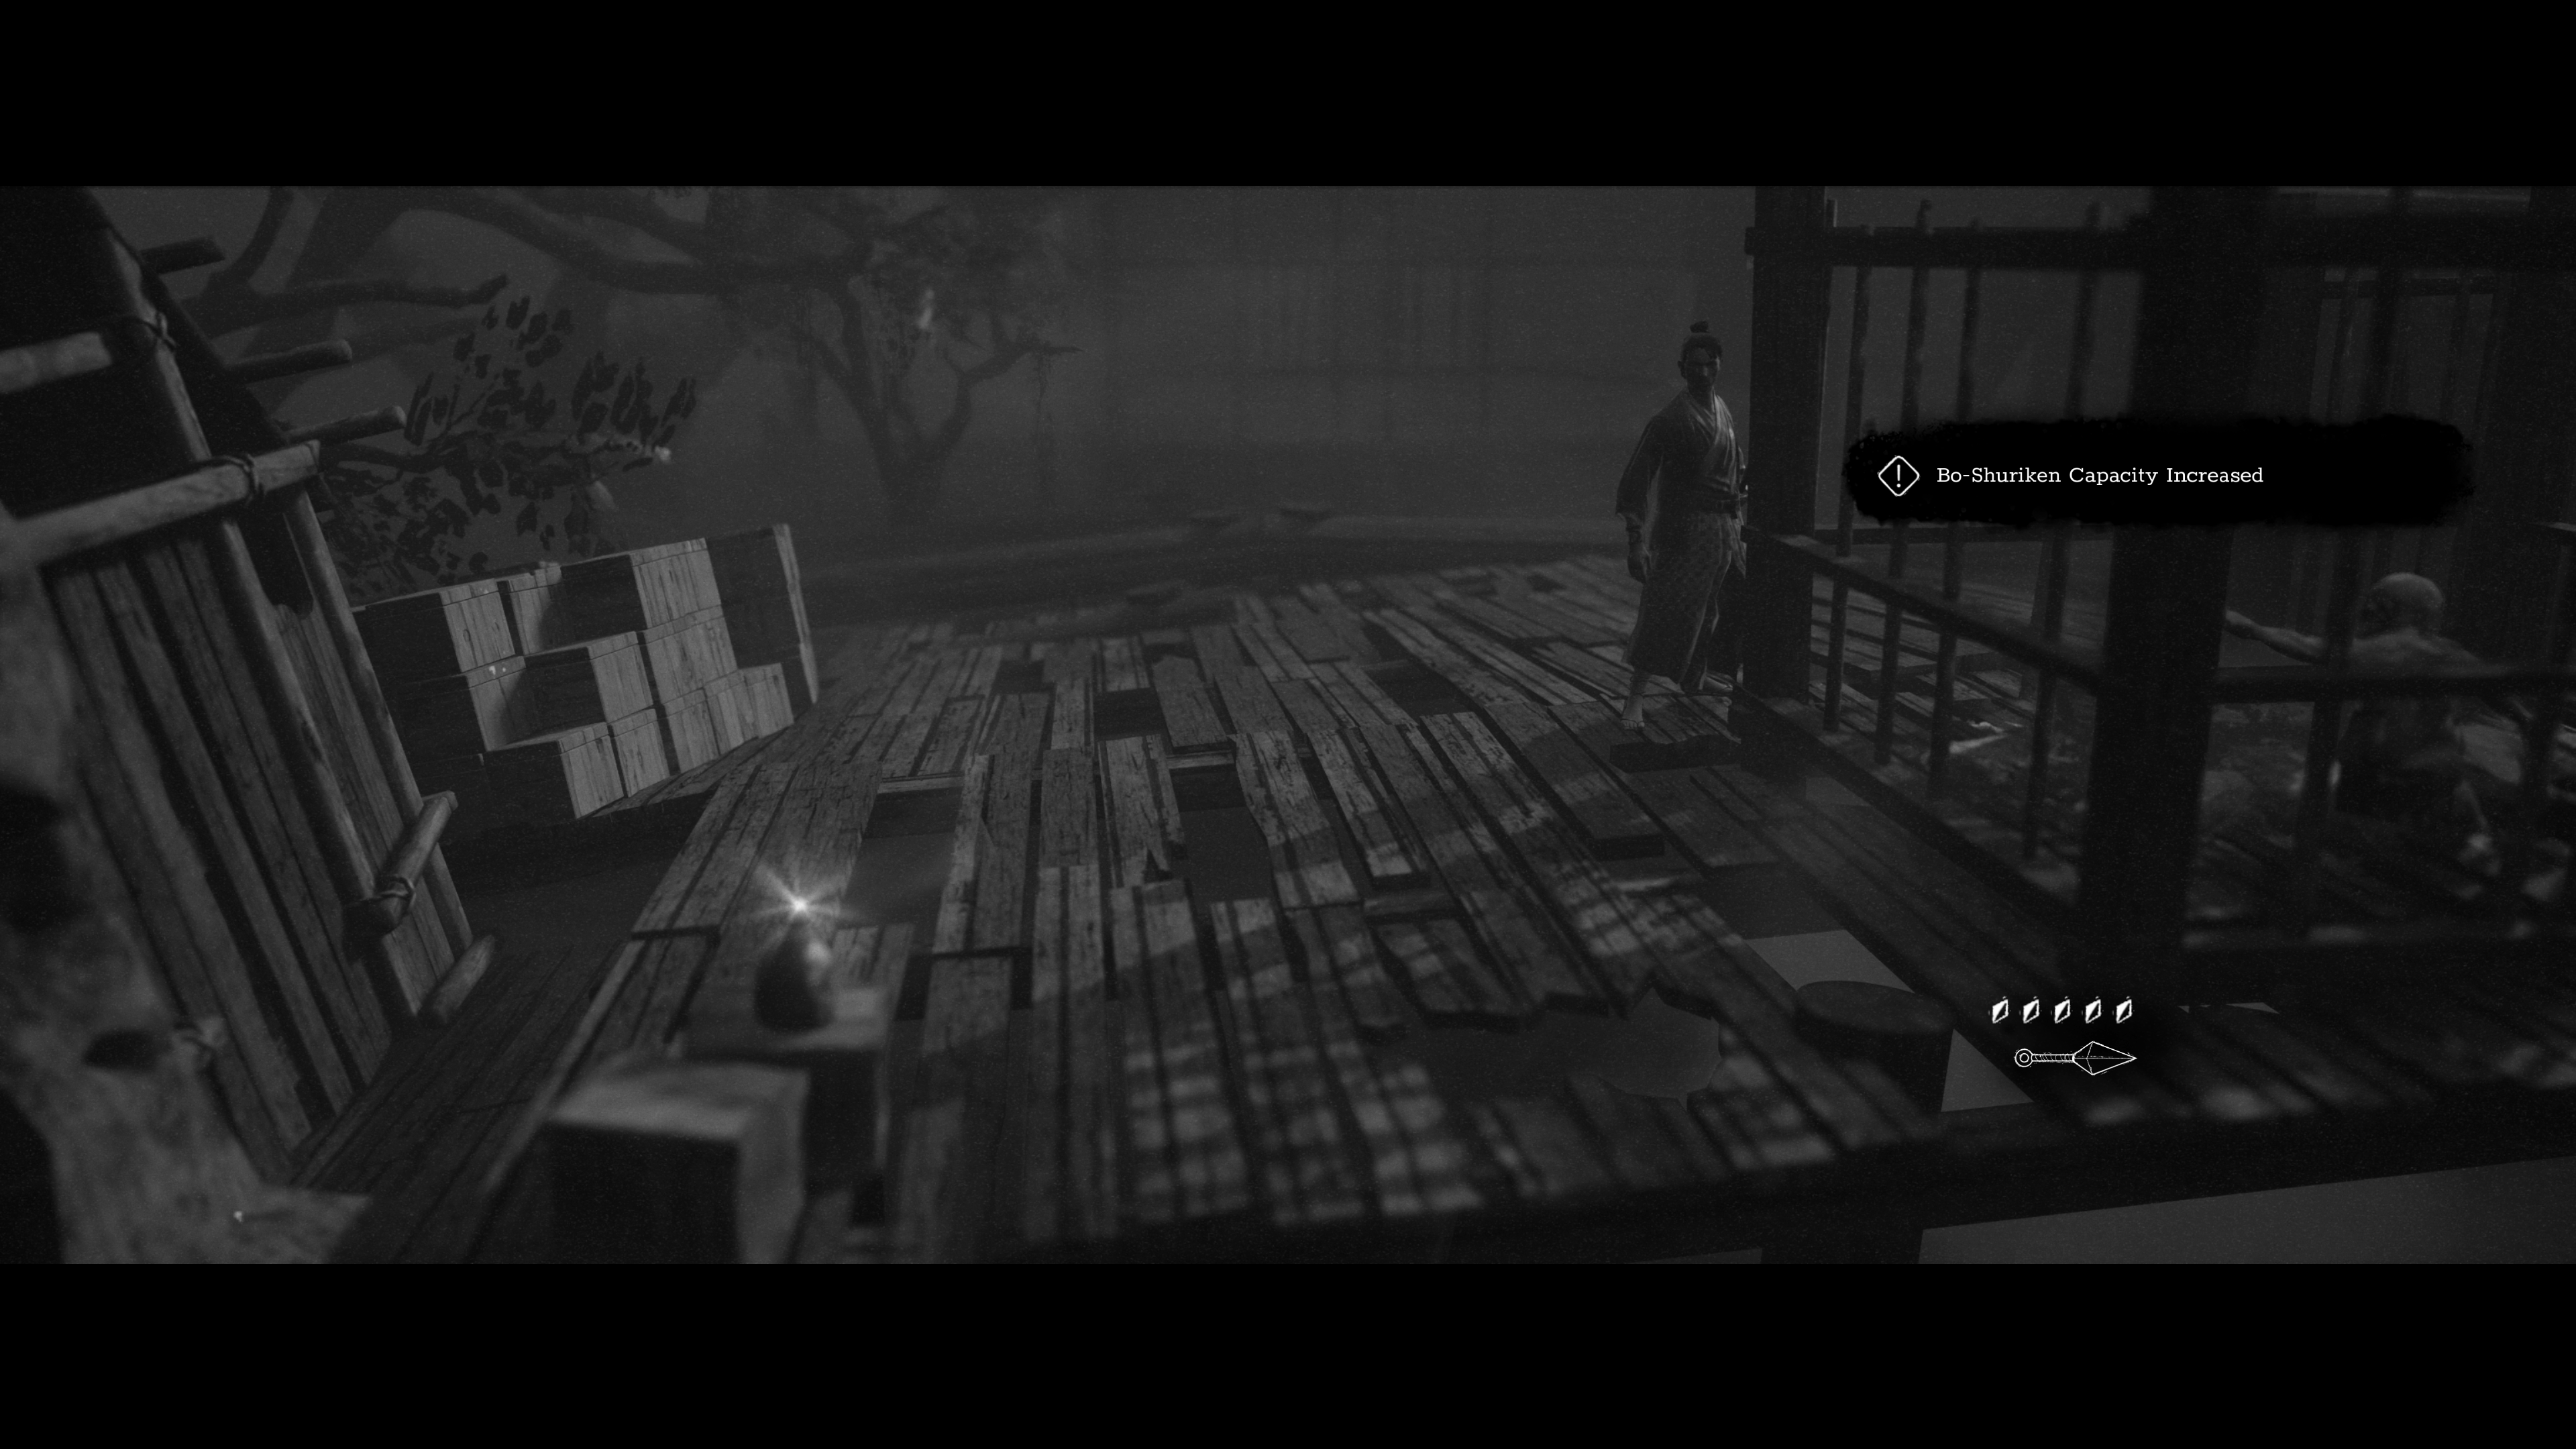
Stamina Upgrade 15 — After you acquire the Ozutsu in Chapter 4, you will fight your way through a swampy area. Beyond, you will find a section elevated above the water. There is a hidden path on the left side. Follow the path you find all the way to the end and around the caged Blighted for this one and Bo Shuriken increase.
Chapter 5 (3 Upgrades)
Stamina Upgrade 16 — This one is in the second puzzle area. There will be a statue on your right with a glowing kanji at its base. Walk past the statue to change the camera angle and show the hidden item.
Stamina Upgrade 17 — When you walk towards what appear to be gaps in the temple section, floor tiles will begin to appear under your feet. You will be standing on a platform with the choice to go right or left the first time this happens. Going right will continue the chapter, so go to the left to find a platform with this one waiting for you.
Stamina Upgrade 18 — At the end of the Chapter, you will begin slowly climbing a rocky path. Right after you begin this final ascent, you should see an archway in the distance. From this screen, go to your left to discover a hidden area with a Shrine and some more sweet Stamina juice.
Chapter 6 (2 Upgrades)
Stamina Upgrade 19 — After you obtain the ball of light that follows you and lets you use the teleport statues, you will wind up in an area with large tombstones in the background bearing Japanese kanji. Walk past them and climb the ledge, but don’t go in the cave ahead. Instead, walk to the shining object furthest in the foreground.
Stamina Upgrade 20 — Later in the level, you will be transported to a spirit version of your burning village. Right after you begin this section, you will find this one sitting on the main path.
Chapter 7 (1 Upgrade)
Stamina Upgrade 21 — This one will be sitting in plain sight right before the second to last Shrine. If you find yourself in the section where you are forced to break into a full on sprint to get out of the exploding village, reload your last checkpoint and walk backwards to get this pickup.
And those are all of the Stamina upgrade locations! To ensure you don’t miss anything else in Trek to Yomi, check out our lore collectible guide as well as our walkthrough on where to find all the health upgrades.


Published: May 6, 2022 11:00 am