Each level in Kirby and the Forgotten Land has three or four Hidden Missions, depending on whether it is a regular stage or boss stage. The second world of Everbay Coast has four stages and one boss stage, making for a grand total of 16 Hidden Missions to find.
If you are missing a few or just can’t nail down that tricky one, we have a step-by-step on how to complete all the Hidden Missions in Everbay Coast broken down level by level. If you are looking for all of the Waddle Dees not in Hidden Missions, head over here.
Use the links below to jump to each level:
All Hidden Missions in Everbay Coast’s Abandoned Beach
There are three Hidden Missions in Everbay Coast’s Abandoned Beach level.
Abandoned Beach Hidden Mission 1: Crack Open 3 Knock-Knock Nuts
Knock-Knock nuts require three kicks to crack open.
- The first Knock-Knock nut in Abandoned Beach can be found near a tree where you cross the water immediately after the level starts.
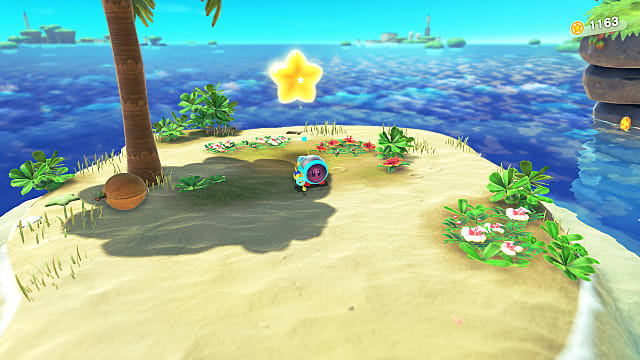
- The second Knock-Knock nut can be found on the island with the warp star at the end of the first area of the stage.
- The final Knock-Knock nut can be found in the area near the exit to the level. you’ll need to be on the boat as Ring Kirby. Navigate to the upper right-hand quadrant of the stage to find the last nut among the coins. Just be careful to avoid the whirlpools!
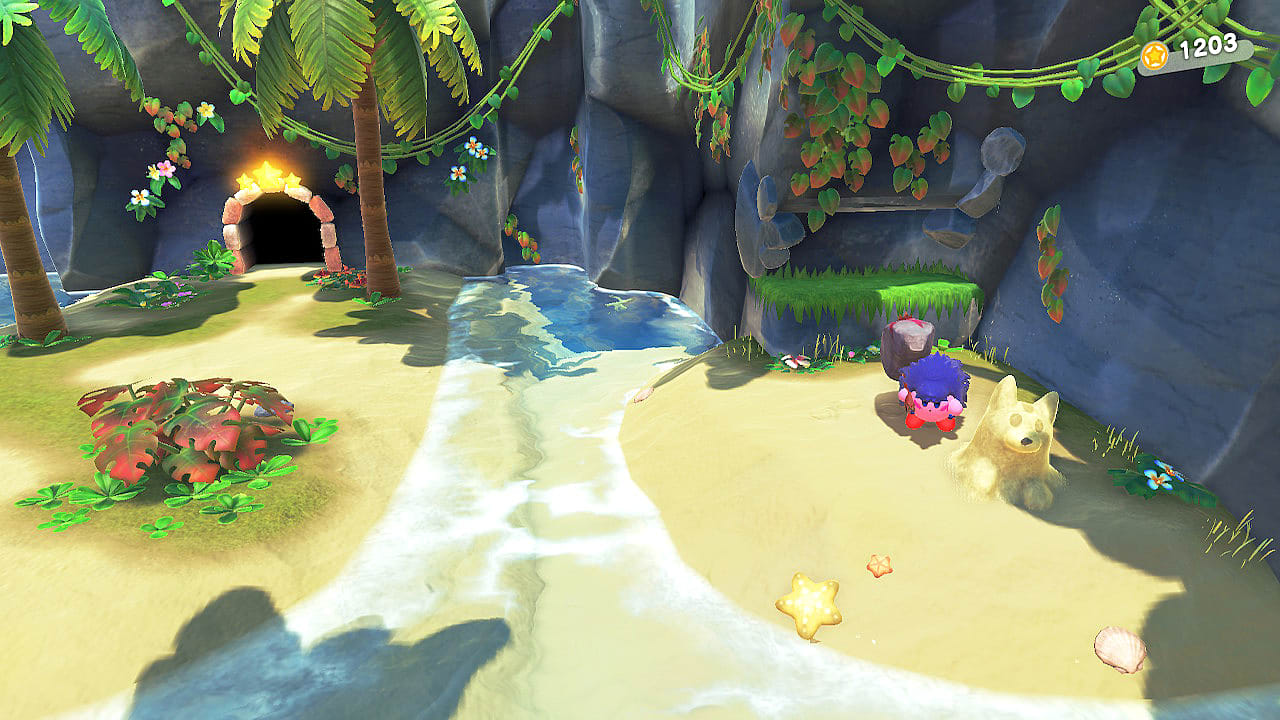
Abandoned Beach Hidden Mission 2: Destroy the Animal Sand Sculpture
At the end of the second section of Abandoned Beach, keep moving right past the door into the next part. There are boxes you can destroy for coins in the wall, but beside them in the sand is a sculpture of a dog. Make it crumble to complete the mission.
Abandoned Beach Hidden Mission 3: Complete the Sign on the Roof
Late in the level, you’ll pass through a dilapidated sign with a letter missing to get to a Ring Mouthful Mode opportunity. Inhale the ring and move back to where you saw the sign earlier. Complete the word to check off this Hidden Mission.
All Hidden Missions in Everbay Coast’s Concrete Isles
There are three Hidden Missions in Everbay Coast’s Concrete Isles level.
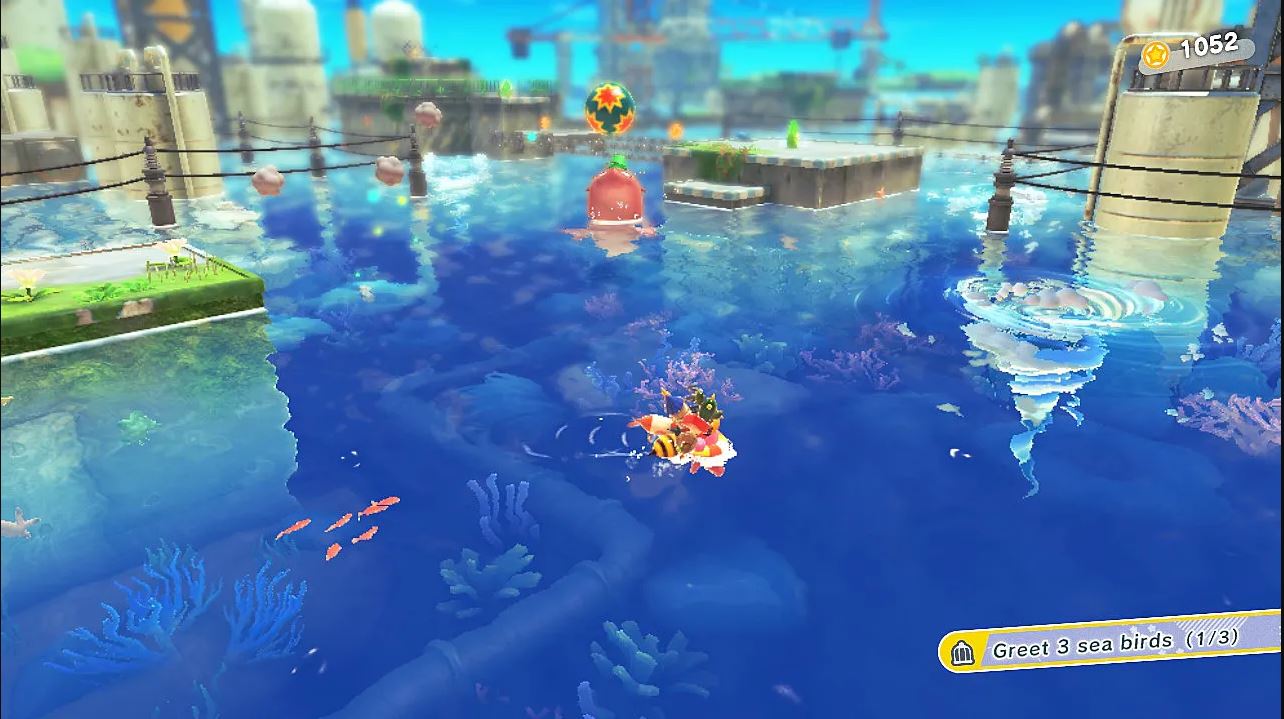
Concrete Isles Hidden Mission 1: Greet 3 Sea Birds
To greet the Sea Birds, you simply have to find them in the level and walk up to them.
- The first Sea Bird can be found shortly after you begin Concrete Isles, sitting in the water just to the right of the second floating platform.
- Sea Bird 2 can be found right before the Orange Star Bit section that gets you a Hidden Waddle Dee. When you see the first Orange Star Bit, turn right into the water to see the bird near an enemy.
- The third Sea Bird is at the very end of the level’s first half. you’ll find it sitting at the base of the structure that holds the Warp Star you’ll be riding to progress.
Concrete Isles Hidden Mission 2: Make Landfall on the Isle of Treasure
After the first section of the level with the drill, where you are collecting Orange Star Bits, you’ll see the Warp Star off in the distance. Head in that direction, but instead going to it, follow the power lines. you’ll find a hole where you can swim out to an island that looks like it’s in the background, but in actuality, that’s where you go for this Hidden Mission.
Concrete Isles Hidden Mission 3: Dig Up a Maxim Tomato
Make sure you keep your Drill Copy Ability until the end of Concrete Isles so you can complete the final Hidden Mission. In the final walkway before the end of Concrete Isles, you’ll need to dig to avoid the volleys from six cannons. Doing so will also dig up a Maxim Tomato, completing this Hidden Mission and refilling your health.
All Hidden Missions in Scale the Cement Summit
There are three Hidden Missions in Everbay Coast’s Scale the Cement Summit level.
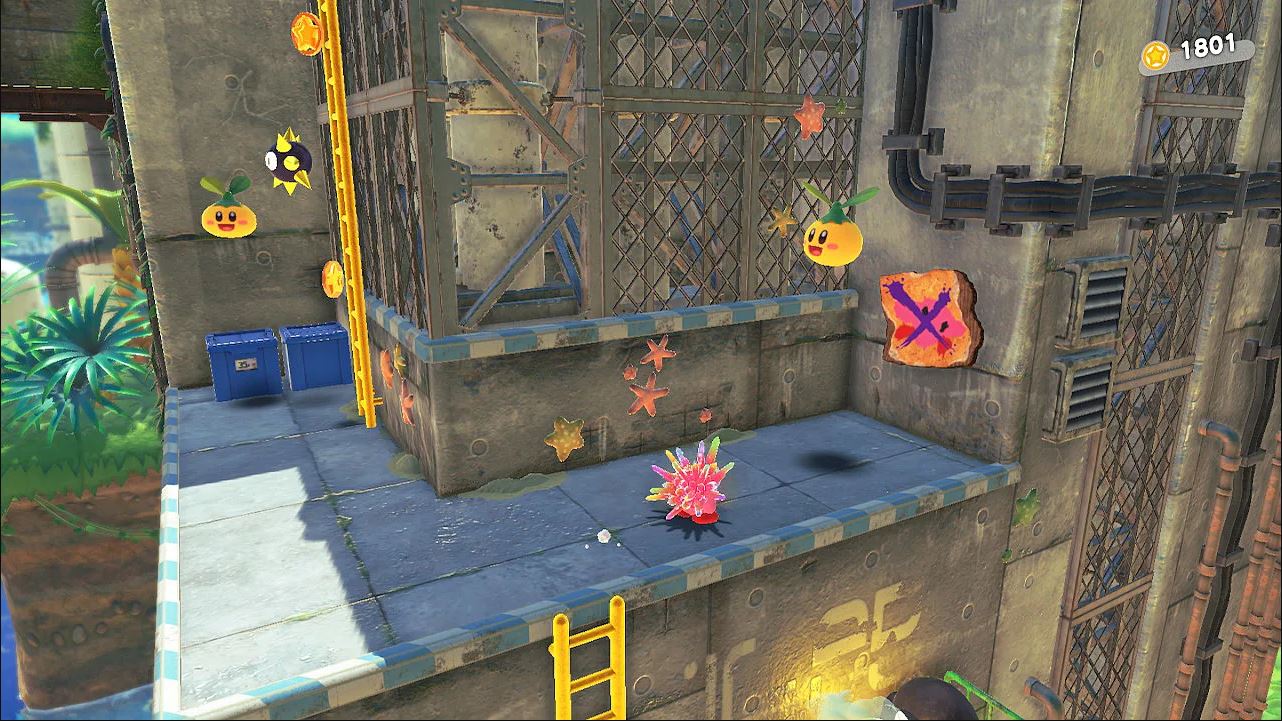
Scale the Cement Summit Hidden Mission 1: Remove 3 Wanted Posters
Removing Wanted Posters is one of the most common objectives in Kirby and the Forgotten Land, and this is the first time you run into it.
- The first poster Scale the Cement Summit can be found right at the start. Climb up two ladders, and it will be on the right wall. Attack it to remove the pesky thing.
- After the mini-boss fight, you’ll come across a challenge room that will earn you a Waddle Dee for successfully completing in time. Near the back exit of this area, a wanted poster is hanging near a small pool of water.
- Following the gliding section at the end of the level, do not immediately finish. First, turn to your right to see an alcove where the final wanted poster is hiding.
Scale the Cement Summit Hidden Mission 2: Freeze Fleurina with an Ice Ability
Before you fight Fleurina, the mini-boss in Scale the Cement Summit, you can choose an ability. To complete this Hidden Mission, choose ice and make sure to keep on the offensive. Do enough damage to Fleurina in a short span of time and she will freeze up, taking loads more damage and unlocking this Hidden Mission.
Scale the Cement Summit Hidden Mission 3: Avoid the Spikes in the Secret Room
If you can find the Hidden Waddle Dee secret room in Scale the Cement Summit, you’ll see you need the Tornado ability to complete the puzzle. Three red switches are positioned among a large section of spikes on the ground. The only way to hit all of the buttons without taking damage is by holding forward and the attack button while Kirby is a Tornado to dash through the area without hitting the spikes.
All Hidden Missions in Fast-Flowing Waterworks
There are three Hidden Missions in Everbay Coast’s Fast-Flowing Waterworks level.
Fast-Flowing Waterworks Hidden Mission 1: Eat 3 Tins of Fish
- After you go down the river at the level’s start, you’ll come to a platform with some lockers and the door to the next area. Find the glowing spot on top of the lockers to get the first Tin of Fish to spawn. It will restore some of Kirby’s health too!
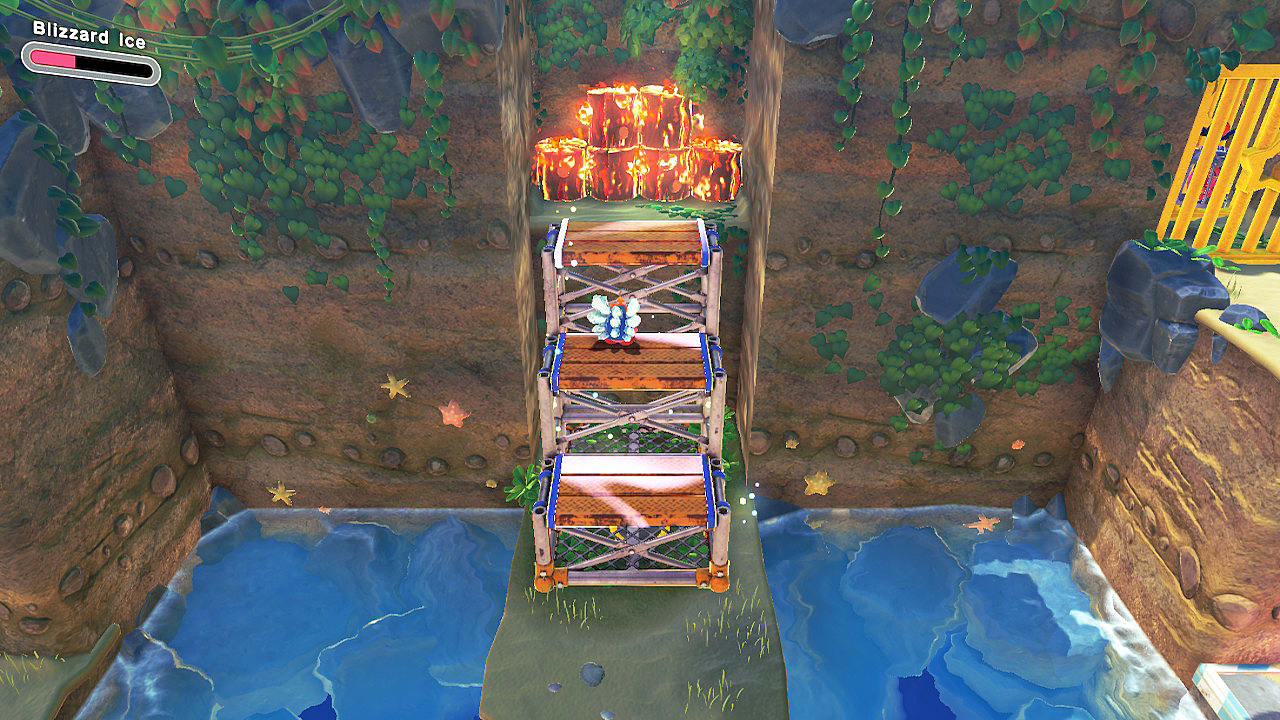
- The second Tin of Fish in the staircase puzzle room. You’ll first need the Ice ability. There are plenty of snowmen around to copy, so don’t fret about it. There is a staircase leading up to a stack of flaming logs in the middle island near the Balloon-Meister seal. Ice them out, and you’ll find a Fish Tin hidden behind it.
- The third Tin of Fish can be found in the final area of Fast-Flowing Waterworks. you’ll see the tuna in the first whirlpool you come across. Grab it, but be sure not to get sucked in.
Fast-Flowing Waterworks Hidden Mission 2: Win the battle without falling into the water
You’ll be trapped in a combat arena while standing on a bridge above a pool of water early in Fast-Flowing Waterworks. Use the Bomb or Ranger ability to get the enemies that stay in the water. Using a ranged ability, you can take as much damage as you need, just make sure you stay on the bridge until you complete all four waves of the encounter.
Fast-Flowing Waterworks Hidden Mission 3: Find the Golden Fish
In the area where you are moving the staircases, go to the middle island with a staircase leading to a Big Kabu at the top. From here, look in the water to your left to see the Golden Fish. Jump in to complete the Hidden Mission.
All Hidden Missions in The Tropical Terror
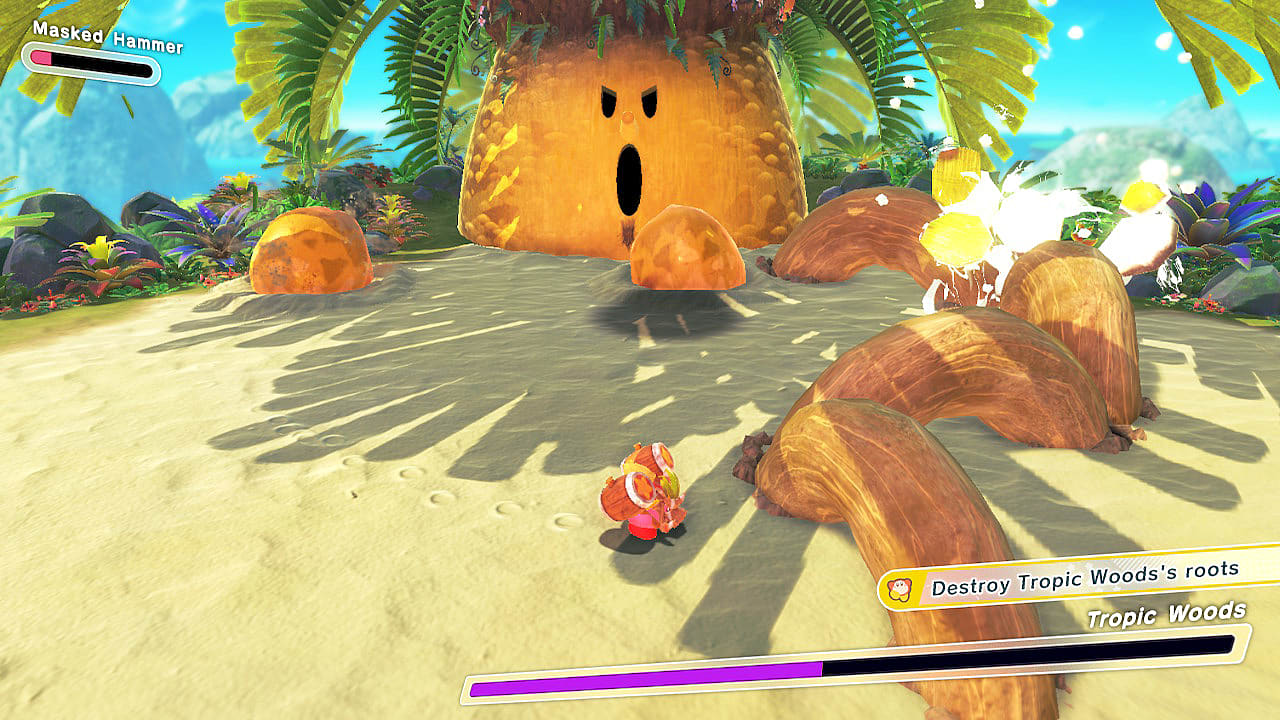
Like in Natural Plains, all of the Hidden Missions for Tropical Terror are completed during the boss fight, and it is likely you’ll have to take down Tropic Woods more than once to get them all. To complete all four Hidden Missions in this level:
- Destroy Tropic Woods’s roots.
- Clear without using a Copy Ability.
- Clear within 2:00.
- Clear without taking any damage.
The first Hidden Mission refers to the second stage of the Tropic Woods boss fight. In this part, the boss will grow roots to protect himself and damage Kirby. Normally, we wouldn’t advise trying to take them down, especially since they will damage you if you get too close, but you must destroy a set of three roots for this Hidden Mission.
The second Hidden Mission is a throwback to classic Kirby. All bosses allow this by dropping stars that can be inhaled and shot back at the boss. Use these drops to get the best of Tropic Woods without even needing to use an ability.
Thoe bottom two are pretty standard in Kirby and the Forgotten Land boss stages and as always, we recommend coming back to this fight later with stronger Copy Abilities to finish the fight quicker and from a greater range.
And those are all of the Hidden Missions in Everbay Coast. If you failed to uncover a Hidden Mission in Natural Plains, check out our Hidden Missions guide for the first world. For any other tips on Kirby and the Forgotten Land, head on over to our Forgotten Land guides page.


Published: Apr 1, 2022 10:47 am