
One of the shardbearing demigod bosses you’ll fight in Elden Ring is Starscourge Radahn, and it’s liable to be a fight to remember. Once the mightiest demigod of all, he’s now a shell of his former self, eaten alive from inside by the scarlet rot of his demigod fellow Malenia. If you’re here, you’re wondering how to beat Starscourge Radahn in Caelid.
Unlike Godrick and Margit, Starscourge Radahn’s fight takes place across three phases, each building on the challenge of the last. Godrick is child’s play compared to this fight, from attack damage to speed, scale, and variety.
We’ve cataloged every move Starscourge Radahn makes in this Elden Ring boss guide, so you’ll have an edge before you even step onto the field. Bear in mind that each successive phase uses all the attacks from previous phases, so we don’t list every attack in every section for the sake of space.
How to Beat Starscourge Radahn in Elden Ring
The first thing you’ll notice when you enter Starscourge Radahn’s arena is the summon signs littering the area where you spawn. These are the various NPCs who’ll either invade you or are part of important questlines, including Blaidd the Half-Wolf and Iron Fist Alexander.
Summoning any of them makes the fight a little easier, as none of them will raise Starscourge Radahn’s health like a standard player cooperator would. You are within your rights to fight Starscourge Radahn head-on without the help, but the encounter is much more cinematic, and more approachable, with help.
Pre-Phase One Attacks
This portion of the fight all but requires your horse, Torrent, as there’s too much ground to cover otherwise. Only use him after Starscourge Radahn stops firing Gravity Arrows. They move too fast and track too well to be on horseback.
Attack 1: Gravity Arrow
Starscourge Radahn’s first attack every time, he’ll charge up a large ball of purple gravity energy into his greatbow then fire it at high speed in your direction. This attack and the other two ranged attacks he uses in this preliminary phase never target your summons. There also isn’t enough cover to reach Starscourge Radahn. You’ll have to dodge it, which you’ll do about a second before the bolt reaches you.
Attack 2: Falling Arrows
After you go beyond Iron Fist Alexander’s summon sign, Starscourge Radahn will aim at the sky, raining down a wide line of greatarrows. These will reach across the field and track you for their entire 15- to 20-second duration. You’ll need to get on Torrent as soon as this attack starts to wind up. If you don’t, there’s no good way to avoid a hail of tree-sized arrows from making you Swiss cheese.
Attack 3: Arrow Blast
Starscourge Radahn uses this attack following the Falling Arrows. It’s a shotgun blast of greatarrows with an opening either to the left or the right, notable by how Starscourge Radahn winds up the attack. As soon as you’re close enough to lock onto him, do so and ride to avoid the blast. He might not give you the best opening to easily avoid an Arrow Blast, but you’ll have to make do.
Starscourge Radahn Phase One Attacks
Phase one is the simplest portion of the Starscourge Radahn boss fight. It’s also the best place to learn attack timings, as they do not differ across the remaining phases.
Attack 1: Seven Swing Slash
Starscourge Radahn’s opener once you get close, he’ll make a big show of winding up his swords, then spin around four times, swinging a total of seven. His first swing hits once; the rest are two-hit strings with different timings for each set. Ideally, you’ll roll directly into him just before the first hit would connect, but know that because Starscourge Radahn is also in motion during each successive attack, you’ll have to adjust on the fly to his new position.
Attack 2: Minor Gravity Slam
With this attack, Starscourge Radahn briefly charges his swords with purple gravity energy then slams them into the ground. Starscourge Radahn stays relatively still during both the windup and the slam, and the attack doesn’t have much tracking, but there is a significant AoE you’ll need to avoid.
Attack 3: Jumping Slam
Usually used as a combo ender, Starscourge Radahn finishes his usual set of slashes, then jumps into the air and slams both swords down directly in front of him. There’s some nasty tracking on this attack, so rolling or strafing it requires near-perfect timing; else, you will get hit and lose around half your health or more.
Attack 4: Riding Slashes
Starscourge Radahn will ride away on his horse and spread his arms wide, making a large circle before turning back toward you and slashing three times as he rides around your position. The three hits are a true combo, which means if you’re hit by one, you’ll be hit by them all, and this attack does enough damage to kill almost anything in one series, so avoid it by dodging toward and to the right of each successive swing.
Attack 5: Leg Sweep
One of Starscourge Radahn’s standard slashes, used primarily when you’re at his feet. Starscourge Radahn will stomp one of his footless stumps, then sweep the ground to his side. It’s one of his weaker attacks due to being a pure punishment move, but he’s usually quick to follow it up with a combo of other standard single slashes, so avoid it by dodging further behind him.
Attack 6: Charing Slam
Starscourge Radahn will ride away again, but this time he’ll turn around and place his swords in an X shape in front of him and charge directly at you. When Starscourge Radahn gets within five meters, he jumps into the air and slams down atop you. As with his other slams in phase one, dodging this is easy: roll directly at him about a half-second before the attack lands.
Starscourge Radahn Phase Two Attacks
At about ⅔ health, Starscourge Radahn will raise both of his axes in the air, charge them with gravity energy, and slam them into the sand. He then pulls the swords out of the sand, now magnetically attached in chunks to the blade. Every part of this transition attack deals damage, from the slam to the pull and the shockwave afterward. Get away when you see Starscourge Radahn start the animation. It will kill you.
Attack 1: Large Gravity Pull
One of Starscourge Radahn’s fastest attacks, he briefly pulls his arms around himself, then raises them to the sky in a V. At the same time, an enormous sphere of gravity energy erupts around Starscourge Radahn, dealing minor damage and pulling you very close. He’ll almost always start a combo shortly after the pull, so start dodging immediately.
Attack 2: Gravity Wave
Starscourge Radahn again buries his blades in the sand then thrusts them outward in your direction. A great wave of gravity energy comes from the sand that covers a wide area. Torrent can technically jump over the wave, and you can dodge through it as well, but the hitbox is deceivingly large, so you have to roll through it in the split-second before it connects, or you’ll be taking pain.
Attack 3: Gravity Slam and Shockwave
Starscourge Radahn raises his swords into the air in this attack and slams them down. Like the phase one version, there’s an AoE shockwave when the slam occurs, but this time it’s empowered by gravity energy, making it both visible and significantly larger. The dodge timing is the same, but rolling backward will only get you hit by this one.
Starscourge Radahn Phase Three Attacks
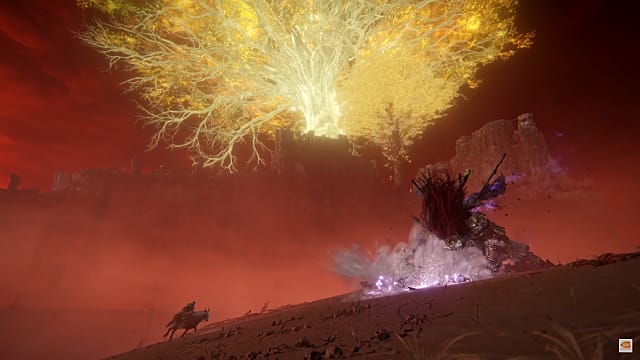
Attack 1: Meteor Strike
At 50% health, Starscourge Radahn will stop whatever he’s doing, wrap his arms and swords around himself, and launch in the sky like a rocket. Starscourge Radahn will go so far into the air that the boss music will stop until all you can hear is the roar of something immense coming from somewhere. Turn to the direction of the sound to see a literal meteor hurtling toward the battlefield. If he hits you, you will die. Hop on Torrent and run perpendicular to his entrance vector, or he’ll turn you into paste.
Attack 2: Gravity Orbs
After waving his swords like a pair of wands, Starscourge Radahn summons eight orbs of gravity energy and tosses them after you. Being clipped by one of them will stop you in your tracks but won’t deal much damage. Taking three will do most of your health. More will kill you. Dodge directly to the right or left, probably several times, to avoid this attack.
Attack 3: Meteorite Arc
Shortly after entering Phase 3, Starscourge Radahn will summon four large meteorites covered in gravity energy in a semi-circle above his head. They won’t do anything for some time, and if you’re quick about it, you can kill him before he launches them your way. If Starscourge Radahn gets a chance to actually use the meteorites, which he’ll do by waving one of his swords like a wand, they’ll quickly fly at and track you, with a high probability that just one connecting will kill you in one hit. You can avoid them all by hopping on Torrent and riding to the left or right.
All the above encompass every notable attack in Starscourge Radahn’s arsenal. Always remember that he’s got a lot of health, does even more damage, and is incredibly mobile despite his massive size.
And that’s how you beat the Starscourge Radahn boss fight in Elden Ring. Our Flask of Wondrous Physick guide will give you plenty of ways to apply powerful buffs that can be a great help to any fight, Starscourge Radahn included. Our Elden Ring guides hub always has more, including other boss guides and questline walkthroughs, like Hyetta’s, so check it out.


Published: Mar 5, 2022 12:58 am