For a game so simple, there’s a lot to know to survive and thrive through the company’s profit quota cycles. In this Lethal Company beginner’s guide, I’ll go into how to set your team up properly, what you should get early, monsters, and a whole huge list of tips and tricks.
The Lethal Company Beginner’s Guide You Wish You Had the First Time You Launched the Game
Long header, right? But I’m not lying — unless you just launched the game and found your way here. Then, welcome! Lethal Company is a hard game, but it’s a game where knowledge is power. You can’t ever guarantee you and your crew will make it through a scrap expedition, but you can increase your chances by being aware of the game’s mechanics and threats.
First, I’ll go over the basic method of play for most crews. Then we’ll touch on what the items and ships upgrades do, as well as a partial bestiary with tips on how to survive and how to kill some of them. Near the end will be a pretty long list of Lethal Company tips and tricks, because I just can’t help myself. I’m providing links to each section to make it easier to get around. Parts three and four are very long, but you don’t want to miss them.
- Part One: Using Crew Roles for Success
- Part Two: Which Ship Upgrades and Items Should You Get First?
- Part Three: Entities to Watch Out for Indoors and Outside
- Part Four: Lethal Company Tips and Tricks
Lethal Company Beginner’s Guide Part One: Crew Roles
I know you’ve seen streamers and their friends all go into the building at once, but have you considered not doing that? Because you should. At least if you have some Walki-talkies. This counts even if you only have two people on your crew: one of you should stay back, and one should go in.

To optimize your chances of survival, you should try to have one crew member stay on the ship to watch the monitor. Like some other games (Phasmophobia, I’m looking at you), it’s possible to have one player stay back to monitor the others. Unlike some others, though, the person staying back on the ship can directly monitor each player’s position in the building and can actually help them.
Using Roles Helps
My groups run with three pseudo-roles:
- Operator: The person watching the monitor and communicating via comms.
- Hauler: The person carrying scrap from the entrance to the building to the ship.
- Delver(s): The person or two actively exploring the facility and finding scrap.
This way, your group has all their bases covered. The person on the ship tells the others where to go, the person hauling makes sure the group’s efforts aren’t wasted, and the person or two exploring can find scrap without worrying too much about monsters.
What Can the Person on the Ship Do?
In case you or a bud (or buds) need some convincing, here’s what the person who stays behind is able to do:
- Watch each player in the building and alert them about nearby monsters.
- Tell the other players where nearby scrap is.
- Close doors with the Terminal.
- Disable Turrets and Landmines using the Terminal.
- Use the Teleporter to bring back crew members in danger.
- Use the Loud Horn to try to lead other players back to the ship or distract Eyeless Dogs (risky).
- Direct the crew back to the ship and around entities roaming the moon.
These are all massive boons to any crew, but it’s not without its risks. Eyeless Dogs and other entities roam the moons you explore, so the person on the ship needs to make sure to check their own surroundings using the monitor and keep a keen ear open.
All of these are amazing reasons to separate your crew based on roles. You don’t need two people staying on the ship, you don’t need the whole group roaming the halls of these facilities. You need scrap, and the best way to get it is to run a tight operation.

Lethal Company Beginner’s Guide Part Two: Your First Ship Upgrades and Items
Not all upgrades and items are equal in Lethal Company. That’s a lesson best learned the easy way (by reading this guide), but it’s kind of fun to learn them the hard way, too. I’m not going to go too in-depth here on the items, but there are some pieces of advice I’d like to give.
What Should You Buy to Start?
Before you land on your first moon, your crew should order some items for delivery. You can order items using the Terminal, and start with 60 credits to spend. For a three or four-man crew, I recommend two Flashlights and two Walkie-talkies. This way, two people indoors get a Flashlight, and there’s communication between inside and outside the ship. In the case of two-man crews, you might want to get two Walkie-talkies, a Flashlight, and a Shovel to start.
What Weapons are Available in Lethal Company?
You’re not going to do a lot of monster killing in Lethal Company, but there are a few you can brutally beat to death in the name of profit and camaraderie. The only two weapons you can buy are the:
- Shovel — Can be used to pummel and kill some monsters.
- Zap Gun — Stuns enemies but can’t kill them.
- Stun Grenade — Stuns enemies as well but can’t kill them.
There are two more you can find while scavenging, though both work identically to the shovel:
- Stop Sign
- Yield Sign
Killing the entities that can be killed is no easy task, but we’ll go more into that in a later section.
Which Ship Upgrade Should You Get First?
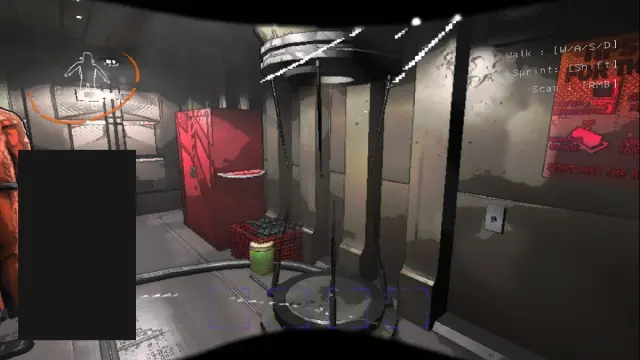
Easily, the Teleporter. But don’t be surprised that it doesn’t work the way you imagined. The Lethal Company Teleporter can be useful for saving your crew mates, but they won’t bring anything back with them when teleported. This means you can’t send someone into the building to get their fill of scrap and then teleport them back for free loot.
Related: What Does “Most Paranoid Employee” Mean?
Lethal Company Beginner’s Guide Part Three: Partial Entity Bestiary
There are monsters indoors and outdoors alike, some more prevalent than others. Two particular entities won’t even spawn until you’re roaming on the expensive, high-hazard moons, so don’t worry about those yet. Do worry about the ones I’m about to go over, even at low hazard levels. This is not a full list of all Lethal Company monsters, but it is most of them. There’s no fun in spoiling everything in a beginner’s guide.
Indoor Entities to Watch Out For
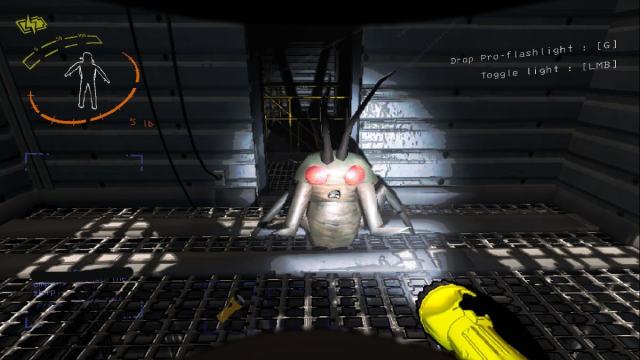
- Hoarding Bugs — These fat little skitterers aren’t too much to worry about. They do steal your scrap, though, and fiercely protect their hoards.
- These entities become aggressive when you steal their scrap, have scrap they want, or if you square up with them when they have their little arms up. They can be easily beaten to death.

- Hydroderes — These slimes meander their way through the building. Stepping directly into them means death, but you can hop over them or use railings to get around them pretty easily.
- These entities can’t be killed, but they can be lured and locked into a room using a Boombox.

- Spore Lizards — These farting lizard entities aren’t much to worry about. They look scarier than they actually are! When cornered, they may bite and release a purple cloud of gas that messes with your vision.
- I’m not sure whether Spore Lizards can be killed; these ones are so innocuous that I’ve never had to bother.
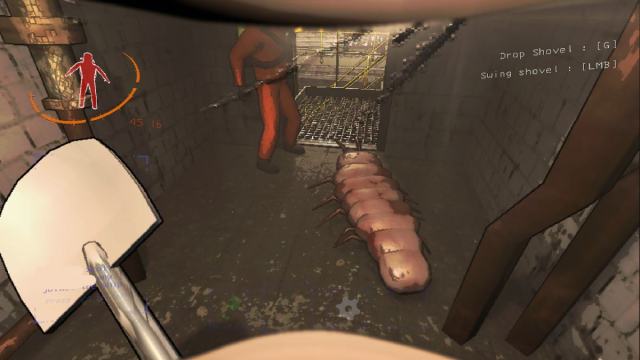
- Snare Fleas — Also known as “head crabs” or by many other names, these annoying little buggers hang from the ceiling in wait. When someone walks under a Snare Flea, it falls onto their head and suffocates them to death.
- You’ll want to monitor the ceiling to avoid these entities. If one lands on a crewmate’s head, you can hit a Snare Flea with a Shovel, Stop Sign, or Yield Sign to knock it off. Then you can chase it and kill it.
- If you can run outside when a Snare Flea gets you, it will die as soon as it gets there. It will also die if the afflicted player is teleported out.
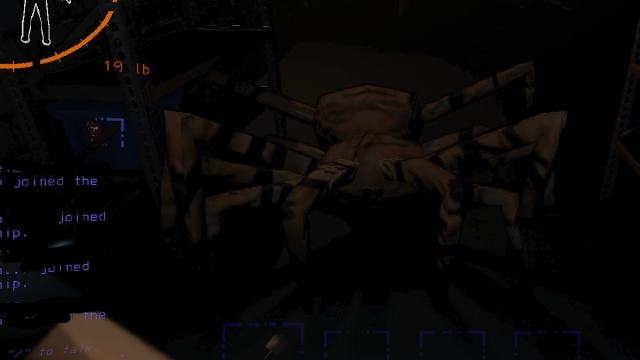
- Bunker Spiders — These leggy boys are not to be trifled with unless you have some railing to jump up onto. Touching their web alerts them to where they are, and they will begin patrolling in that direction.
- If there’s no other solace in it, you can kill spiders. It takes several hits, but it can be done. They will two-shot you, though, so use a railing for safety.

- Coil-heads — Above all indoor threats is the Coil-head. These entities will only move when you aren’t looking at them, and wow! They move fast when not in sight.
- Coil-heads are often a death sentence for new players. They can’t be killed and require good positioning and rapid-glancing toward them to position the entity to get around it.
- Touching Coil-heads does not kill you. You can walk right by one totally safely. Just make sure someone is looking at it.
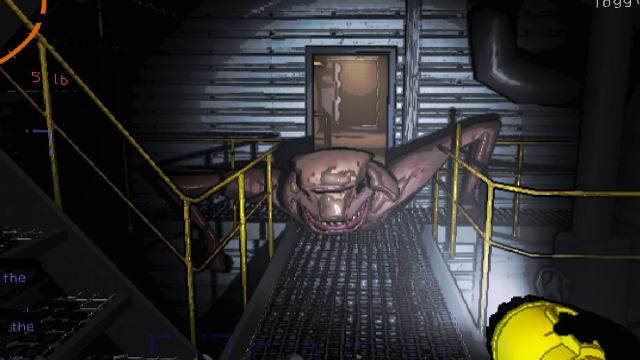
- Thumpers — You can hear Thumpers. You can really, really hear them. As their namesake implies, these are some loud entities. They chase with amazing haste.
- I’ve got a guide specifically on Thumpers, but essentially, the gist is they can be killed, and they can’t turn while running. Make sure to turn often (going up or down some stairs will do, too) when running from a Thumper. They can be brutally beaten into submission through several hits, but you’ll need to be on a railing to survive since they can two-shot you.

- Bracken — The Flower Man! When you hear a spooky ambient tune inside the building or come across a room that makes you think of the Backrooms, there’s a Bracken somewhere in the building.
- The Bracken doesn’t like being looked at, but you can’t let it sneak up on you either. Be sure to look around often if you know there’s a Bracken about, but don’t stare at it if you see it. Often players will just see its two white, beady eyes in the darkness. Look away; otherwise, it will snatch and kill you.
- You can kill the Bracken. You need a Zap Gun and two players to do it. One zaps the entity, while the other pummels it to death. Otherwise, your best defense is keen awareness of your surroundings and to not stare at it.
Aside from the above-mentioned Lethal Company monsters you can find indoors are the Jester and the community-dubbed “Girl in Red.” These aren’t gone over because this is a beginner’s guide and frankly, it’s more fun and terrifying to run into these naturally the first time.
Outdoor Entities to Watch Out For
There are fewer monsters outdoors in Lethal Company. I’m only going to touch on three of them, and it’s worth noting that none of the three I’m going to talk about can be killed.

- Eyeless Dogs — I have a whole guide dedicated to dealing with these guys. They’re attracted to only sound, as they can’t see. Regardless, or maybe just to spite the fact they’re blind, these are the most vicious entities you’ll see outdoors.
- I really recommend reading the full guide I wrote on these, but basically just crouch-walk and stay silent when you’re hauling scrap back to the ship and these big boys are about.
No screenshot since I’m never lucky enough to get one!
- Earth Leviathan — No, I won’t make a Dune joke. This time. These massive sandworms can wipe out unsuspecting crews with ease, and the warning for them isn’t very forgiving.
- Listen for rumblings around you to tell whether an Earth Leviathan is nearby. When it’s about to strike, it will send up bits of dirt and debris around you before it jumps. If you hear the rumbling, back up to where you were before you heard it and change your trajectory a bit. These are easier to manage than it first seems.
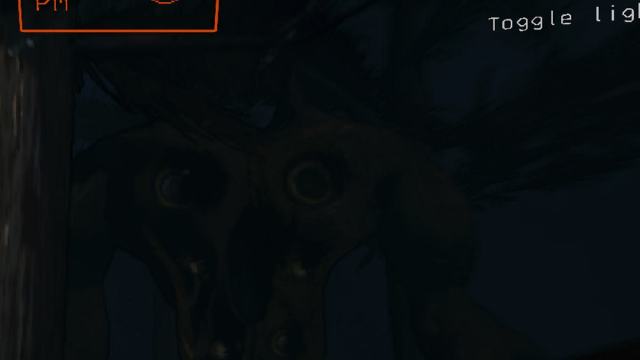
- Forest Keepers — While Eyeless Dogs seek prey based on sound, these forest giants seek prey based on sight. They also move much faster than you might think, so stay cautious on moons that have them.
- You’re completely safe from Forest Keepers while inside the ship, but they’ll grab you in a half-second if you step out of it with one right there. You can teleport a player who’s about to be eaten by one of these to save them from an untimely death.
Related: All Lethal Company Scrap List with Sell Prices Guide
Lethal Company Beginner’s Guide Part Four: Tips and Tricks Party Time!
To wrap up this massive Lethal Company beginner’s guide, I’ll include a massive list of Lethal Company tips and tricks to help you on your way. These are going to cover a lot of beginner questions rather than those geared toward more experienced players. We’ve got to help our new crew mates become great, great assets, and the best way to do that is to share knowledge.
- Pile your stuff up on the ship. You or one of your friends might be inclined to shove stuff into the cupboard, but the scanner won’t pick up items in the cupboard if you’re trying to scan to get an idea of their overall value. Then again, the scanner’s overall accuracy when trying to scan a bunch of piled-up items is suspect at best, anyway.
- Drop loot outside the building, not inside. Hoarding Bugs are greedy and will outright steal your stuff. Put your loot outside to avoid having it stolen, and to make it easier to haul back when the time comes.
- Do your big shopping sprees while still at the company building. This way you won’t waste precious time waiting for your stuff to arrive at a moon. Time doesn’t pass at all while at the company building.
- Don’t sell everything you have if your haul is over the quota. The profit quota only goes up, and the effort required to make it increases. Only selling approximately the quota amount ensures that you’ll have a nest egg to put toward the next quota, or the next, or the next. You never know what’s going to happen out there.
- Never forget you lose everything on the ship if everyone dies. Don’t let everyone die. One person needs to survive.
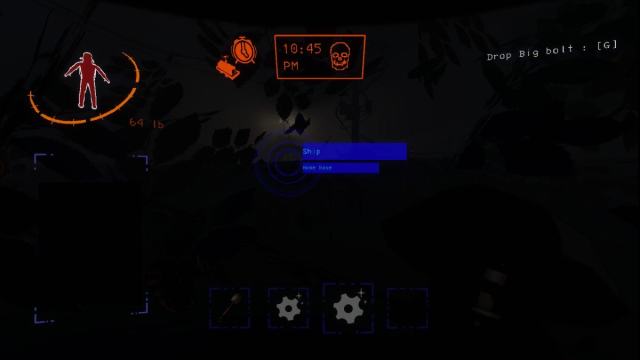
- Scan everything, all the time. That is, unless you’re just standing on the ship staring at the monitor. Otherwise: scan, scan, scan!
- Try to bring your dead coworkers’ bodies back to the ship. This way you won’t lose money because they died.
- Only sell on the last day of the quota. The company pays less on days other than the last one. You want the full profit amount from your efforts — every time.
- Outdoor monsters usually don’t start spawning until the evening. Maybe around 5 to 6 p.m. is when you need to get antsy under most circumstances. Newer players may want to just take off around 8 to 9 p.m. to stay safe.
- Outdoor monsters spawn earlier in bad weather. Fog, Flooded, Storm, whatever — they come out sooner when it’s bad outside.
- Hoarding Bugs can push you off ledges. I don’t want to hate these little guys, but this can be a reason to just kill them.
- Every building has at least one Fire Exit. Some even have multiple, and it varies based on moon. The March moon has three Fire Exits, for example. Sometimes using the Fire Exit is the only way to keep getting scrap, if the Main Entrance is being camped by a monster.
- Absolutely none of the ship decor has any practical function. Some of it is pretty cute, though! And the suits are nice to have, though they don’t offer any extra protection.
- You can damage other players by hitting them with weapons. Don’t hit your fellow employees with a Stop Sign. It’s not only rude, but you can kill them.

- Standing on railings can protect you from lower height entities. The Thumper and Bunker Spider can both be dodged by standing on railings, and you can hit them while on a railing if you have a weapon. Note that diagonal railings, like on staircases, are still dangerous.
- Railings are tricky to hop onto. I mentioned a few times in the entities section to use railings to stay safe, and it’s something you’ll have to do from time to time to avoid an untimely death. There are many you can’t jump onto, but luckily it’s always the same hoppable railings per room “layout.” Test out jumping onto railings in different hallways and stairways to see what I mean, and determine the ones that work.
- Use the scan command at the Terminal to see how much loot is left. Using the scan function at the Terminal allows you to see how much scrap is left outside and its worth. That doesn’t necessarily mean you should go after it all, but it’s a good idea to check.
- Don’t leave the TV, Record Player, or Boombox on in the ship. Even if you’re the one standing there at the monitor, any of these three can aggro Eyeless Dogs on moons where they’re present.
- If you walk into quicksand/mud/tar, go back the way you came. This is the only way to guarantee a path out, and is a good reason not to jump when going to and from the ship. Some moons have this sort of terrain even in clear weather. If you jump into one, you might not have the Stamina to get out.
- You can run at the same speed backward as forward. Left to right, too!
- The buildings are randomized, but the moons are not. Once you figure out your way around a moon, you should be able to get around it without much guesswork. It’s traversing the buildings that’s the navigational problem.
- The higher the hazard level, the more dangerous the moon. This almost goes without saying, but it’s just worth keeping in mind. More hazardous moons will have more enemies and maybe Turrets, and the Jester and Girl in Red can show up on the very high (S+) hazard levels.
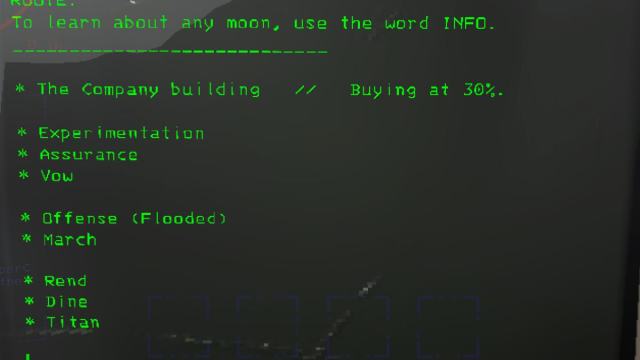
- The moons that cost money are highly dangerous. There are three moons that cost money to visit: Rend, Titan, and Dine. When you pay to visit one, though, you only have to pay for the initial trip. You can stay there for the rest of the quota cycle, so when you decide to go to one, do it at the start of a cycle.
- The Lockpicker can be reused. It can be used as many times as needed, but it takes 30 seconds to unlock a door and is annoyingly heavy to carry. It’s nice in concept, bad in function.
- Mind your Stamina on Flooded moons. You drown in water because you run out of Stamina. If you enter a small body of water with full Stamina, you should be able to come out the other side. That said, you should try to avoid getting in the water if you don’t know how deep it is.
- Eclipsed moons will kill you. Eclipsed is a special modifier that brings entities out right there in the morning. Not to mention the dangers indoors. If you are new to the game, try to avoid Eclipsed moons as much as possible.
- Storms can strike you down at random. When you’re outside during a storm and the game is just in a bad mood, you can be struck down by lightning entirely at random. Taking into account how metals will also get struck by lightning, I also recommend newer players avoid Storm moons.
- You can rearrange furniture on the ship by looking at it and pressing the B key. This doesn’t work on the monitor.
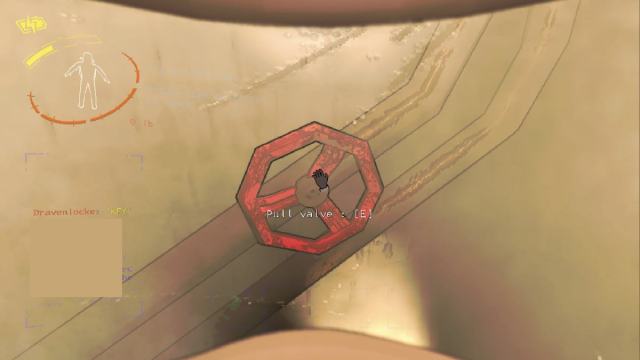
- If there’s a steam leak indoors, seek out the source and turn off the valve. If you wander into steam and follow the leaking sound, you can seek out its relevant valve and turn it to stop the leak.
- Always charge your electronics before heading out of the ship. Your Flashlight, Pro-flashlight, Walkie-talkie, or whatever — charge it before you leave.
- Communicate! This one should go without saying, but even among my friends, we sometimes don’t tell the others what’s going on. Use the Walkie-talkies regularly to communicate between those inside the building and the person on the ship. This includes telling the people indoors if there are monsters by the ship. Keep channels of communication open at all times, as best you can.
- You can teleport dead crew mates back using the Teleporter. Only when their bodies are still present. If they’re eaten by something like a Forest Keeper or Earth Leviathan, they’re gone.
And that’s all the advice I think I can give in my Lethal Company beginner’s guide, though I’ll surely think of more tips and tricks and add them here. The game is a perpetual learning experience, after all. Check out some of our other Lethal Company guides here on GameSkinny, going over some of the game’s tools, upgrades, and monsters.



Published: Nov 17, 2023 04:17 pm