Barioth in Monster Hunter Rise isn’t the same roadblock it was in Monster Hunter World: Iceborne, but that doesn’t mean you should take it lightly. Poorly equipped or careless hunters will be carted back to camp again and again, but the rewards are more than worth the challenge.
We’ll cover everything you need to know about this fight, including how to hunt Barioth, its armor set bonuses, and an overview of its weaknesses, among other details.
How to Beat Barioth: Weaknesses and Attacks
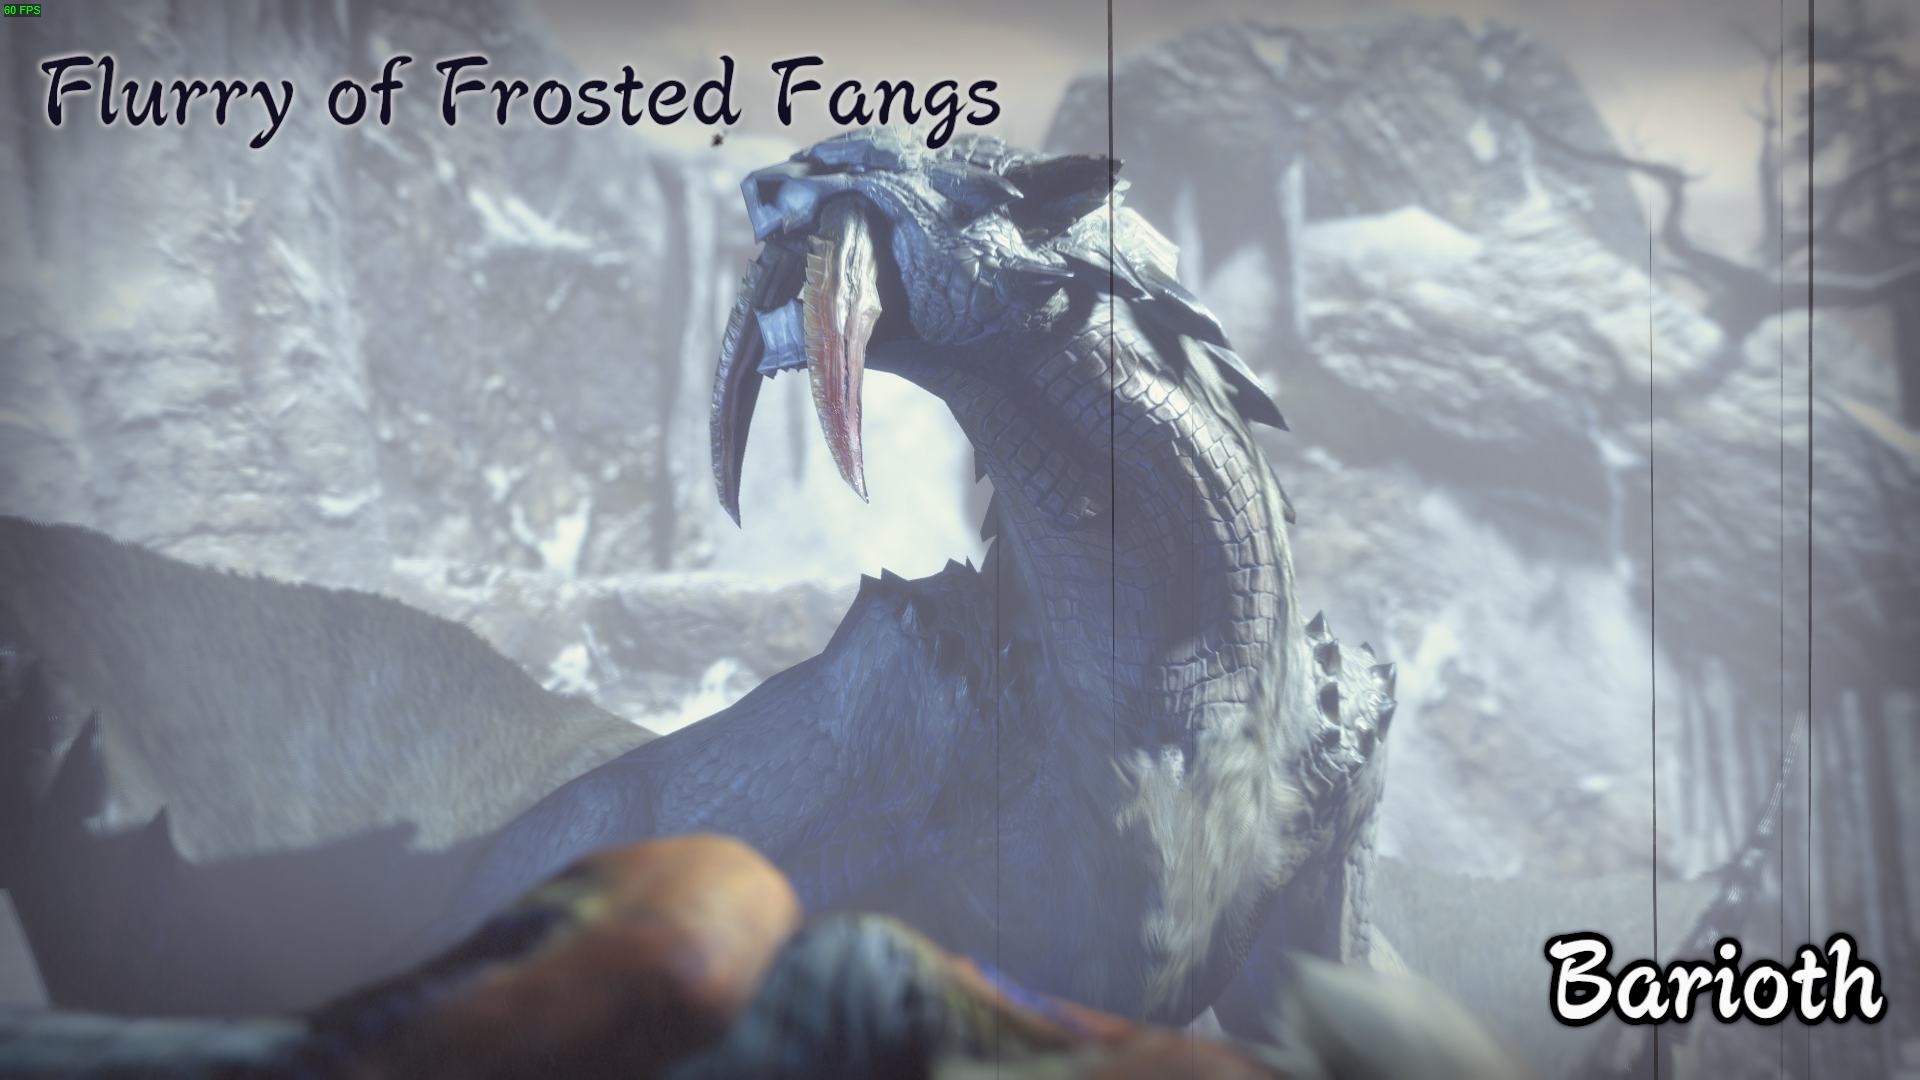
A heavy hitter that’s faster and more agile than it has any right to be, Barioth has a suite of both physical and Ice-elemental attacks. It prefers to smash and claw at you but can create whirlwinds or explosions of cold air that will also send you flying.
Barioth is weak to both Fire and Thunder, though Fire is the better of the two, as you might expect from an Ice-based monster. Fireblight and Blastblight are good options, though Thunderblight isn’t as effective as the pure elemental damage. Don’t expect to build up Blast too quickly, but once it starts going off, Barioth will explode again.
Attack and Strategies
Barioth has a lot of attacks for a mid-game monster, and all of them are dangerous. We won’t cover specific ways to avoid or guard against these attacks, as there are dozens of avoidance or mitigation methods across the different weapon types, but we will provide general strategies.
(Flying) Whirlwind Breath
Whether it’s on the ground or in the air, Barioth will pull its head back like it’s about to spit up and send out a giant ball of snow and ice that, when it hits the ground, becomes a localized ice whirlwind. If the ice ball hits you, you’re likely to be sent flying by the updraft that occurs just afterward.
The attack will cause Iceblight, cutting your Wirebug recharge rate in half unless cured with a Nulberry. A well-timed roll is usually enough to avoid this attack, as will running perpendicular to Barioth as it winds the attack up. Still, you’re better off using your weapon’s avoidance abilities.
Flying Lunge
Barioth jumps into the air and hovers for about a second, then lunges down to the ground. The hitbox covers Barioth’s front portion, including its head, claws, and wingspan, and it lingers until the monster comes to a complete stop. If you’re standing at the very end of the lunge, you’ll still take the full brunt of the attack, so get out of the way however possible.
Shoulder Check
One of Barioth’s favorite attacks, especially when you’re at its side, it puts one of its shoulders toward you, winds up, then uses that shoulder like a battering ram to slam away anything in its path. While not the most damaging attack in Barioth’s arsenal, it has one of the largest hitboxes and comes out deceptively fast, so be on the lookout for it, or you’ll land on your behind at half health.
Lunging Bite
Barioth pulls back on its haunches and then lunges forward. Like the flying lunge, the hitbox for this attack lingers until the very end of the animation, and it extends from wingtip to wingtip.
Tail Slap
Another of Barioth’s favorite attacks, it hops backward while presenting one side to the front. It then slowly swings its tail around its body, reaching across to its head. This attack probably has the longest hitbox in Barioth’s arsenal, and it covers a large space across Barioth’s front-facing side. The slap can come from either direction, depending on your position relative to Barioth.
Claw, Slap, Bite
Barioth doesn’t move much during these three standard attacks, instead attacking directly in front of it with tooth, wing, and claw. There’s a bit of hitbox lingering here, and none of the attacks reach very far, making them easy to out space or use as weapon ability activators.
Big (Double) Slam
Barioth’s primary one-shot attack, it pulls back on its haunches again and launches high into the air, likely offscreen. Less than a second later, it slams headfirst into the ground, creating a large shockwave and AoE. This attack has some of the best tracking, and the timing to avoid it is very precise. If you don’t manage to get out of the way in time, expect massive damage. If Barioth is enraged, it will launch itself and slam a second time.
Wild Charge
A last-ditch attack, Barioth takes almost a full second to wind up, then charges forward with such force that it lands on its side and takes a couple of seconds to recover. The attack covers a huge distance, easily more than half the width of most Frost Islands arenas. It’s a massively damaging attack like the big slam and will send you flying farther than any other attack Barioth uses. It’s easy to dodge roll or otherwise avoid/block, thankfully. Just be careful: once the charge starts, the hitbox remains throughout the animation.
Barioth Rewards and Gear
As with most mid-game monsters, Barioth has both a Low and High-Rank reward tree and Low and High-Rank armor and weapons.
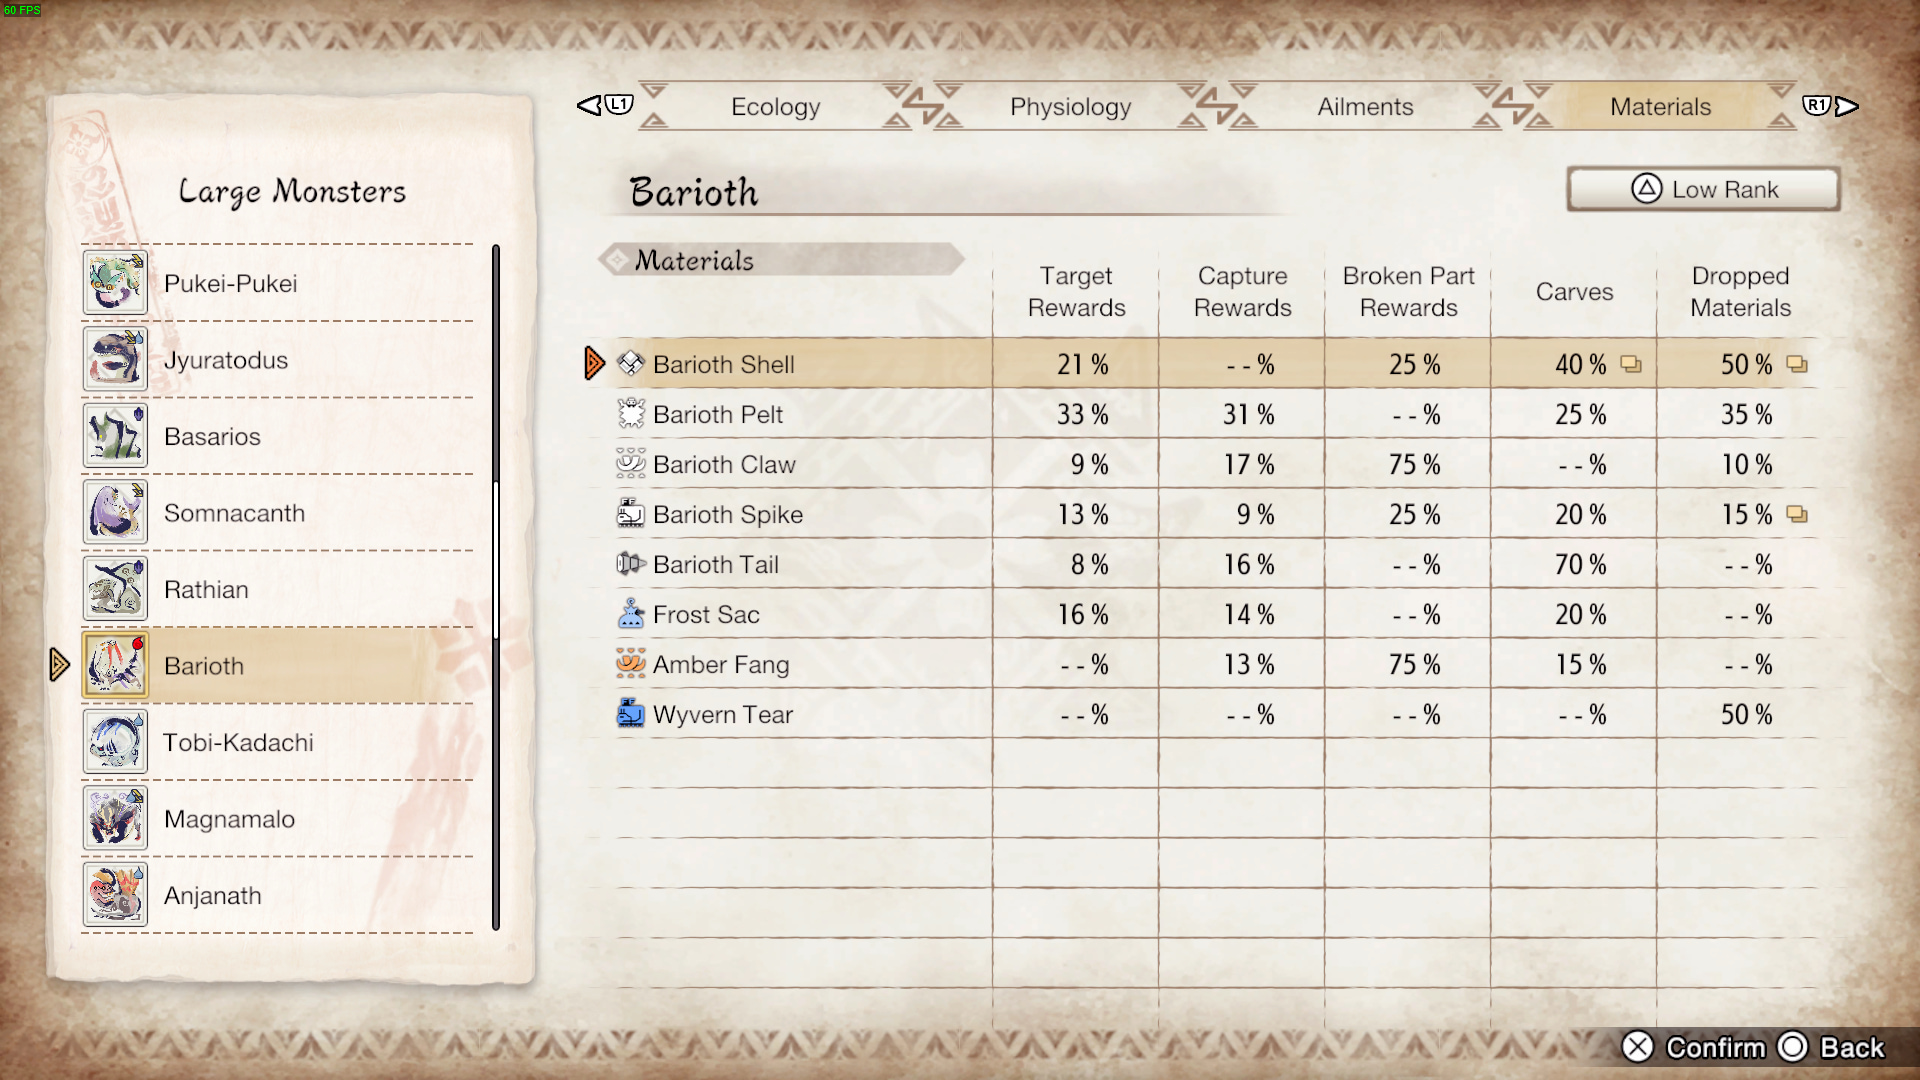
Low-Rank Materials
Barioth Shell
- Target Rewards: 21%
- Capture Rewards: –%
- Broken Part Rewards: 25%
- Carves: 40%
- Dropped Material: 50%
Barioth Pelt
- Target Rewards: 33%
- Capture Rewards: 31%
- Broken Part Rewards: –%
- Carves: 25%
- Dropped Material: 35%
Barioth Claw
- Target Rewards: 9%
- Capture Rewards: 17%
- Broken Part Rewards: 75%
- Carves: –%
- Dropped Material: 10%
Barioth Spike
- Target Rewards: 13%
- Capture Rewards: 9%
- Broken Part Rewards: 25%
- Carves: 20%
- Dropped Material: 15%
Barioth Tail
- Target Rewards: 8%
- Capture Rewards: 16%
- Broken Part Rewards: –%
- Carves: 70%
- Dropped Material: –%
Frost Sac
- Target Rewards: 16%
- Capture Rewards: 14%
- Broken Part Rewards: –%
- Carves: 20%
- Dropped Material: –%
Amber Fang
- Target Rewards: –%
- Capture Rewards: 13%
- Broken Part Rewards: 75%
- Carves: 15%
- Dropped Material: –%
Wyvern Tear
- Target Rewards: –%
- Capture Rewards: –%
- Broken Part Rewards: –%
- Carves: –%
- Dropped Material: 50%
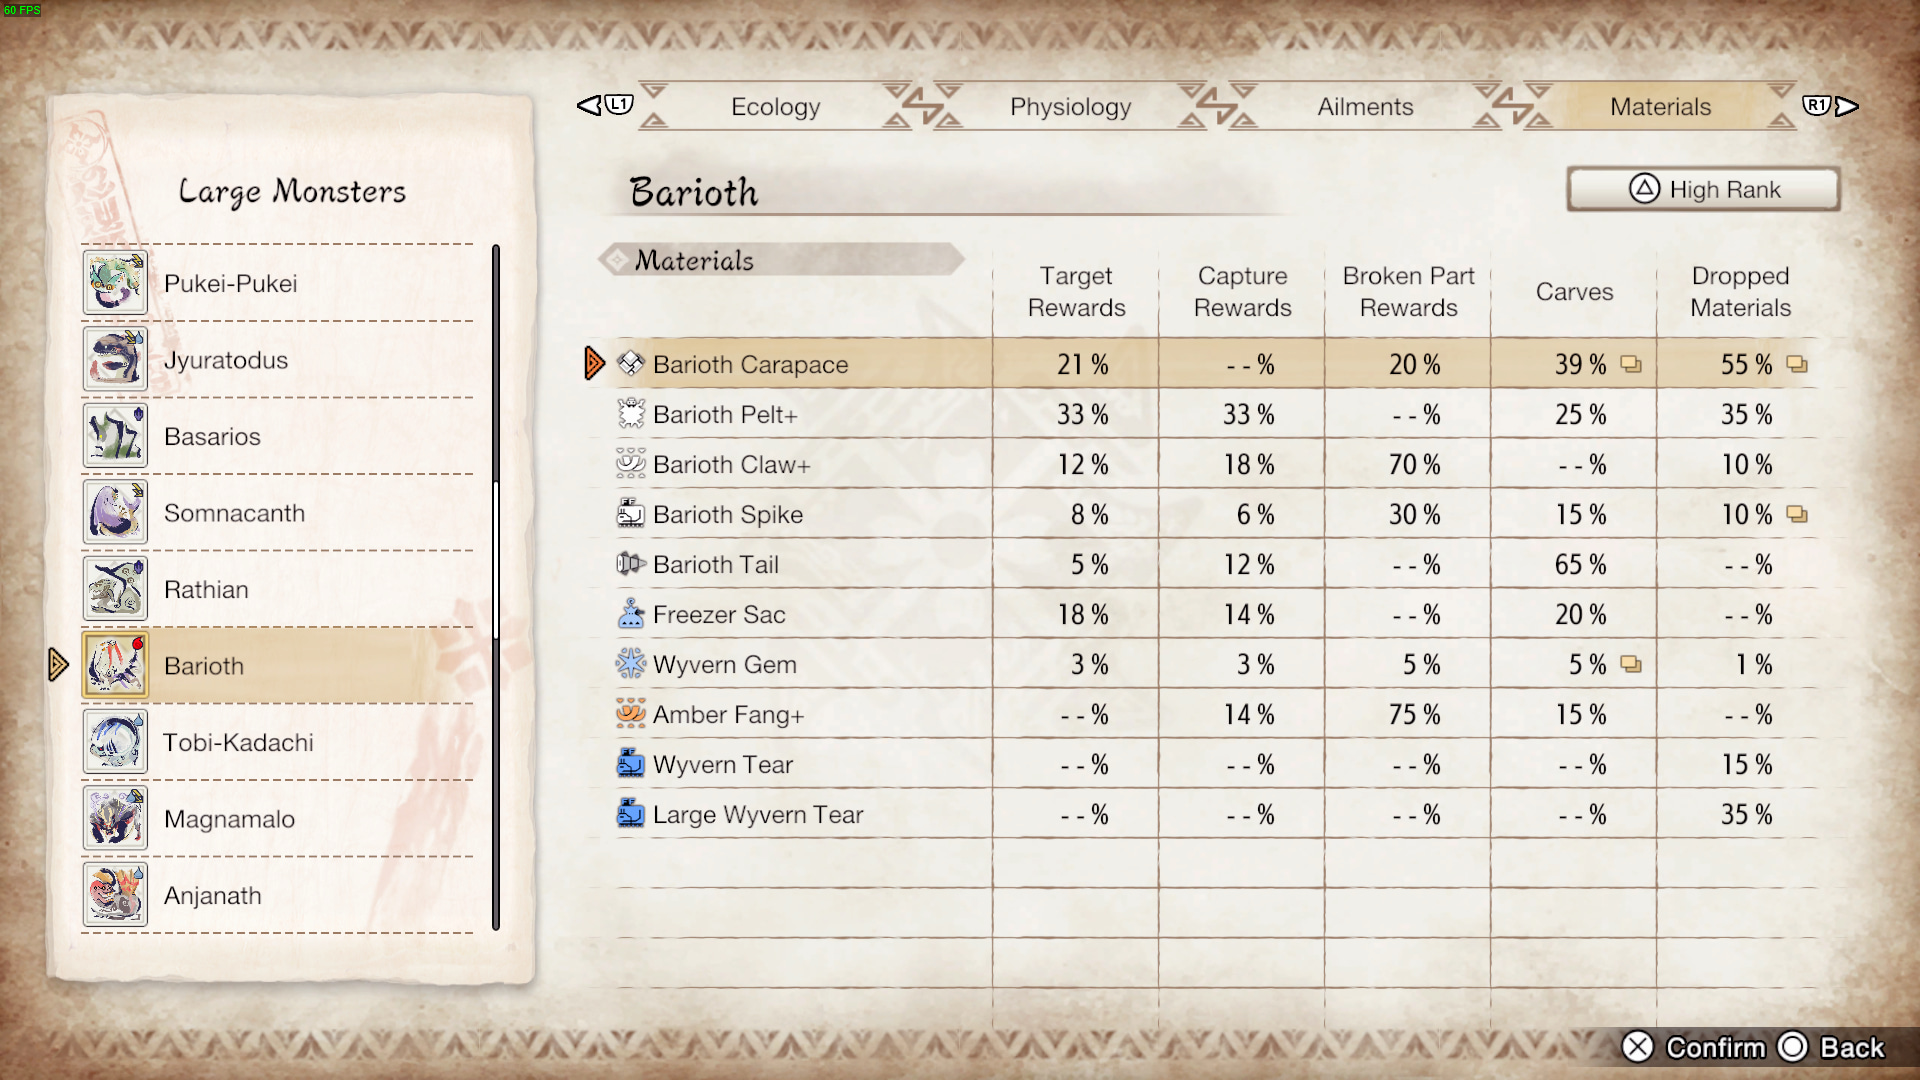
High-Rank Materials
Barioth Carapace
- Target Rewards: 21%
- Capture Rewards: –%
- Broken Part Rewards: 20%
- Carves: 39%
- Dropped Material: 55%
Barioth Pelt+
- Target Rewards: 33%
- Capture Rewards: 33%
- Broken Part Rewards: –%
- Carves: 25%
- Dropped Material: 35%
Barioth Claw+
- Target Rewards: 12%
- Capture Rewards: 18%
- Broken Part Rewards: 70%
- Carves: –%
- Dropped Material: 10%
Barioth Spike
- Target Rewards: 8%
- Capture Rewards: 6%
- Broken Part Rewards: 30%
- Carves: 15%
- Dropped Material: 10%
Barioth Tail
- Target Rewards: 5%
- Capture Rewards: 12%
- Broken Part Rewards: –%
- Carves: 65%
- Dropped Material: –%
Freezer Sac
- Target Rewards: 18%
- Capture Rewards: 14%
- Broken Part Rewards: –%
- Carves: 20%
- Dropped Material: –%
Amber Fang+
- Target Rewards: –%
- Capture Rewards: 14%
- Broken Part Rewards: 75%
- Carves: 15%
- Dropped Material: –%
Wyvern Tear
- Target Rewards: –%
- Capture Rewards: –%
- Broken Part Rewards: –%
- Carves: –%
- Dropped Material: 15%
Large Wyvern Tear
- Target Rewards: –%
- Capture Rewards: –%
- Broken Part Rewards: –%
- Carves: –%
- Dropped Material: 35%
Armor Set Bonuses
Both Low and High-Rank Barioth armor sets are built for weapons you can quickly sheath and draw. Great Swords and Longswords primarily, in other words.
Low-Rank Armor Skills
- Barioth Helm: Critical Draw x1 (Extra affinity on weapon draw attacks).
- Barioth Mail: Quick Sheath x1 (Faster sheathing).
- Barioth Vambraces: Critical Eye x1 (Flat Affinity boost).
- Barioth Coil: Critical Eye x2.
- Barioth Greaves: Quick Sheath x1.
High-Rank Armor Skills
- Barioth Helm S: Critical Draw x2.
- Barioth Mail S: Quick Sheath x1, Maximum Might x1(Affinity boost when at full stamina).
- Barioth Vambraces S: Quick Sheath, Maximum Might x1, Critical Eye x1.
- Barioth Coil S: Critical Draw x1, Critical Eye x2.
- Barioth Greaves S: Quick Sheath x1.
We’ve covered how to beat other monsters in Monster Hunter Rise, including Magnamalo and Tigrex, and how to get various crafting materials like Fur Scrap, Fulgarbug, and others. Our Rise guides hub has more and will grow a ton when the Sunbreak expansion releases at the end of June.


Published: May 29, 2022 08:53 pm