After a long wait (we’ve been stoked for this one since it was still called Project Setsuna) and much fanfare, the spiritual successor to Chrono Trigger has finally arrived.
While sadly skipping the dying Vita, both PS4 and PC gamers can now dive into the epic world-saving story of I Am Setsuna (read our full review here).
Before you dive in, there are some key differences from modern day RPGs you’ll need to know about if you want to safely escort Setsuna to the Last Lands.
If you already know the basics and are looking to unlock other secrets in the game, be sure to check these out:
Getting Started With I Am Setsuna
When you first load the game, there’s an immediate option to turn off in-game voices, and I highly recommend taking it. The voices are in Japanese, so they are less annoying than in many translated JRPGs with constantly repeated battle phrases — but trust me that even these foreign sayings will become obnoxious and grating after the 1,000th battle or so.
Before even meeting any characters or advancing into the story at all, there’s one critical difference here between I Am Setsuna and more modern games that you need to remember: there’s no auto save. It’s world map saving or save points only kids! Don’t get stuck starting over after sinking five or more hours in.
For PC users, there will also be some adjusting to do with the keyboard setup. Rather than the keyboard and mouse setup you may be used to, the game essentially uses the home keys like you are typing, with the space bar for confirming and the “H,” “J,” and “K” keys for pulling up menus or canceling. “U” and “I” take the place of the bumpers on a controller, while the mouse actually isn’t used at all.
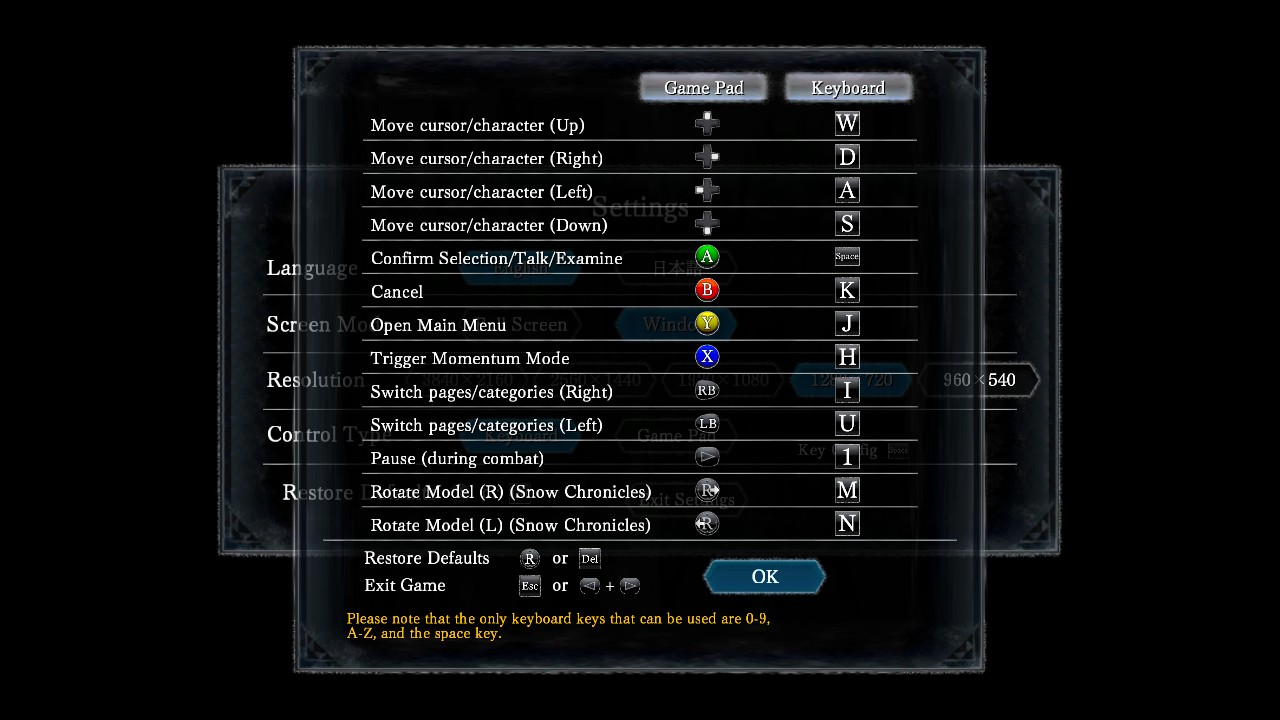 The keyboard layout is a bit different than normal for a PC game
Momentum System
Momentum is built up anytime you wait to choose an option when your active time gauge is filled (although it does pause while an enemy uses an attack or skill).
Activating Momentum is a little awkward with the keyboard, as its clearly designed around tapping a button at the right time on a controller, so be sure to get used to reaching over and pressing “H” just as you perform the action when your Momentum bar fills.
Don’t forget you can fill the bar up to three times for exponentially more powerful effects, which is frequently necessary during boss battle.
In addition to Momentum, there’s another associated mechanic that isn’t explained very well in the tutorial. Fluxation and Singularity are random events that only occur when you use Momentum. It isn’t guaranteed to happen every battle, but the more often you engage Momentum with Tech skills the more likely they will occur.
The bonuses provided by Fluxation – which pop when using Talismans with Flux – are also randomly chosen each time the event occurs. On your 200th instance of Fluxation, the Ruler Of Heaven And Earth achievement pops.
You may notice while level grinding that you typically don’t get money from battles. That’s because you earn money by completing quests, or by selling the Materials dropped by monsters (like Large Pincer, Blood-Splattered Bone, Pengy’s Treasure, and so on).
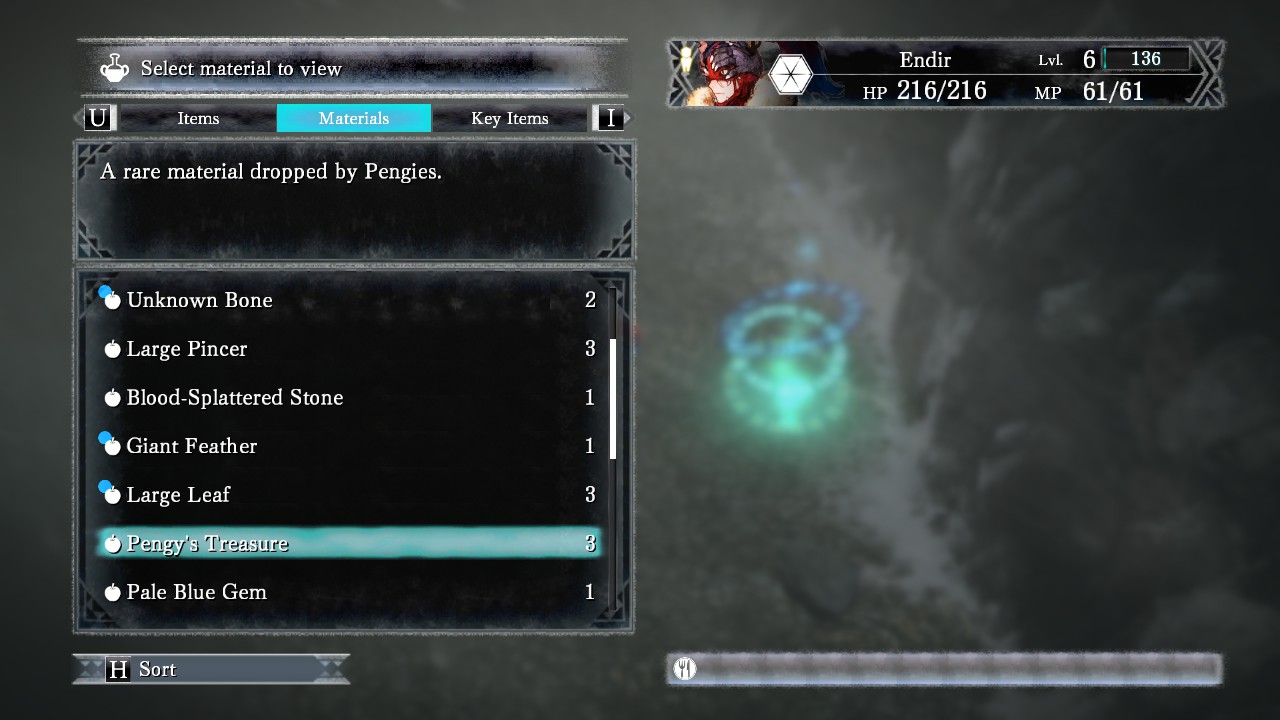 Some are used for recipes, while others are best sold off
Tutorial Mission through Nive Villiage
You won’t need any help on the tutorial mission, as there’s not really a possibility of failure and the game clearly walks you through slaughtering those cuddly little Pengys who are just minding their own business until you blunder into their domain.
The A New Direction achievement will automatically unlock for meeting Hapsper at the start of the tutorial.
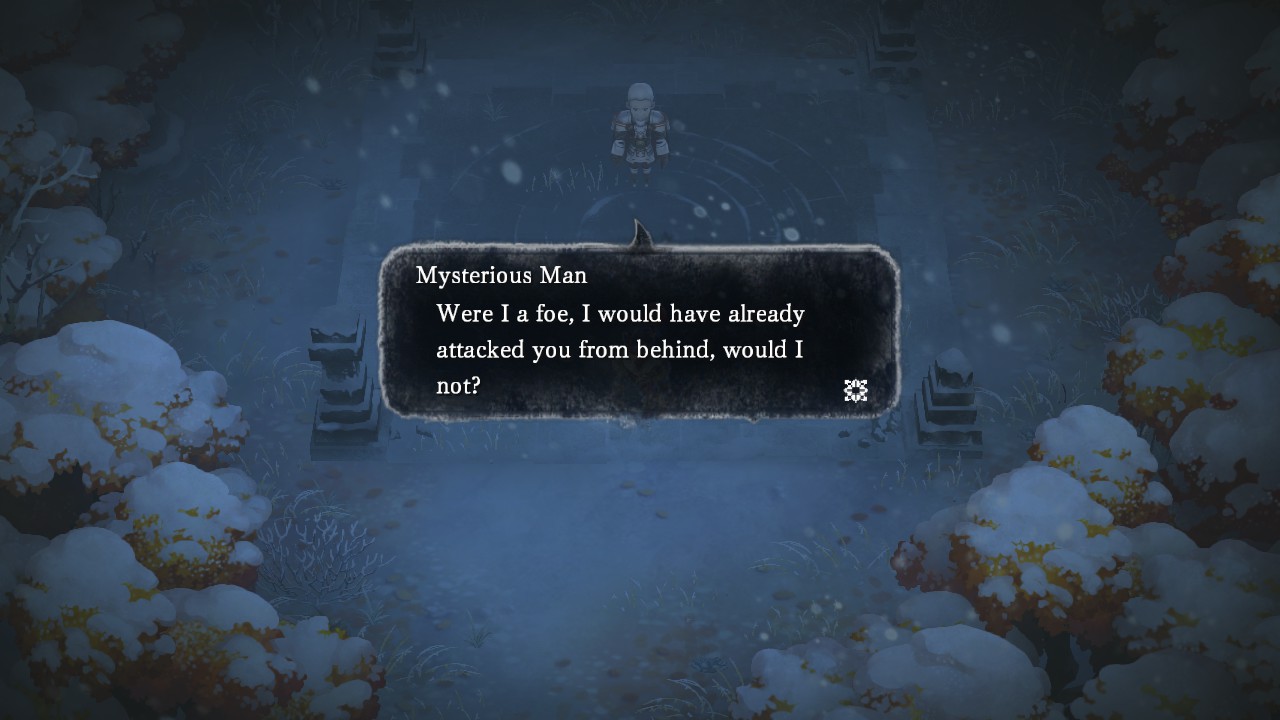
After finishing the tutorial job, a mysterious man approaches Endir with an assassination job: kill an 18 year old girl on an island. Being the mercenary he is, Endir accepts, and the game really kicks off when disembarking the boat at Nive.
 A jobs a job, right?
Combat Strategies and Buying Items
There aren’t a ton of options in the opening segment of the game in regards to strategies using Talismans, Tech abilities, and so on, but there are a few points to keep in mind.
First off, there’s no point in using the Cyclone Tech on a single enemy. It doesn’t deal additional damage, it just deals your normal attack damage to multiple targets. It does deal additional damage if you save up your Momentum to levels 1 – 3, however.
When you have just Endir in your party, two Cyclones should be more than enough to take out the groups of enemies. When Endir is traveling with Setsuna or Aeterna, you can conserve MP but end the battle nearly as quickly with a Cyclone followed by normal attacks to finish them off.
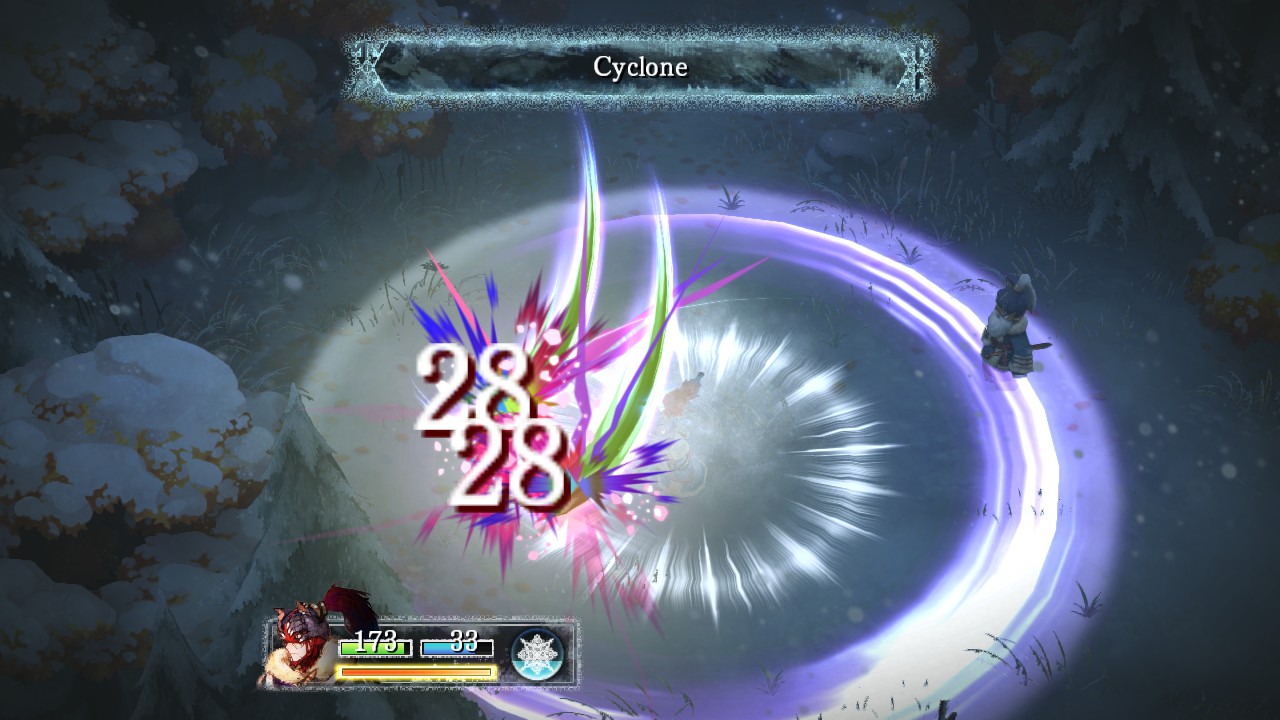 Using Cyclone
Keep in mind that while Setsuna’s base attack is quite weak, it can actually hit multiple enemies if they’re near each other, as she throws two rings instead of just one.
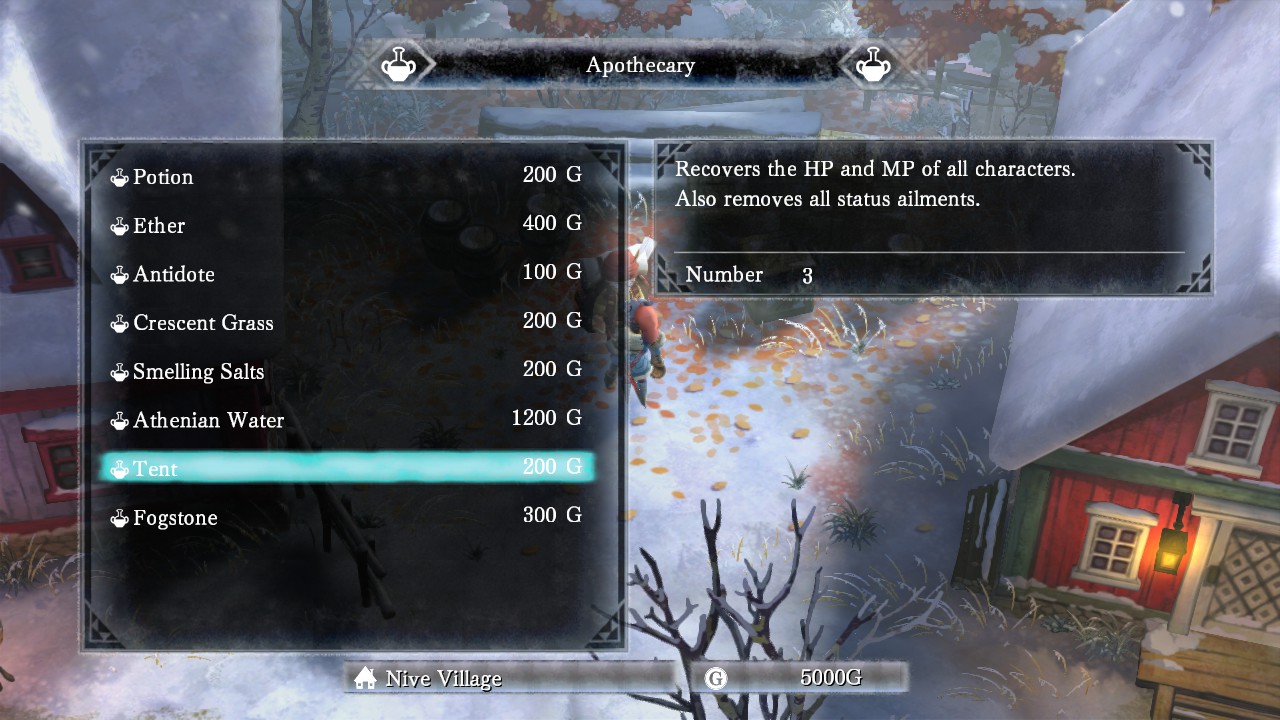
Tech abilities like Cyclone, Charge, and Heal use a lot of MP, especially in the start of the game, so make sure to buy some ethers at the merchant in Nive as you will probably run dry of MP during boss fights.
Enemies on the starting island don’t use status effects, however, so buying items that cure sap, paralysis, etc. is a waste of your starting 5,000 gold.
Level Grinding
Everyone knows you don’t go through the time portal right away at the Millenial Fair in Chrono Trigger – instead you battle monsters in Guardia Forest until you have the 3,000 G to buy the Lode Sword first.
 Rats, just standard old fantasy RPG consumables
While there isn’t a high powered weapon to save up for in I Am Setsuna, you do still want to level in the Dazzshire Woods as the upcoming first boss is quite difficult. The 1st boss is potentially beatable at level 3 (although difficult), but 4 is better and 5 is best if you are willing to put in the grind time.
During your grinding, the All-Seeing Eye achievement will pop if you use basic attacks to kill enemies, as this will frequently result in Exact Kills. After reaching Setsuna at the monument and going through a dialog scene, the An Uninvited Guest achievement pops when you meet Raishin after being taken prisoner.
Nive Village Boss
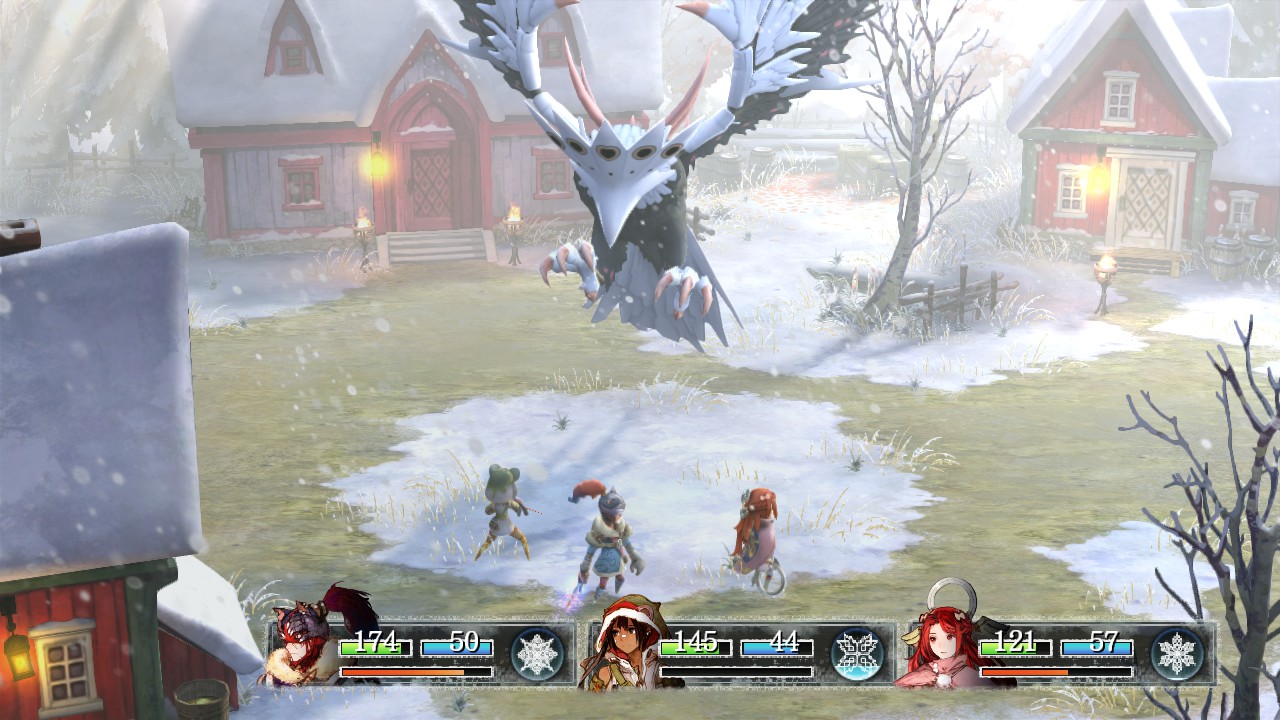
Eventually the whole “trying to kill Setsuna” thing gets sorted out and it’s time to defend Nive against a roving horde of monsters.
After taking out the small groups of enemies with Aeterna and Endir alone, it’s time to face the 1st I Am Setsuna boss with a full party lineup of Endir, Aeterna, and Setsuna.
Unlike with normal enemies, you can’t hit the boss from behind to start the battle with full gauges – so don’t bother running around behind him.
 Facing the game’s first boss
Before starting this fight, make sure to have an Athenian Water on hand, as its likely at least one party member will get knocked out. You can buy them from the merchant at a steep price, or a chest in the Dazzshire Woods has 3 of them. The flying boss will typically use these attacks:
- Inhale – increases damage of next attack
- Wing Slice – deals around 50 damage to one character
- Dive – deals around 30 damage to all characters
- Burning Breath – deals around 40 damage to all characters
For this battle, your strategy should be to either have Endir attack normally and Aeterna use the Charge Tech, or instead save up your Momentum and have them team up for the X-Strike combo at levels 2 – 3.
Either way, Setsuna should be on healing duty, as her base attack does negligible damage here. Setsuna’s Cure tech is honestly sort of overkill as it will heal 400 HP – way more health than you actually have – but there’s no point in resorting to potions until she runs out of MP anyway.
Don’t bother with Aeterna’s base attack during the battle unless you are out of MP and ethers. It’s better to burn a turn using an ether and then use Charge than only doing 15 damage with Aeterna’s normal attack
Ocean Boss
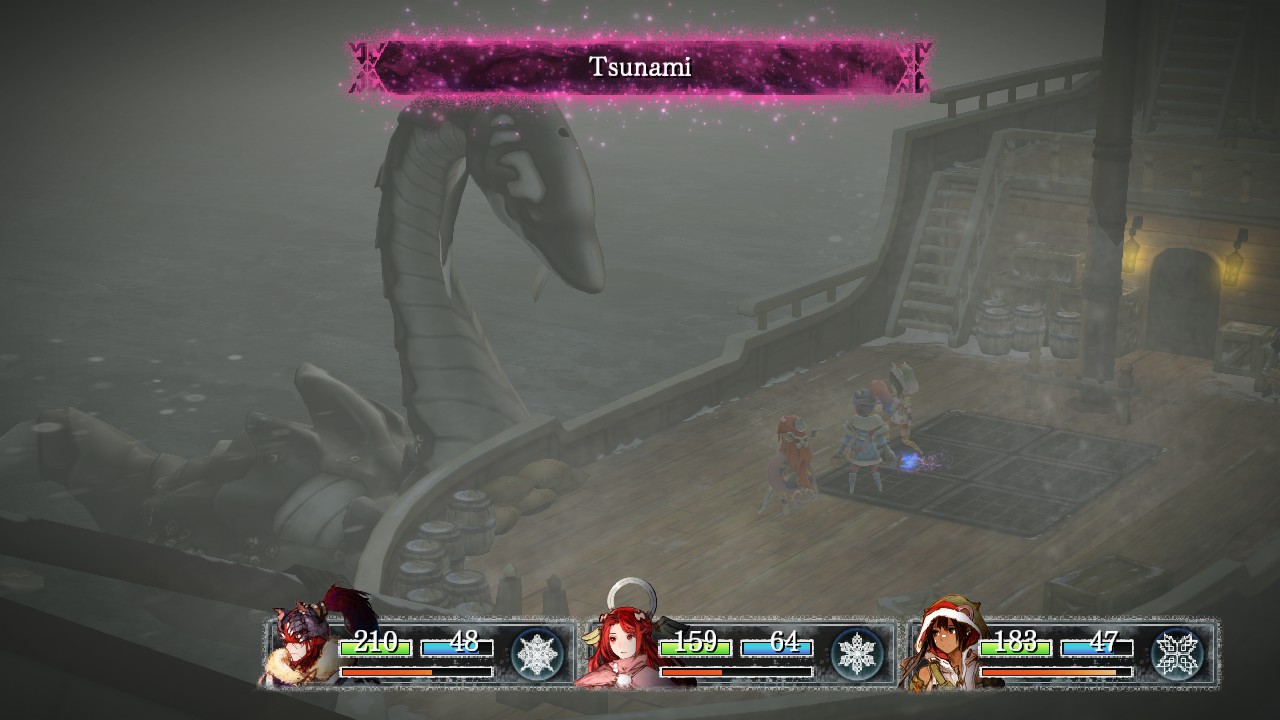
After leaving Nive behind its time to hit the open ocean, and predictably your party is waylaid by enemies during the trip.
The ship section first pits you against three waves of normal enemies that are easily dispatched, followed immediately by another boss. This aquatic boss utilizes these attacks:
- Tsunami – hits all three characters for 50 – 65 damage
- Bellow – stuns the whole party
- Water Spry – hits one characters for around 70 damage
- Body Slam – deals 35 – 40 damage against all characters
X-Strike is again your best bet here. While a tier 1 Momentum charged x-strike will do around 65 damage, the tier 3 charge will do almost 200, so its more than worth the time to save up your Momentum. Aeterna’s base attack again does very little damage and isn’t worth the effort unless you have no other options.
 Facing the ocean boss
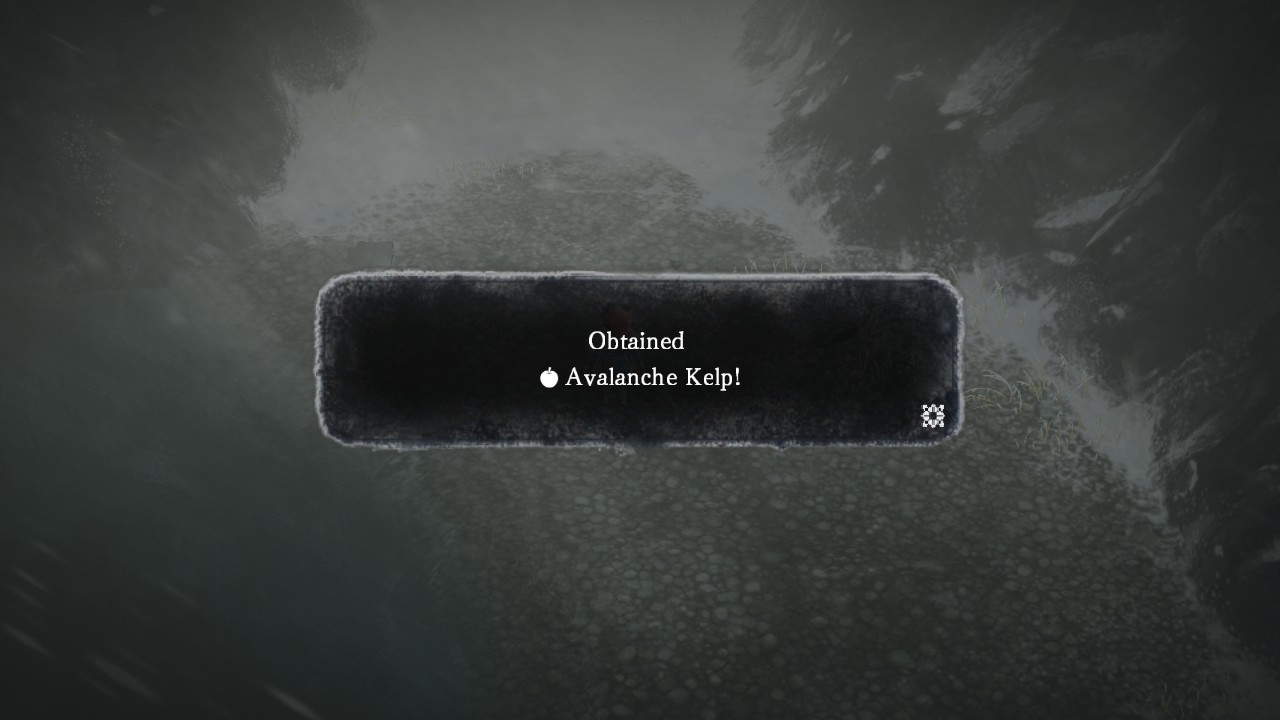
Shining Spot Hunting
Once you get past the opening area and first two bosses, be on the lookout for small shiny orbs scattered across the game that are accompanied by a brief piano note cue. Simply called shining spots, they hold hidden objects you will want to collect.
The first shining spot offers up some Avalanche Kelp right near where you wake up on the Forgotten Shore. If you aren’t sure if you’ve missed any in an area, head to the Snow Chronicles section of the menu and switch to the Locations tab.
 Your first shining spot!
That’s all you need to know to complete the first segment of the game and get on with protecting Setsuna so she can save the world.
Stay tuned for our complete guide to finding all the I Am Setsuna shining spots, as well as guides on opening all those locked chests, beating bosses, and utilziing the full tech list.


Published: Jul 19, 2016 04:43 pm