It gets easier and easier to miss Hidden Waddle Dees as you progress to the later levels of Kirby and the Forgotten Land. There are more of them on average per level, and they tend to be a bit trickier to discover.
Finding them allows you to increase your total count and unlock everything Waddle Dee Town has to offer. As you collect more of them, more stores and mini-games unlock in the hub.
Where to Find All Hidden Waddle Dees in Winter Horns
This walkthrough guide will show how to find all 18 Hidden Waddle Dees in Winter Horns. If you’re looking for all of the Hidden Missions, head over here to our companion guide to the Winter Horns world in Kirby and the Forgotten Land.
Use the links below to jump to each level:
All Hidden Waddle Dees in Winter Horns’ Northeast Frost Street

There are four Hidden Waddle Dees in the Northeast Frost Street level of Winter Horns.
Northeast Frost Street Waddle Dee 1
After you get the Vending Mouth in the first area of the stage, search for a stack of boxes with a bomb block in the middle.
Shooting the block will create a pathway to that part of the stage. From that spot head upwards and defeat the snowballs to find a weak metal wall that is hiding the first Hidden Waddle Dee.
Northeast Frost Street Waddle Dee 2
In the next area, you’ll find a door guarded by some bars. This is the entrance to the mini-game that will reward you with the next Hidden Waddle Dee. To access it, inhale a Ranger and follow the cloud walkway around the corner where you’ll see a target floating in mid-air. Shoot it to raise the bars and unlock the secret area.
Once you’re in, you’ll have to solve a shooting range puzzle to get the Waddle Dee. First, shoot the Red Star Switch on the right side. This will lower the bars in the middle and give you an opportunity to shoot the moving target.
You’ll want to time your shot a bit ahead of your target because of travel time so factor that into your shot and you’ll unlock the path to the Waddle Dee in no time.
Northeast Frost Street Waddle Dee 3
At the end of this area, there will be a series of see-saw platforms. The largest comes at the end. If you are on it, you’ll see when it dips to the left there is a bomb block hiding a hole in the wall. Blast it to find the third Hidden Waddle Dee of the level.
Northeast Frost Street Waddle Dee 4
When you get to the third staircase of the stage’s final area, inhale it like you did the others. You’ll need to be a level below to get the Waddle Dee, so waddle over to the far left and drop down via a gap in the railing.
Now, move back to the opposite side of the level below to find a previously unbreakable wall now crushable in Stair Mouth mode.
This will reveal a hidden room where the Waddle Dee is encased floating in the top corner. Move the stairs over to the back of the room, spit them out and climb to reach the final Hidden Waddle Dee in Northeast Frost Street.
All Hidden Waddle Dees in Winter Horns’ Metro On Ice
There are four Hidden Waddle Dees in Winter Horns’ Metro on Ice level.
Metro on Ice Waddle Dee 1
Right after the area fight, you’ll be put into an area with four Star Nails you need to hit with your Hammer ability. Each of the nails is in the four corners of the room and once you whack them all a hole where the Waddle Dee is hiding will be revealed.
Metro on Ice Waddle Dee 2
You’ll want to hold on to the Hammer ability for the second Hidden Waddle Dee. You’ll need to whack all the star nails in the level’s next section to reveal the path to the first secret passage. In this room, you’ll need to collect five green star bits to unlock the path to this one.
- The first star bit is in the middle walkway.
- The second is on the island to the left.
- On the right island, whack the peg on the ice with your Hammer and the third star bit will reveal itself.
- The fourth is behind a fence at the back of the room, guarded by Gordos
- The final star bit is in a dome in the upper area of the room.
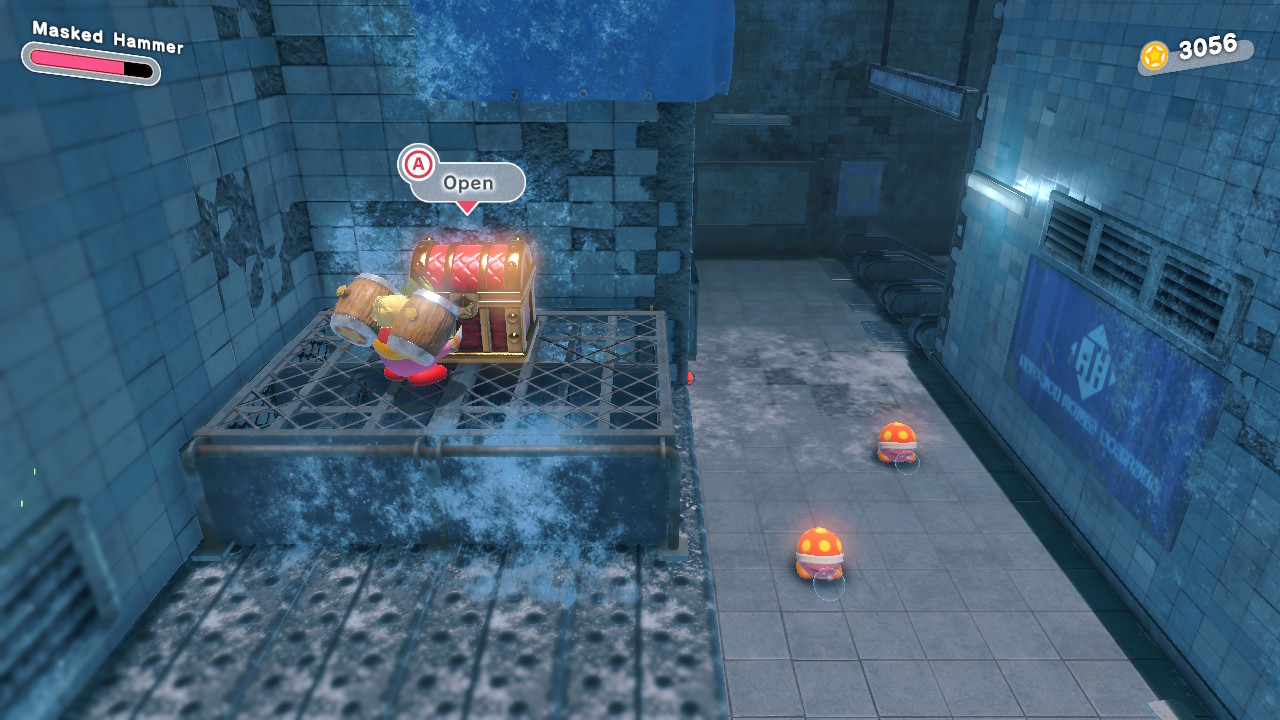
Metro on Ice Waddle Dee 3
Towards the end of the second area of Metro on Ice, you’ll see a ladder leading to two Balloon-Meisters. They are guarding the treasure chest that contains Waddle Dee number 3.
Metro on Ice Waddle Dee 4
At the end of the stage, you’ll need Cone Mouth Kirby. During this segment, you’ll encounter a large moving metal structure. As it moves back and forth you see it sometimes reveals a crack in the ice below it. Use the Cone to crack it and reveal a pathway behind it and to a pipe, you’ll have to crack as well. Break the pipe to ride the water up on top of the structure, where you’ll find the Waddle Dee’s cage floating at the end of the platform.
All Hidden Waddle Dees in Winter Horns’ Windy, Freezing Seas

There are five Hidden Waddle Dees in the Windy, Freezing Seas level.
Windy, Freezing Seas Waddle Dee 1
When you get to the second Buffahorn in the first section of the level, walk toward the camera to find a hidden platform with a pipe. you’ll need to enter Pipe Mouth mode and you’ll be sent on an incline and then off a ramp. Time your jump off the ramp to line up so that you get the extra boost into the wall on the other side, cracking it to reveal the stage’s first Hidden Waddle Dee.
Windy, Freezing Seas Waddle Dee 2
In the Ring Mouth boat steering area, you’ll see this Hidden Waddle Dee behind a grate next to an ice wall. Use the boat to crash through the wall and rescue this one.
Windy, Freezing Seas Waddle Dee 3
On the screen where you exit Ring Mouthful mode, you’ll want to inhale a Hot Head for Fire. There will be a platform on the right with a capsule floating there. When you reach it, the camera will reveal a path to an alcove blocked by ice you need to melt. Behind it is the third Hidden Waddle Dee.
Windy, Freezing Seas Waddle Dee 4
The final Hidden Waddle Dee of the stage is in the last section where the wind pushes you forward. Stay to the right and you’ll see a blue railing. In front of it is a crater with the friend captured down there. Jump over or go around to rescue the critter and complete the mission.
Windy, Freezing Seas Waddle Dee 5
The final Waddle Dee is found in the secret underground cavern. Right at the end of the level, inhale the lone Hot Head for its fire ability and head for the left of the Big Kabu to find the secret entrance.
In this room you’ll want to find the lift to engage Scissor-Lift Mouthful Mode. Move the lift left and to reach an alcove where the end of a cannon fuse is hiding. Light the fuse and then jump down, inhale the Scissor-Lift again and move to as far right as you can go to reach the cannon.
Once you’re at peak height ejecting will automatically spit you into the cannon. Do this in a timely manner to get fired up to the ledge where the final one hides.
All Hidden Waddle Dees in Winter Horns’ The Battle of Blizzard Bridge

The Battle of Blizzard Bridge level in Winter Horns has five Hidden Waddle Dees to find. Each section of Blizzard Bridge has a boss encounter followed by an area you can only access using the weapon the boss dropped. This is where the level hides its Hidden Waddle Dees.
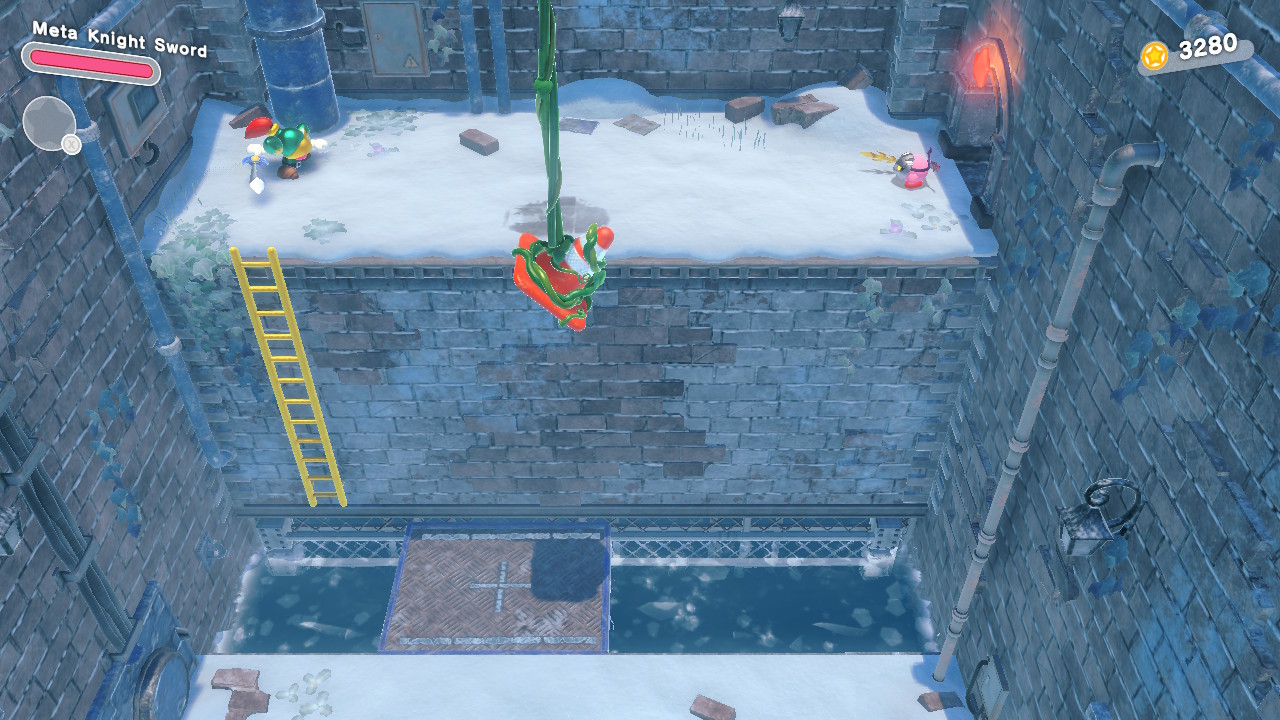
Battle of Blizzard Bridge Waddle Dee 1
In the Sword Secret room, you first have to cut down a cone from a vine to make it land on a moving platform. Time your slice just before the platform is underneath so it has a little time to fall.
Absorb the cone and find a weak floor to smash into up ahead that will reveal itself as the hiding place of the first Hidden Waddle Dee.
Battle of Blizzard Bridge Waddle Dee 2
This Waddle Dee is the reward for completing the Tornado Secret room. Use the Tornado ability to power the yellow fan in the water, raising the bars to a red switch in the room.
Dash using your Tornado to hit this switch to raise the walkway out of the water. Now, you’ll want to inhale the nearby Vending Machine because you’ll be level with a weak shutter on the left wall. Breaking it with soda cans will reveal this friendo.
Battle of Blizzard Bridge Waddle Dee 3
Inside the Hammer room, you’ll need to inhale a car to enter Car Mouthful mode and boost across to the opposite side of the stage, making the big jump at the end. Boost through the cracked wall on the other side to reach the Hidden Waddle Dee.
Battle of Blizzard Bridge Waddle Dee 4
After the Hammer room, you’ll find the fourth Waddle Dee floating in his cage just above the water below a series of concrete and ice platforms you must navigate. You can pretty much just jump down to the exact spot, take the damage, and respawn back up on solid ground having marked the objective as done.
Battle of Blizzard Bridge Waddle Dee 5
The final Waddle Dee of Blizzard Bridge is in the Ice Secret room. When you enter look to your right (Kirby’s left) and freeze the Kabu bouncing around before you kick it through the hole in the grate.
It will hit the Red Star Switch and raise a platform in the water. Run to where the big pipe is and inhale it to enter Pipe Mouthful mode. Just a breezy roll down the slope and a jump through a cracked wall will put you right in front of the last one.
If you need to know how to find all the Waddle Dees in a different area, like Wondaria Remains, consult our ever-growing list of Kirby and the Forgotten Land guides.


Published: Apr 6, 2022 05:31 pm