The all-new Sea of Thieves: A Pirate’s Life update has introduced five expansive new Tall Tales. The fourth, called Dark Brethren, sees you and your crew assailing Davy Jones’ stronghold in an attempt to thwart his plans. This labyrinth is filled with puzzles, enemies, and secrets to plunder. Some of these include Siren Murals.
Siren Murals require you to find and pull hidden levers in the correct order throughout the Tall Tale. Doing so will uncover the ancient artwork of the Sirens. This guide shows where each Mural is and how to find its corresponding lever.
How to Solve All Siren Mural Puzzles in the Dark Brethren Tall Tale
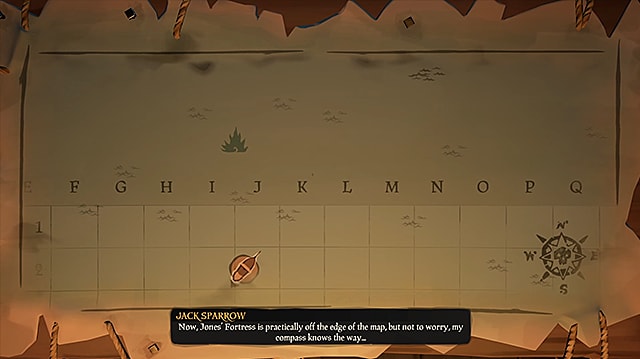
In order to access the Dark Brethren Tall Tale, you will need to have completed the first three Tall Tales, all of which can be started at any outpost. Once you launch this tale, you will be sent to the far north. There is a small icon on the map, north of the bounds of the Sea of Thieves.
You’ll know you’ve come to the correct place when you see a giant spire of rock and sea life. Anchor nearby and swim or cannon your way to the base of the spire. Circle around until you find a door guarded by a pair of Siren Statues. Your ghostly friend Jack Sparrow will open the door, and you will arrive at the first Siren Mural location.
Siren Mural 1
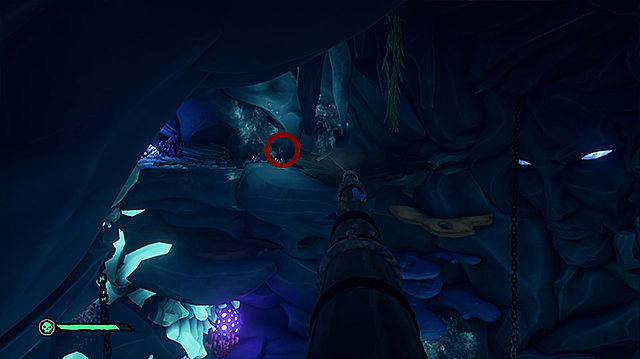
Proceed through the door and look left. The first lever is on the wall near some pieces of a wrecked ship.

The next lever is on that same wall, towards the back near the corner.

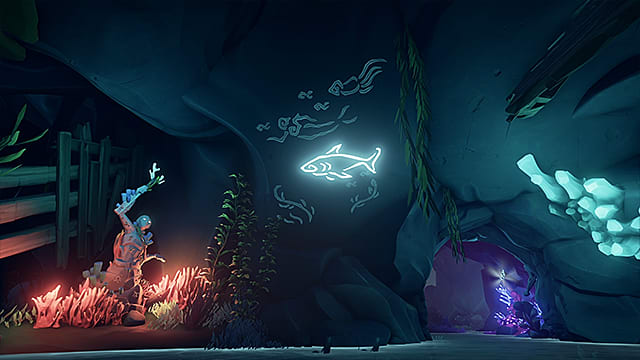
The final lever is centered on the back wall (relative to how you entered the room), near some bright coral. Pull that lever just as you did the others, and a mural will light up near the ceiling where you entered the room.

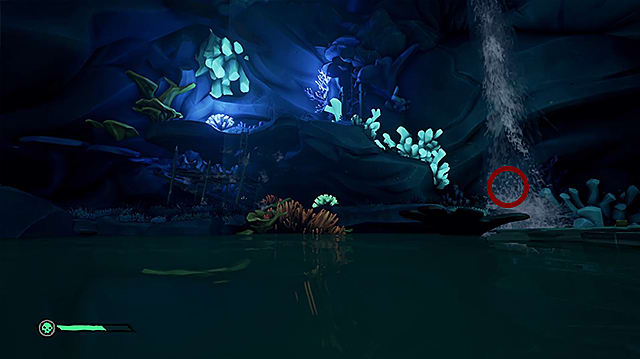
Siren Mural 2
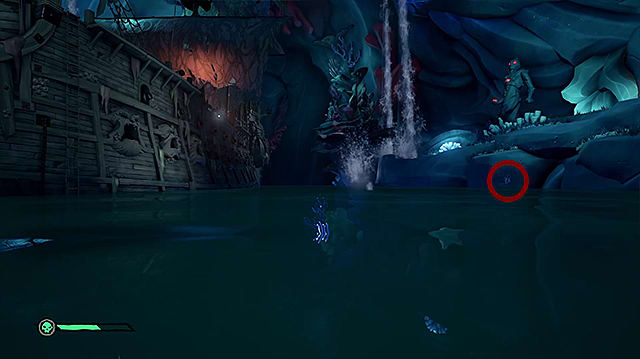
The next mural is in the large chambers housing Davy Jones’ ship, the Flying Dutchman.
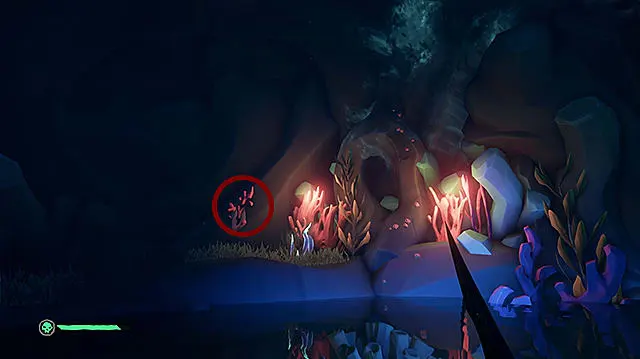
The first lever is near the port-quarter (or back left) of the ship. It is on the rocks under the Siren Statue, just above the water line.
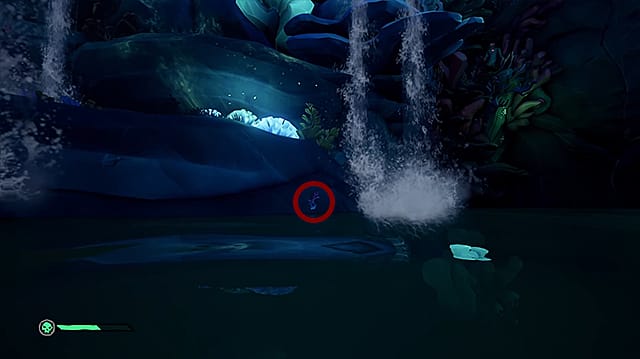
The next lever is on the opposite side of the ship, almost mirroring the location of the first one. Look on the side of the wall right before a waterfall, just above the waterline, and give it a pull.
Finally, look toward the front of the ship. This lever is also on the outer perimeter of the water, just above the water line, near where the water falling from a carved face is landing.

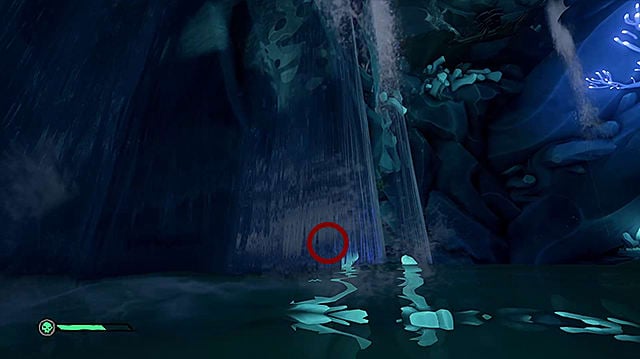
Siren Mural 3
The third Siren Mural is in the chamber you unlock directly behind the Flying Dutchman. First, deal with some aggressive Sirens trying to kill you.
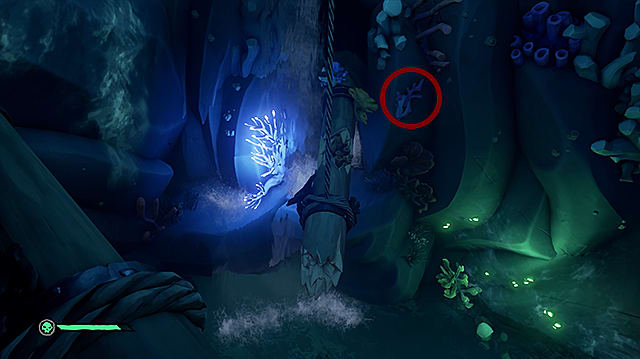
The first lever is on the small outcropping of land. Cut the rope holding pieces of wreckage at the bottom of the chamber. Once they float up, use those pieces to reach the land and move to your right. The lever is against the wall behind a narrow waterfall.
Now, turn around and jump in the water. The next lever is against the wall to your left, behind the larger waterfall.
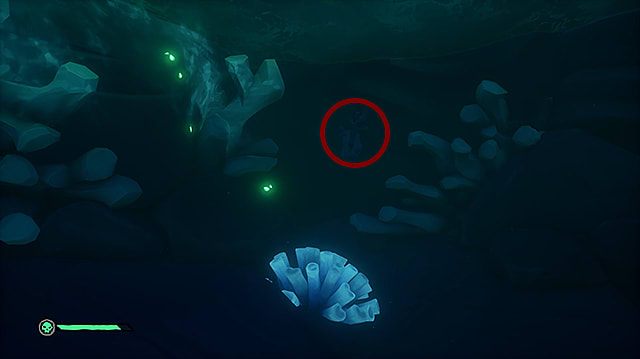
Turn around again, and swim down. The final lever is near the bottom on the opposite side of the chamber.
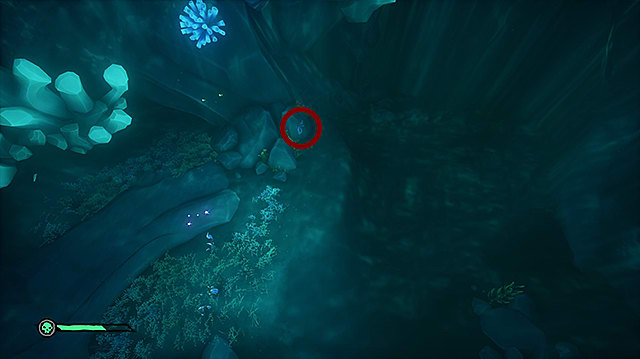
Siren Mural 4
Proceed until you come to a vertical chamber with several Siren statue puzzles. The first siren puzzle will open the door. The second will turn off a waterfall, allowing you to proceed. The next set of levers starts after that waterfall.
The first lever is roughly on your direct path. Once you come to a mast acting as a bridge, look to your right. It is against the rock near the base of the mast.
Continue forward until you cross an even larger mast-turned-bridge. The lever is directly past that (directly in front of you) against the back wall.
For the third lever, you will need to backtrack and return to the start of this larger mast-bridge. Once you’ve crossed back look to your left, it is on a narrow ledge facing the center of the room.

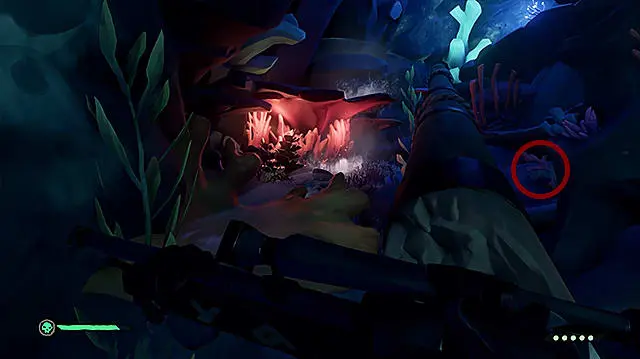
Siren Mural 5
After you exit this room, you will drop into a pool and fight some Sea Crawlers. Once they are defeated, you will pass through a door, and eventually into a chamber that is partially filled with water. Fill it further by completing another Siren statue puzzle.
Once the puzzle is complete you will see a red lever, near the center of the room.
Next, proceed to a room with two broken masts suspended by ropes and pulleys. Raise both masts about halfway, then cross them to find the second lever on the other side, accessible by standing on the second mast.
Finally, drop into the water to find the last lever submerged near the bottom of the pool. Pull that, and the Siren Murals will be complete.
After you complete all of the Siren Murals, you will see a pop-up notification that you have received a new Commendation. Congrats!
Check out some of our other Sea of Thieves guides here on GameSkinny:
- SoT Legend of the Sunken Kingdom Voyage Walkthrough
- SoT Shrine of Ancient Tears Journals Walkthrough
- SoT Shrine of Hungering Journals Walkthrough
- SoT Shrine of the Coral Tomb Journals Walkthrough
- SoT Shrine of Ocean’s Fortunes Journals Walkthrough
- SoT Shrine of Tribute Journals Walkthrough
- SoT Secret Waters Commendation Guide
- Where to Find the Kraken in Sea of Thieves
- SoT Dark Desires Commendation Guide
- SoT Strike Your Colours Commendation Guide
- SoT Lost Shipments Voyage Guide


Published: Jun 26, 2021 02:27 am