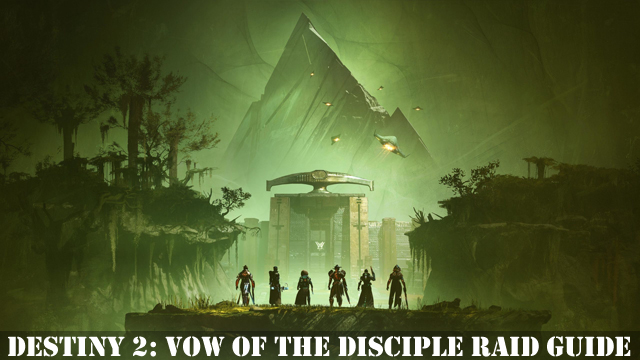
Vow of the Disciple is the latest raid for 1-6 players in Destiny 2, which is a part of the Witch Queen expansion. It takes players to the swamps of the Savathun’s Throne World, where they will face the Scorn faction. The raid offers exotic and legendary weapons as rewards, as well as new suits.
This guide will provide you with a complete guide to the Vow of the Disciple raid and final boss in Destiny 2. Note that players must complete the Witch Queen campaign to be able to enter the raid. It is also recommended to be at least Level 1530 to be able to compete in this raid.
Destiny 2: Vow of the Disciple Raid Guide
Payload Guide (Opening)
The raid begins from an encounter and a fight with the Projection of Savathun. The fight should be easy enough, but is necessary to open the gate to the Payload.
Once you’re at the Payload, which is a type of a vehicle, you need to do the following in order to make it move:
- Defeat all three Knowledge Bearers
- Pick up all Knowledge buffs they drop
- Stack all Knowledge buffs on the Payload
Once all Knowledge Bearers are defeated, and all Knowledge buffs are stacked onto the Payload, it will move to the next checkpoint. This process will repeat five more times at different checkpoints.
Note that you can’t move too far away from the Payload, or you will be penalized with Darkness. Once a checkpoint is cleared, all penalties will be removed.
Also, each time you stack a Knowledge buff onto the Payload you will be rewarded with the following buffs:
- Heightened Knowledge
- Brimming Knowledge
- Overflowing Knowledge
Obelisks Guide (Acquisition)
 Image credit: Fireteam Ragnarök
In this section players need to defend the three Obelisks (top, middle, and bottom), which have walls with symbols that players must remember. Each time these symbols are randomized.
Players need to reveal the next symbols by doing the following:
- Top Obelisk: Kill the Taken Knight
- Middle Obelisk: Shoot the pillar in the center to open the corresponding door
- Bottom Obelisk: Kill the corresponding Glyphkeeper (left for light, right for dark)
Once all three Obelisks are defended, they will show three symbols that you must remember. Then, shoot the one Obelisk displaying all three correct symbols. You must shoot the symbols very quickly.
If you do everything right, the Obelisk will show the following message:
“The Obelisk accepts your offering.”
There are several reasons how players can fail this section:
- Doing things too slow. Once the Obelisks fill up with glowing light, which is a timer, your team will be wiped.
- Shooting the wrong symbols. You will have another chance after symbols reshuffle.
- Letting Scorn damage the Obelisks. Once Obelisks get damaged too much, your team will be wiped.
If you are not able to get this section right, the Obelisk will show the following message:
“The Obelisk rejects your offering.”
At this point, you will have to restart the entire section, and repeat the process again.
The Caretaker Guide (Collection)
The Caretaker is the first boss of the two in the Vow of the Disciple raid. This Scorn boss will try to destroy Obelisks that you need to activate in order to move to the next section. If he manages to destroy them before you move on, you will have to start over again.
This section consists of the following tasks:
- Stun The Caretaker
- Enter the Dark rooms to collect three symbols
- Shoot the corresponding symbols, you’ve picked up, on the Obelisks
- Accomplish this on all three Obelisks
- This will activate the damage phase on The Caretaker
Break your team into two groups: one needs to focus on stunning The Caretaker, and the other one on collecting symbols and shooting Obelisks.
Your strategy should look like this:
- One player needs to shoot The Caretaker in front
- When his backside opens, another player needs to shoot his back until the boss is stunned
- The third one needs to remember the symbols on the Obelisks and collect the right symbols inside the rooms
- The fourth one should open the doors on the other side of the room
- The last two players need to focus on shooting Adherents that are swarming around
When all three Obelisks are active, you can start dealing actual damage to The Caretaker. If you have such exotic weapons like Divinity and Outbreak models, then you should have no problem beating this boss.
In this way you move from one floor to the other, and at the end The Caretaker will run for his life.
Artifacts Guide (Exhibition)
This section includes three Antechambers, and you can complete each of them by following these steps:
- Pick up the first artifact to start the timer
- Kill the two Glyphkeepers and remember the symbols revealed
- Kill the knight with the shield by removing the shield with the Splinter Artifact
- Kill the rest of the Adherents
- Once symbols allign at the gate, shoot the ones that match to the revealed ones before
Note that players will not be able to see both Glyphkeepers at the same time, but only the ones with the artifacts will see the Taken one, and the rest will see the Scorn one. So communicate together to be able to match up the symbols revealed at the gate.
Each kill will extend the time on the timer and remove the Darkness penalty. But if you don’t manage to complete this section in time, your team will be wiped, and you will have to start over.
Rhulk Guide (Dominion)
After a series of jumping platforms you will arrive at the Dominion arena to fight the final boss Rhulk, Disciple of the Witness.
You will notice that you cannot approach the area with the boss just yet, as the invisible gravity field will push you away. In order to actually approach the boss you must first complete the Obelisks puzzle by doing the following:
- Destroy the Pervading Darkness pillar above the boss
- Let two players stand on the symbol on the ground, one of which should have Leeching Force buff
- Once the buff moves from one player to the other, kill the Glyphkeepers
- When Rhulk shoots his laser, the player with the Leeching Force buff needs to jump onto the laser, receiving Emanating Force buff
- The players with the Emanating Force buff must shoot at the totems in front with the corresponding symbols
When Rhulk teleports front and back, the process restarts until all totems get shot. At this point repeat the five steps above.
Once the barrier falls, you can finally approach the boss arena and face Rhulk, who is surrounded by more totems with symbols. Here’s what you need to do to be able to beat Rhulk:
- Deal damage to Rhulk until he drops his glaive that turns into a pillar
- Shoot the pillar to reveal the correct symbols and get the Leeching Light buff
- Player with the Leeching Light buff needs to jump onto the Rhulk’s laser
- That same player can now shoot the correct pillar with matching symbols
- Once Rhulk’s critical spot is revealed, shoot at it
In total, Rhulk will have four critical spots. If you don’t manage to kill him fast enough, the whole section restarts again.
You will know that you’re close to killing him when he starts rotating. That’s when you need to put all your fire power into that critical damage.
Rewards
Once the Vow of the Disciple raid is successfully completed, the players will be rewarded with the following items:
- Collective Obligation (Exotic Pulse Rifle)
- Submission (Legendary Submachine Gun)
- Cataclysmic (Legendary Linear Fusion Rifle)
- Insidious (Legendary Pulse Rifle)
- Forbearance (Legendary Grenade Launcher)
- Deliverance (Legendary Fusion Rifle)
- Lubrae’s Ruin (Legendary Glaive)
- Resonant Fury Suit (Hunter)
- Resonant Fury Suit (Titan)
- Resonant Fury Suit (Warlock)
Related guides
- How to Get Neutral Element
- How to Get Come to Pass
- How to Complete the “Rite of Dawning” Quest
- How to Get 2021 Dawning Armor
- How to Get the Forerunner and Halo Weapons
That’s all you need to know on how to complete the Vow of the Disciple raid in Destiny 2. For more Destiny 2 tips and tricks articles, be sure to visit our dedicated hub page.


Published: Mar 15, 2022 11:20 am